Getting Started

Introduction!

Firstly, a huge thanks for purchasing this theme, your support is truly appreciated!
This document covers the installation and use of this theme, reveals some answers to common problems and issues. We encourage you to read throughout this document if you are experiencing any difficulties. If you have any questions that are beyond the scope of document, please feel free to contact us via our Support Tickets System.

Compatible with Prestashop

Azone PrestaShop Theme is fully compatible with Prestashop version 8.x

To install the theme you must have a working version of Prestashop already installed. For information in regard to installing the Prestashop platform, please see the Prestashop Documentation.

Installation

System requirements

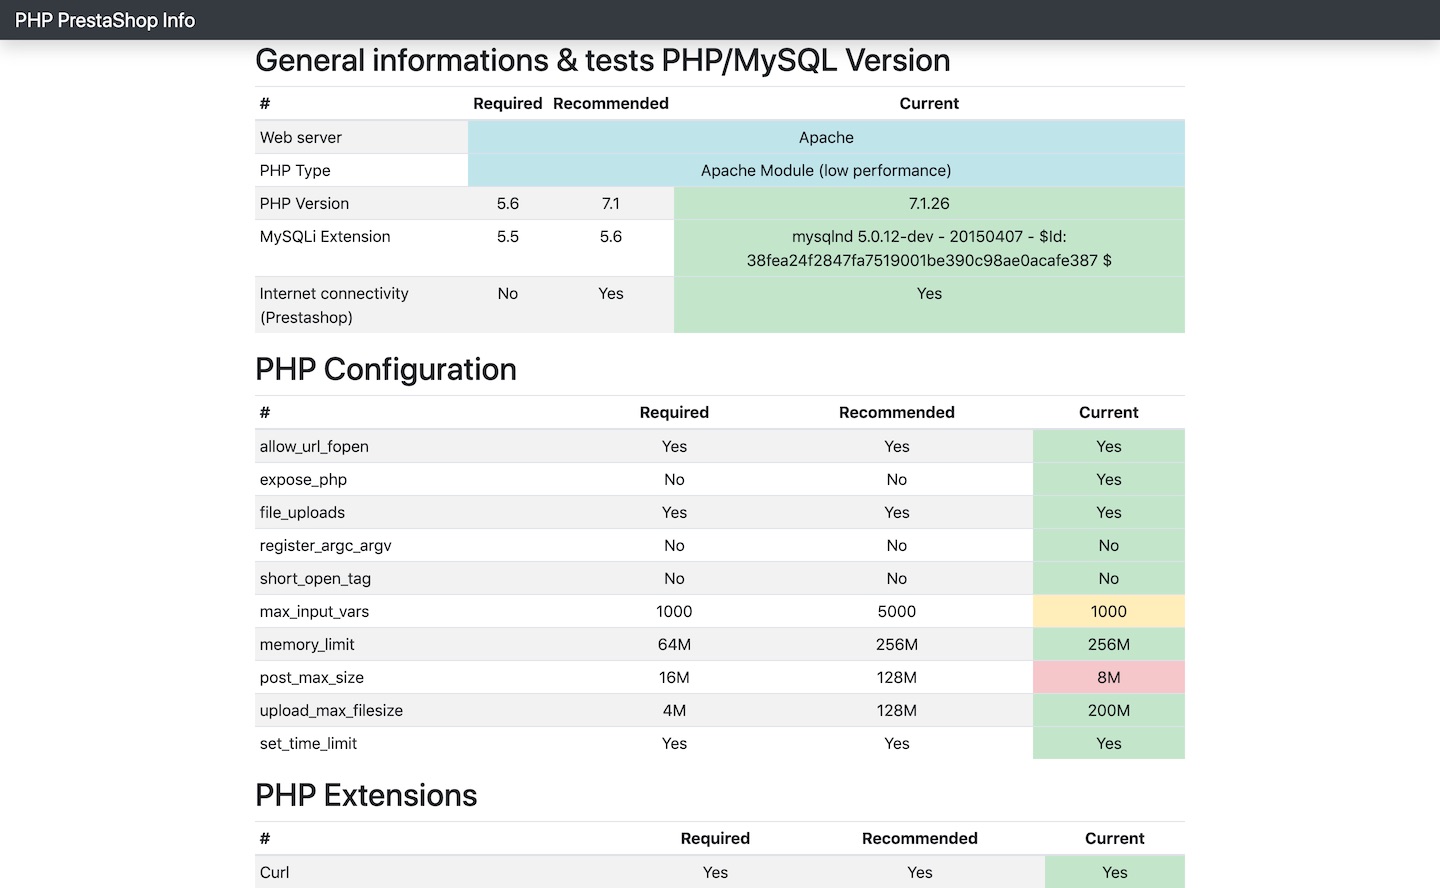
PrestaShop needs the following server configuration in order to run:

  • Web server: Apache Web Server 2.4 or any later version. (Although compatible, Apache Web Server 2.2 is not recommended since it reached its EOL in 2018).
  • PHP: We recommend PHP 8.1. See the compatibility chart below for more details. (Although compatible, PHP 7.2.5 to 8.0 are not recommended since they reached or will reach soon their end of support.)
  • MySQL: 5.6 minimum, a recent version is recommended.
  • Server RAM: The more the merrier. We recommend setting the memory allocation per script (memory_limit) to a minimum of 256M.

PrestaShop works best in Unix-based systems such as Linux and macOS, and while Windows might work, it is not actively supported.

How to verify your server meets PrestaShop’s requirements

  • Download the latest version from GitHub.
  • Extract the zip file.
  • Upload the phppsinfo.php file to your server and put it inside your current shop’s directory or the one where you intend to install it.
  • Open it up on your browser (http://your-domain.com/path-to-your-prestashop/phppsinfo.php).
  • Type in the login and password if prompted (use prestashop for both).

You’ll get a web page detailing requirements and recommendations, and how your server does compared to them:

Azone Prestashop Theme

Make sure that your PHP configuration has the following extensions and settings configured

Theme Installation

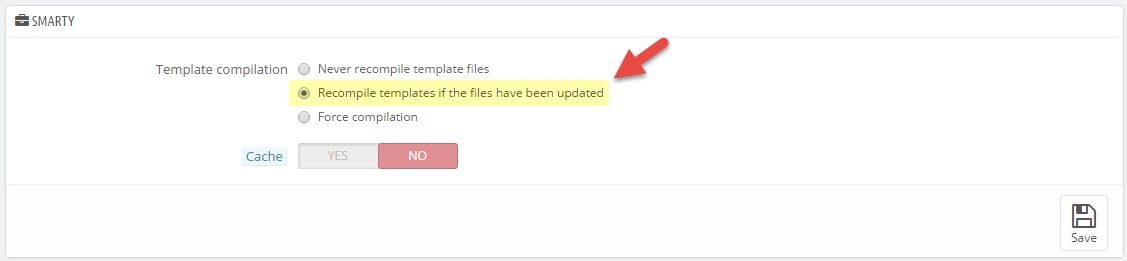
Note: Before installing theme, you must disable the cache. In your back office, please go to CONFIGURE >> Advanced Parameters >> Performance >> find “Cache” parameter >> Set “No” to disable cache >> Click “Save”.

Azone Prestashop Theme

SP Azone Theme Installation

Make sure you take the "Installable zip" - sp_azone_theme_x.x.x.zip

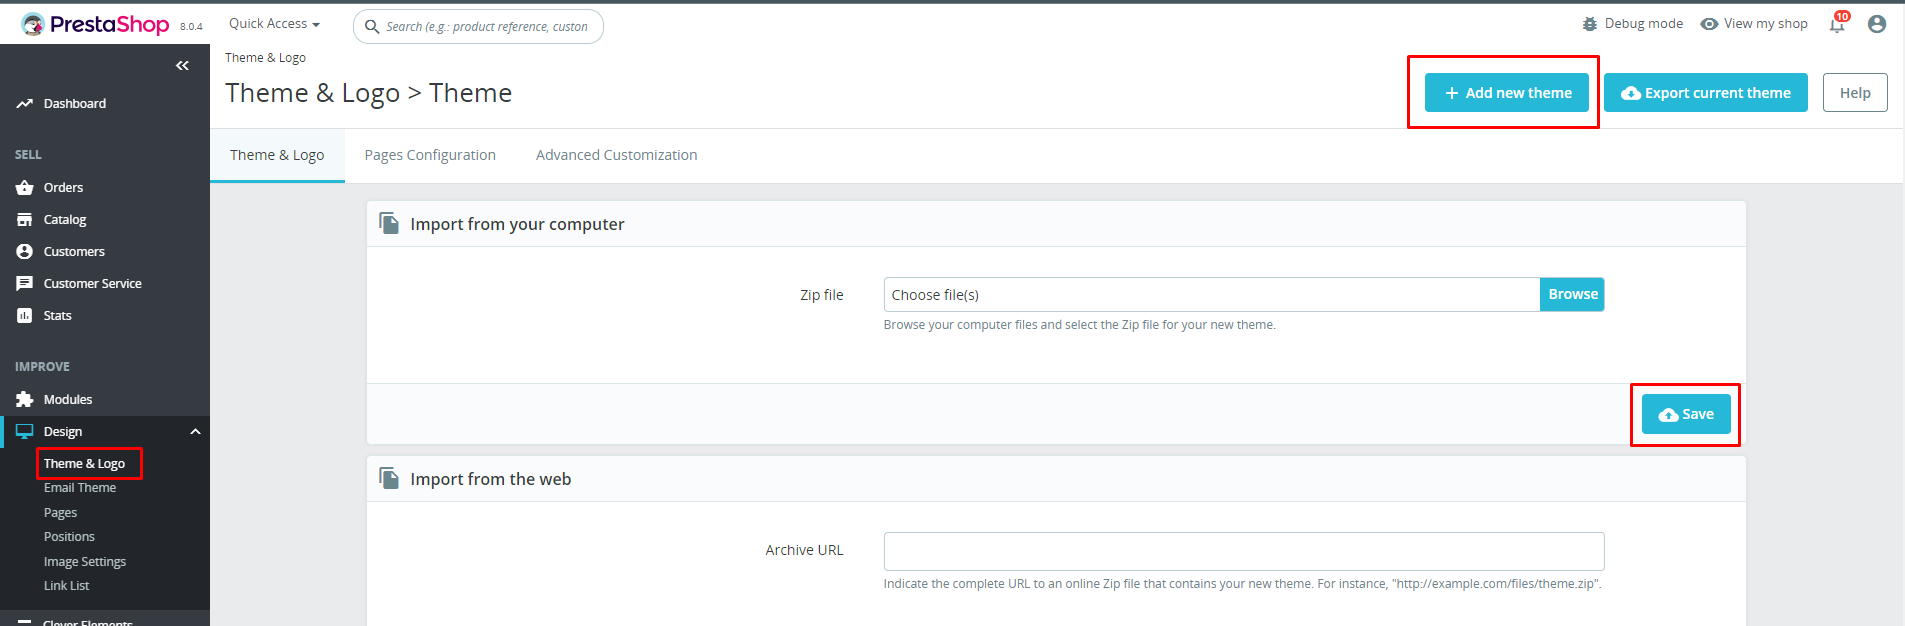
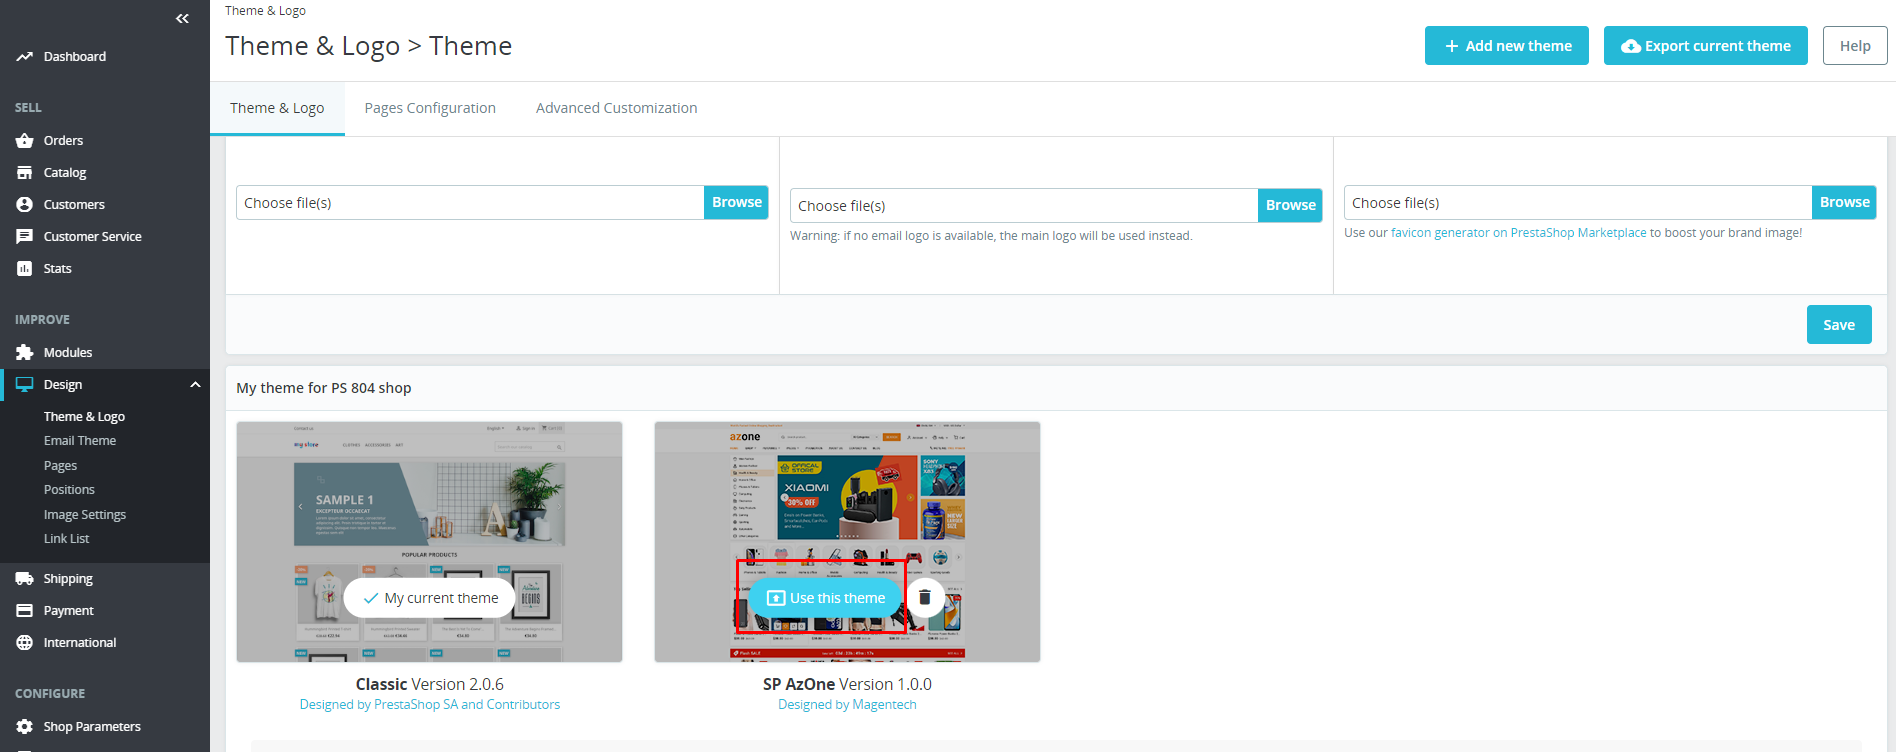
1. Login to your Prestashop admin panel and navigate to IMPROVE >> Design >> Theme & Logo. At the top of the page click the Add a new theme button.

2. Navigate to “Import from your computer>> choose the zip theme file >> Save.

Azone Prestashop Theme

3. When your choice is successfully validated , just click to Use this theme button.

Azone Prestashop Theme


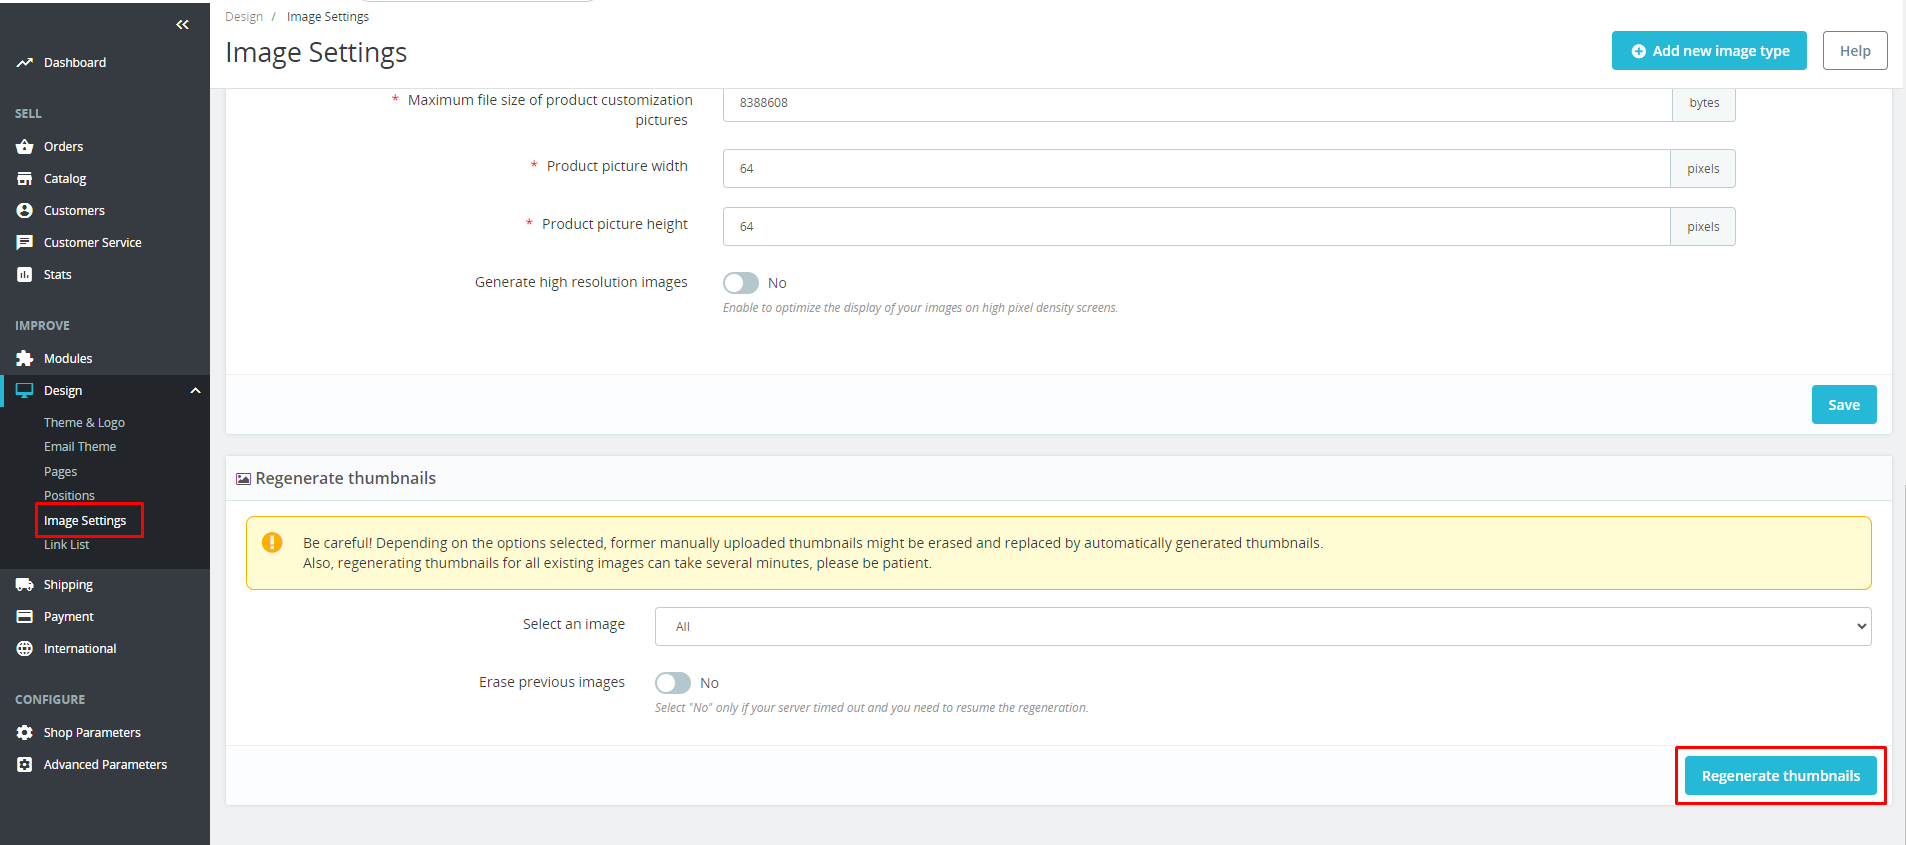
Note: After SP Azone theme is installed, you should Regenerate thumbnails. Go to IMPROVE >> Design >> Image Settings

Azone Prestashop Theme

If you want to install other demo, please follow step below

  • Go to MAGENTECH > SP Theme Configuration
    Azone Prestashop Theme


  • Choose Import Demo : Choose demo (which has not been imported yet) you want to import. If the demo has already been imported, skip this step. Azone Prestashop Theme

  • Go to Layout: Choose Header Style, Content Style and Footer Style which you want to show Azone Prestashop Theme

  • Click Save button & Finish installer

How to use Elementor

Clever Elements

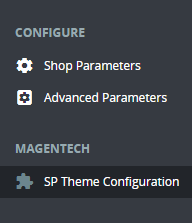
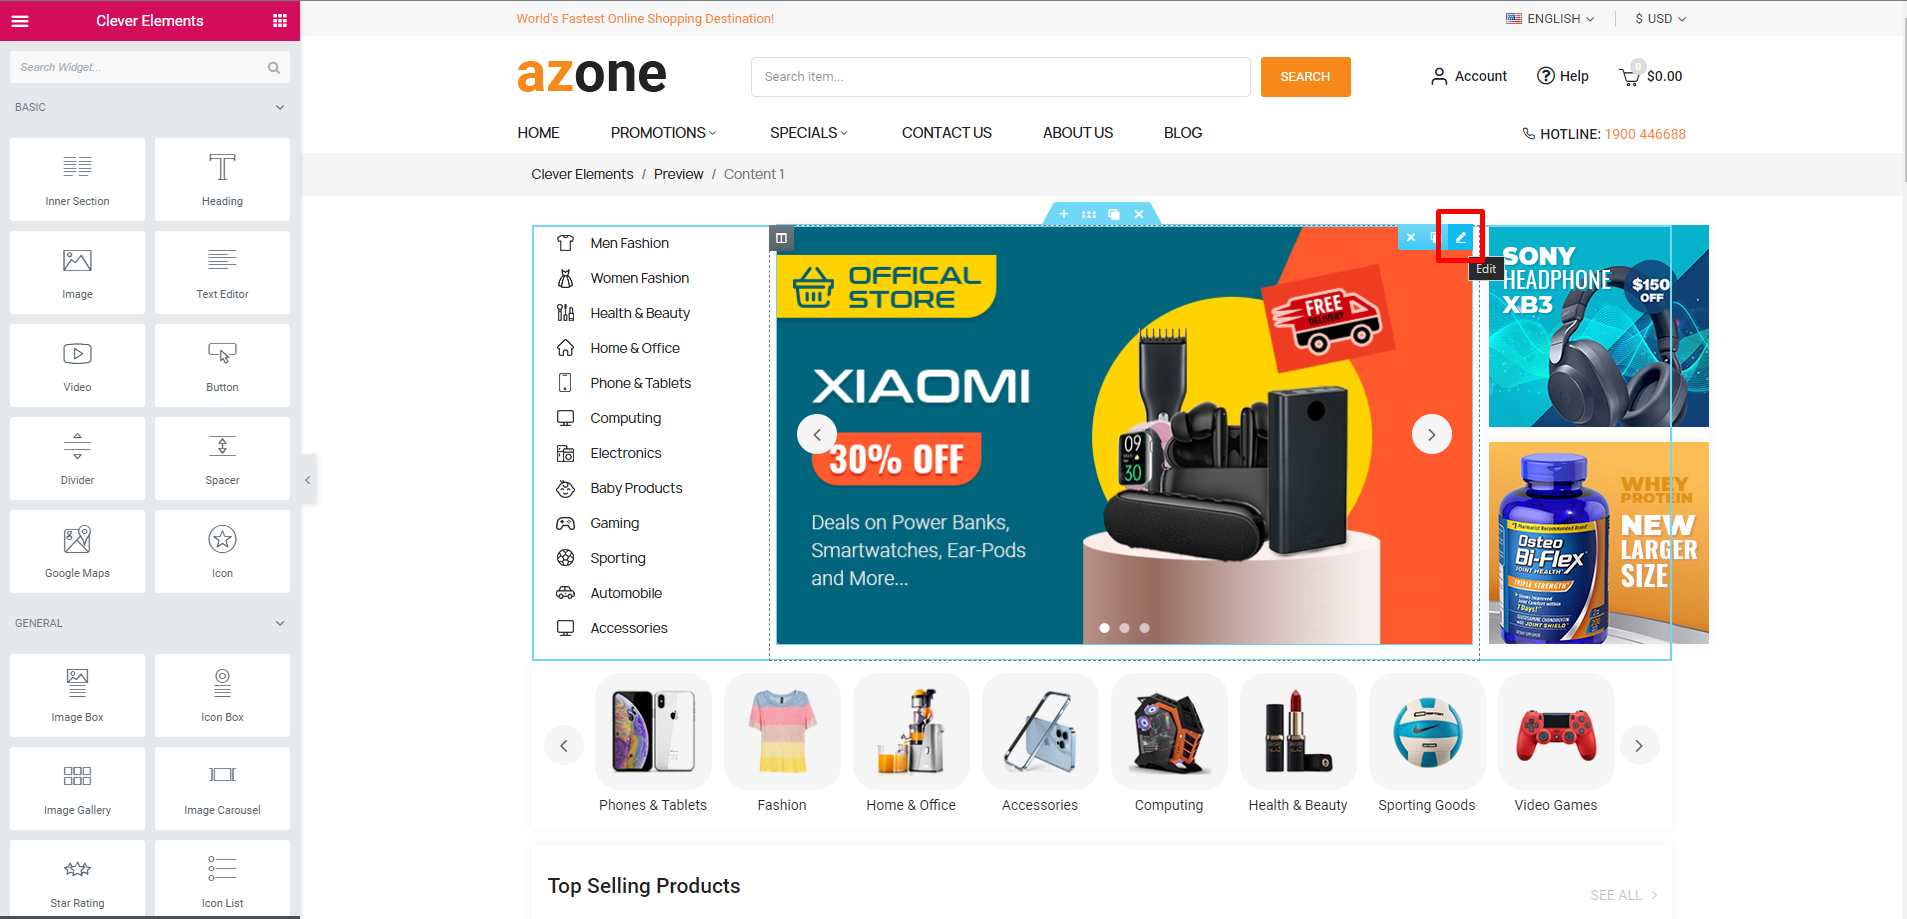
Clever Elements is a visual page builder module for PrestaShop enabling the creation of web pages in a live, visual way. There are 2 ways to Edit content with Clever Elements

The First Way
  • Login to your Prestashop BackOffice
  • Open the frontend
  • Hover the header, homepage content, footer, you will see the icon Edit with Clever Elements Azone Prestashop Theme. Just click it and the Clever Elements panel will be showed.
    Azone Prestashop Theme

  • Hover each widget/element you want to edit, then double click or click Edit icon to customize Azone Prestashop Theme

  • On the Panel header, you can choose to edit the widget's content/style. Every Widget has a different setting.
  • You can Save your current changes at any stage.
The Second Way
  • Login to your Prestashop BackOffice
  • Go to IMPROVE > Creative Elements > Saved Templates
    Azone Prestashop Theme

  • You will see template list. At the template you are using or want to edit, click Edit Azone Prestashop Theme

  • On the Panel header, you can choose to edit the widget's content/style. Every Widget has a different setting.
  • You can Save your current changes at any stage.

SP Theme Configuration

SP Theme Configuration

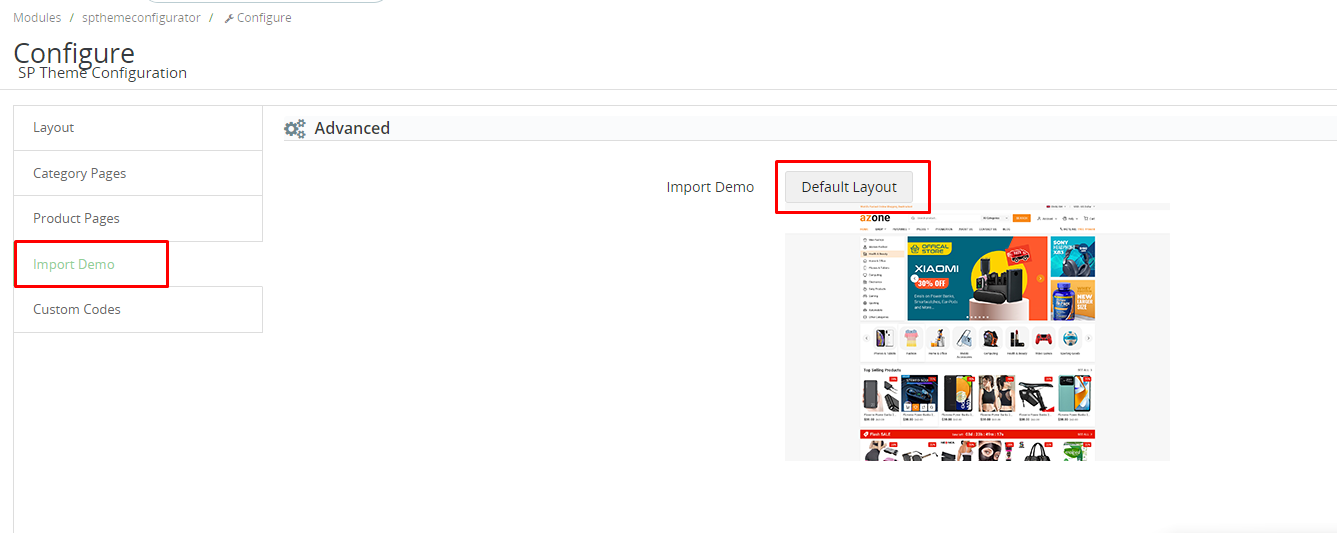
You can set up layouts, import demos from our server and configure category pages, product detail, etc...

* Navigate to MAGENTECH >> SP Theme Configuration
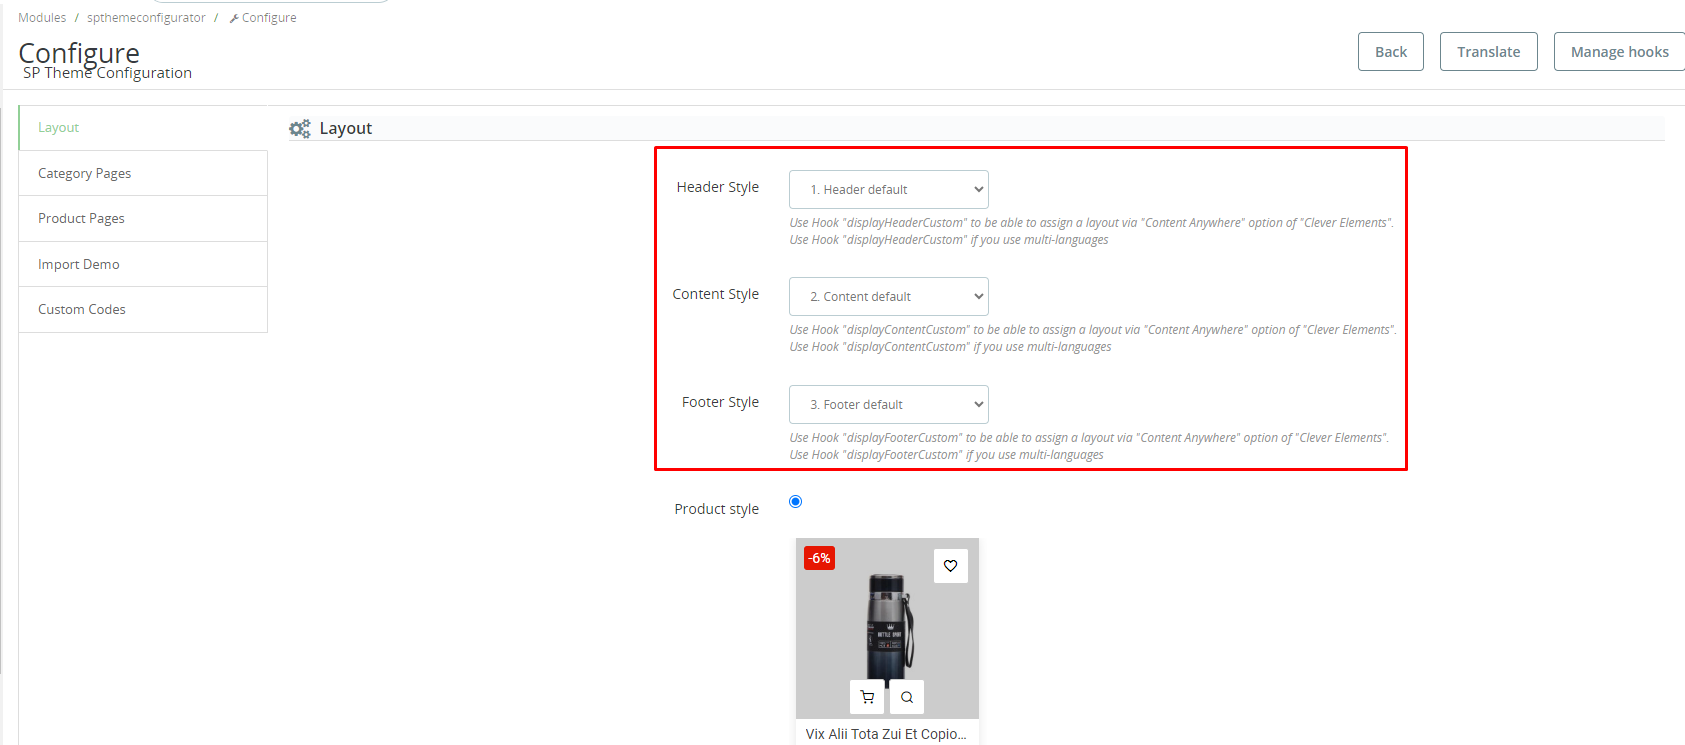
Azone Prestashop Theme

1. In Layout tab

Azone

  • Header Style: Select Header template (in Clever Elements >> Saved Templates) to show
  • Content Style: Select Index Content template (in Clever Elements >> Saved Templates) to show
  • Footer Style: Select Footer template (in Clever Elements >> Saved Templates) to show
  • Product Style: Select Product box style in the Frontend

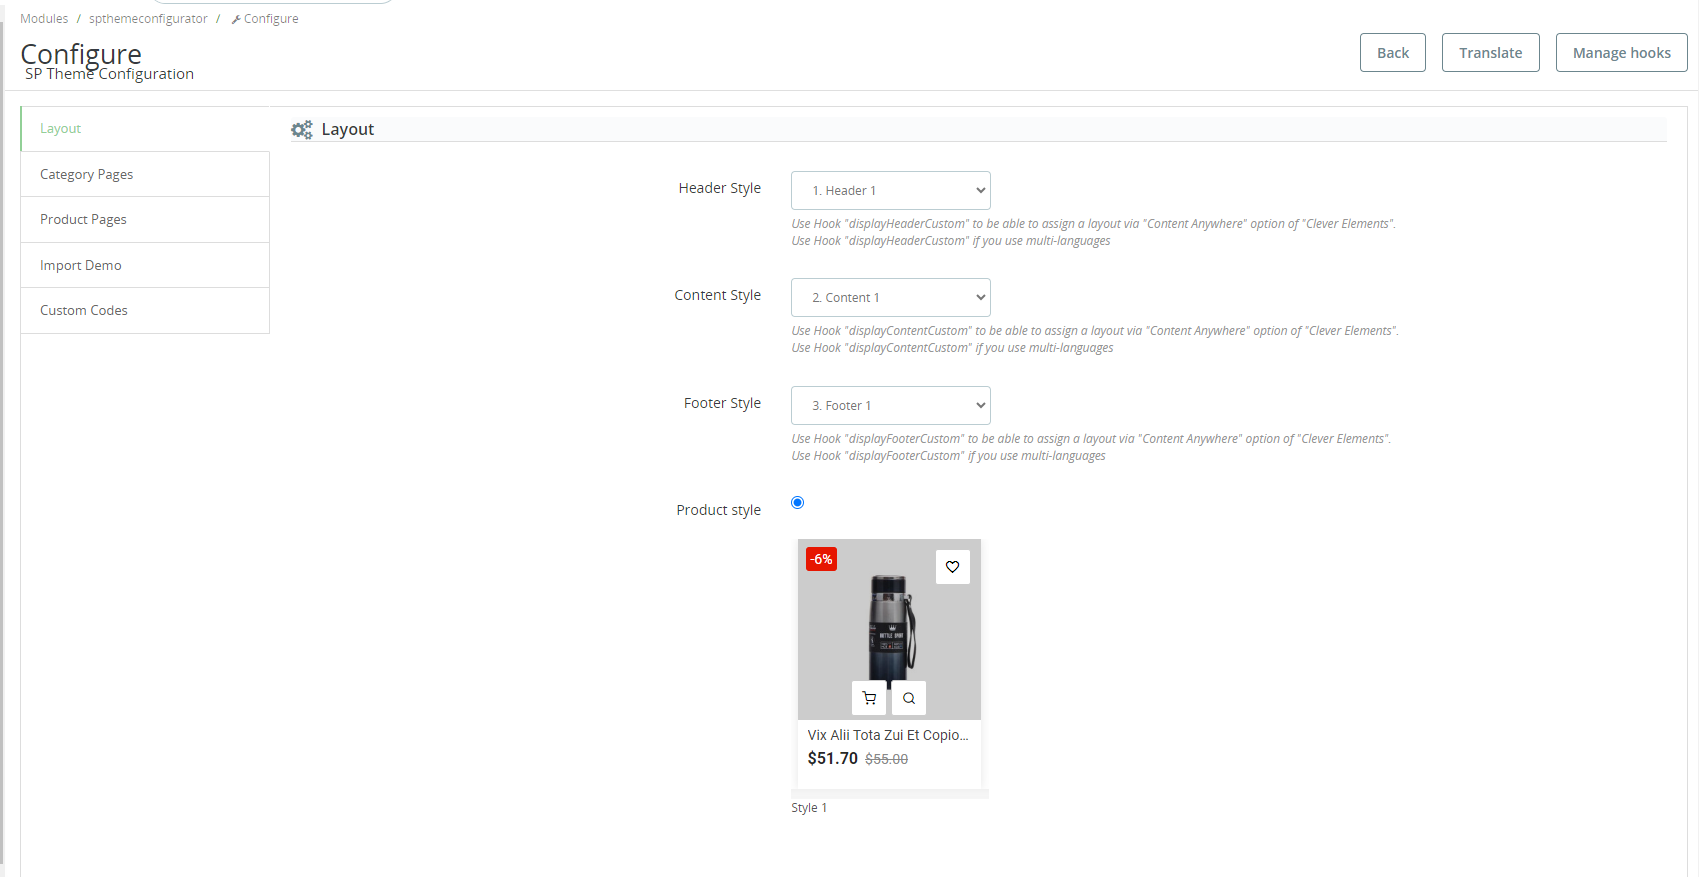
2. In Category pages tab

Azone

  • Show category title: Turn it Enabled if you want to show the Category Title at the top of Category pages
  • Show category image: Turn it Enabled if you want to show the Category Image
  • Show category description: Turn it Enabled if you want to show the Category Description
  • Show subcategories: Turn it Enabled if you want to show the Subcategory list
  • Number of Subcategories in one row: Set number of Subcategories per row
  • Show sub category image: Turn it Enabled if you want to show the SubCategory Image
  • Show sub category title: Turn it Enabled if you want to show the SubCategory Title
  • Show sub category description: Turn it Enabled if you want to show the SubCategory Description

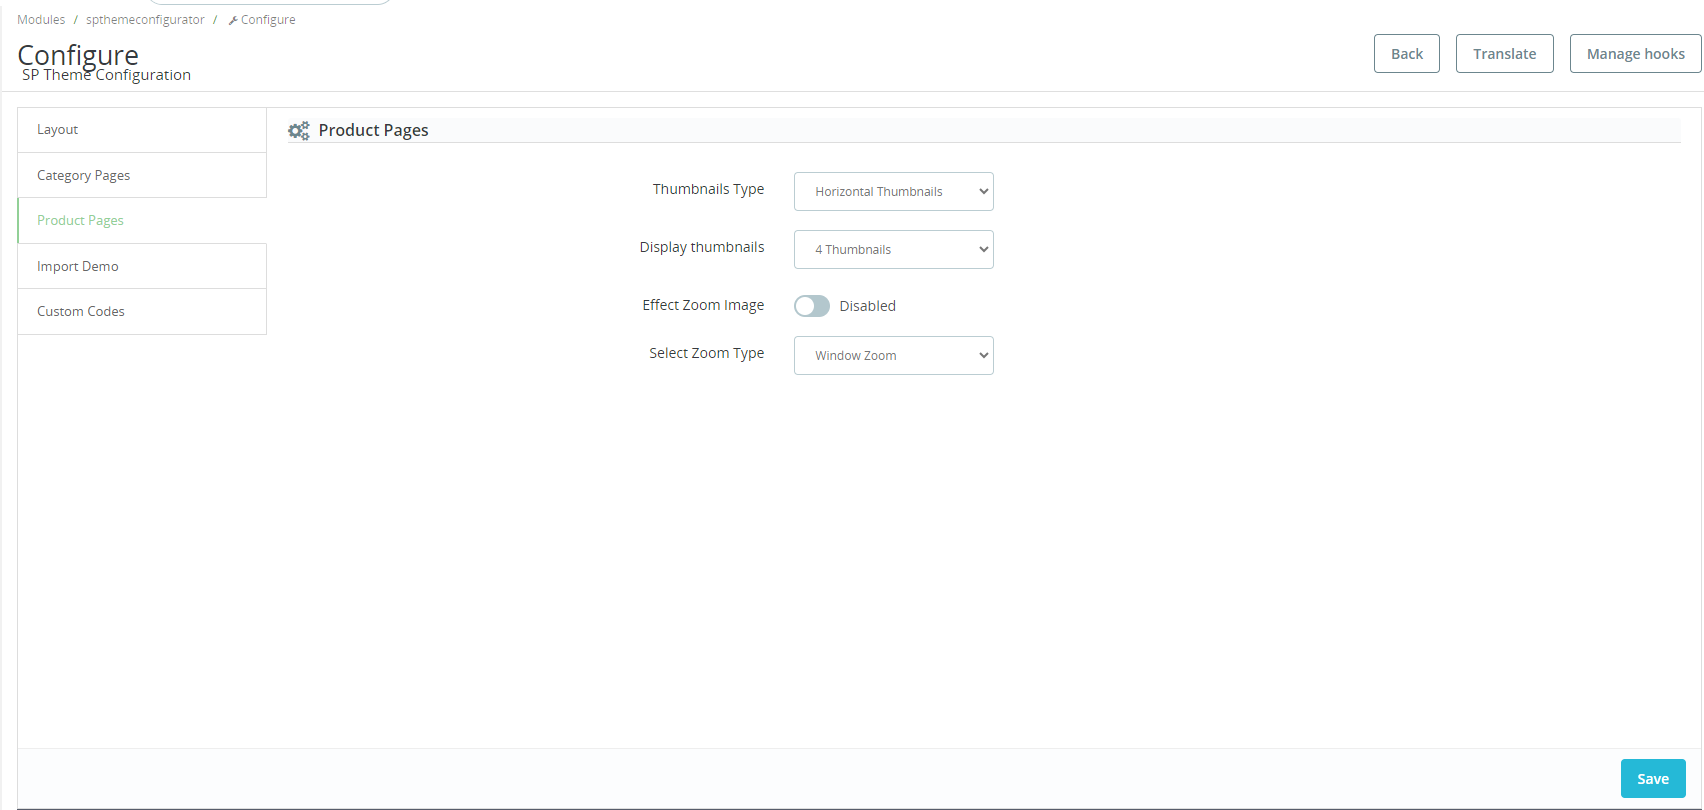
3. In Product Pages tab

Azone

  • Thumbnails Type: Product thumbnails can be displayed horizontal slider or vertical slider (Left side vertical slider/Right side vertical slider).- This function will be update soon
  • Display thumbnails: Set number of thumbnail images per row. - This function will be update soon
  • Effect Zoom Image: Turn it Enabled if you want to show Product detail image zoom function
  • Select Zoom Type: Select Product Image zoom style

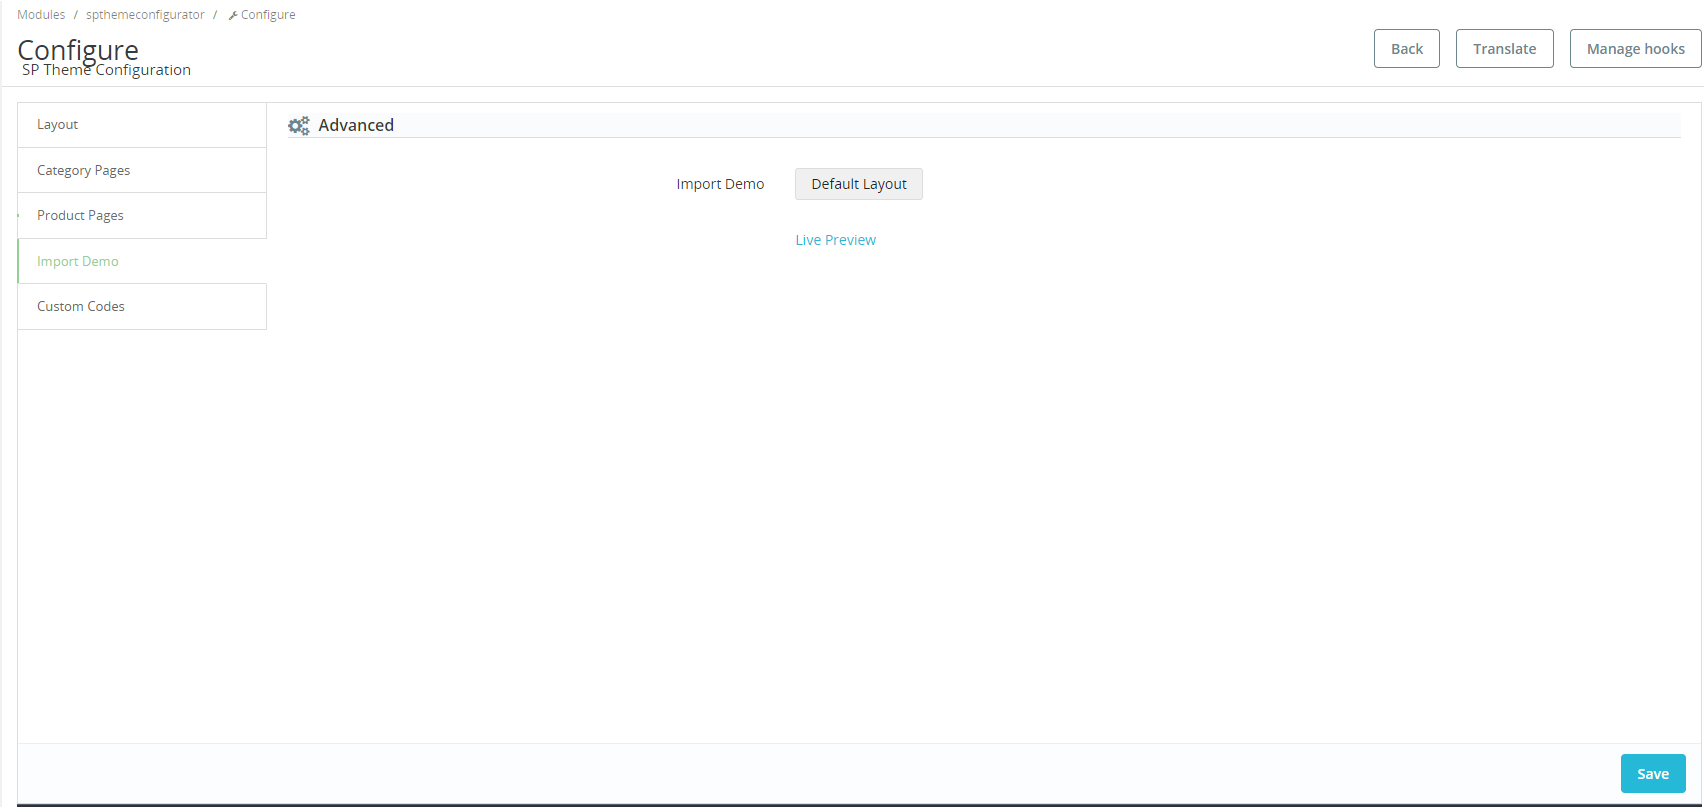
4. In Import Demo tab

Azone

  • You can update all of the latest demo from our server directly
  • Choose any demo (which has not been imported yet) you want to import.
  • After that, please remember to Choose Header Style, Content Style and Footer Style which you want to show in Layout tab above

5. In Custom Codes tab
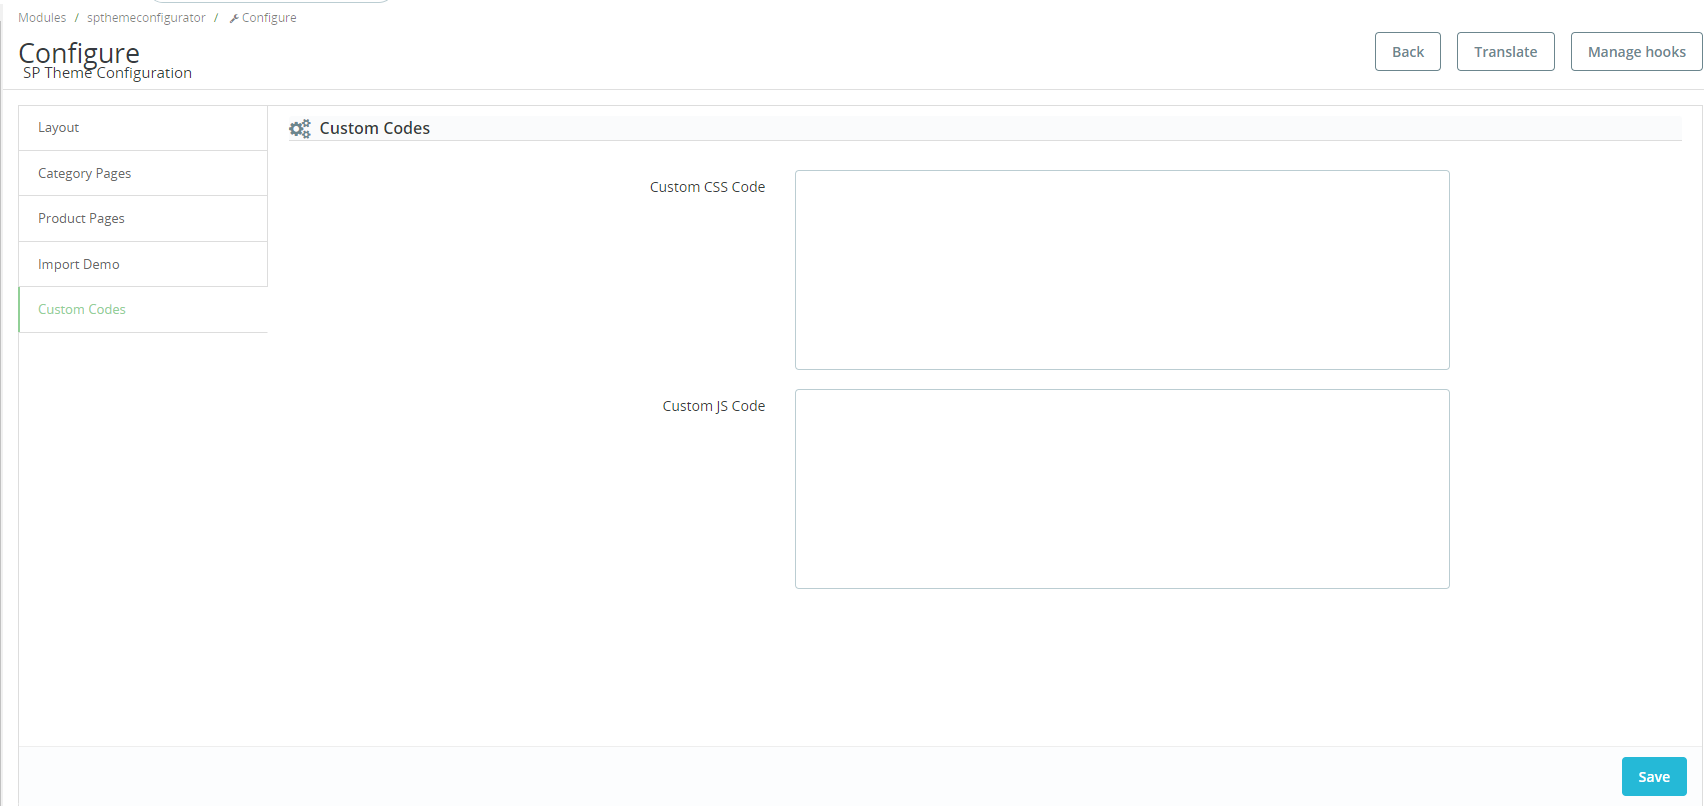
Azone

  • You can put custom CSS or Javascript. After that, you could go to the Front-end to view the changes.

Examples code css


								body{
									background-color: red;
								}


Examples code Javascript


								alert('This is demo javascript');


SP Megamenu Configuration

SP Memgamenu (displayMenu)

1. Navigate to IMPROVE >> Modules >> Modules and Services go to Installed modules section and look for SP Mega Menu >> Click the Configure button to access the module configuration page.

2. In the SP Mega Menu Panel, you could Add New Module by click on the button like the following image:

Azone

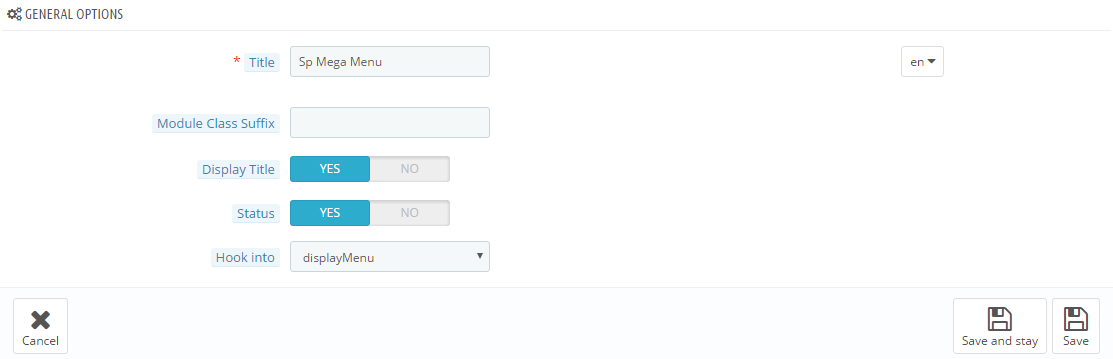
3. You could configure General Options then click "Save" or "Save and stay" button.

Azone

4. After, scroll down you could configure Menu Information as follows

Azone

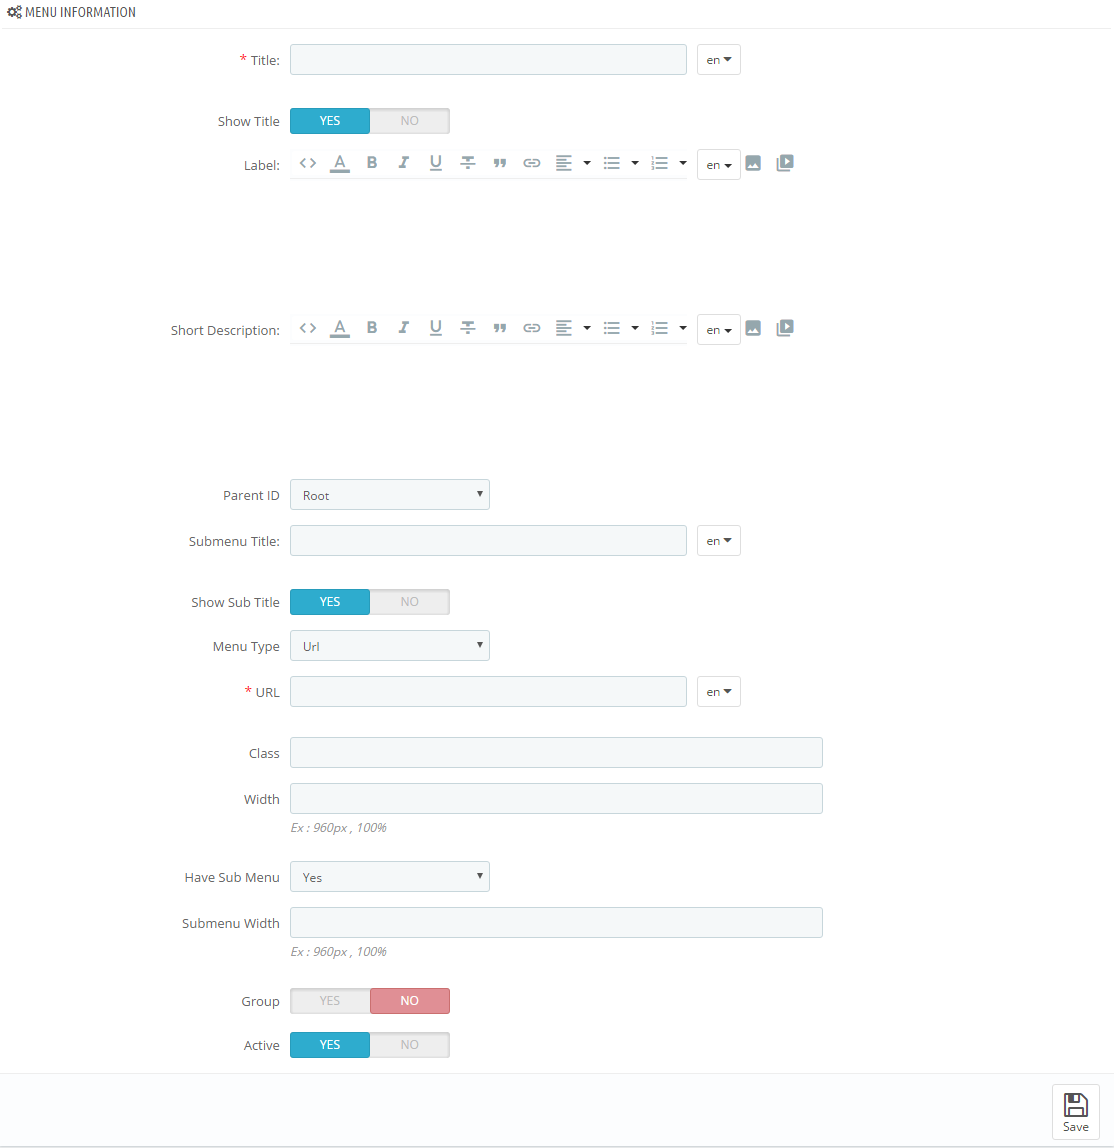
5. Click Add New button to add items as you want.

6. Menu list of Mega Menu. You need to look at the menu list to configure easily.

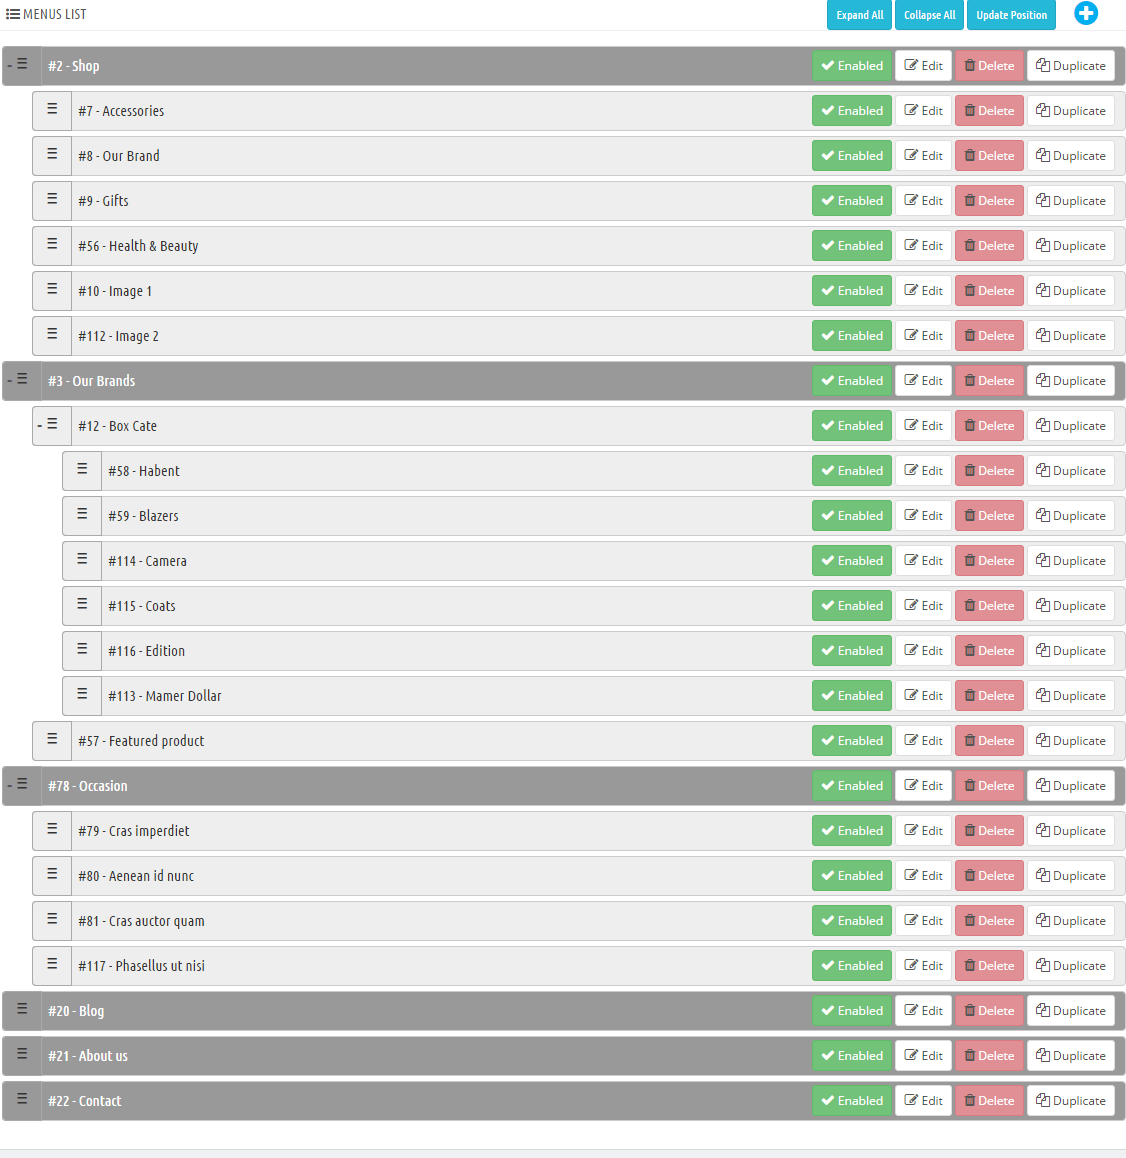
7. To configure each item, you need to click Edit button.

Languages

Management Languages

1. Add new Language

Step 1:

- In the Prestashop Admin Panel, navigate to IMPROVE >> International >> Translations

Azone

Step 2:

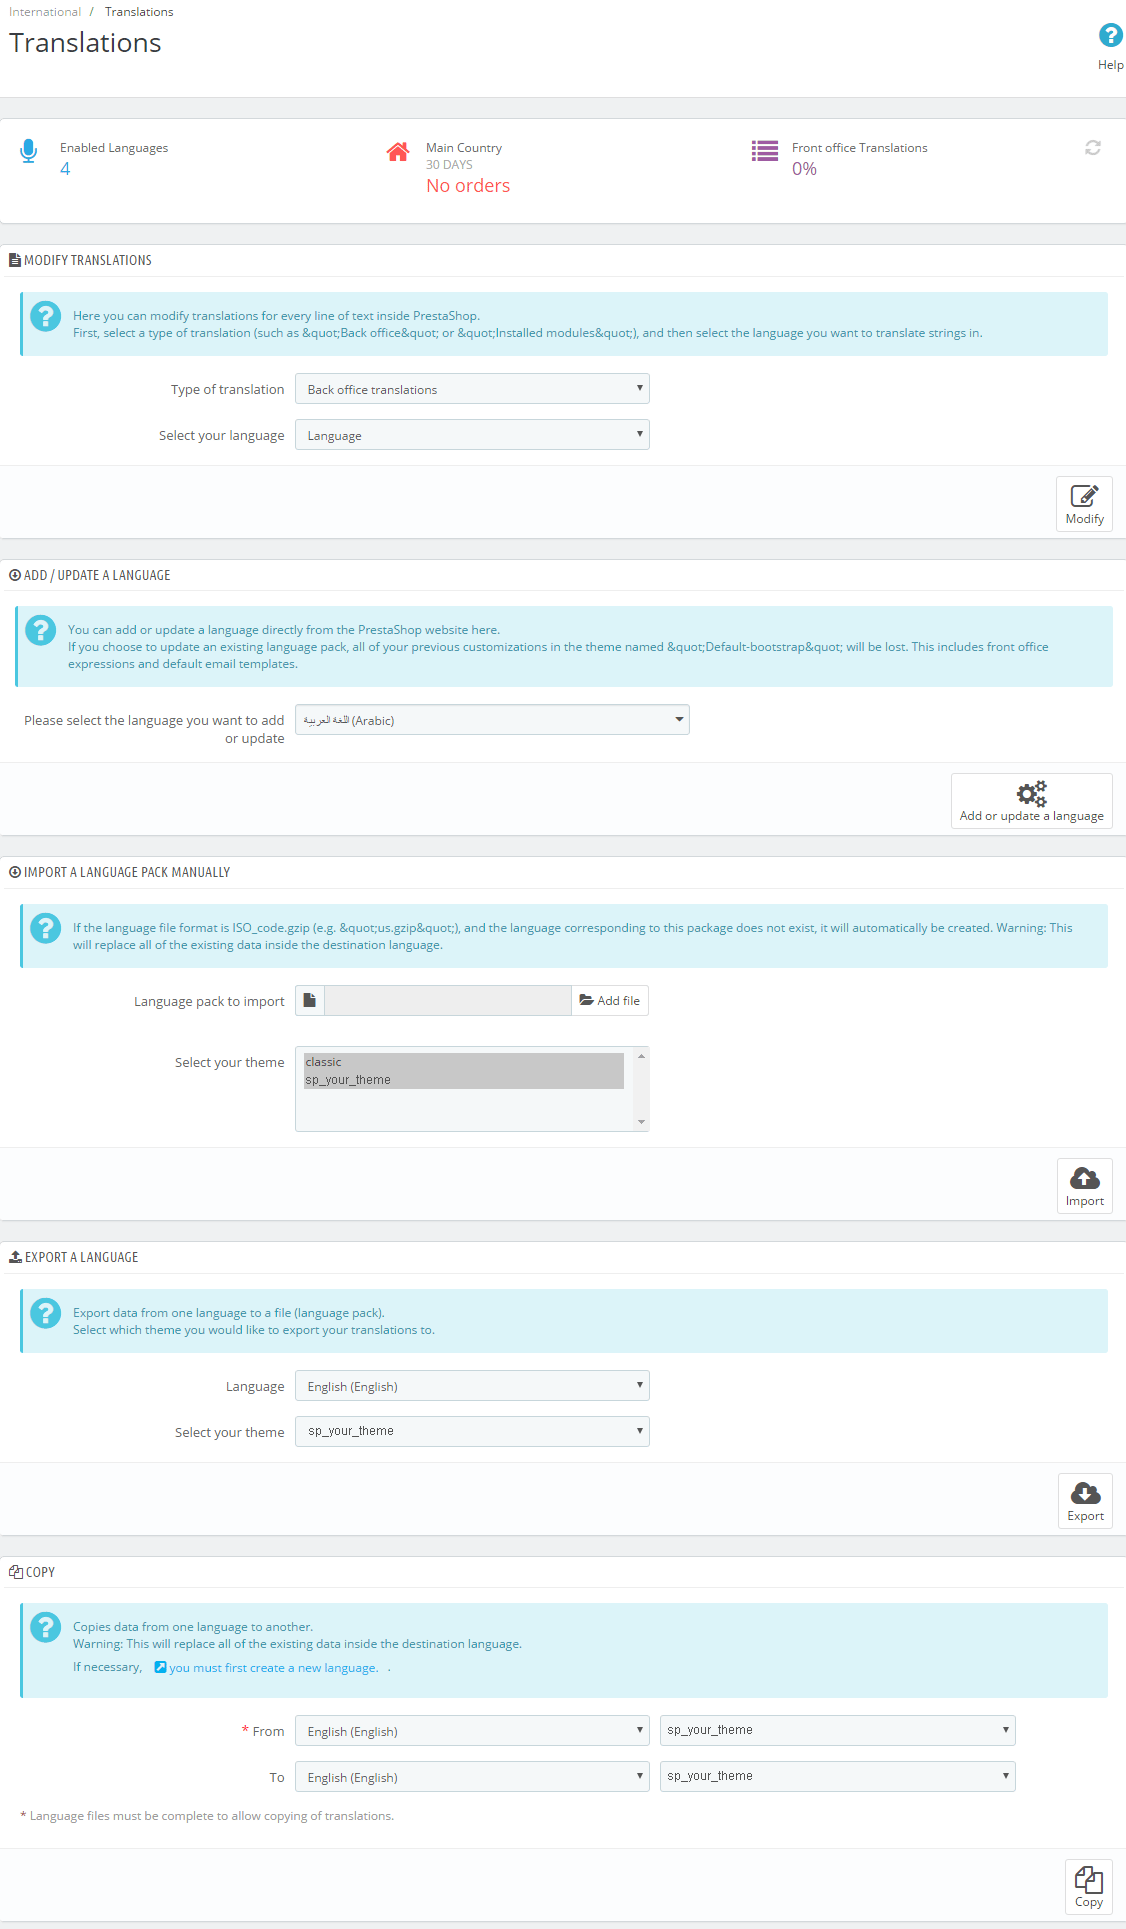
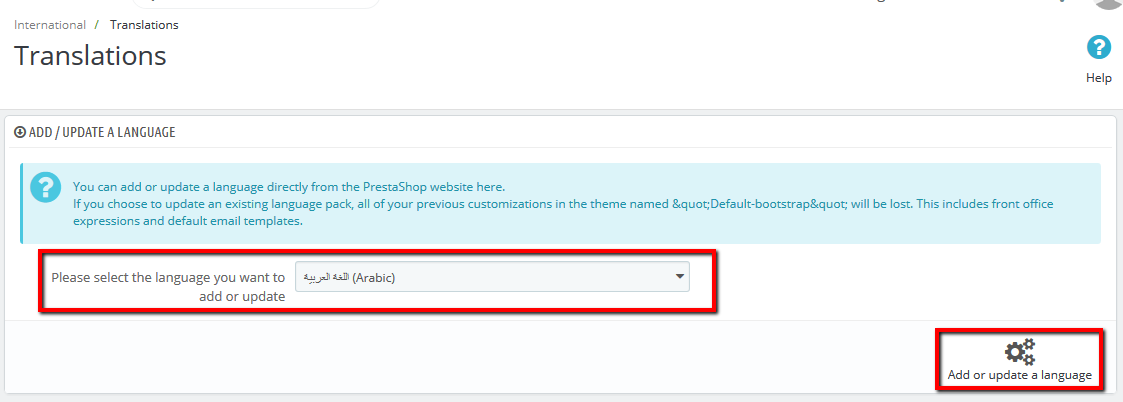
- At here, Scroll to block "ADD / UPDATE A LANGUAGE"

- Then, Select the language you want to add new, and click button "Add or update a language"

Azone

2. Export Language

Step 1:

- In the Prestashop Admin Panel, navigate to IMPROVE >> International >> Translations (Same Add new Language)

Step 2:

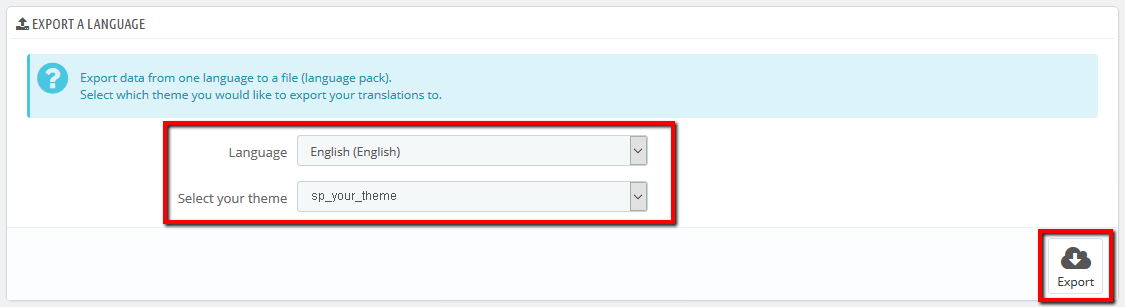
- At here, Scroll to block "Export a Language"

- Then, Select Language and Your theme that you want Export, and click button "Export"

Azone

3. Import Language

Step 1:

- In the Prestashop Admin Panel, navigate to IMPROVE >> International >> Translations (Same Add new Language)

Step 2:

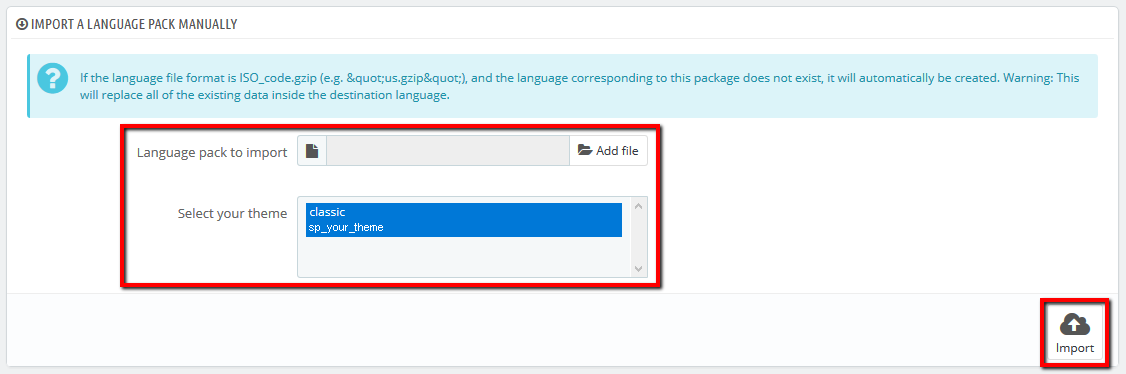
- At here, Scroll to block "Import a language pack manually"

- Then, click button "Add file" and choose file language and select your theme, and click button "Import"

Azone

4. Management Language

Step 1:

- In the Prestashop Admin Panel, navigate to IMPROVE >> International >> Localization, and choose tab "Languages"

- You can edit or delete language on your store

Azone

Step 2:

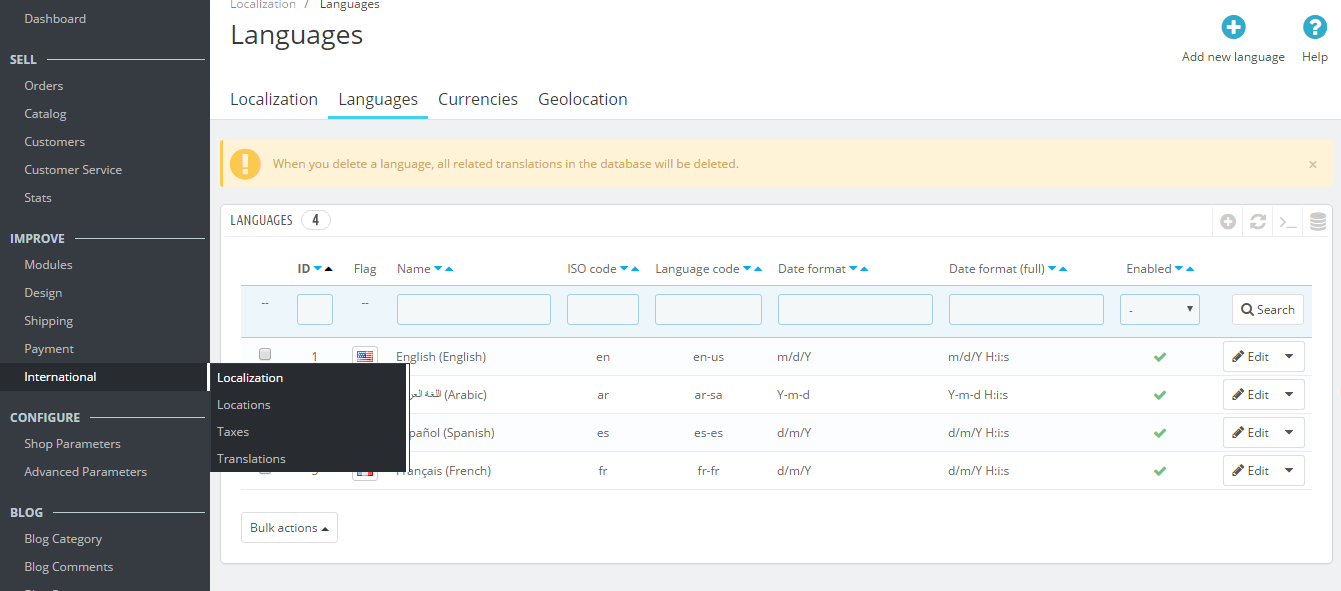
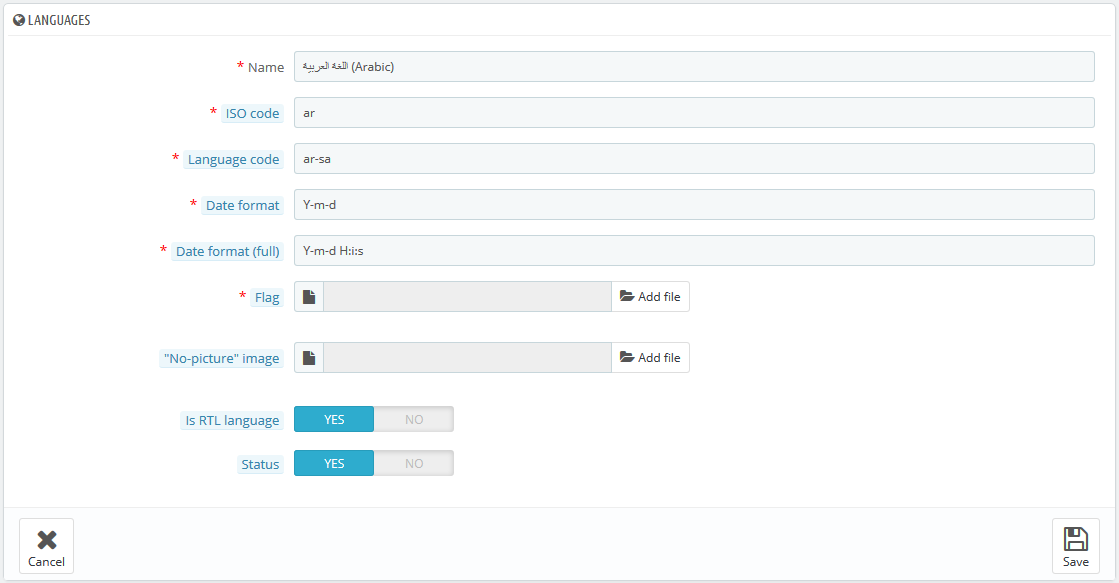
- If you want change language, click button "Edit".

Azone

Currencies

Management Currencies

Step 1:

- In the Prestashop Admin Panel, navigate to IMPROVE >> International >> Localization, and choose tab "Currencies"

Azone

Step 2:

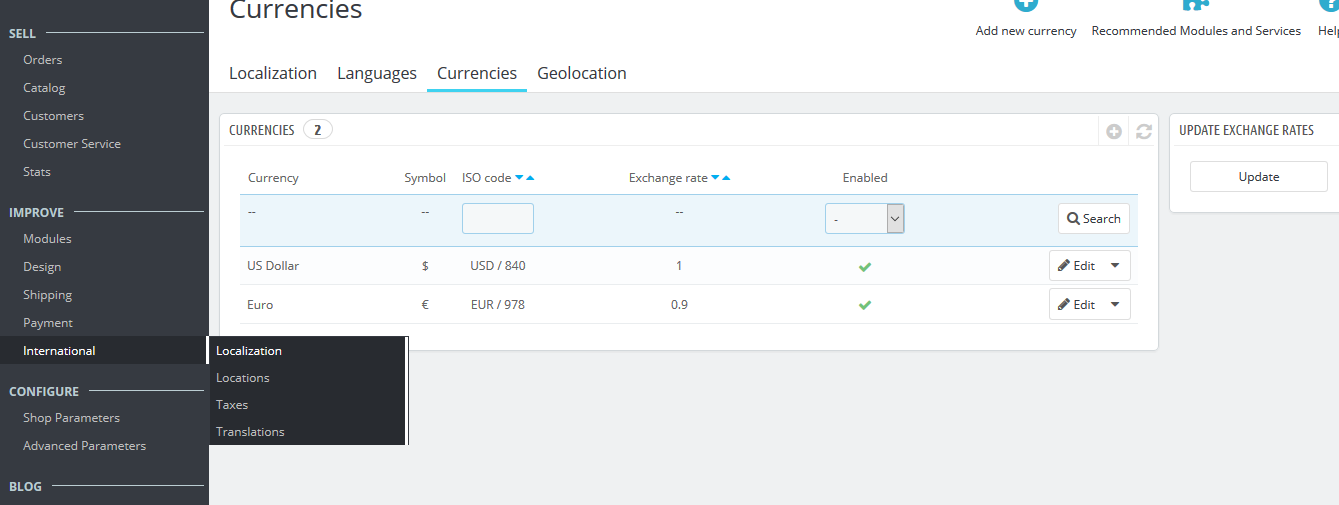
- In the "Currencies" configuration page, click button Azone in the right corner to “ADD NEW”.

Step 3:

You could configure this module like the illustration

Translation

Management Translation

1. Translations Theme

Step 1:

- In the Prestashop Admin Panel, navigate to IMPROVE >> International >> Translations (Same Add new Language)

Step 2:

- In the "Translations" configuration page, scroll to block "MODIFY TRANSLATIONS"

  1. Choose "Type of translation" is "Theme translations"
  2. Choose "Select your theme" is your theme you want translated.
  3. Select your language you want translated

- Then click button "Modify"

Azone

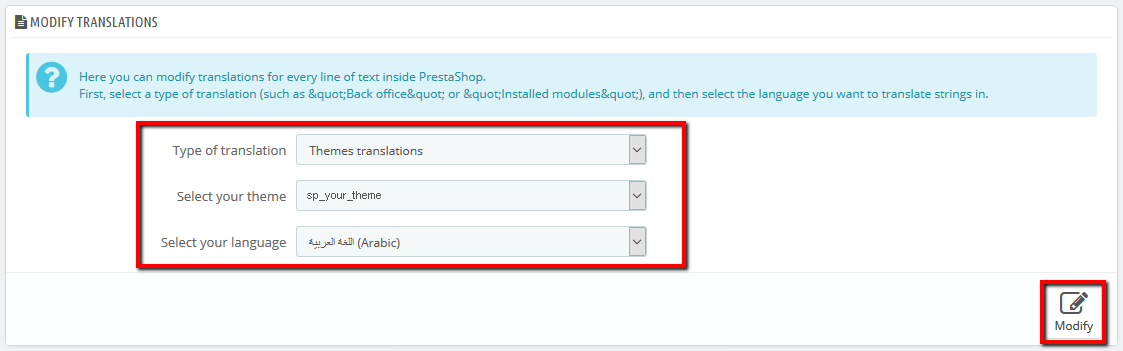
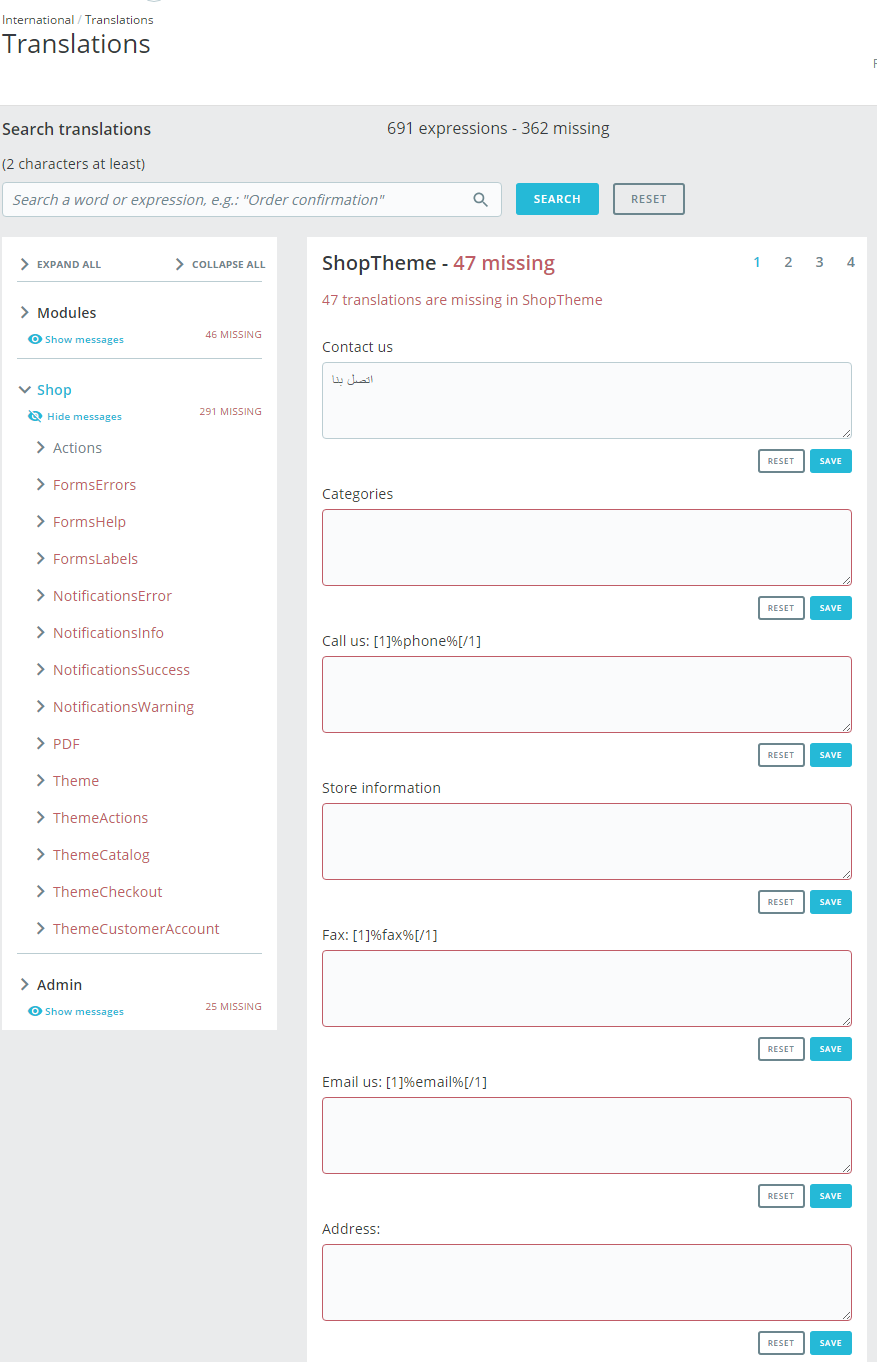
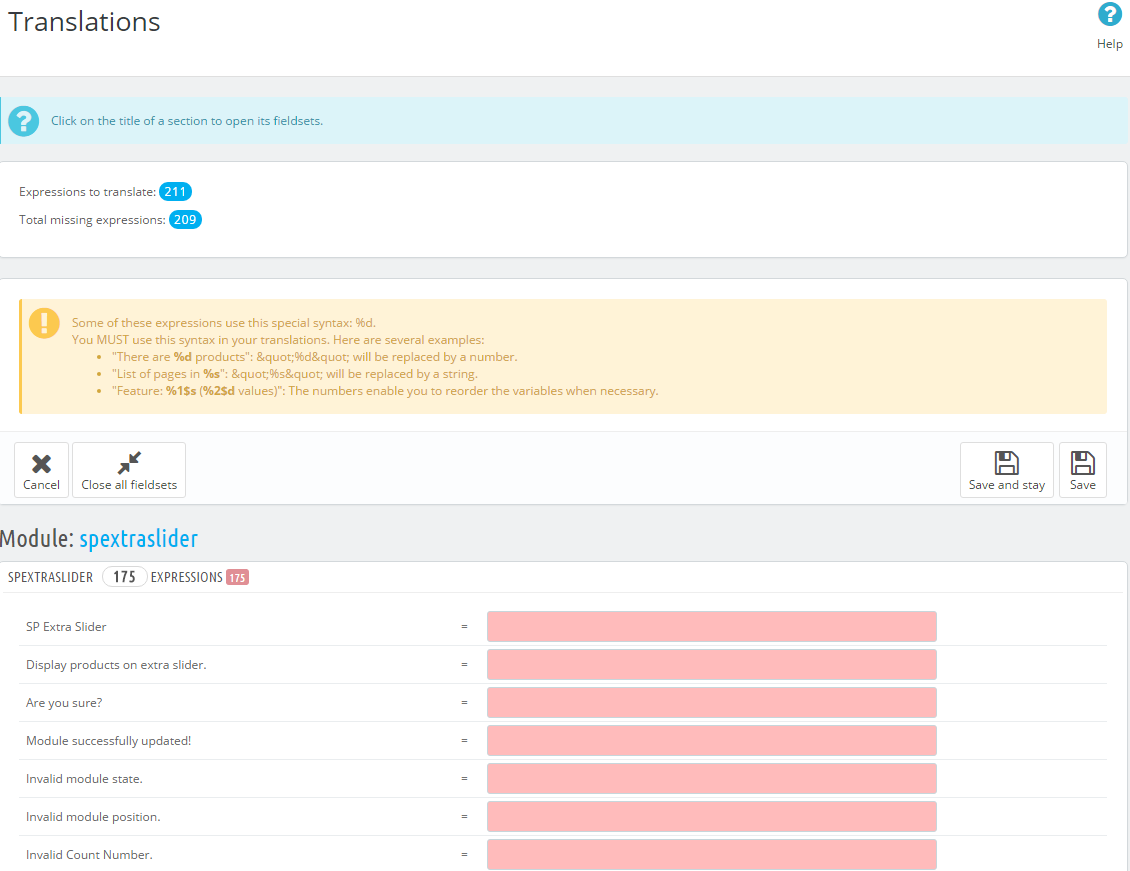
- Here, you can translate the text in the theme.

Azone

2. Translations Modules

Step 1:

- In the Prestashop Admin Panel, navigate to IMPROVE >> International >> Translations (Same Add new Language)

Step 2:

- In the "Translations" configuration page, scroll to block "MODIFY TRANSLATIONS"

  1. Choose "Type of translation" is "Installed modules translations"
  2. Choose "Select your module" is your module you want translated.
  3. Select your language you want translated

- Then click button "Modify"

Azone

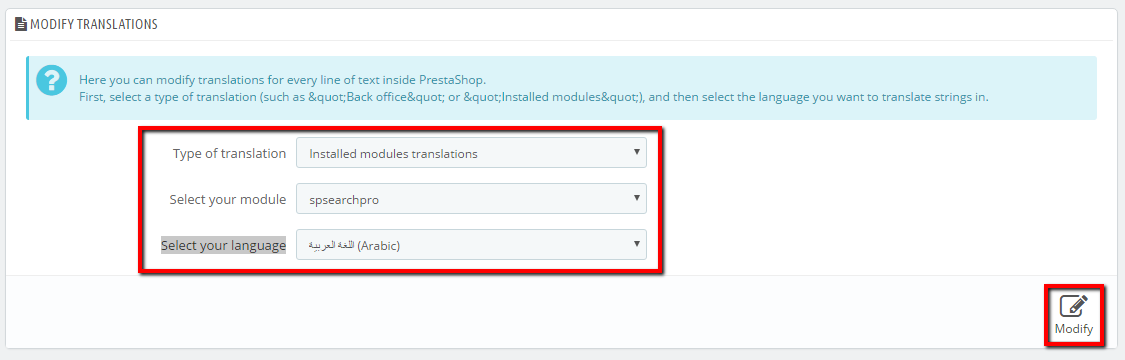
- Here, you can translate the text in the module.

Azone

Other

Support

SUPPORT - If you have any questions that are beyond the scope of this help file, please feel free to send us via: Support Tickets System
FAQs - Go to Here to view more the Frequently Asked Questions.


Change Log

Changelog

Click here to view changelog.