Getting Started
1.1 Introduction!
Firstly, a huge thanks for purchasing this theme, your support is truly appreciated!
This document covers the installation and use of this theme, reveals some answers to common problems and issues. We encourage you to read throughout this document if you are experiencing any difficulties. If you have any questions that are beyond the scope of document, please feel free to contact us via our Support Tickets System.
1.2 System Requirements
Please make sure your hosting server meets the PrestaShop requirements:
- Supported operating system: Windows, Mac and Linux.
- Wamp (for Windows) or Xampp (for Windows and Mac)
- Web server: Apache Web server 1.3 or later, Microsoft’s IIS Web server 6.0 or later.
- PHP 5.2* or later.
- MySQL 5.0 or later.
- At least 32 Mb of RAM on your server (64 Mb is comfortable, the more the better).
Note: If you can not import the theme/module file to your server due to the maximum upload and PHP memory limit, you need to increase the parameter “memory_limit=200M”; “max_execution_time=300″; “max_execution_time=1000″ & “upload_max_filesize=20M” in the file php.ini.
1.3 PrestaShop Guide
If you are not familiar with Prestashop, please read its guide first: http://doc.prestashop.com/display/PS16/Getting+Started
Installation
There are two ways to install SP Clickboom 17 Theme
- Quickstart Installation: By using this package, you will set the theme exactly like our Demo with sample data.
- Manual Installation: Include of Theme layout Installation Packages.
2.1 Quickstart Installation
We provide Quickstart package for each theme which aims to ease the installation for users. It will help you save much time of installing and configuring if you plan to start your site from the beginning. Please following steps below:
- Step 1: Download the quickstart package of SP Clickboom 17 theme
- Step 2: Extract the downloaded package named “sp_clickboom_quickstart_p1.7.3.0_v3.5.0″ in your localhost (or your hosting) folder. In Quickstart folder you will see the extracted folder that include all sample data
-
Step 3: Start installation by opening browser and navigate to your URL (where the Quickstart uploaded) to load default Prestashop installer. Please follow these steps of the Installer so that the installation process can be set.
- Installation Assistant (Choose your language)
Please select the installation language
Please note: The installation language option will not affect your store language. By default PrestaShop is offered in English. You can install additional localization packages to change the store language.
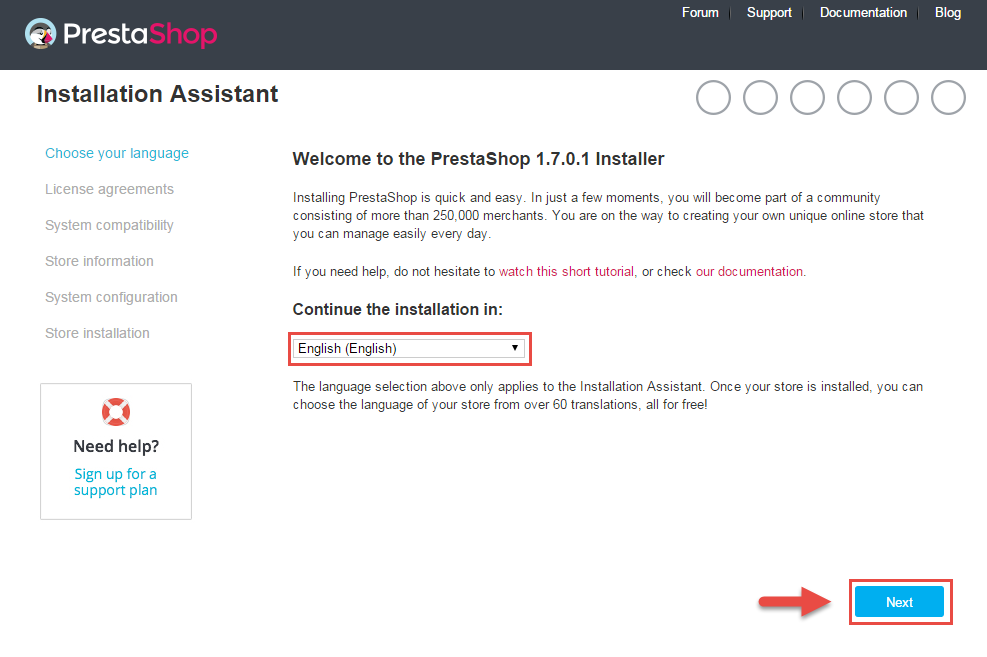
When you are done, click the ‘Next’ button.
- Installation Assistant (License agreements)
Please check the license agreement.
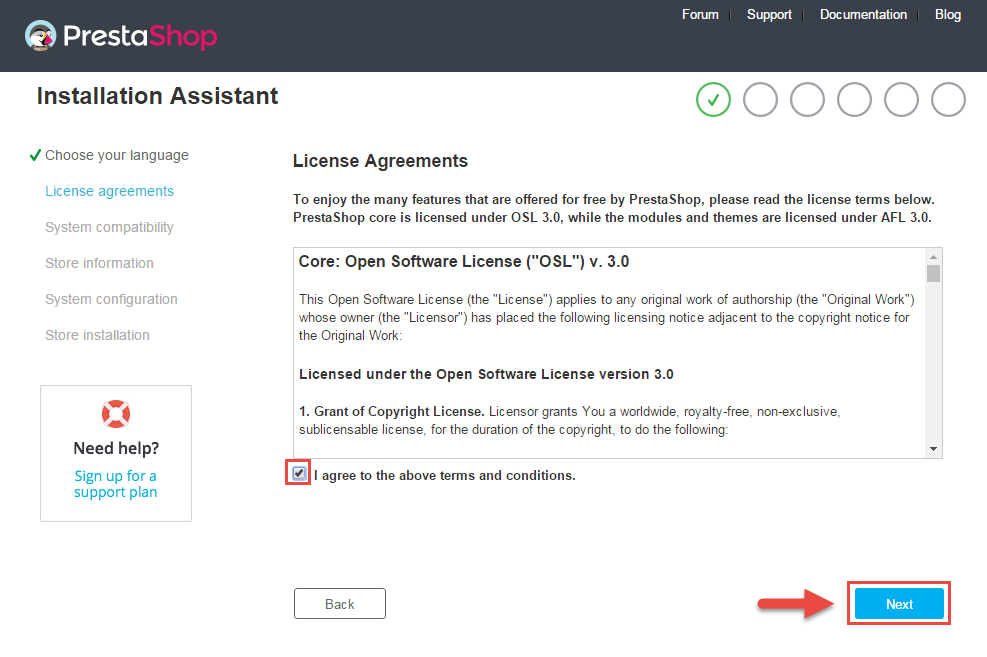
When you are done, click the ‘Next’ button.
- Checking PrestaShop Compatibility
In this step, you could check if PrestaShop was compatible with your system environment.
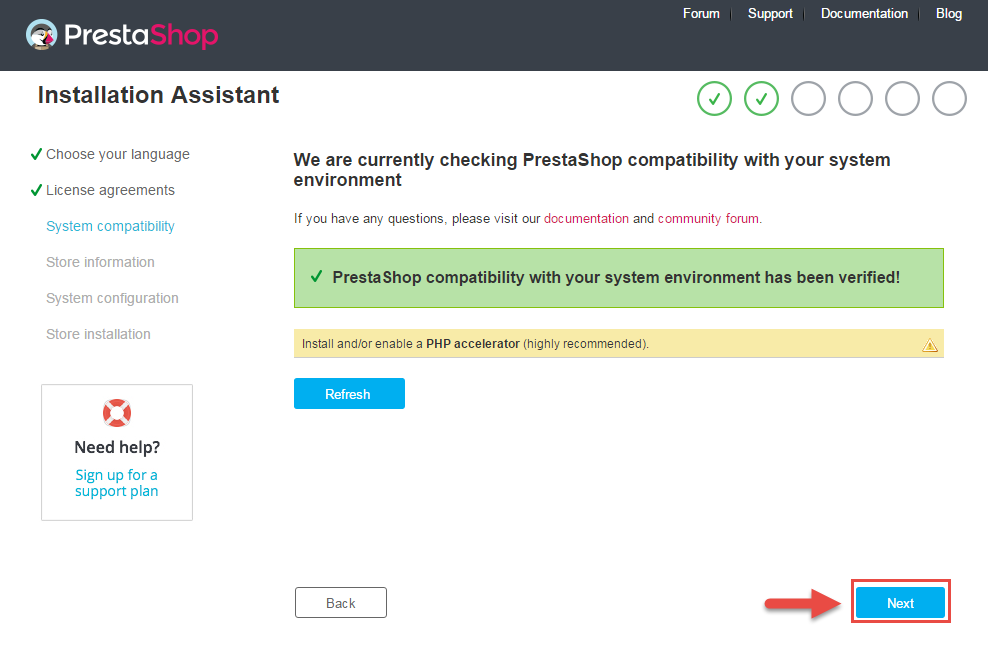
When you are done, click the ‘Next’ button.
- Store Information
Now add required information for your store: Shop name, Main activity, Country, Shop timezone and add the account info: first name, last name, email and password. Click “Next” to next step.
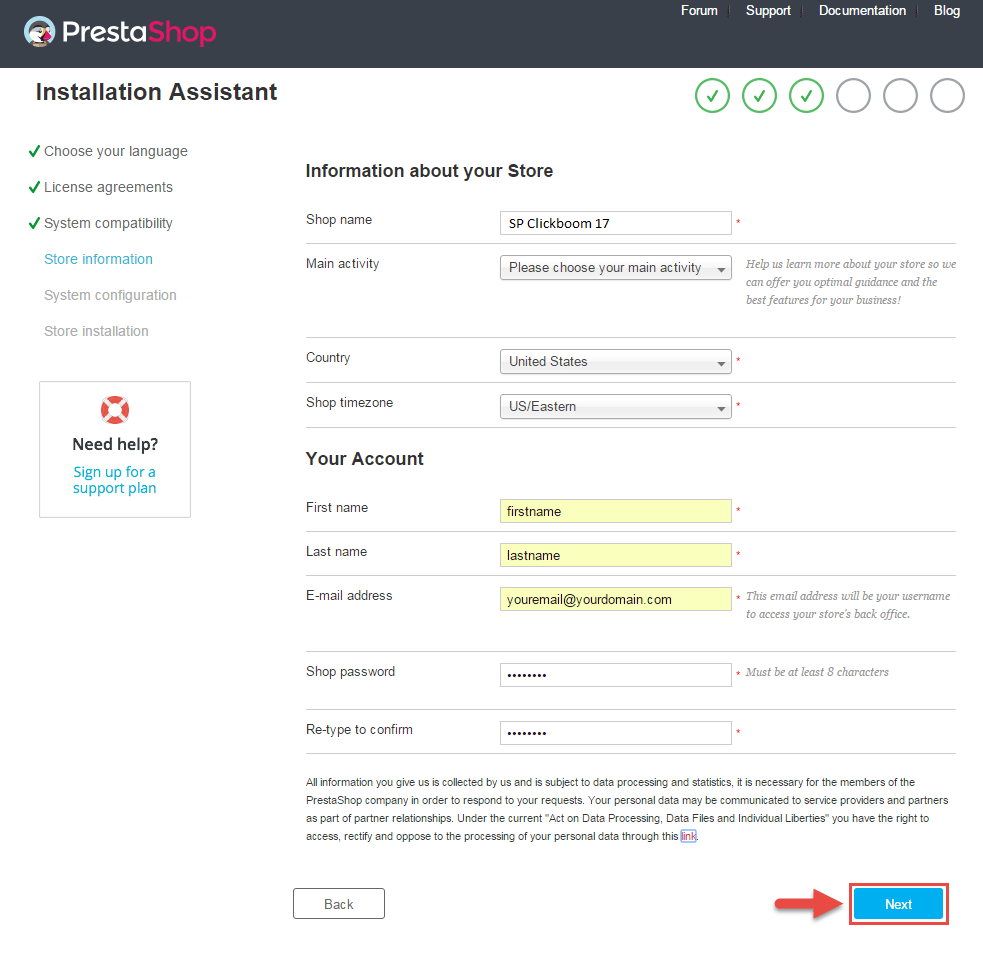
When you are done, click the ‘Next’ button.
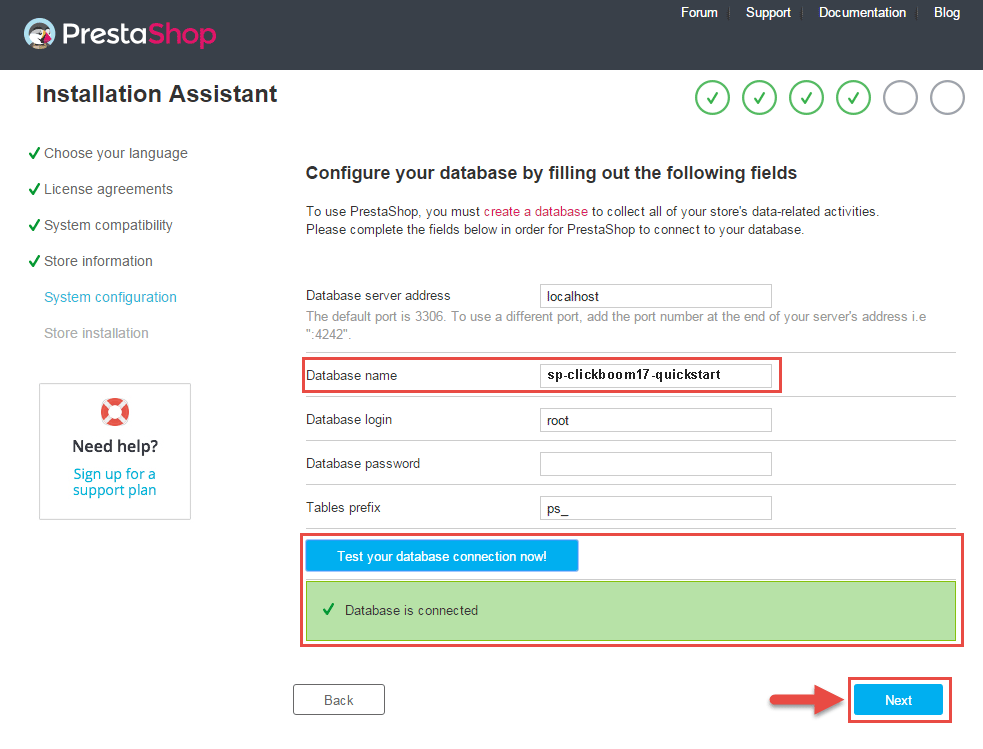
- System Configuration
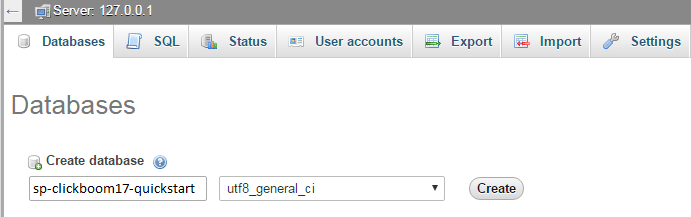
Here is the database configuration panel, we need to create database first.

Access your database panel and create database for your site. Add database name and then click “Create” button.
When the database is created successfully, copy and paste its name into the “Database name” field, then click the “Test your database connection now!” button to make sure that the entered settings are correct. If they are, you will see a Database is connected message. After that, you could click the “Next” button to move to next steps.
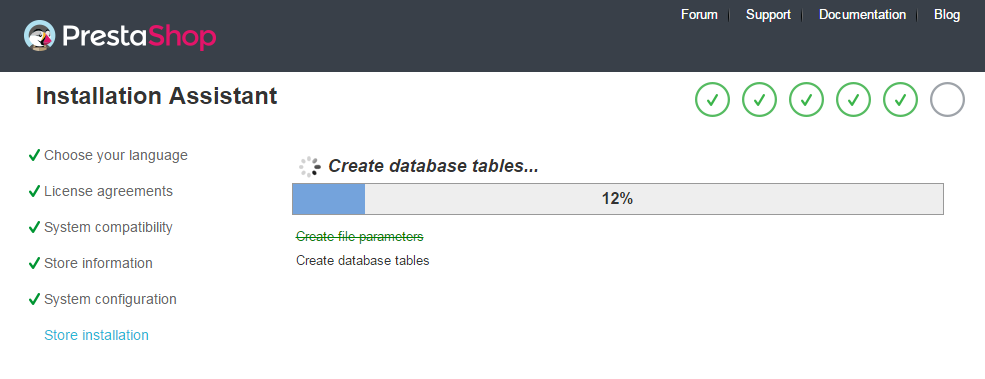
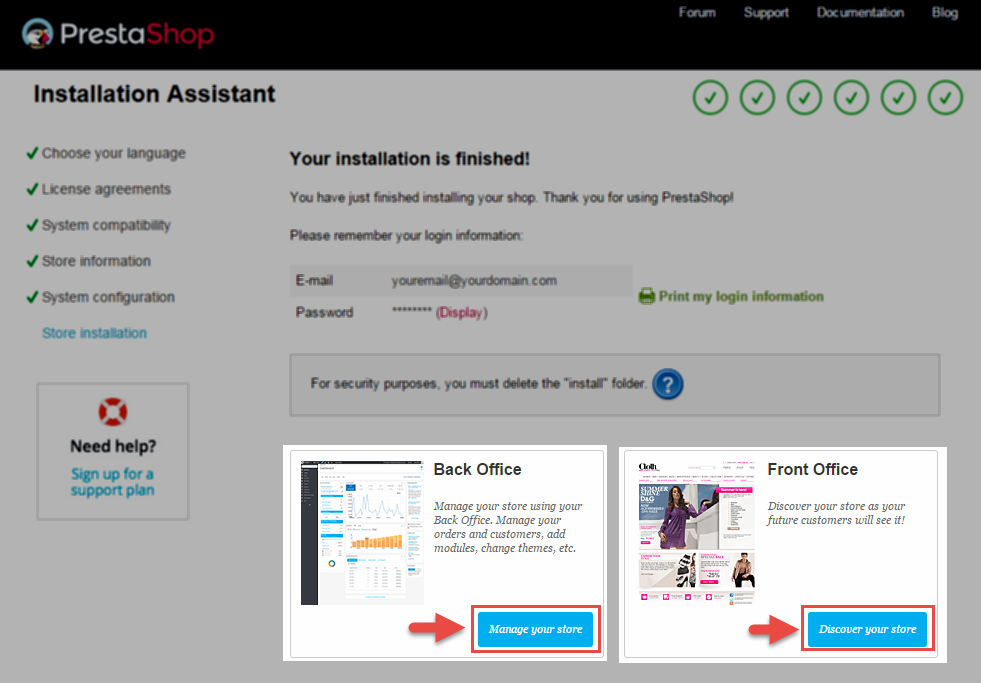
- Finish installation: This process could take a few minutes
Note: For security reasons you need to delete the install/ directory on your hosting server.
And finally, go to the Frontend or Backend as you want:
2.2 Theme Installation
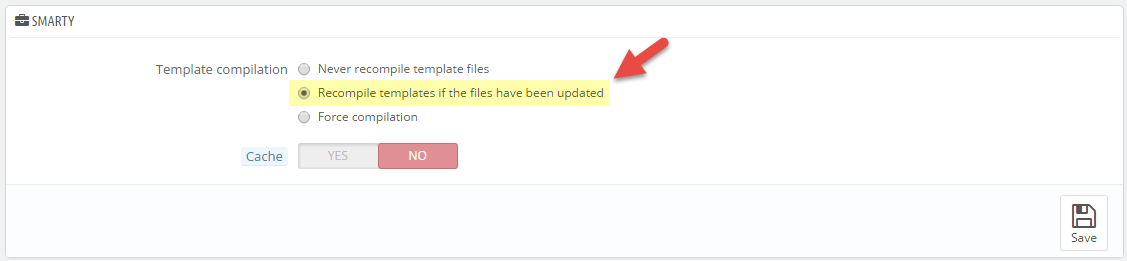
Note: Before installing theme, you must disable the cache. In your back office, please go to CONFIGURE >> Advanced Parameters >> Performance >> find “Cache” parameter >> Set “No” to disable cache >> Click “Save”.
SP furnicom Theme Installation
Install the “sp_furnicom_template_p1.7.x_v3.5.0.zip” file.1. Login to your Prestashop admin panel and navigate to IMPROVE >> Design >> Theme & Logo. At the top of the page click the Add a new theme button.

2. Navigate to “Import from your computer” >> choose the zip theme file as named “sp_furnicom_template_p1.7.x_v2.4.0.zip” >> Save.

Note
- If you get the message file is too large
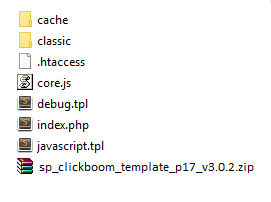
- You're use prestashop version 1.7 or higher
With either case, you must upload theme file in the "/themes" folder.
- Login to your Prestashop admin panel and navigate to IMPROVE >> Design >> Theme & Logo. At the top of the page click the Add a new theme button.
- Navigate to “Import from FTP” >> choose the zip theme file as named “sp_furnicom_template_p1.7.x_v3.5.0.zip” >> Save.

3. When your choice is successfully validated , the new theme will be shown in the section named as Select a theme for your “[name]” shop . Then Click "Use this theme" button to replace your current theme with SP furnicom theme.

Note: After click button, your site may be broken. If your site was broken, please run this command: chown -R apache:apache prestashop root directory path (usting PUTY software)
Example: Run this command chown -R apache:apache sp_furnicom
4. Click "Save" button and go to front-end to view your website.
2.3 Layout Settings
1. In your Prestashop Admin Dashboard, navigate to IMPROVE >> Modules >> Modules and Services >> go to Installed modules section, search for “SP Theme Configuration” module then click on Configure.
2. In the SP Theme Settings, choose “Layout” to configure the parameters in this section. After finishing, you could go to the front-end to view the changes.
Management & Pages
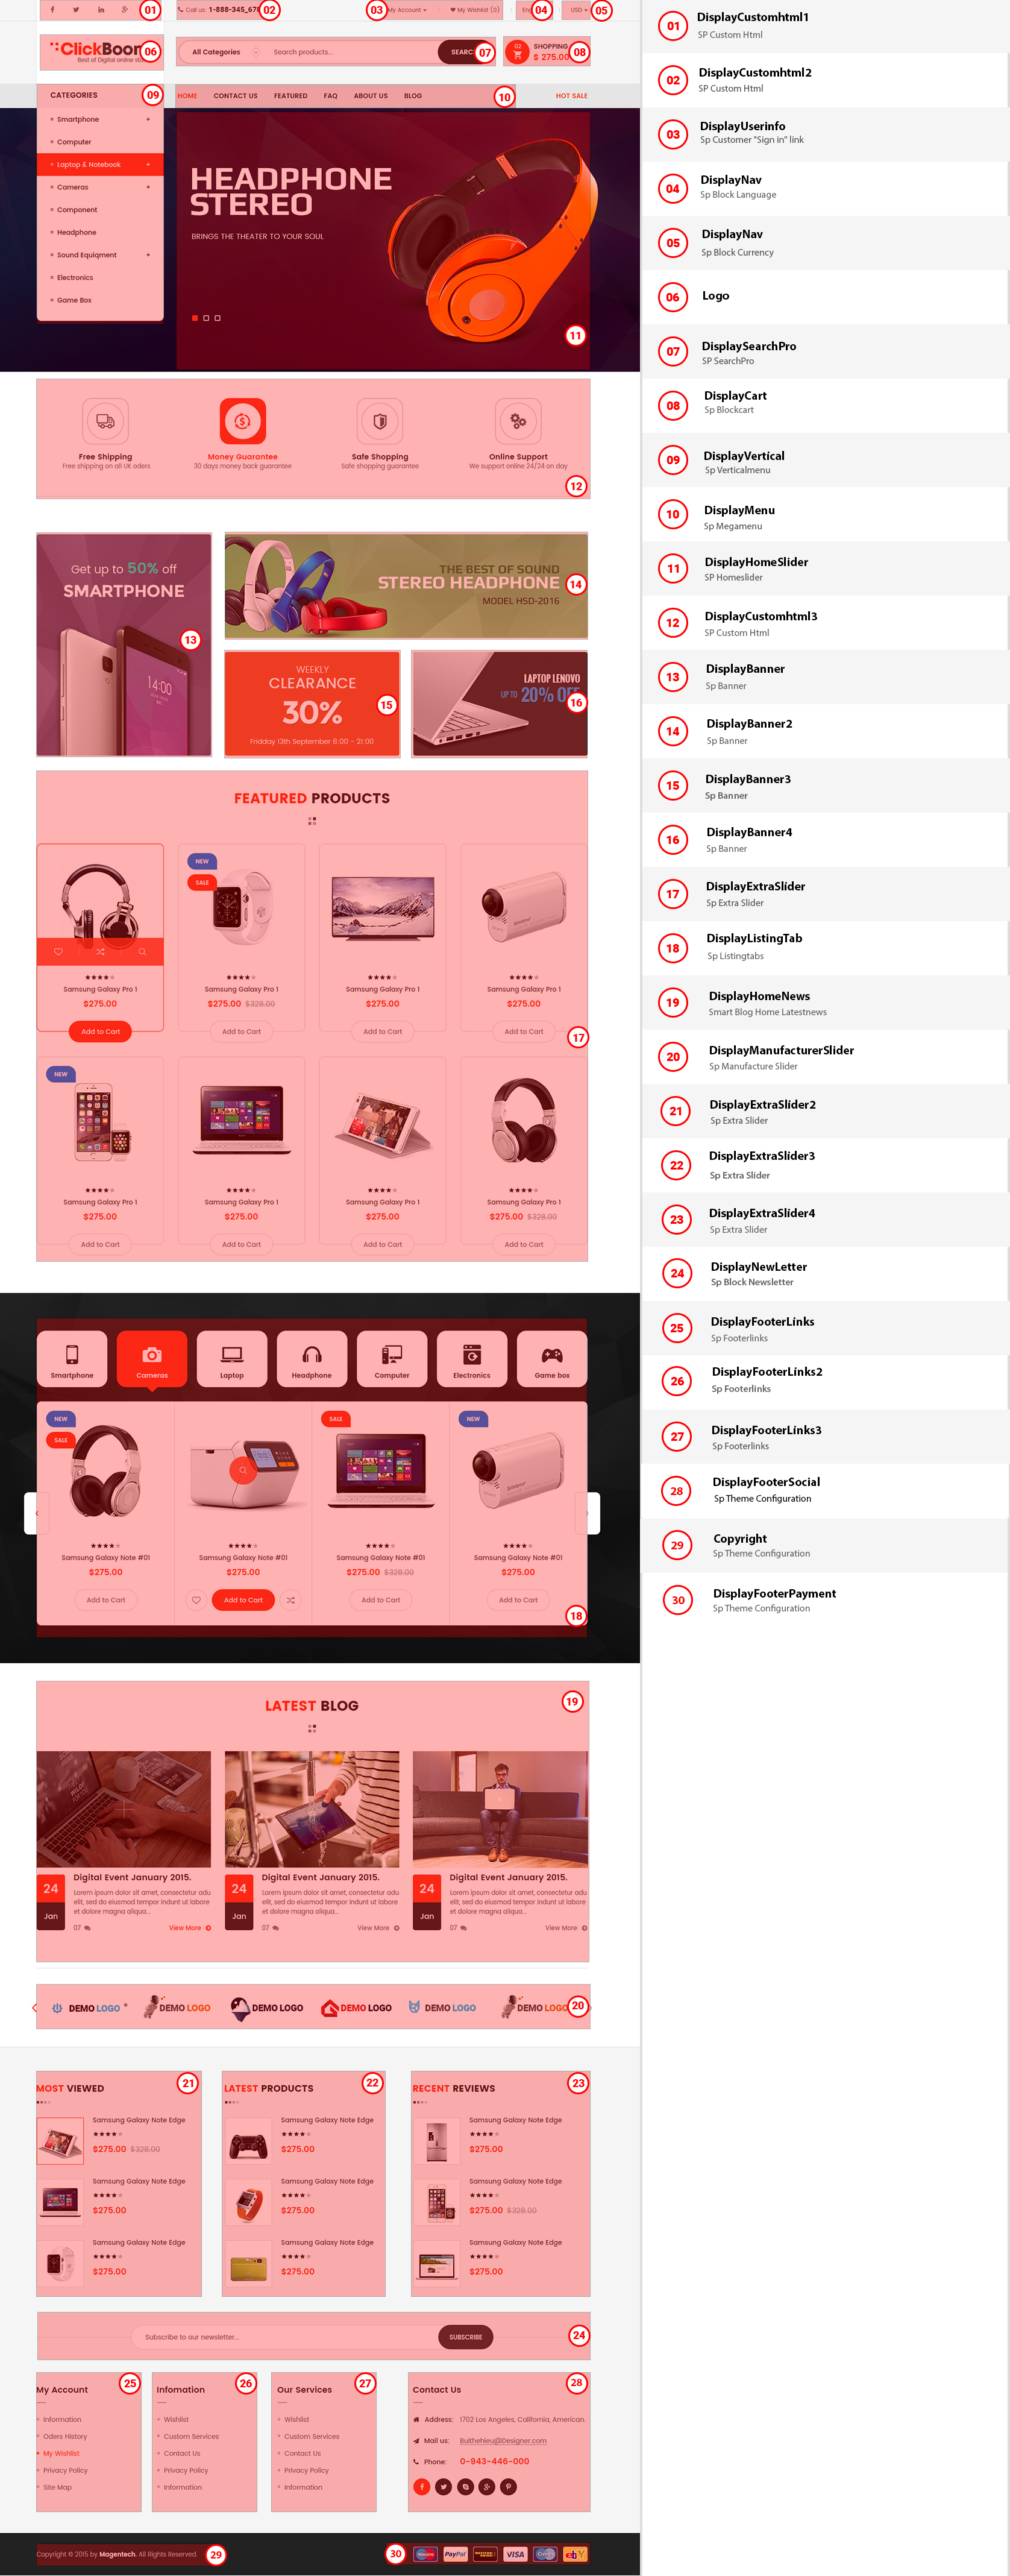
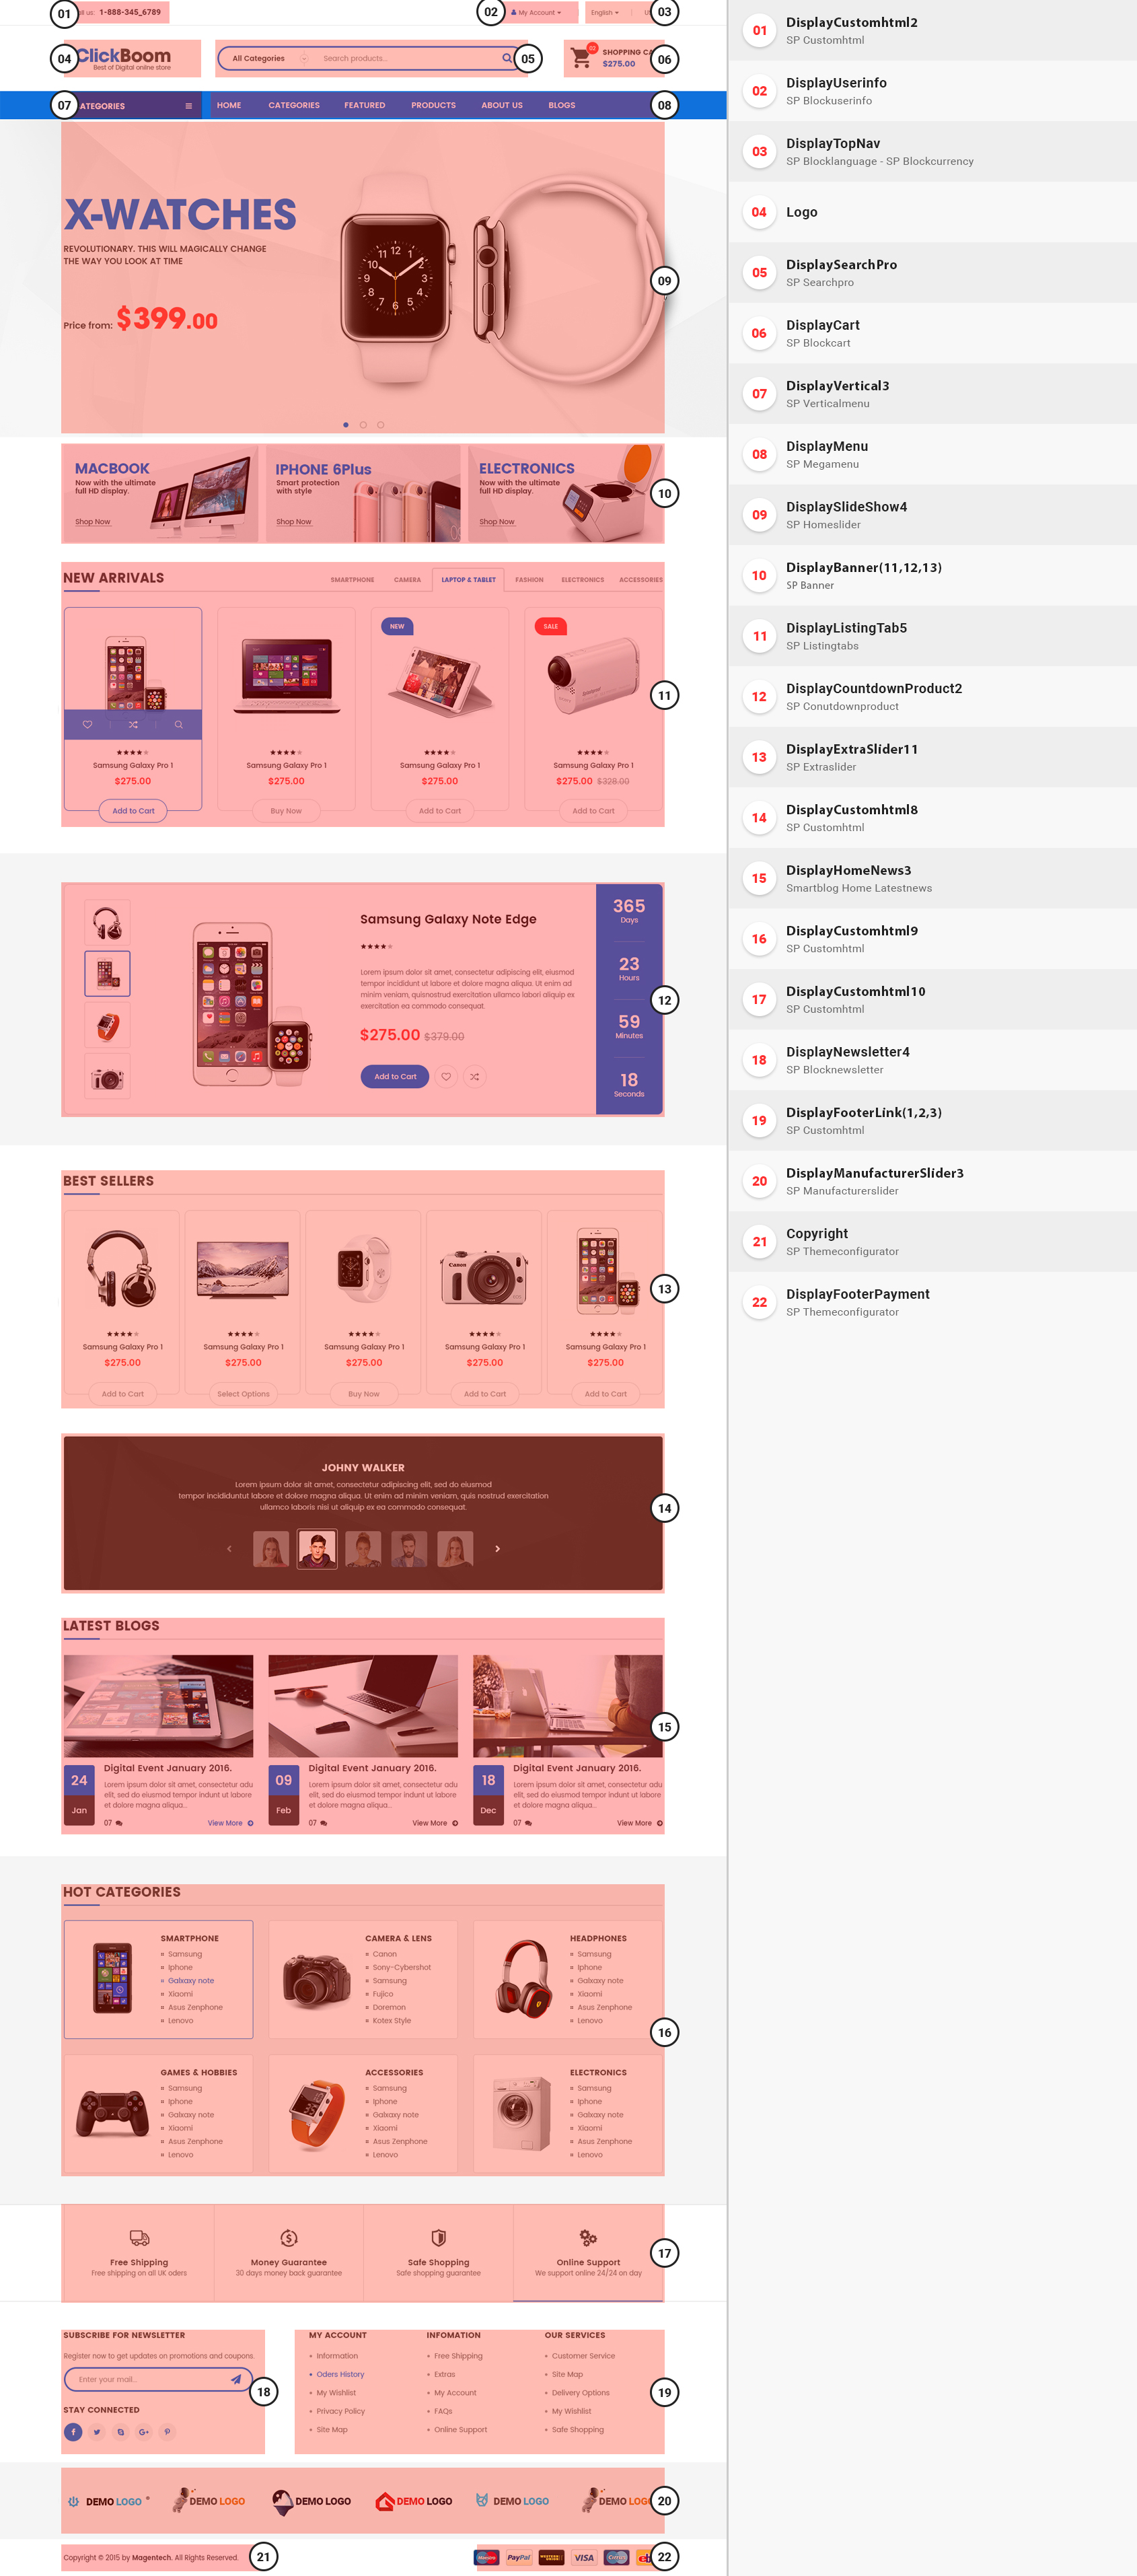
3.1 Homepage 1
SP Clickboom 17 Layout 1
SP Custom HTML – Contact Html
Frontend Appearance:

Backend Setting:
Step 1: In the Prestashop Admin Panel, navigate to IMPROVE >> Modules >> Modules and Services >> Installed Modules look for “SP Custom HTML module >> click “Configure” button to configure.
Step 2: In the “SP Custom HTML” configuration page, click  button in the right corner to “ADD NEW MODULE”.
Step 3: You could configure this module like the illustration
Copy and paste the following code into the content:
<p><strong>Call us: </strong>1-888-345_6789</p>
Sp Customer "Sign in" link
Frontend Appearance:
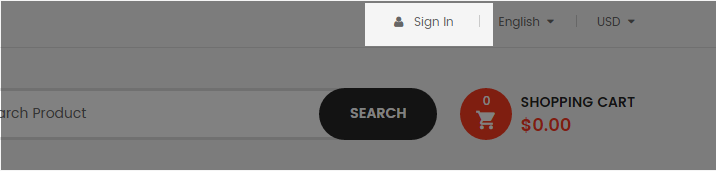
Backend Settings:
In the Prestashop Admin Panel, navigate to IMPROVE >> Modules >> Modules and Services >> Installed Modules look for “Sp Customer "Sign in" link” module >> click “Enable button to enable this module.
a. SP Block Currencies
Frontend Appearance:
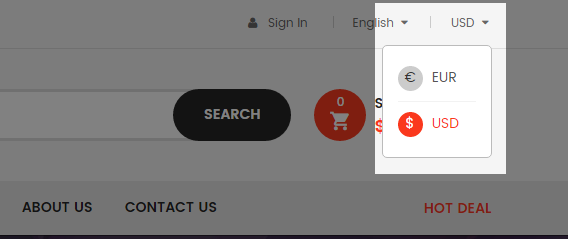
Backend Settings:
In the Prestashop Admin Panel, navigate to IMPROVE >> Modules >> Modules and Services >> Installed Modules look for “SP Currency Block” >> click “Enable” button to enable this module.
b. SP Languages Selector Block
Frontend Appearance:

Backend Settings:
In the Prestashop Admin Panel, navigate to IMPROVE >> Modules >> Modules and Services >> Installed Modules look for “SP Languages Selector Block >> click “Enable” button to enable this module.
SP SearchPro
Frontend Appearance:

Backend Settings:
Step 1: In the Prestashop Admin Panel, navigate to IMPROVE >> Modules >> Modules and Services >> Installed Modules look for “SP Search Pro” module >> click “Configure” button to configure.
Step 2: In the “SP Search Pro” configuration page, click button in the right corner to “ADD NEW MODULE”.
Step 3: You could configure this module like the illustration.
SP Shopping Cart
Frontend Appearance:

Backend Settings:
Step 1: In the Prestashop Admin Panel, navigate to IMPROVE >> Modules >> Modules and Services >> Installed Modules look for “ SP Shopping Cart module >> click “Configure” button to configure.
Step 2: You could configure this module like the illustration
Sp slider for your homepage
Frontend Appearance:

Backend Settings:
Step 1: In the Prestashop Admin Panel, navigate to IMPROVE >> Modules >> Modules and Services >> Installed Modules look for “SP Home Slider module >> click “Configure” button to configure.
Step 2: In the “SP Slider For Your Homepage” configuration page, click button in the right corner to “ADD NEW MODULE”.
Step 3: You could configure this module like the illustration
Step 4: In the last part named Slides List of this configuration page, click button in the right corner to add new slide and edit slide’s information as follows:
SP Banner
Frontend Appearance:

Backend Settings:
Step 1: In the Prestashop Admin Panel, navigate to IMPROVE >> Modules >> Modules and Services >> Installed Modules look for “SP Banner module.
Step 2: In the “SP Banner” configuration page, click button in the right corner to “ADD NEW MODULE”.
Step 3: You could configure this module like the illustration
SP Extra Slider – Best Seller
Frontend Appearance:

Backend Settings:
Step 1: In the Prestashop Admin Panel, navigate to IMPROVE >> Modules >> Modules and Services >> Installed Modules look for “SP Extra Slider module.
Step 2: In the “SP Extra Slider” configuration page, click button in the right corner to “ADD NEW MODULE”.
Step 3: You could configure this module like the illustration
SP Listing Tabs – Fashion
Frontend Appearance:
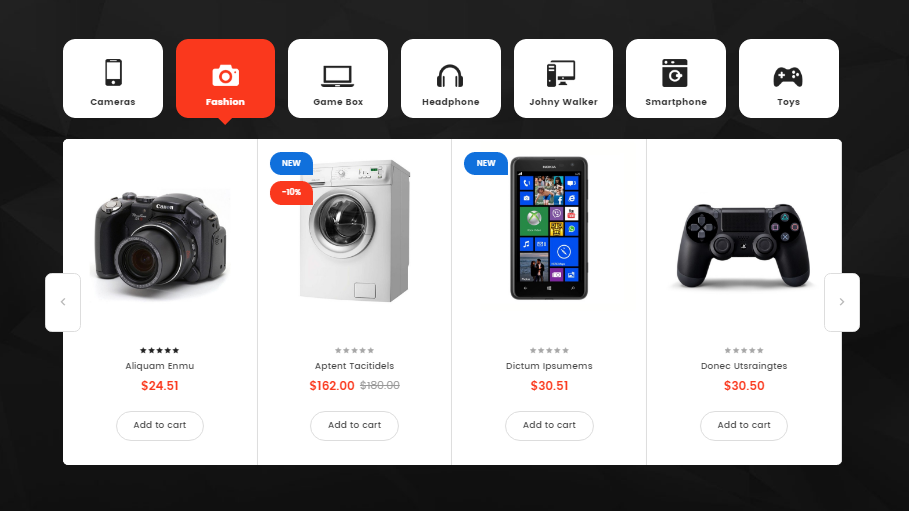
Backend Settings:
Step 1: In the Prestashop Admin Panel, navigate to IMPROVE >> Modules >> Modules and Services >> Installed Modules look for “SP Listing Tabs module.
Step 2: In the “SP Extra Slider” configuration page, click button in the right corner to “ADD NEW MODULE”.
Step 3: You could configure this module like the illustration
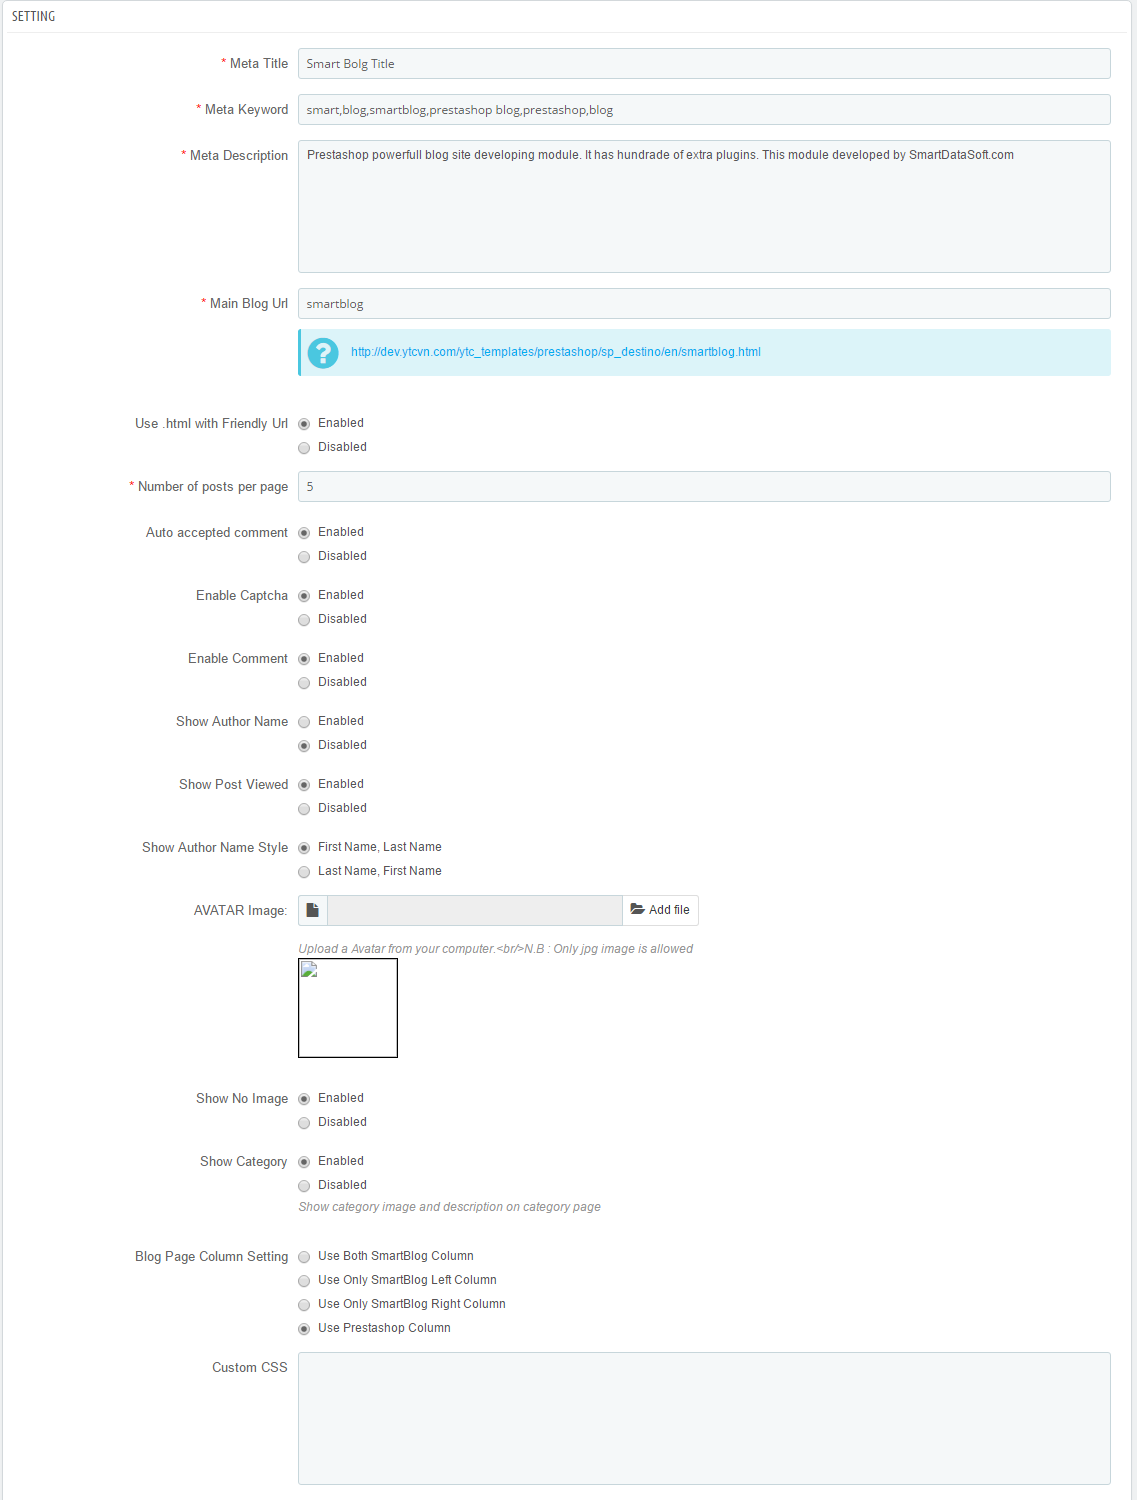
SmartBlog Home Latest
Frontend Appearance:
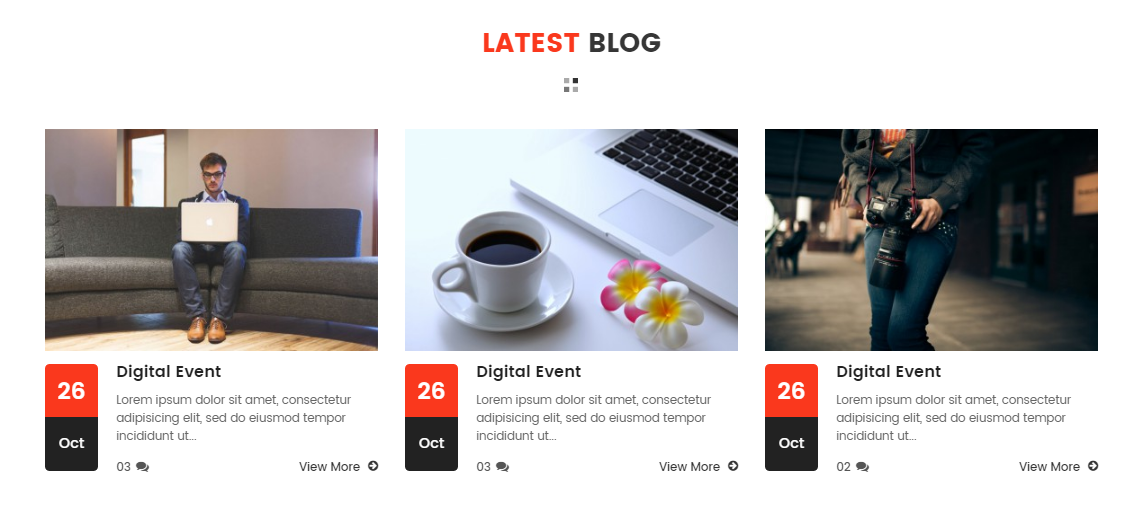
Backend Settings:
Step 1: In the Prestashop Admin Panel, navigate to IMPROVE >> Modules >> Modules and Services >> Installed Modules look for “SmartBlog Home Latest” module.
Step 2: You could configure this module like the following image.

SP Manufacture Slider – Featured Brands
Frontend Appearance:

Backend Settings:
Step 1: In the Prestashop Admin Panel, navigate to IMPROVE >> Modules >> Modules and Services >> Installed Modules look for “SP Manufacture Slider module.
Step 2: In the “SP Manufacture Slider” configuration page, click button in the right corner to “ADD NEW MODULE”.
Step 3: You could configure this module like the illustration
SP Newsletter Block
Frontend Appearance:

Backend Settings:
Step 1: In the Prestashop Admin Panel, navigate to IMPROVE >> Modules >> Modules and Services >> look for “SP Newsletter Block module.
Step 2: You could configure its settings like the illustration
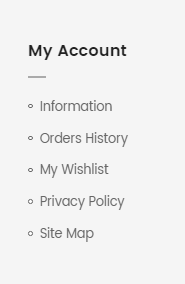
Sp Footer Links – Our Shop
Frontend Appearance:
Backend Settings:
Step 1: In the Prestashop Admin Panel, navigate to IMPROVE >> Modules >> Modules and Services >> Installed Modules look for “Sp Footer Links module.
Step 2: In the “Sp Footer Links” configuration page, click button in the right corner to “ADD NEW MODULE”.
Step 3: You could configure this module like the illustration
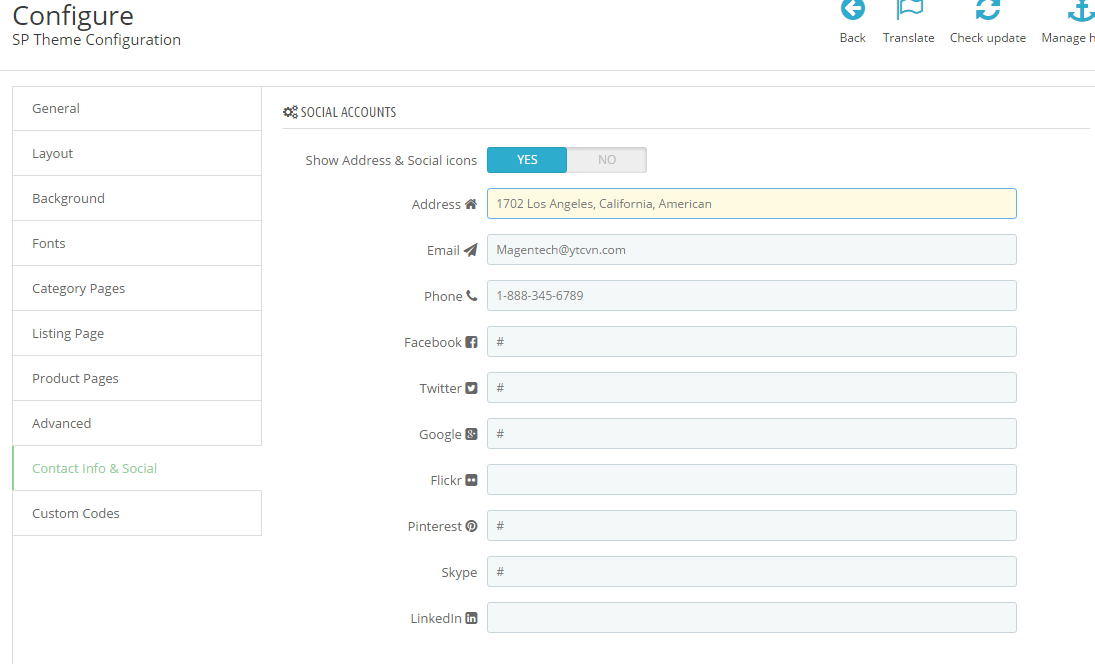
1. In your Prestashop Admin Dashboard, navigate to IMPROVE >> Modules >> Modules and Services >> go to Installed modules section, search for “SP Theme Configuration” module then click on Configure.
2. In the SP Theme Settings, choose “Social” to configure the parameters in this section. After finishing, you could go to the front-end to view the changes.
- Frontend Appearance:
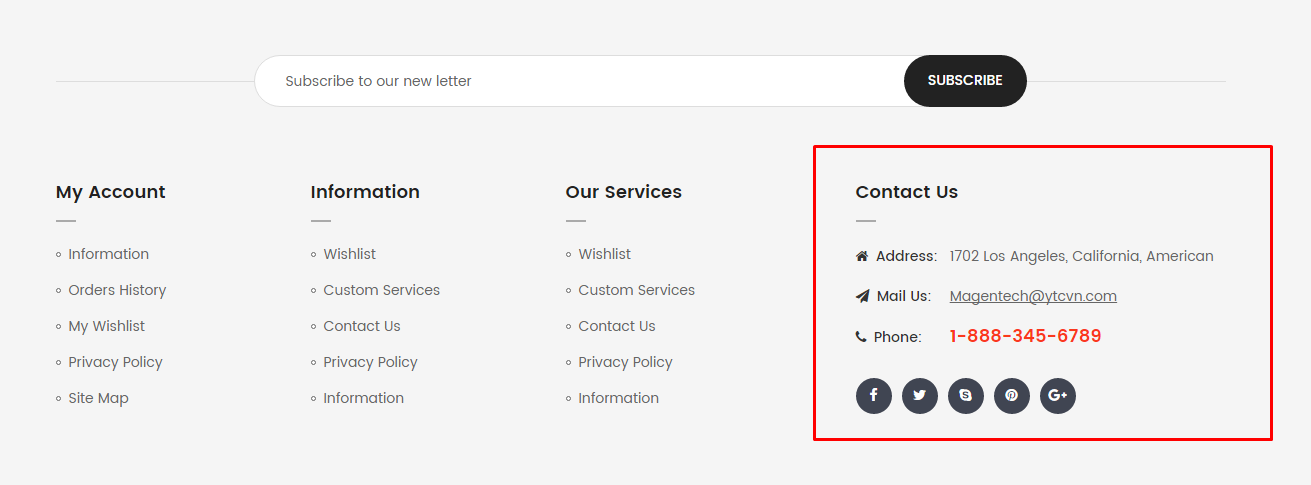
1. Footer Payment
Frontend Appearance:

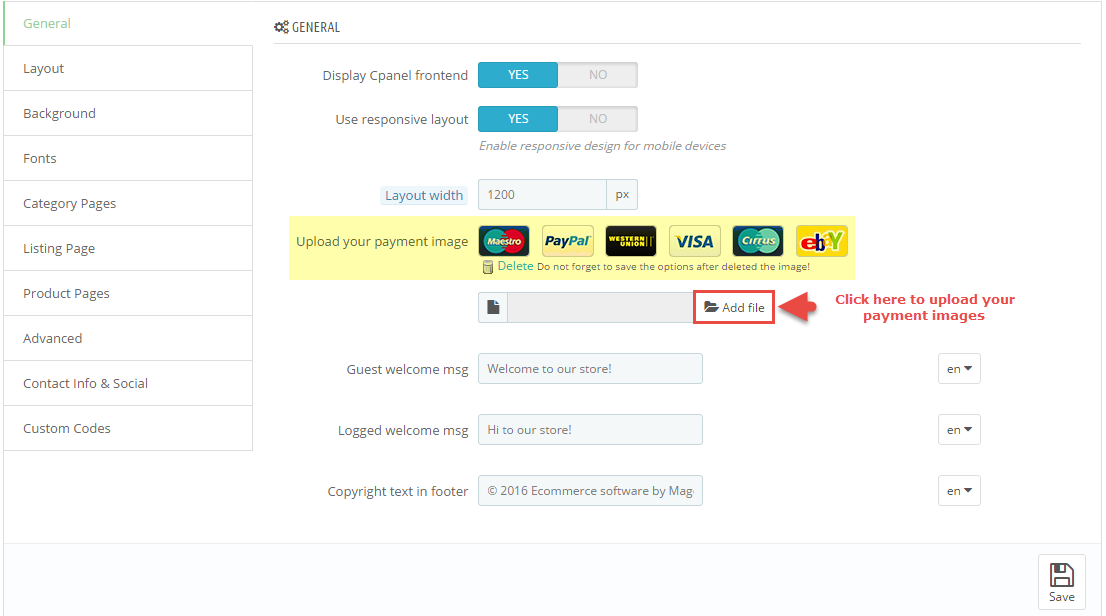
To edit Payment, please follow these steps:
a. In your Prestashop Admin Dashboard, navigate to IMPROVE >> Modules >> Modules and Services >> go to Installed modules section, search for “SP Theme Configuration” module then click on Configure.
b. In the SP Theme Settings, choose “General” to configure the parameter named “Payment” in this section. After finishing, you could go to the front-end to see the changes.
2. Footer copyright
Frontend Appearance:

To edit Copyright, please follow these steps:
a. In your Prestashop Admin Dashboard, navigate to IMPROVE >> Modules >> Modules and Services >> go to Installed modules section, search for “SP Theme Configuration” module then click on Configure.
b. In the SP Theme Settings, choose “General” to configure the parameter named “Copyright” in this section. After finishing, you could go to the front-end to see the changes.
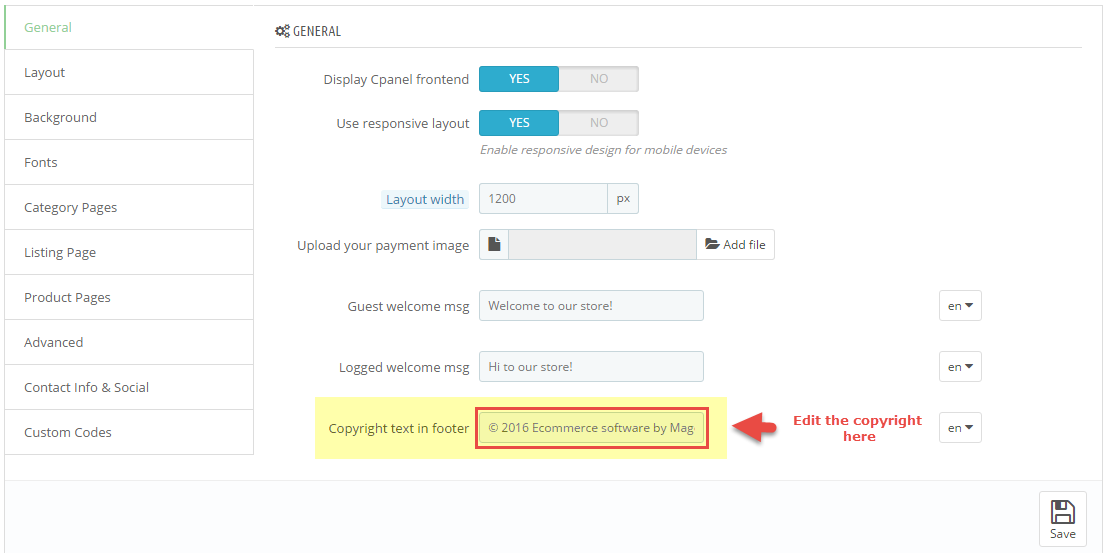
c. After finishing, you could go to the front-end to see the changes.
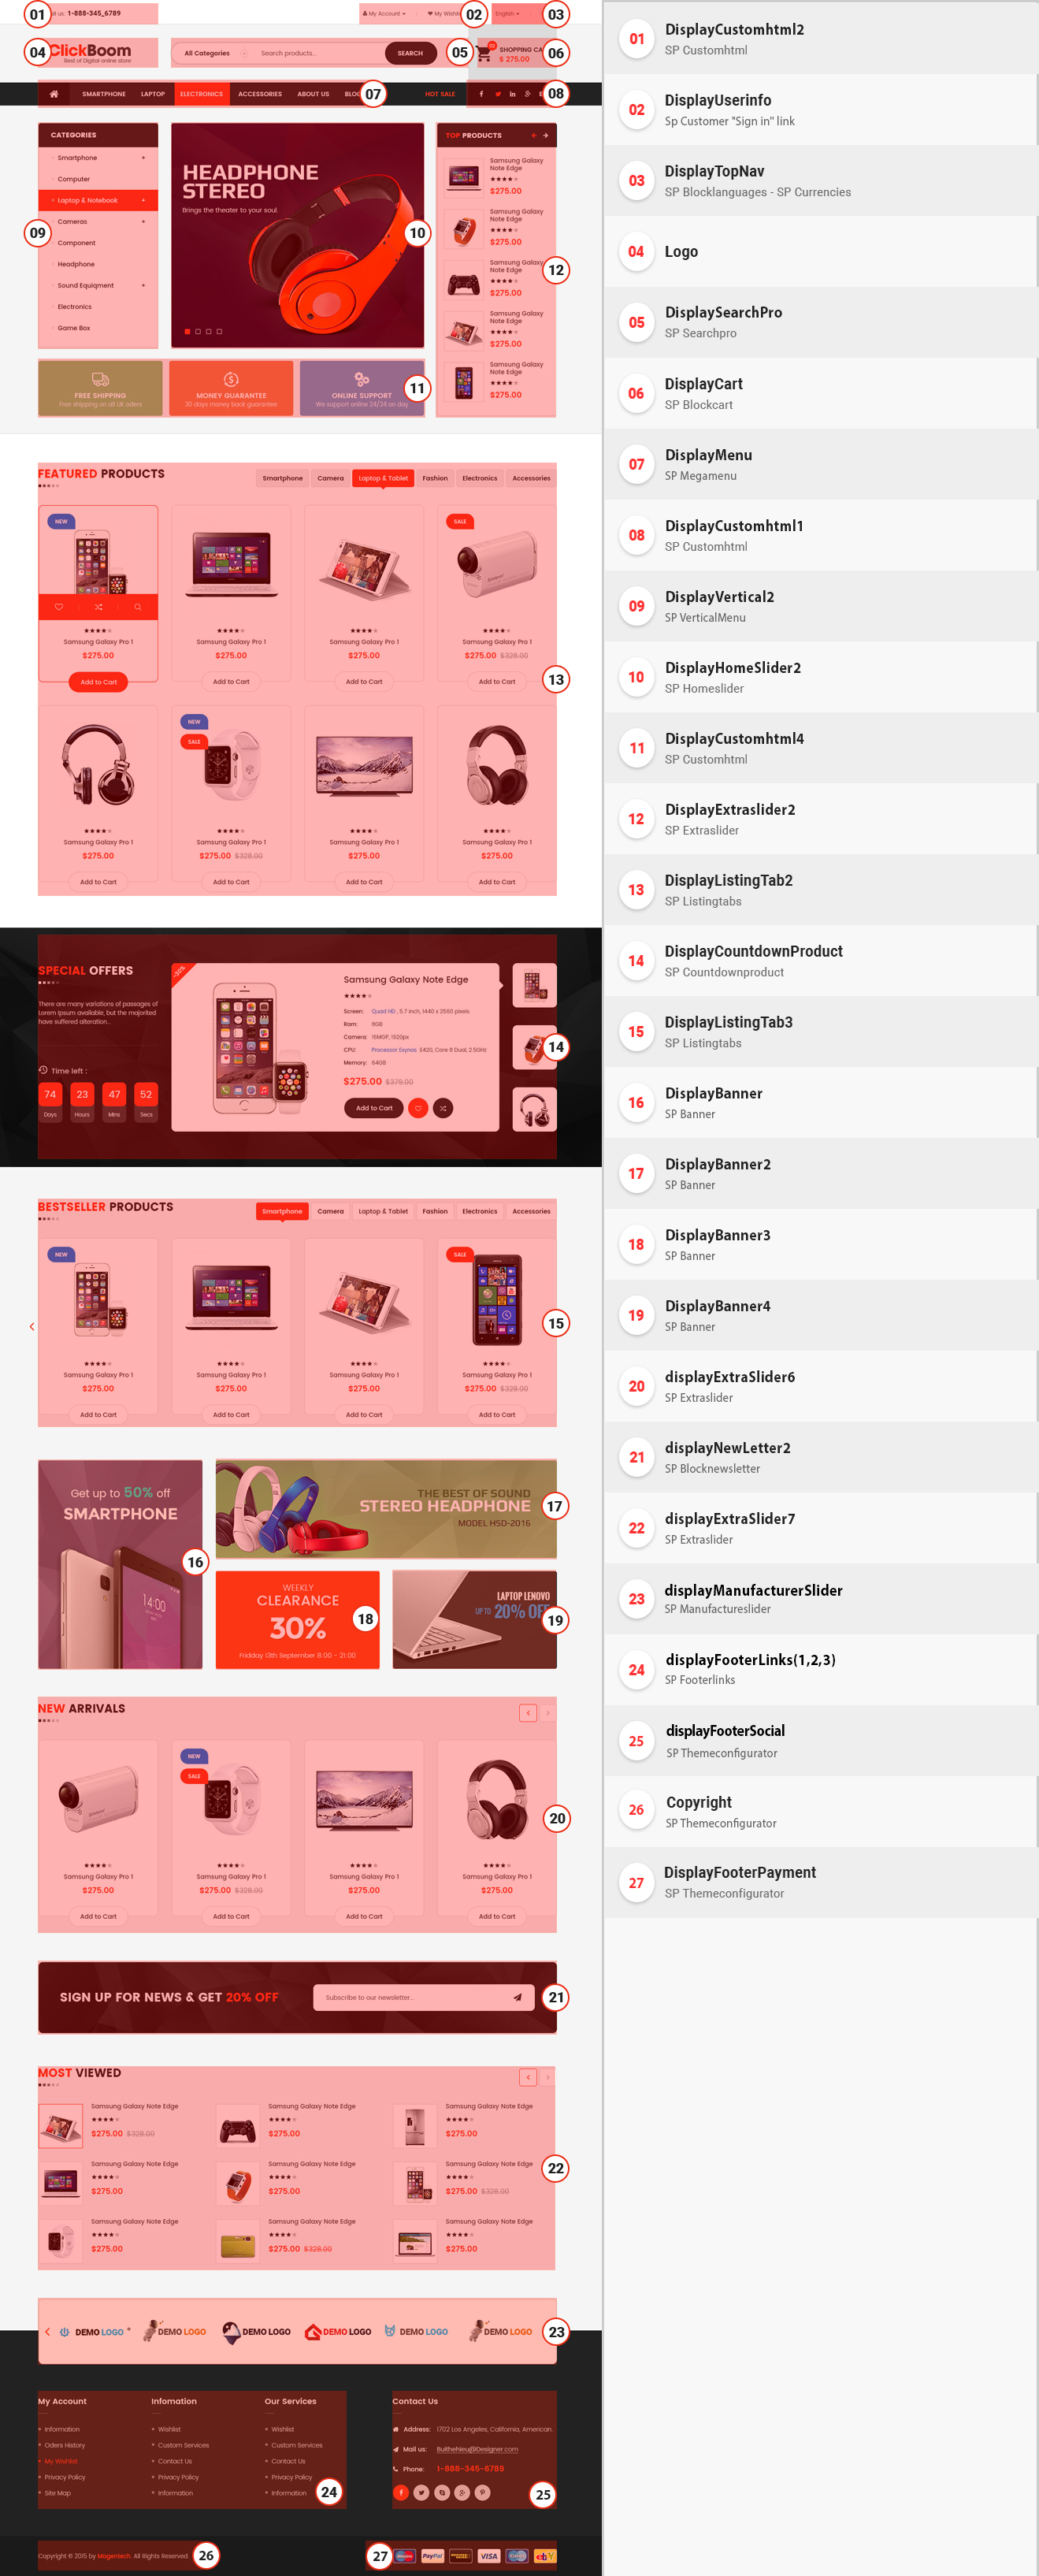
3.2 Homepage 2
SP Clickboom 17 Layout 2
SP Countdownproduct – Special Offers
Frontend Appearance:
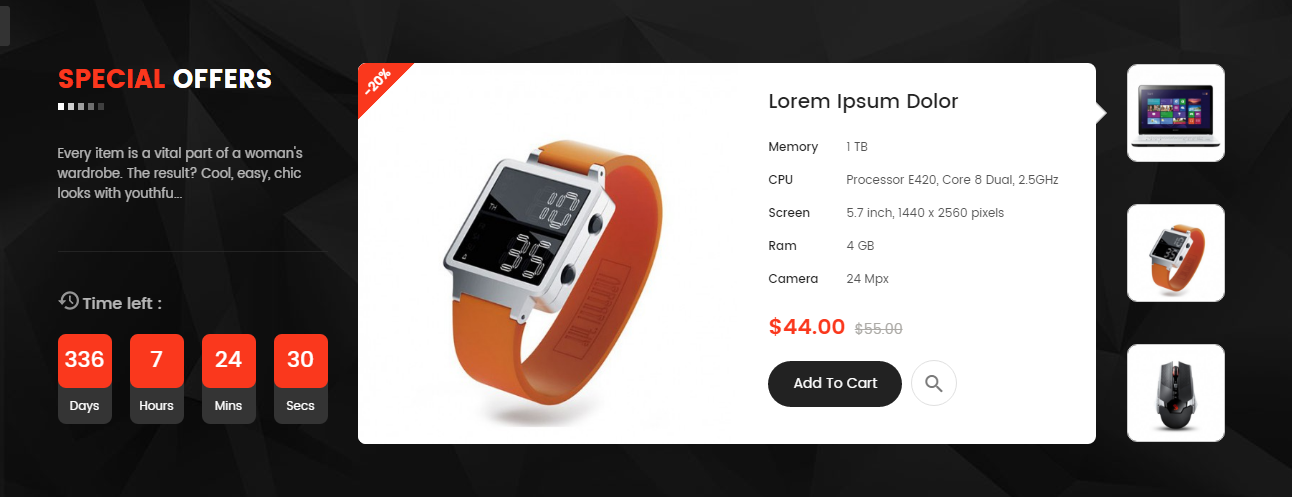
Backend Settings:
Step 1: In the Prestashop Admin Panel, navigate to IMPROVE >> Modules >> Modules and Services >> Installed Modules look for “SP Countdown Product module.
Step 2: In the “sp-countdownproduct.png” configuration page, click button in the right corner to “ADD NEW MODULE”.
Step 3: You could configure this module like the illustration
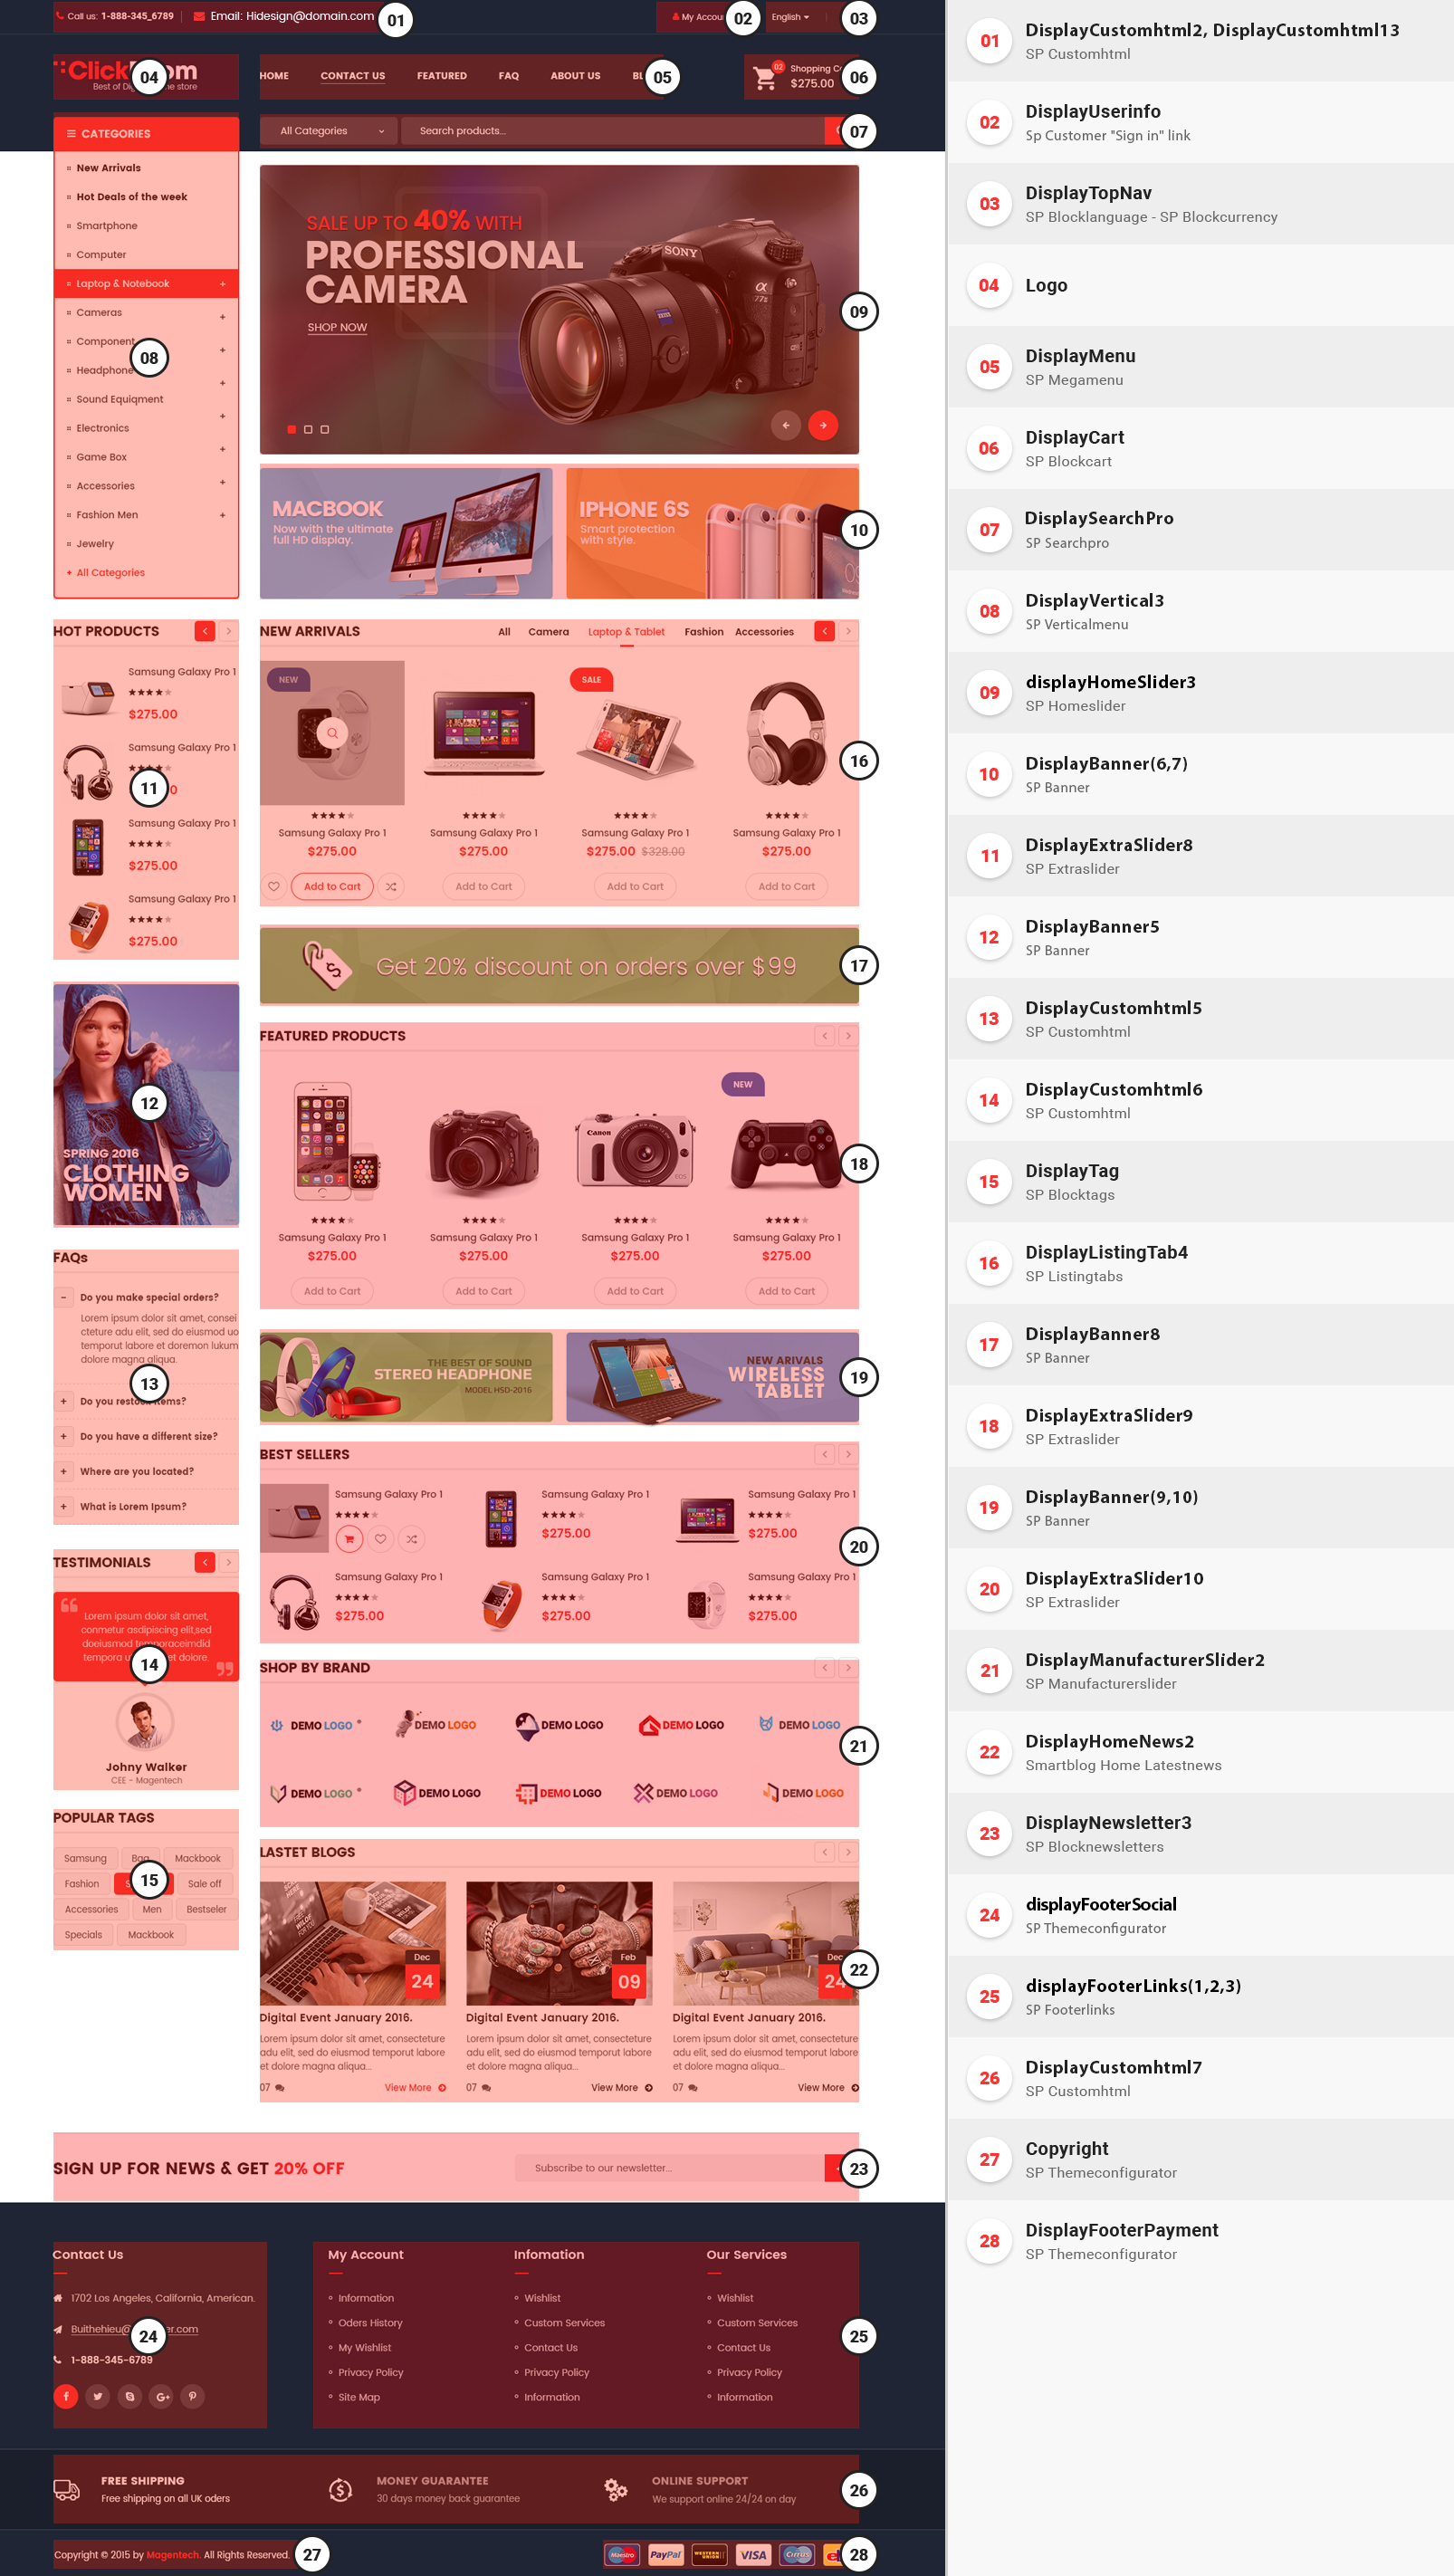
3.3 Homepage 3
SP Clickboom 17 Layout 3
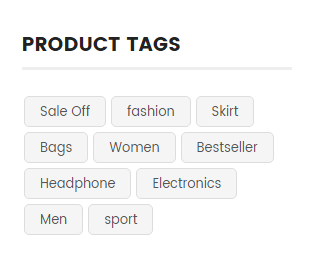
SP Tags Block
Frontend Appearance:
Backend Settings:
Step 1: In the Prestashop Admin Panel, navigate to IMPROVE >> Modules >> Modules and Services >> Installed Modules look for “SP Instagramgallery module.
Step 2: In the “SP Instagramgallery” configuration page, click button in the right corner to “ADD NEW MODULE”.
Step 3: You could configure this module like the illustration
3.4 Homepage 4
SP Clickboom 17 Layout 4
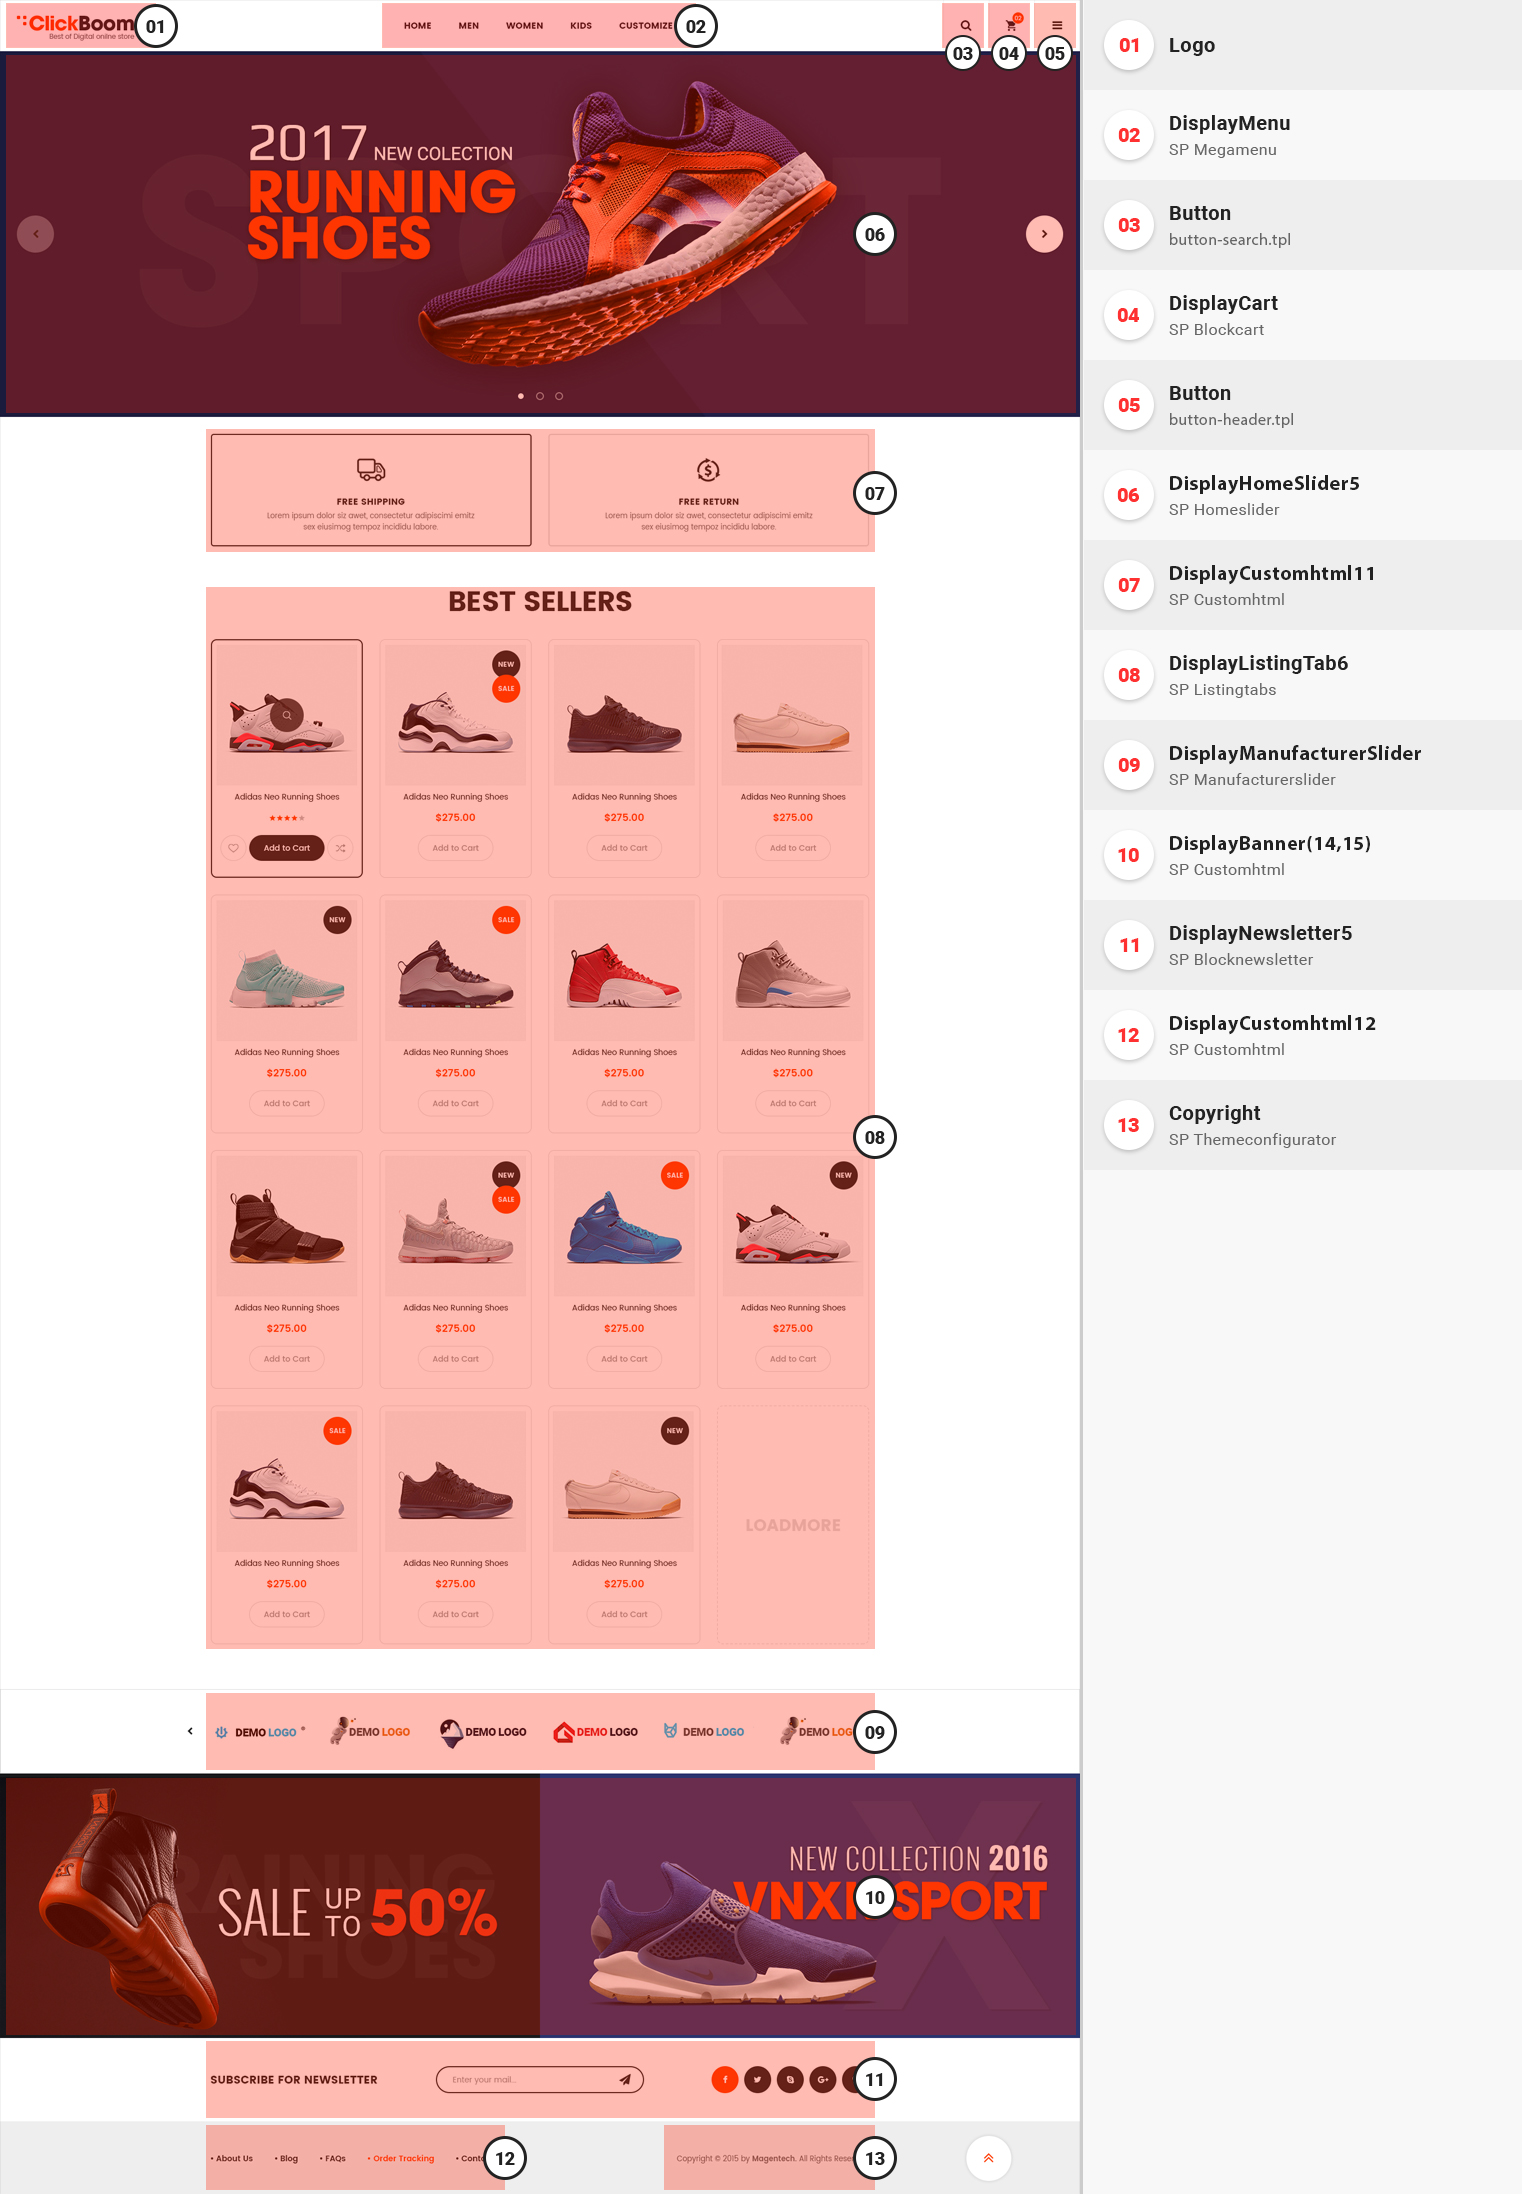
3.5 Homepage 5
SP Clickboom 17 Layout 5
SP Theme Configuration
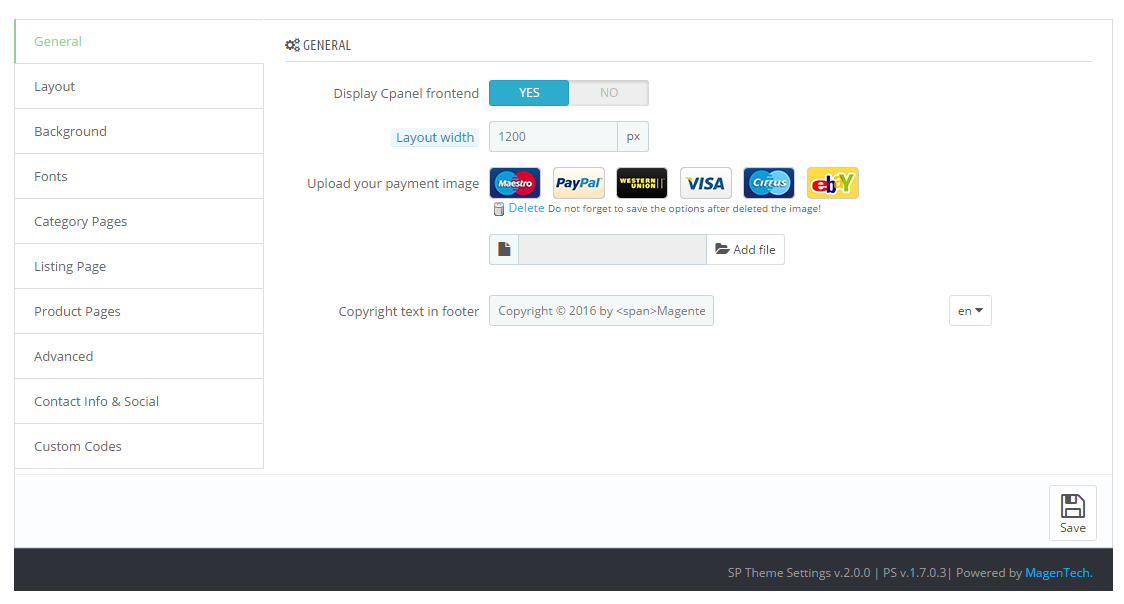
3.1 General Settings
1. In your Prestashop Admin Dashboard, navigate to IMPROVE >> Modules >> Modules and Services >> go to Installed modules section, search for “SP Theme Configuration” module then click on Configure.
2. In the SP Theme Settings, choose “General” to configure the parameters in this section. After finishing, you could go to the front-end to view the changes.
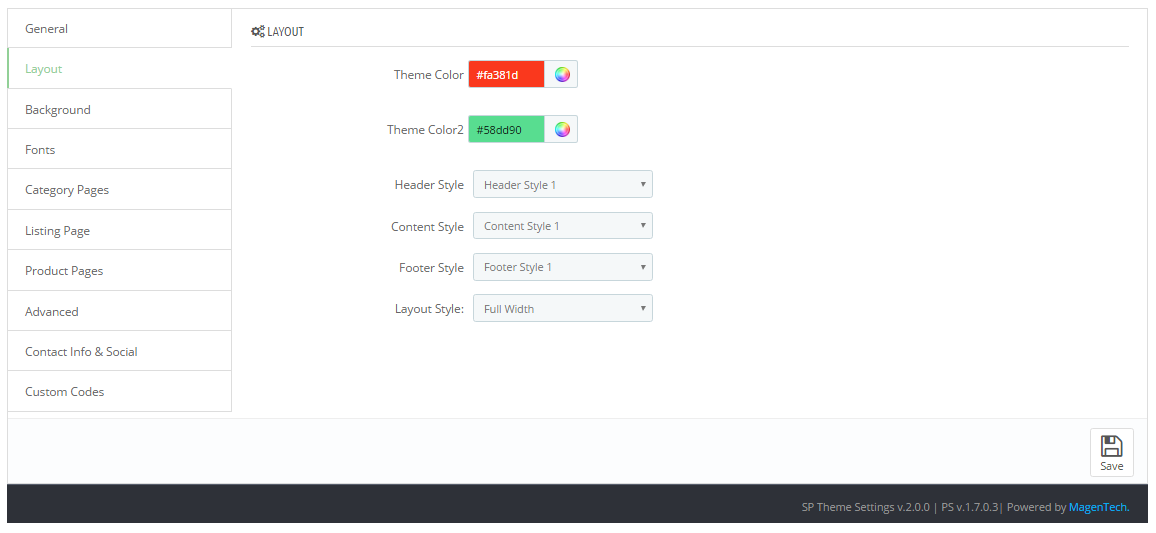
3.2 Layout Settings
1. In your Prestashop Admin Dashboard, navigate to IMPROVE >> Modules >> Modules and Services >> go to Installed modules section, search for “SP Theme Configuration” module then click on Configure.
2. In the SP Theme Settings, choose “Layout” to configure the parameters in this section. After finishing, you could go to the front-end to view the changes.
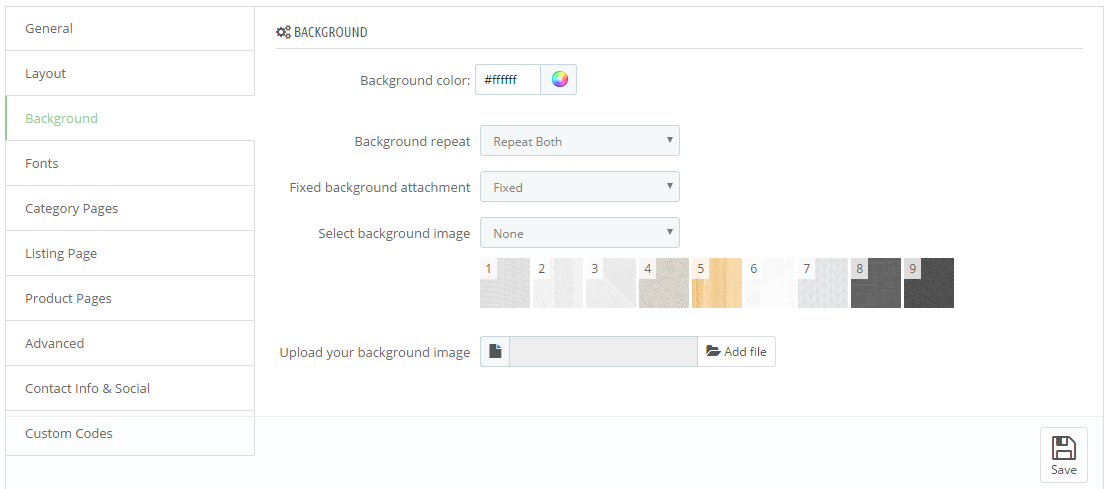
3.3 Background Settings
1. In your Prestashop Admin Dashboard, navigate to IMPROVE >> Modules >> Modules and Services >> go to Installed modules section, search for “SP Theme Configuration” module then click on Configure.
2. In the SP Theme Settings, choose “Background” to configure the parameters in this section. After finishing, you could go to the front-end to view the changes.
3.4 Fonts
1. In your Prestashop Admin Dashboard, navigate to IMPROVE >> Modules >> Modules and Services >> go to Installed modules section, search for “SP Theme Configuration” module then click on Configure.
2. In the SP Theme Settings, choose “Fonts” to configure the parameters in this section. After finishing, you could go to the front-end to view the changes.
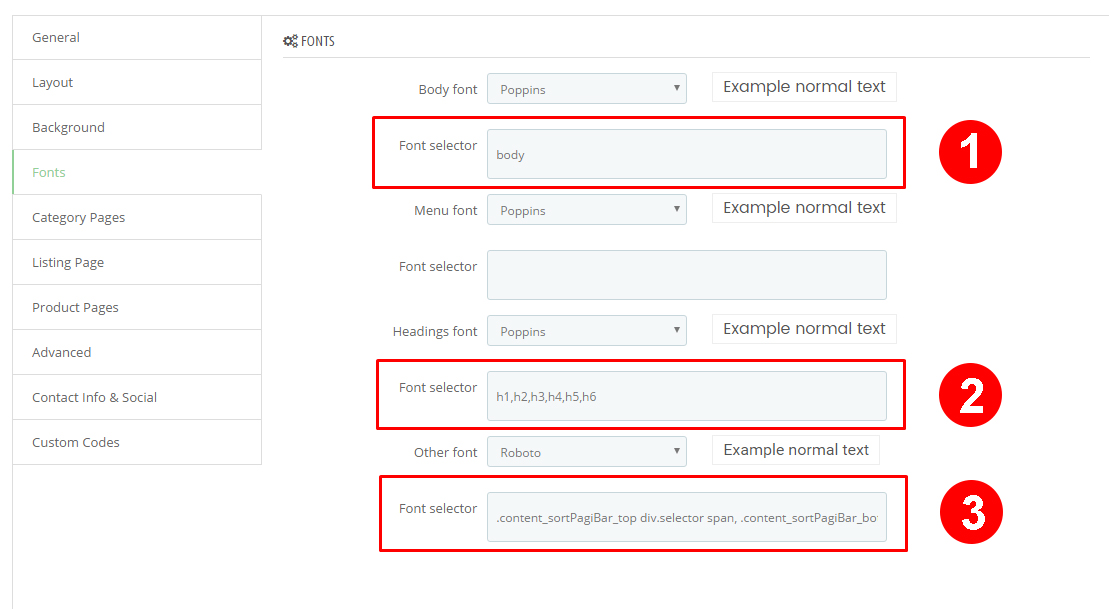
Note: Please copy and paste the following line into Font Selector tab:
1.
body2.
h1,h2,h3,h4,h5,h63.
.content_sortPagiBar_top div.selector span, .content_sortPagiBar_bottom div.selector span,.content_sortPagiBar_top label, .content_sortPagiBar_bottom label , .cart_block .buttons a, .content_sortPagiBar_top .view-bottom #pagination ul li span, .content_sortPagiBar_bottom .view-bottom #pagination_bottom ul li span
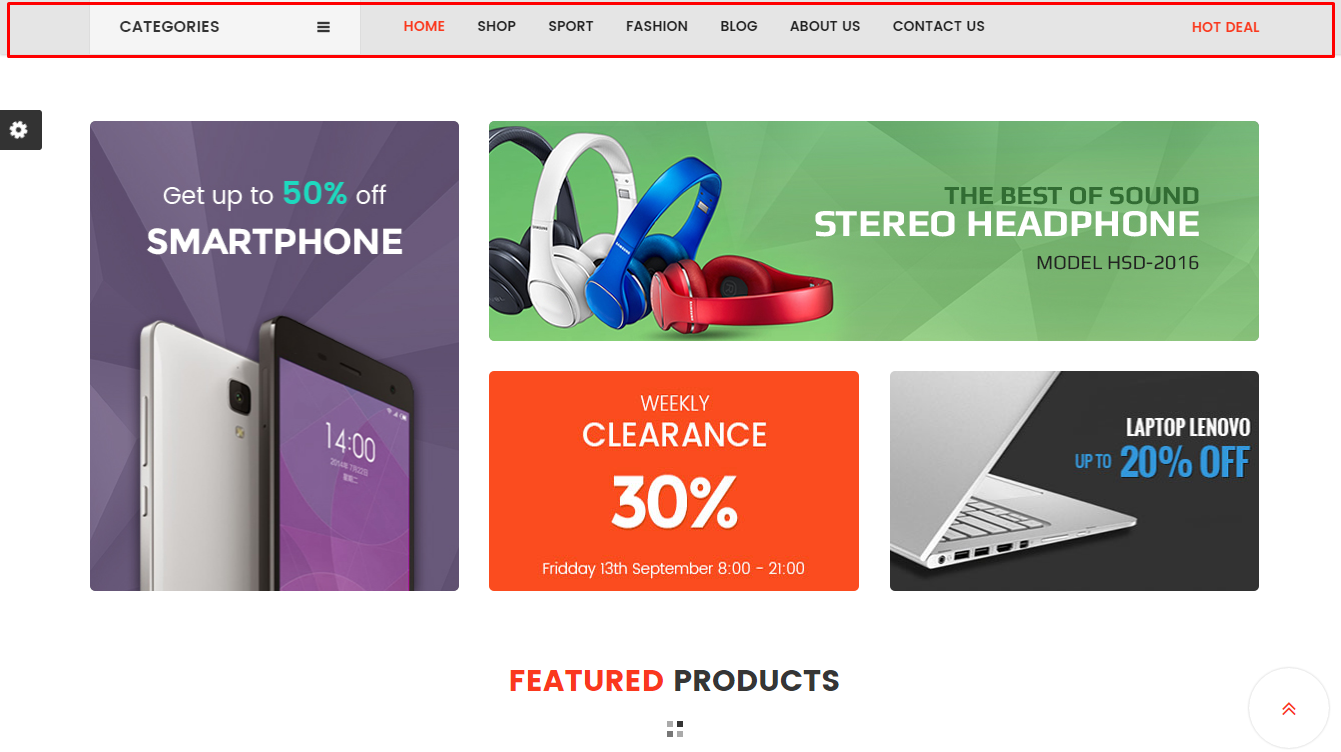
SP Megamenu Configuration
SP Memgamenu (displayMenu)
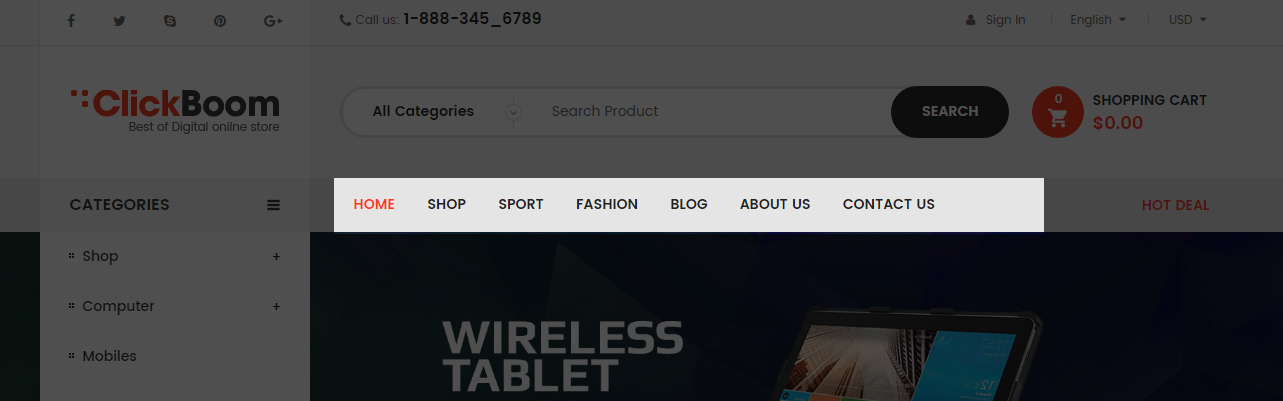
1. Navigate to IMPROVE >> Modules >> Modules and Services go to Installed modules section and look for SP Mega Menu >> Click the Configure button to access the module configuration page.
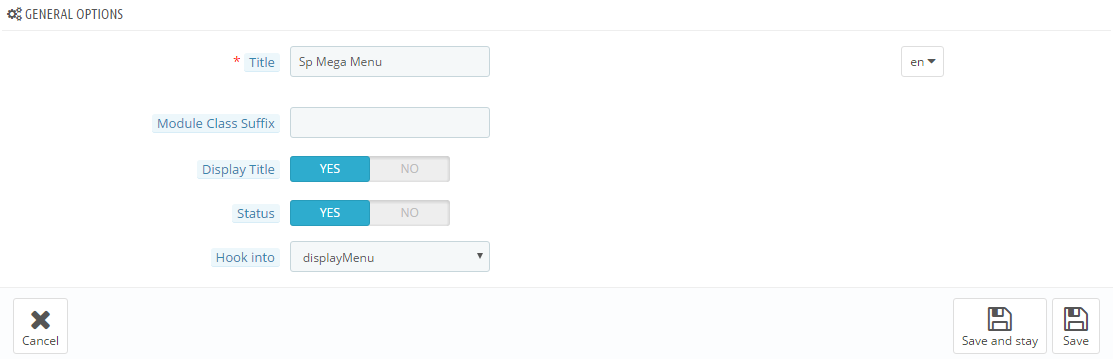
2. In the SP Mega Menu Panel, you could Add New Module by click on the button like the following image:
3. In the configuration page of new module, you could configure General Options as follows
4. In the configuration page of new module, you could configure Menu Information as follows
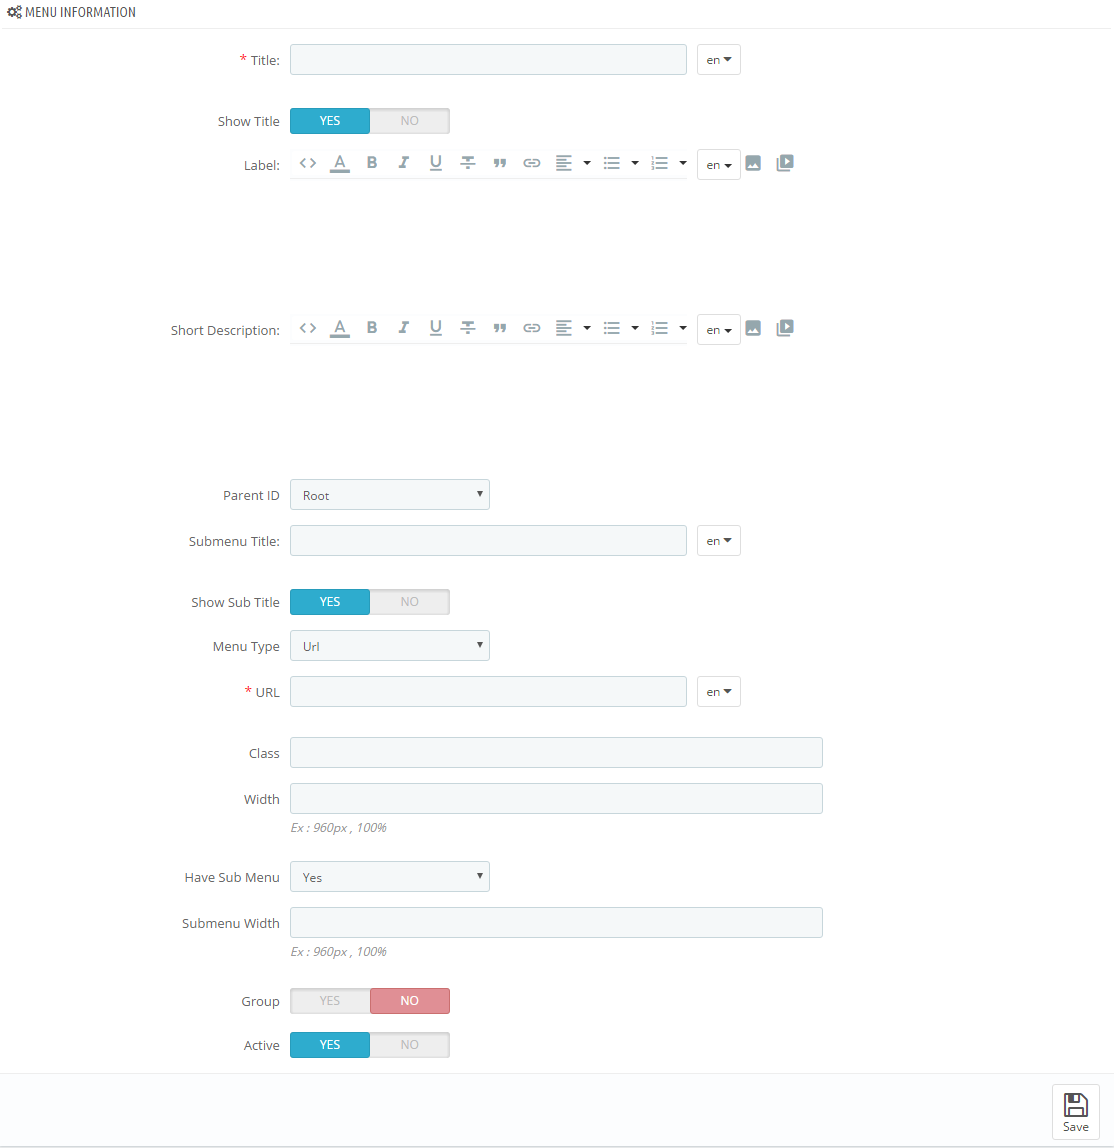
5. In order to add menu items, to add items as you want, you need to click Add New button.
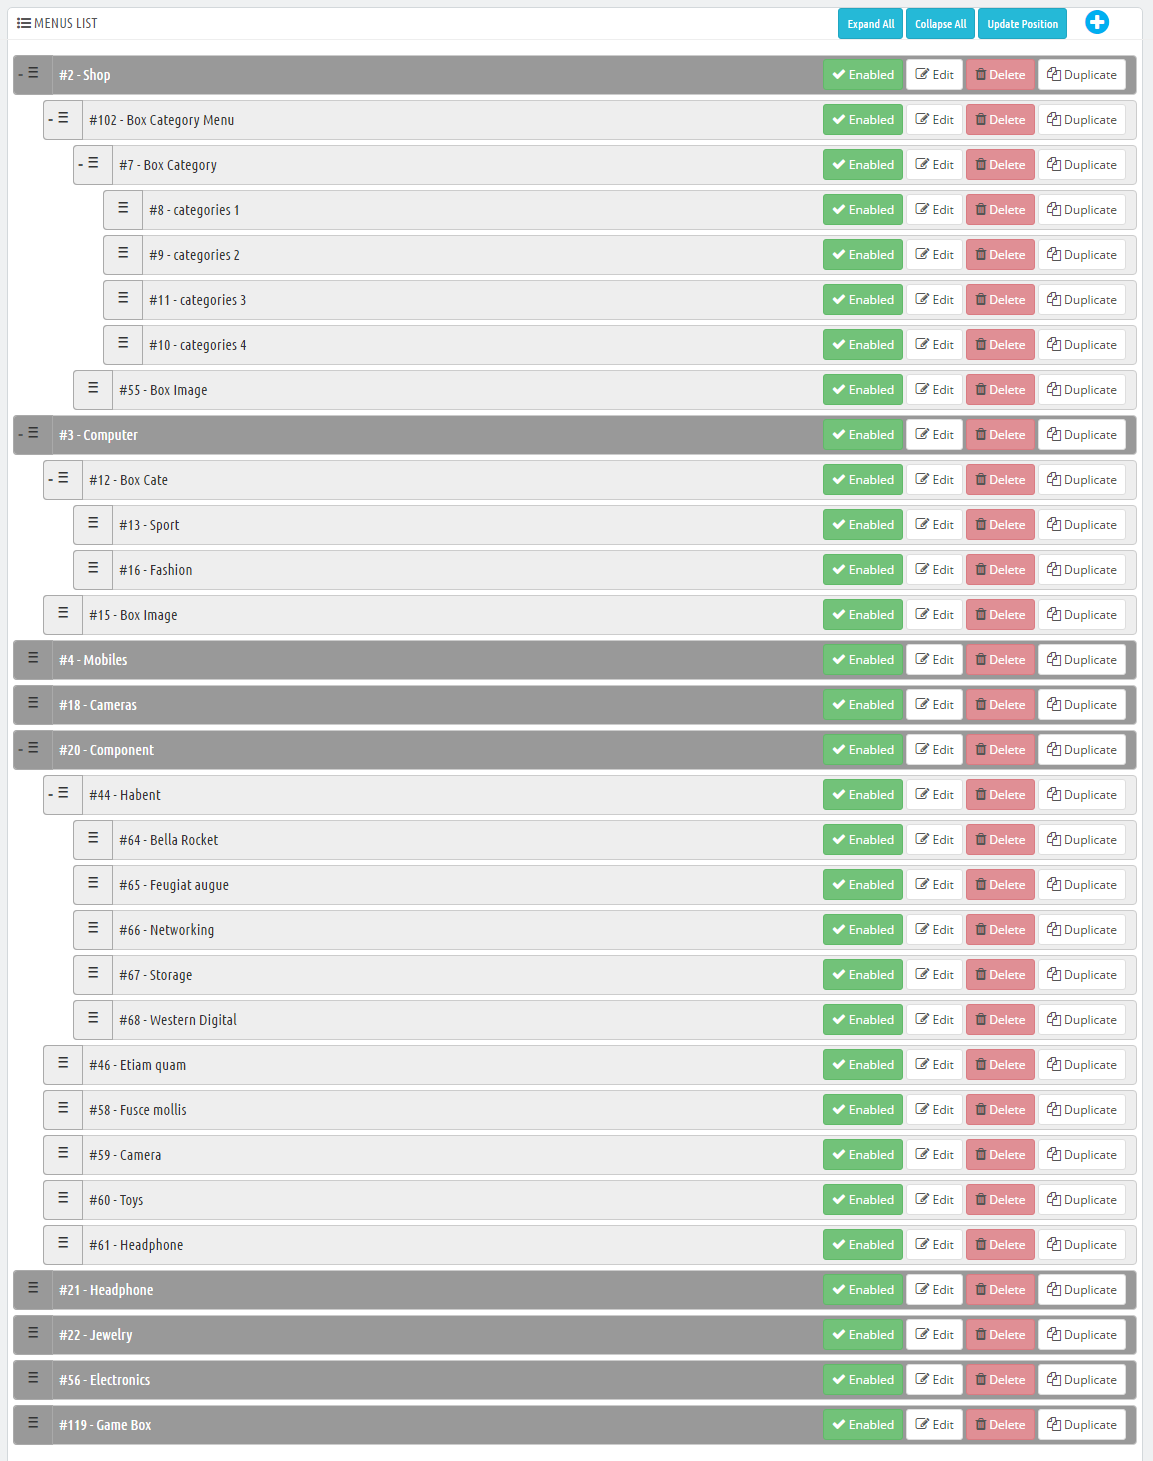
6. Menu list of Mega Menu You need to look at the menu list to configure easily.
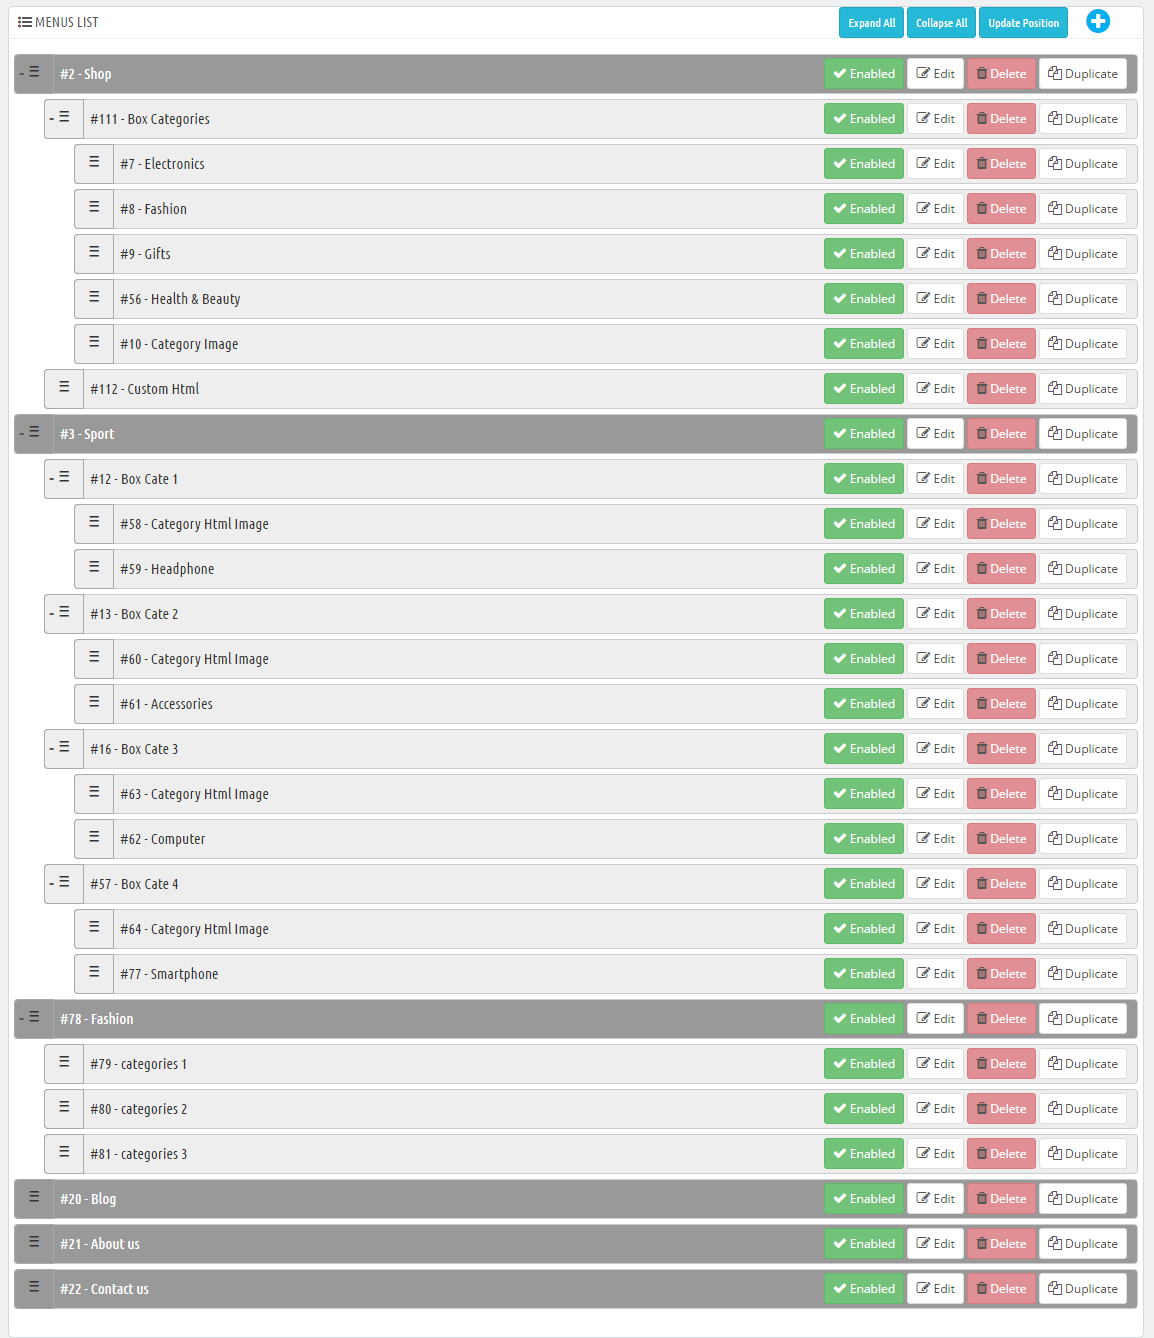
7. To configure each item, you need to click Edit button.
Go Here to readmore about the SP Mega Menu module.
Note: In the next steps, when editing items in the menus, the items (in a menu) having same level could have same configuration. Therefore, we encourage you read thoroughly and find out the item’s level to configure it without any errors.
Shop
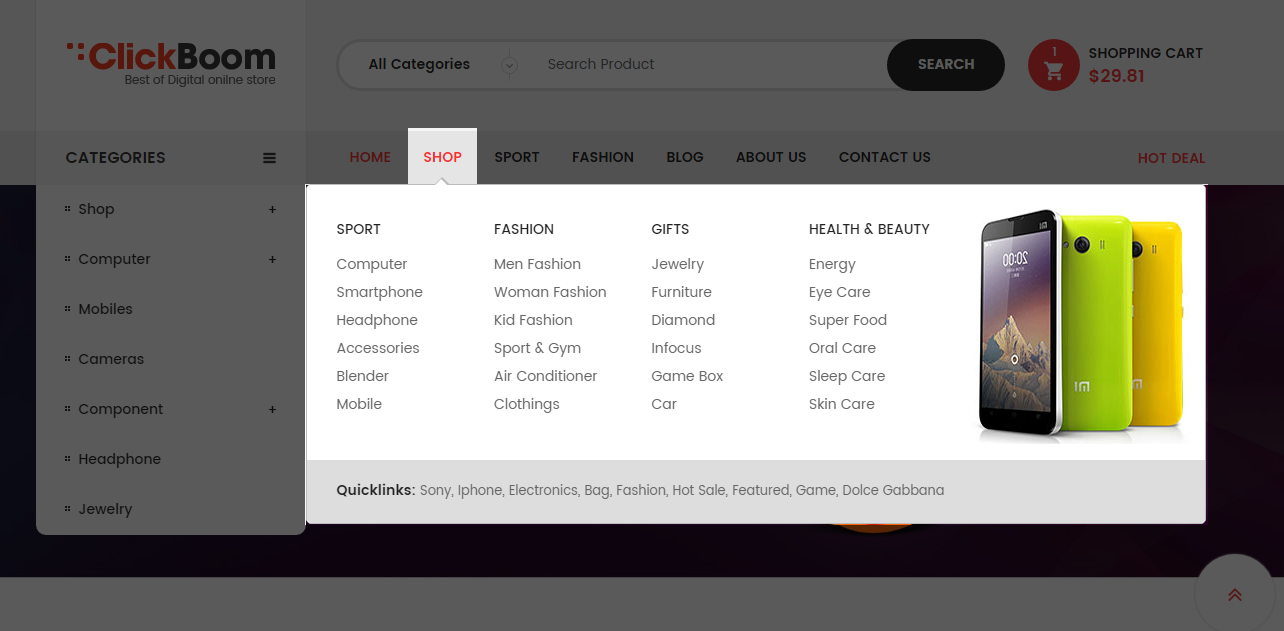
- Backend Setting : Please click Here to view.
- Backend Setting of Item "Box Categories" Please click Here to view.
- Backend Setting of Item "Fashion" Please click Here to view.
Note: The items named ‘Sport’, ‘Gifts’, 'Health&Beauty’ having same menu level as item ‘Fashion’ could have same configuration
- Backend Setting of ‘Category Image′: Please click Here to view.
Copy and paste the following code into the content:
<p><img src="http://dev.ytcvn.com/ytc_templates/prestashop/sp_clickboom17/themes/sp_clickboom17/assets/img/cms/1_1.jpg" alt="image custom" width="226" height="244" /></p>
- Backend Setting of ‘Custom Html′: Please click Here to view.
Copy and paste the following code into the content:
<p><strong>Quicklinks: </strong> <a href="#">sony,</a> <a href="#">iphone,</a> <a href="#">electronics,</a> <a href="#">bag,</a> <a href="#">fashion,</a> <a href="#">hot sale,</a> <a href="#">featured,</a> <a href="#">game,</a> <a href="#">dolce gabbana</a></p>
Sport
Frontend Appearance 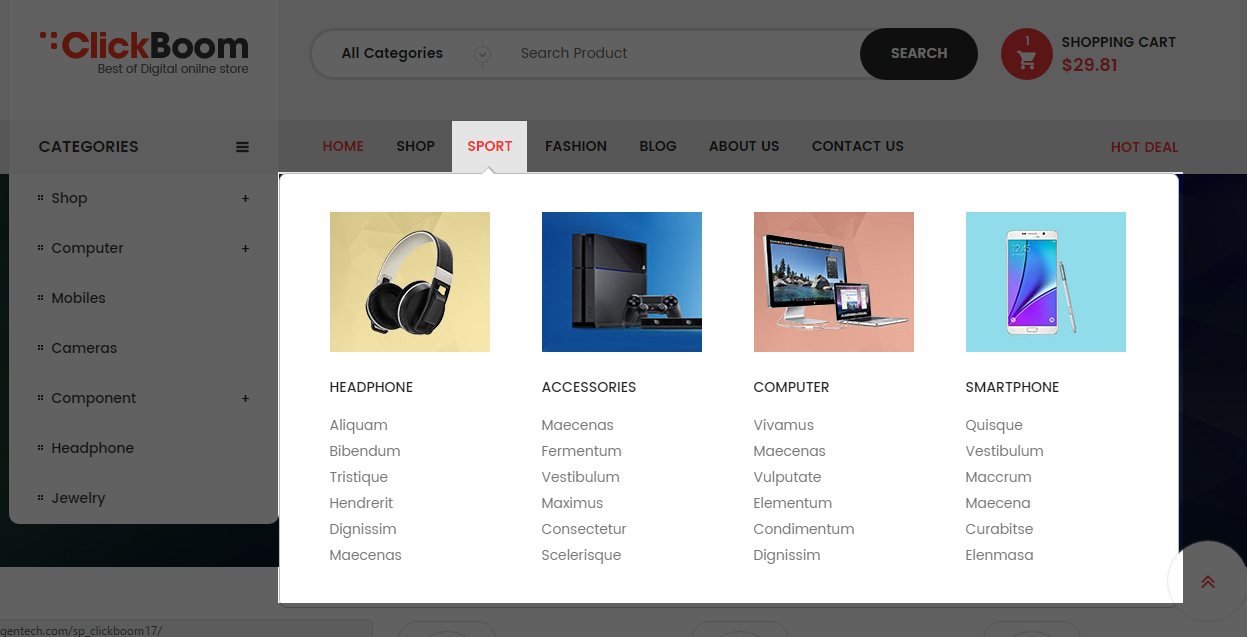
- Backend Setting : Please click Here to view.
- Backend Setting of ‘Box Cate 1’: Please click Here to view.
- Backend Setting of ‘Category Html Image’ in ‘Box Cate 1’: Please click Here to view.
Copy and paste the following code into the content:
<p><a href="#"><img src="http://dev.ytcvn.com/ytc_templates/prestashop/sp_clickboom17/themes/sp_clickboom17/assets/img/cms/categories-1.jpg" alt="image custom" /></a></p>
- Backend Settings of Item ‘Headphone′ in ‘Box Cate 1′: Please click Here to view.
Note: The items named ‘Box Cate 2’, ‘Box Cate 3’, ‘Box Cate 4’ having same menu level as item ‘Box Cate 1’ could have same configuration
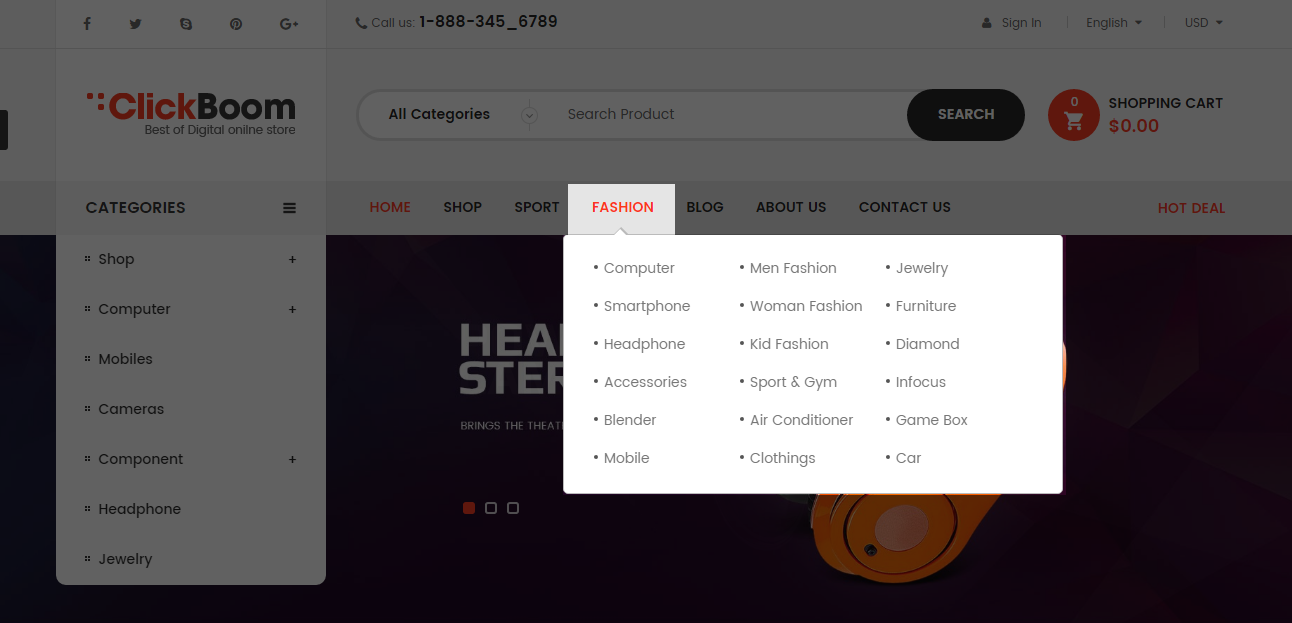
Fashion
SP Vertical Megamenu Configuration
SP Vertical MegaMenu (displayVertical)
1. Navigate to IMPROVE >> Modules >> Modules and Services go to Installed modules section and look for SP Vertical Mega Menu >> Click the Configure button to access the module configuration page.
2. In the SP Vertical Megamenu Panel, you could Add New Module by click on the button like the following image:
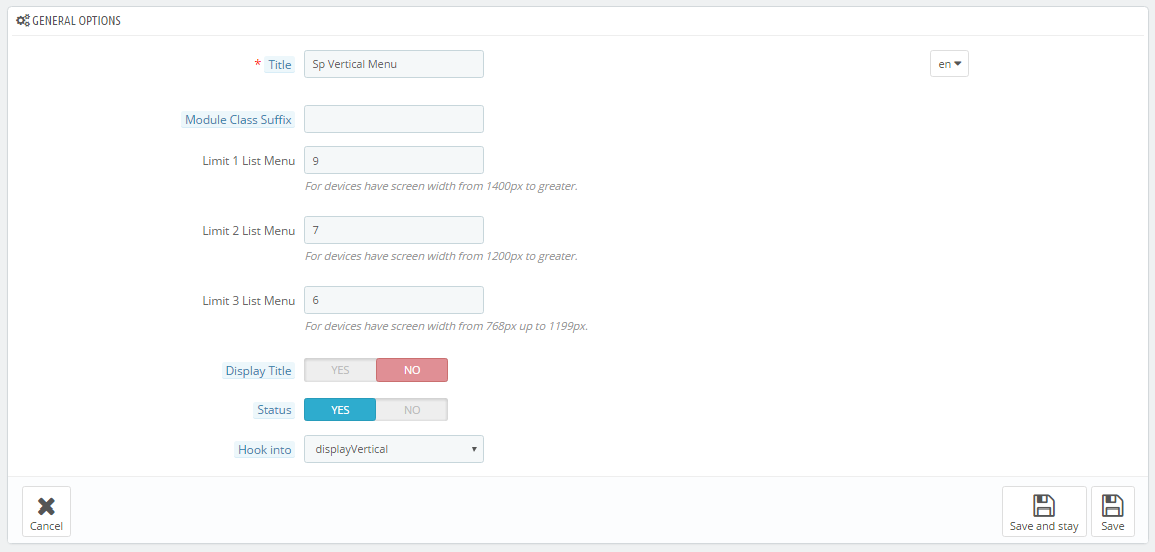
3. In the configuration page of new module, you could configure General Options as follows
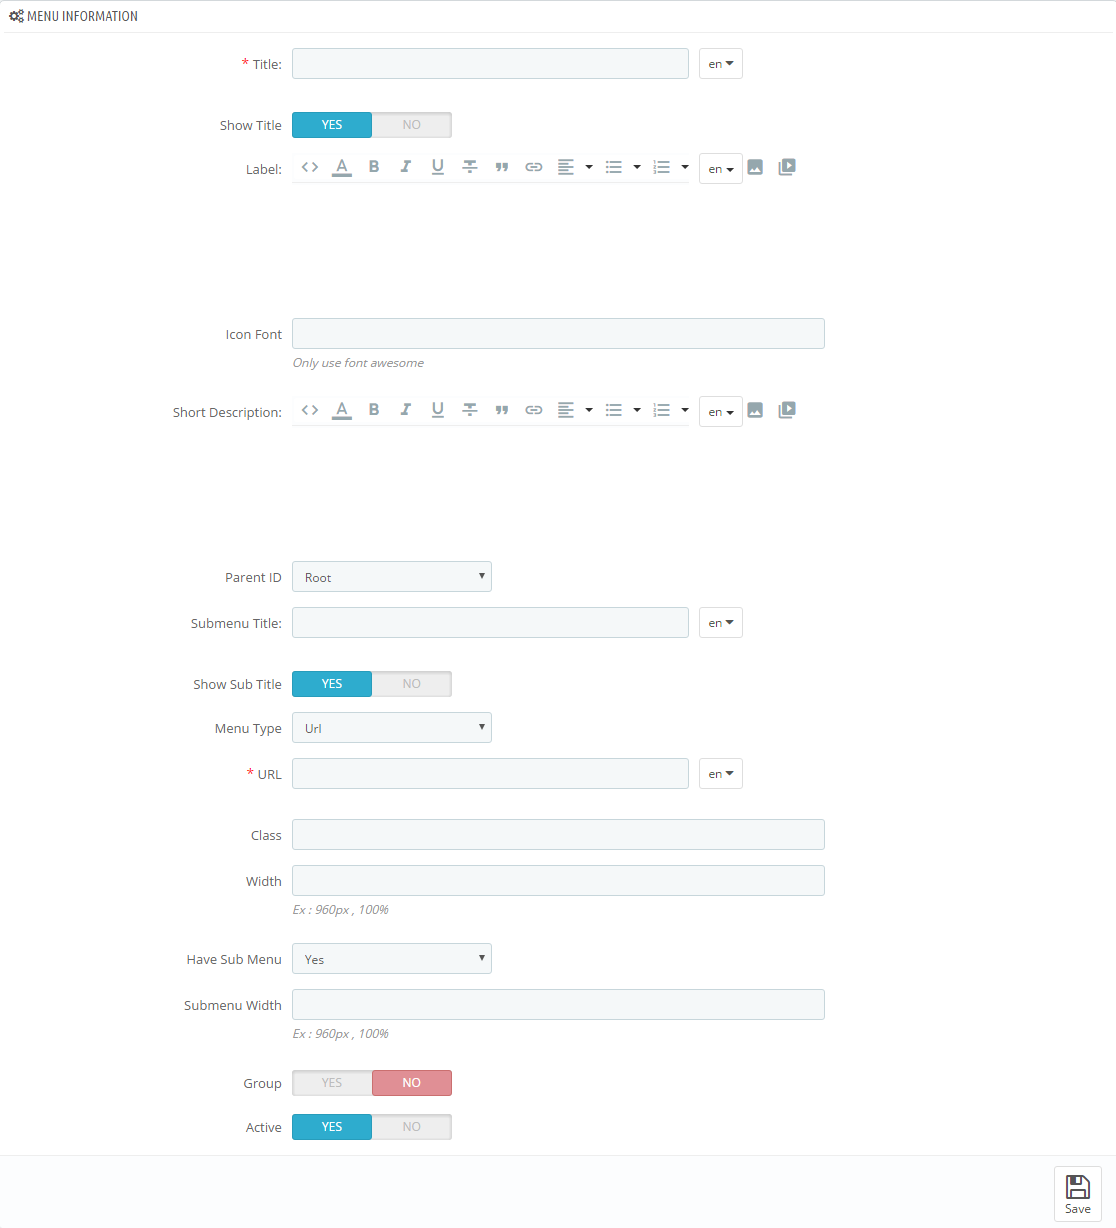
4. In the configuration page of new module, you could configure Menu Information as follows
5. In order to add menu items, to add items as you want, you need to click Add New button.
6. Menu list of Vertical Megamenu You need to look at the menu list to configure easily.
7. To configure each item, you need to click Edit button.
Go Here to readmore about the SP Vertical Megamenu module.
Note: In the next steps, when editing items in the menus, the items (in a menu) having same level could have same configuration. Therefore, we encourage you read throughtly and find out the item’s level to configure it without any errors.
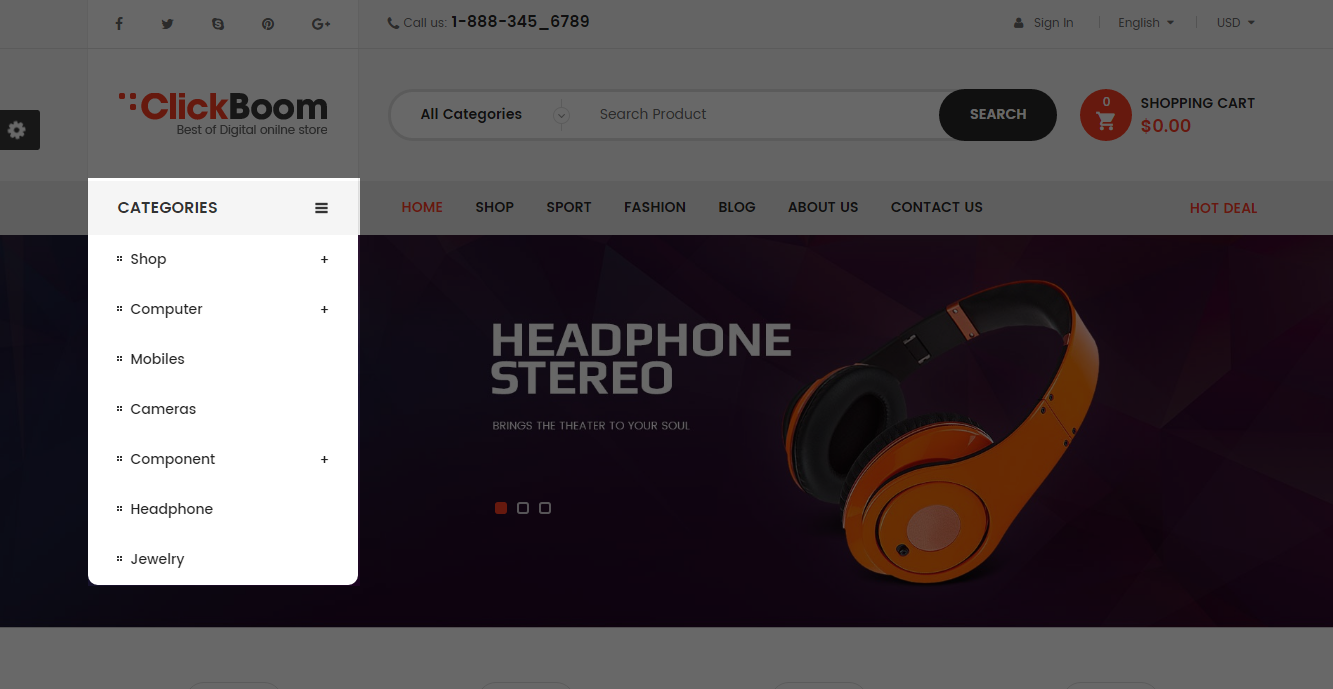
Shop
Frontend Appearance
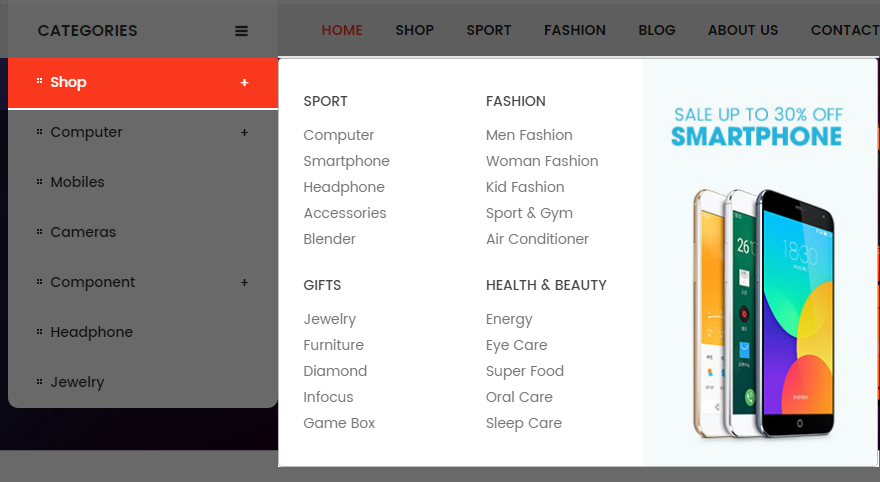
- Backend Setting : Please click Here to view.
- Backend Settings of Item ‘Box Category Menu’: Please click Here to view.
- Backend Settings of Item ‘Box Category’: Please click Here to view.
- Backend Settings of Item ‘Categories 1’ in ‘Box Category’: Please click Here to view.
- Backend Settings of Item ‘Categories 2’ in ‘Box Category’: Please click Here to view.
- Backend Settings of Item ‘Categories 3’ in ‘Box Category’: Please click Here to view.
- Backend Settings of Item ‘Categories 4’ in ‘Box Category’: Please click Here to view.
- Backend Settings of Item ‘Box Image’: Please click Here to view.
Copy and paste the following code into the content:
<p><img src="http://dev.ytcvn.com/ytc_templates/prestashop/sp_clickboom17/themes/sp_clickboom17/assets/img/cms/verticalmenu01.jpg" alt="#" /></p>
Note: You could do the same with the other items in this vertical mega menu
Product Listing Page
Product Listing Page
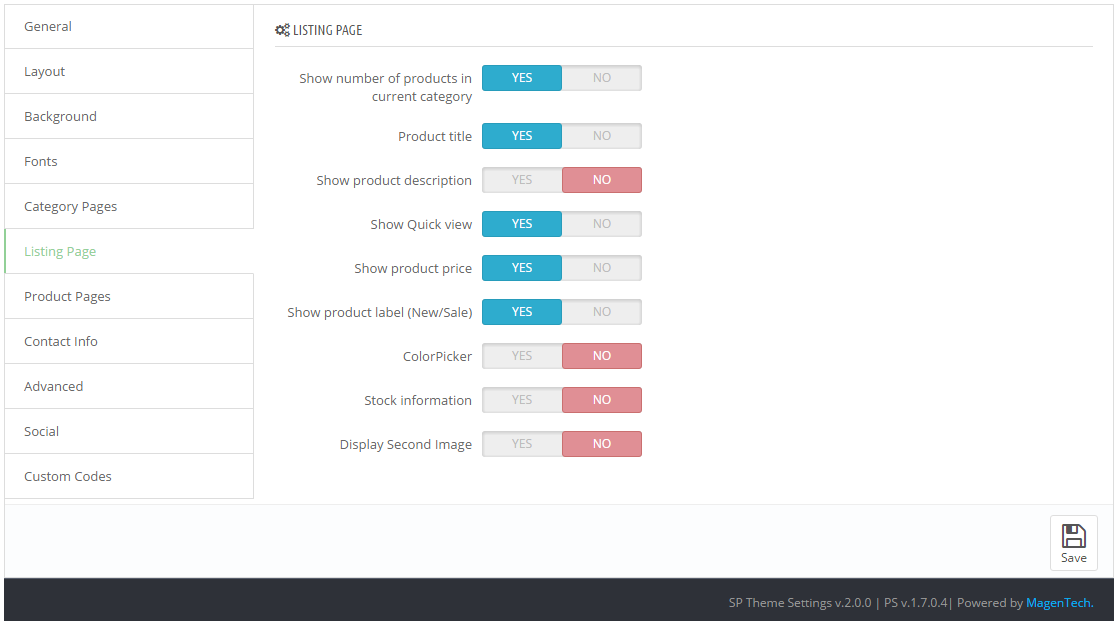
1. In your Prestashop Admin Dashboard, navigate to IMPROVE >> Modules >> Modules and Services >> go to Installed modules section, search for “SP Theme Configuration” module then click on Configure.
2. In the SP Theme Settings, choose “Listing Pages” to configure the parameters in this section. After finishing, you could go to the front-end to view the changes.
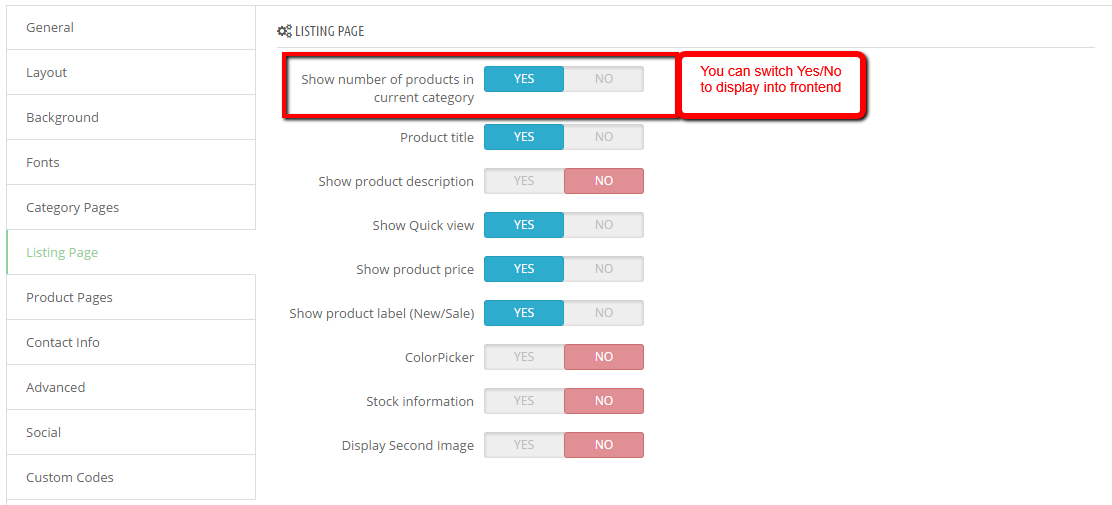
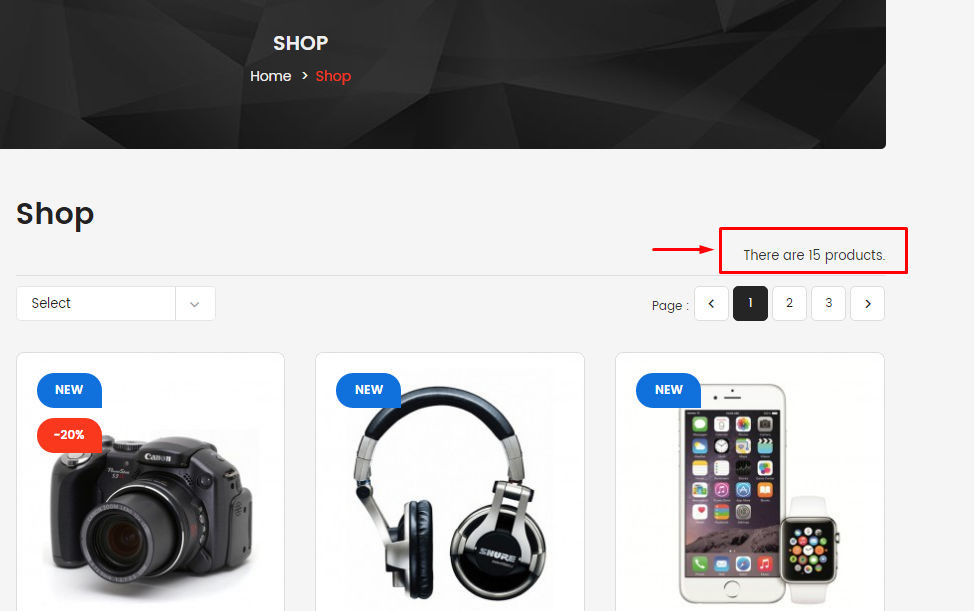
+) Show number of products in current category
Display product number on Listing Page (Show/Hide)
Backend Settings:
Frontend Appearance:
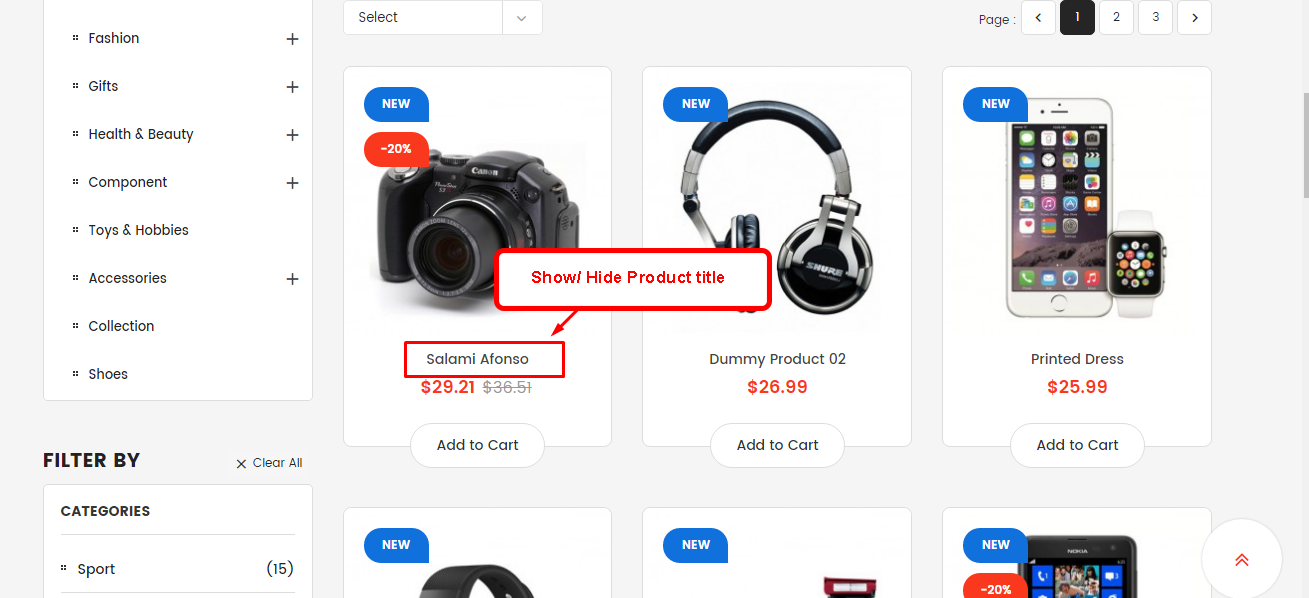
+) Product title
Display product title on Listing Page (Show/Hide)
Backend Settings:

Frontend Appearance:
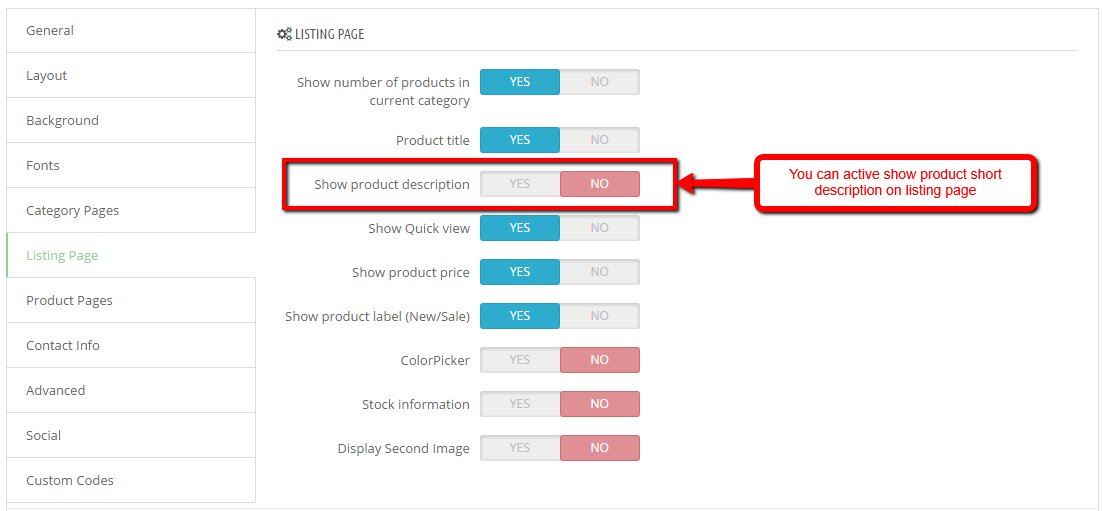
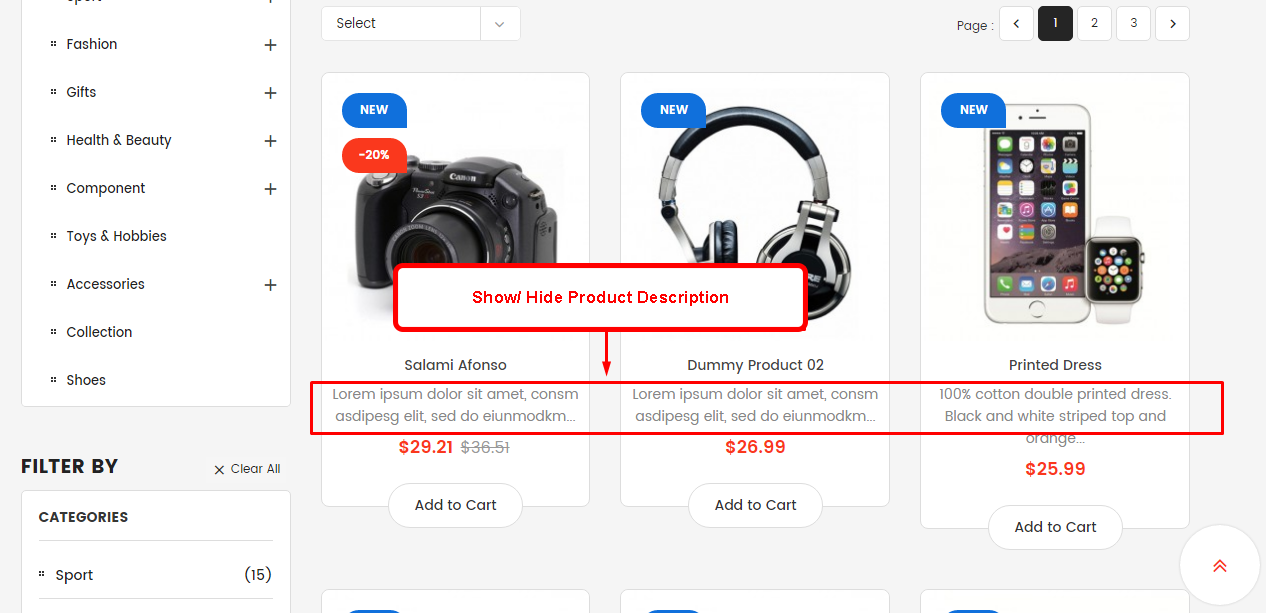
+) Show product description
Display product short description on Listing Page (Show/Hide)
Backend Settings:
Frontend Appearance:
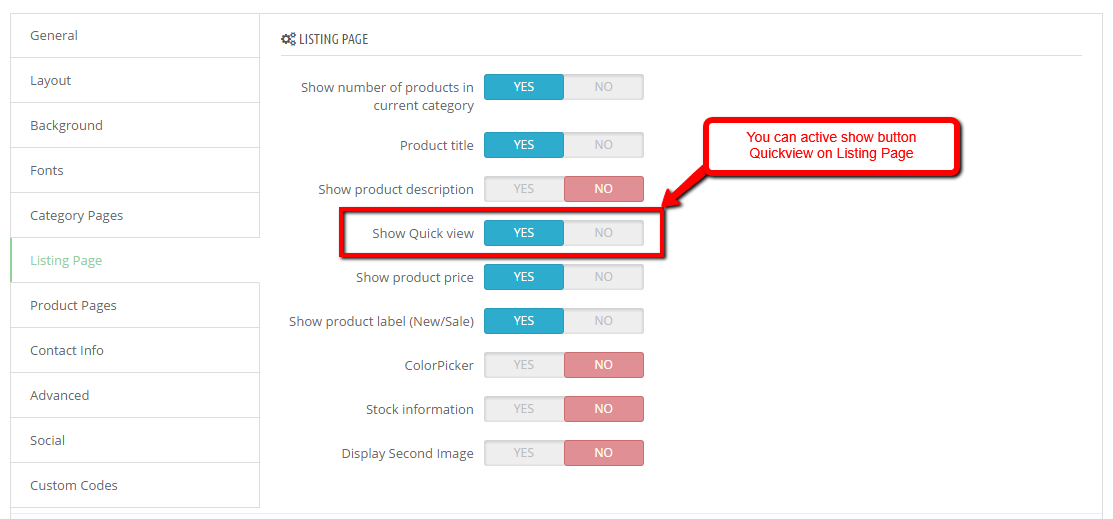
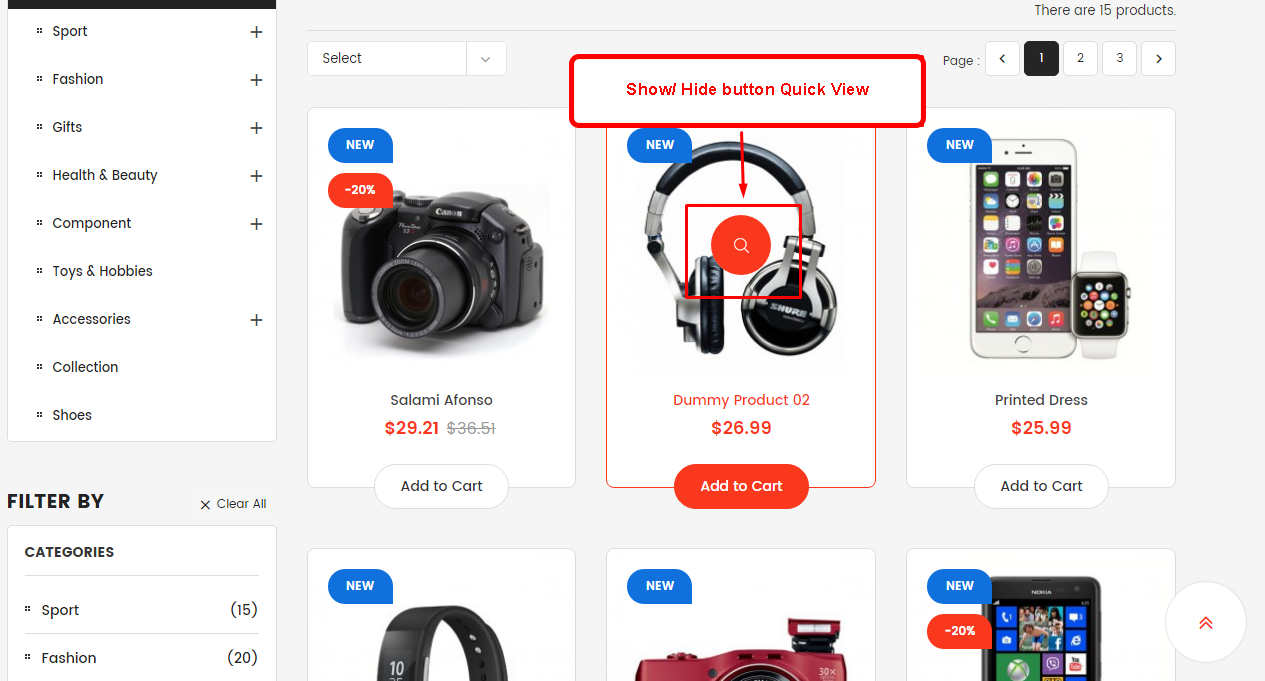
+) Show Quick view
Display button Quickview on Listing Page (Show/Hide)
Backend Settings:
Frontend Appearance:
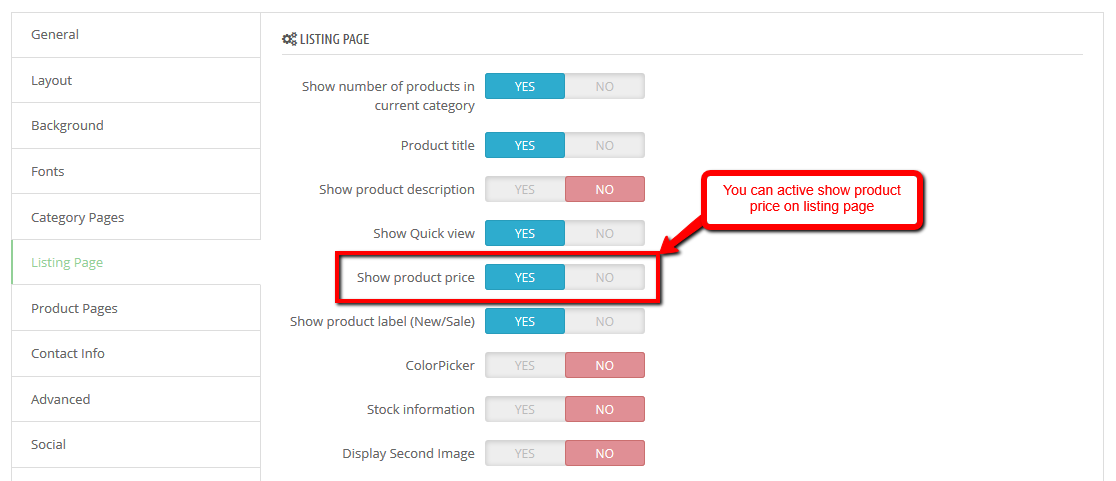
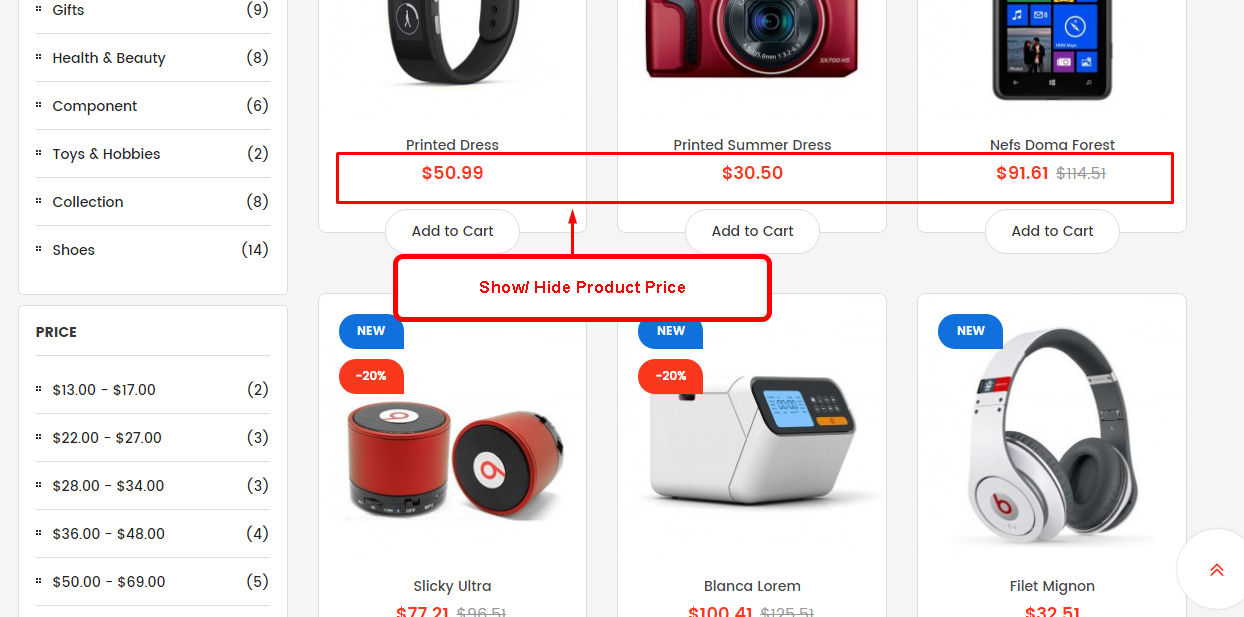
+) Show product price
Display product price on Listing Page (Show/Hide)
Backend Settings:
Frontend Appearance:
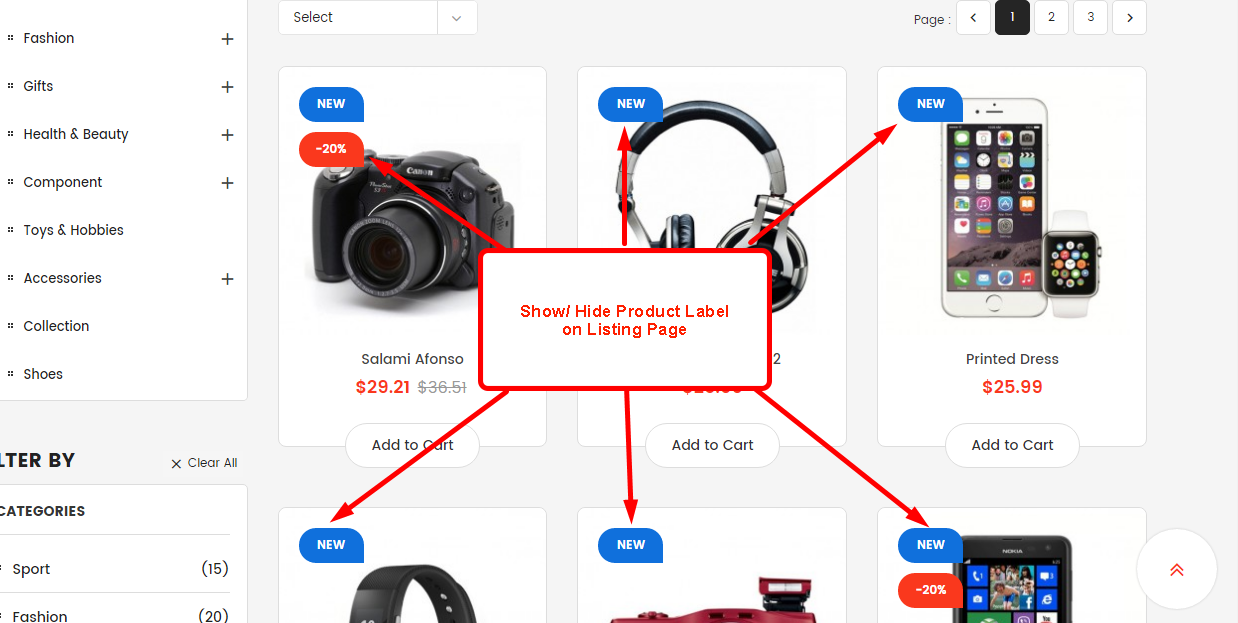
+) Show product label (New/Sale)
Display product price on Listing Page (Show/Hide)
Backend Settings:
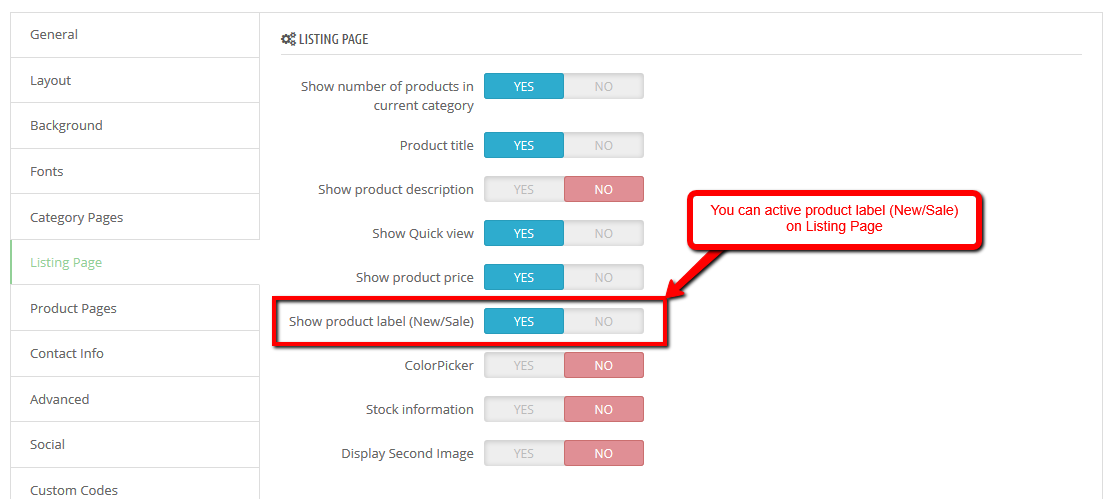
Frontend Appearance:
+) Stock informartion
Display product stock on Listing Page (Show/Hide)
Backend Settings:
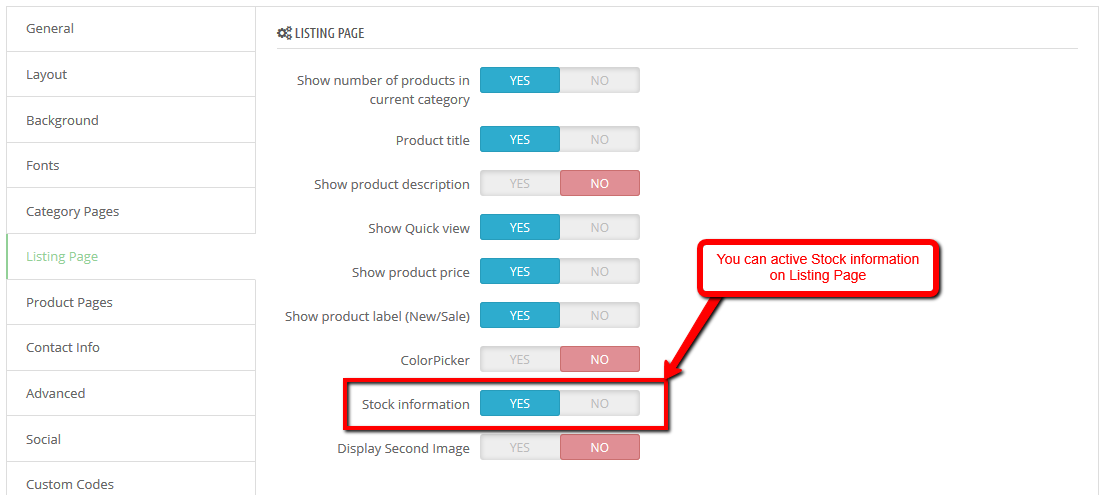
Frontend Appearance:

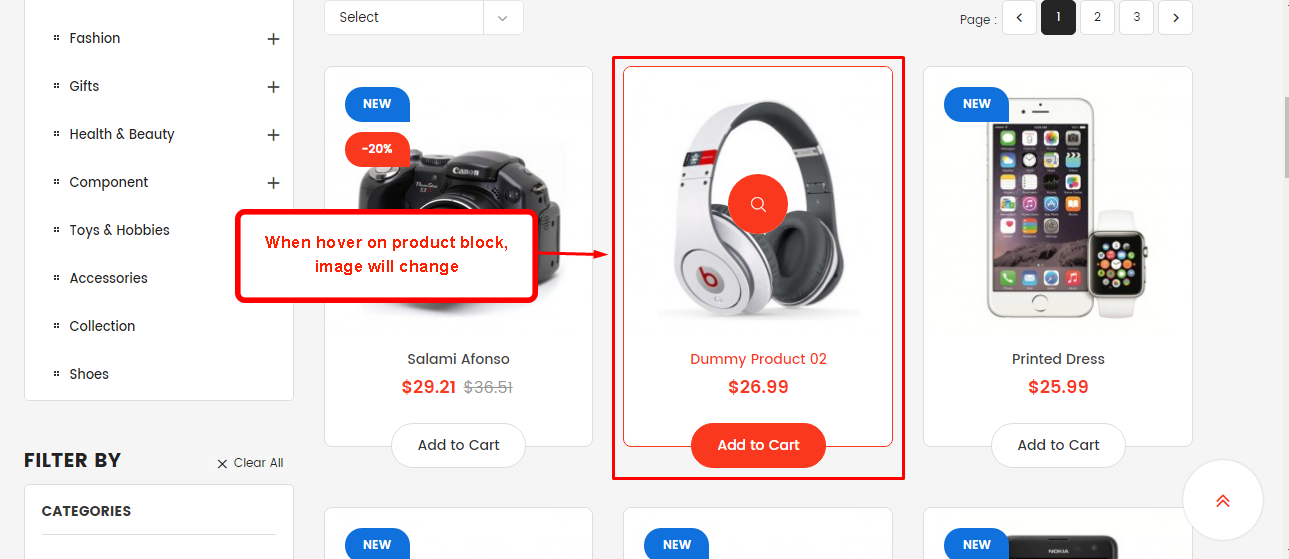
+) Display Second Image
Display second product image when hover on Listing Page (Show/Hide)
Backend Settings:
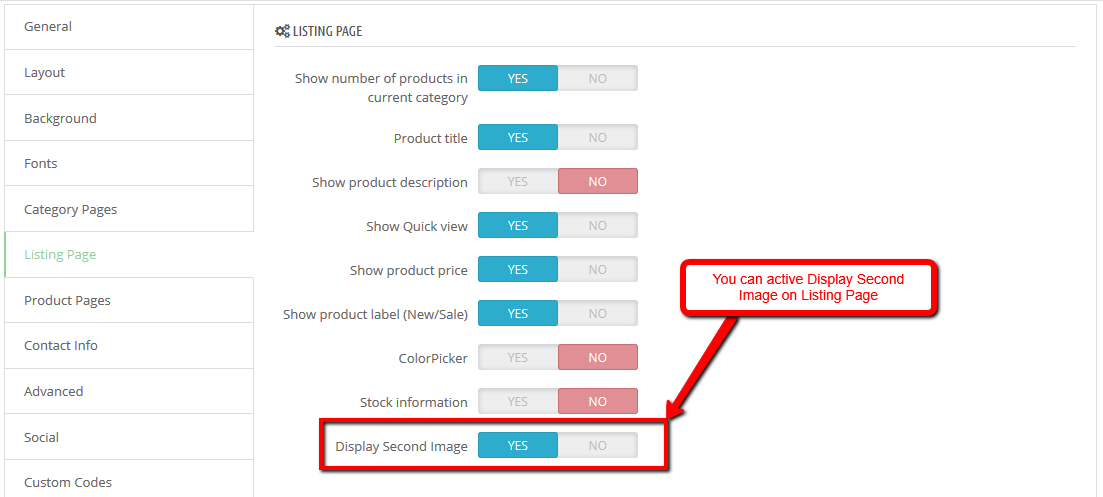
Frontend Appearance:
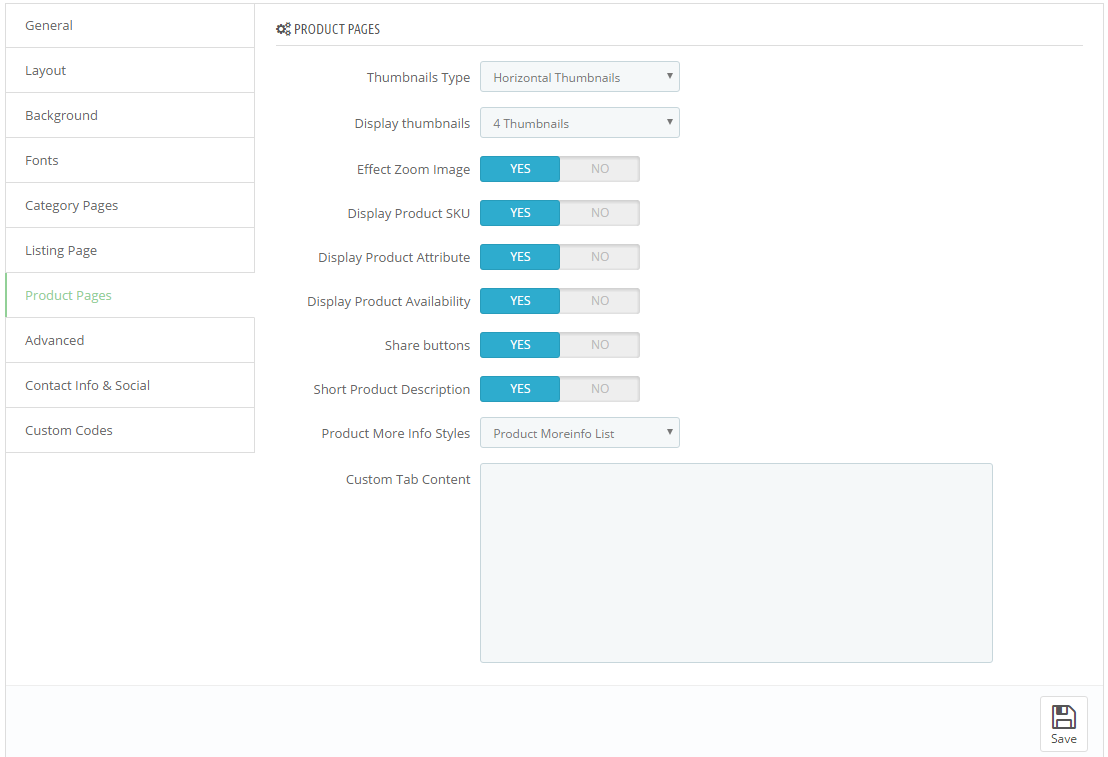
Product Detail Page
Product Detail Page
1. In your Prestashop Admin Dashboard, navigate to IMPROVE >> Modules >> Modules and Services >> go to Installed modules section, search for “SP Theme Configuration” module then click on Configure.
2. In the SP Theme Settings, choose “Product Pages” to configure the parameters in this section. After finishing, you could go to the front-end to view the changes.
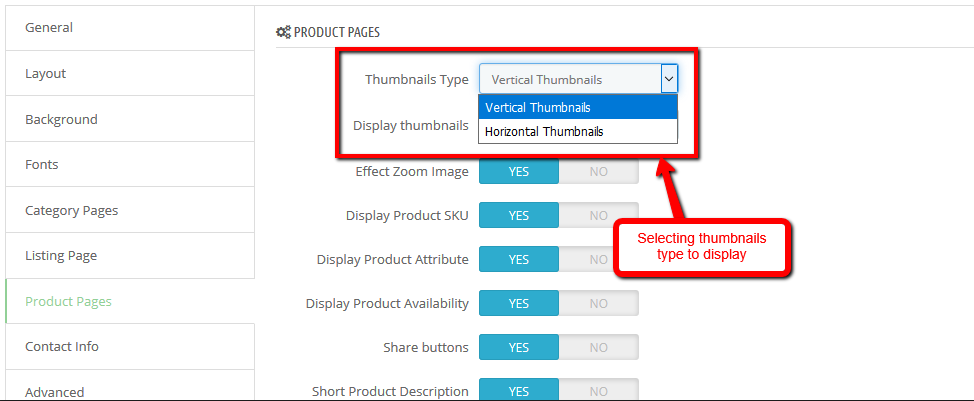
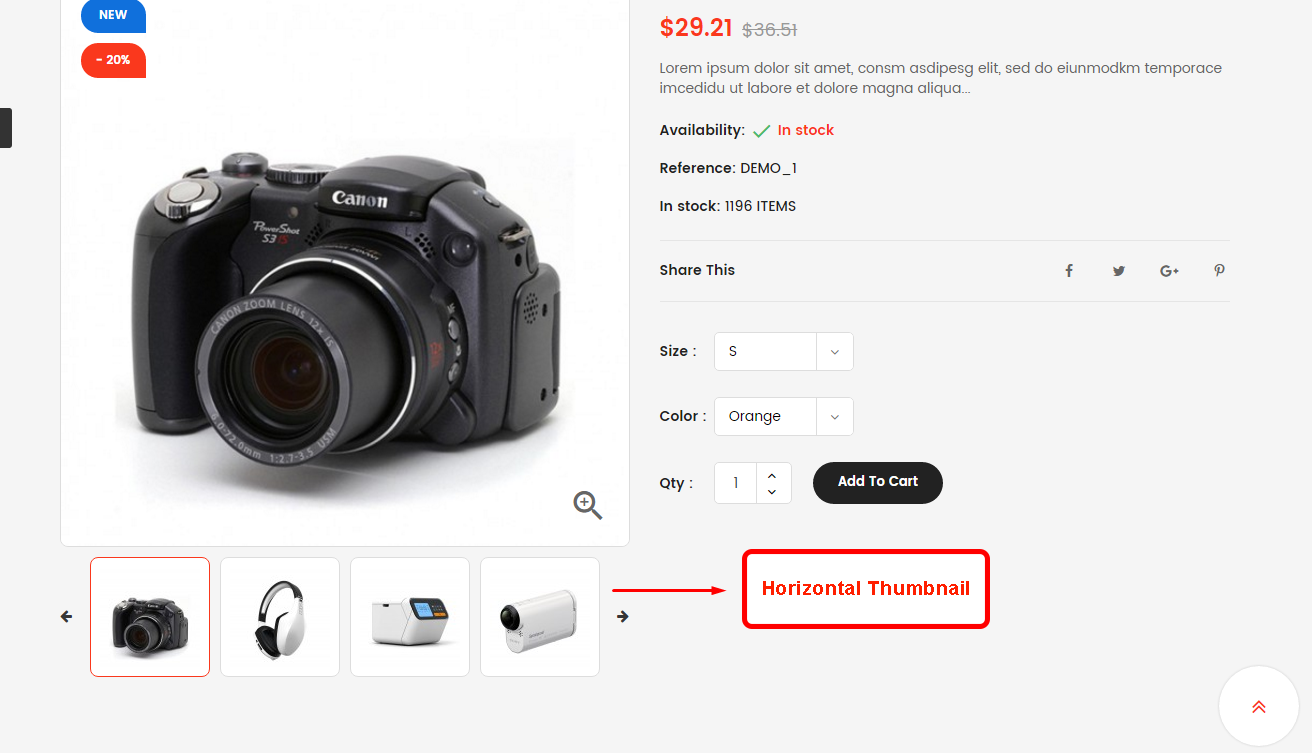
+) Thumbnails Type
Choose type display of thumbnails block on product page.
- Vertical Thumbnails
- Horizontal Thumbnails
Backend Settings:
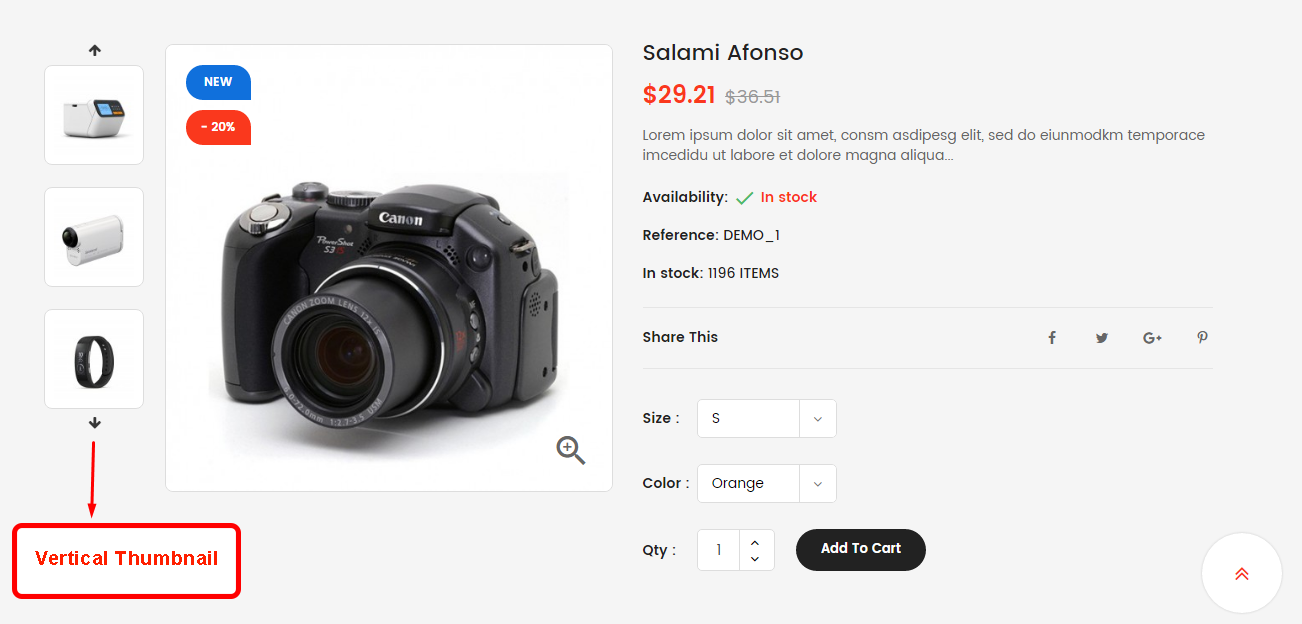
Frontend Appearance:
-Vertical Thumbnails
-Horizontal Thumbnails
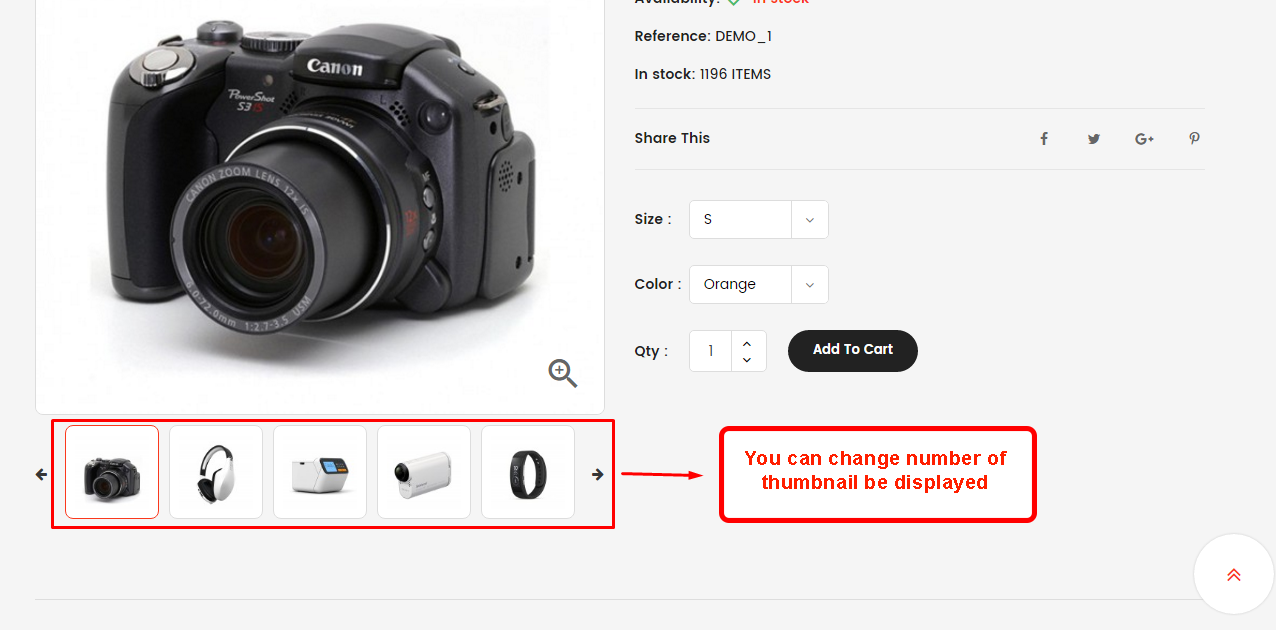
+) Display thumbnails
Number of thumbnails be displayed.
Backend Settings:

Frontend Appearance:
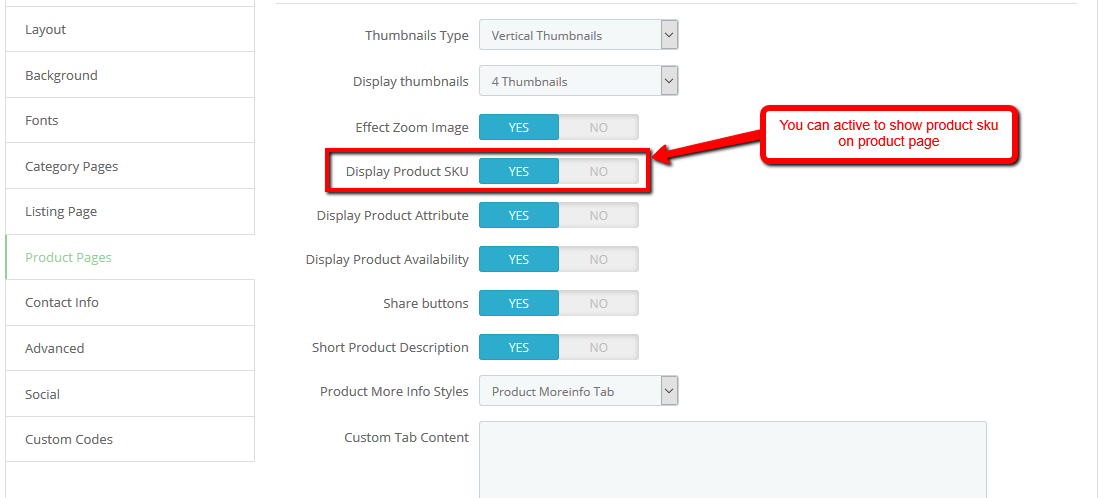
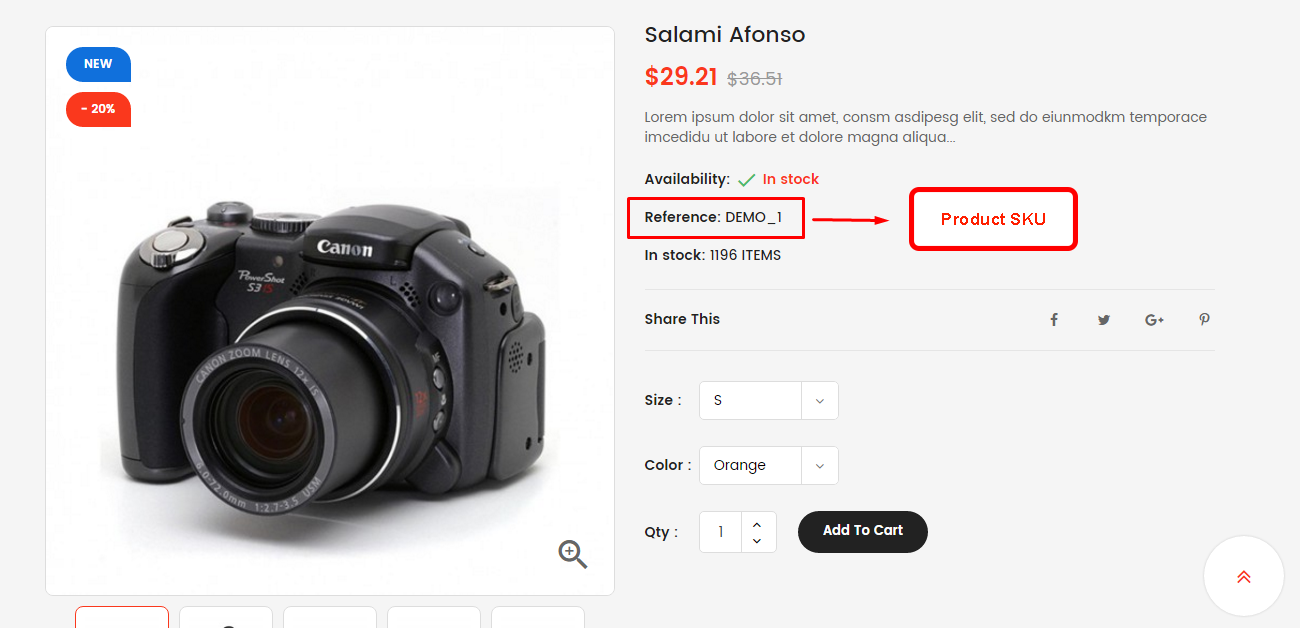
+) Display Product SKU
Show/Hide Product SKU.
Backend Settings:
Frontend Appearance:
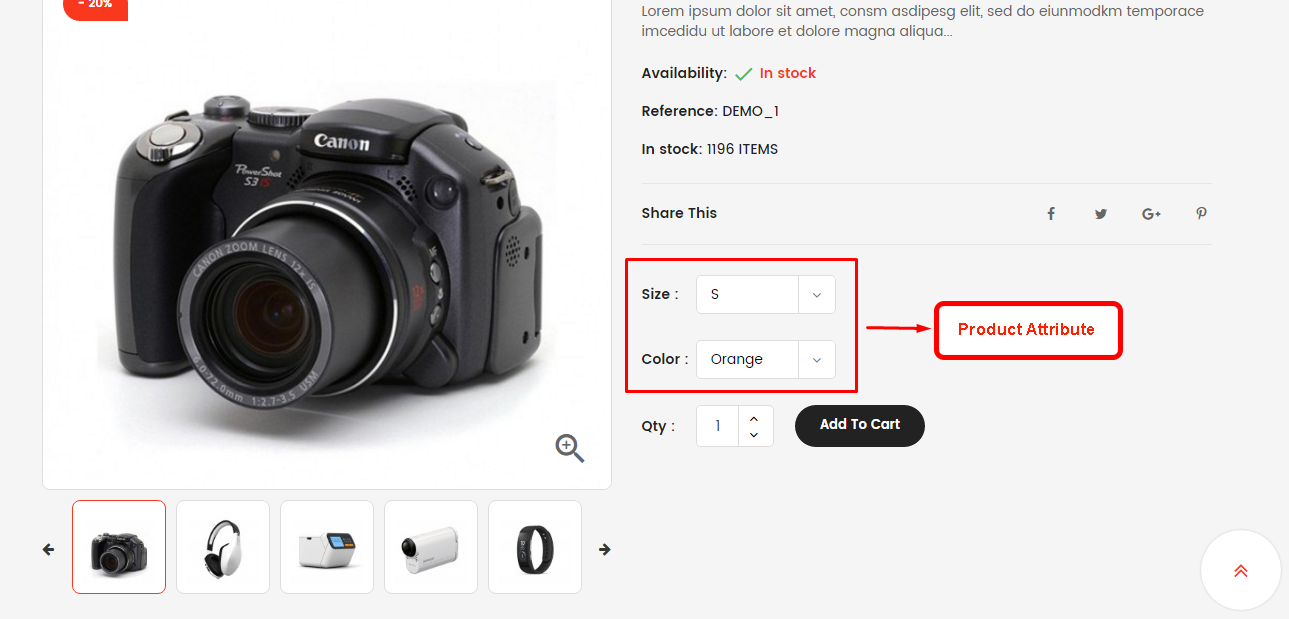
+) Display Product Attribute
Show/Hide Product Attribute.
Backend Settings:
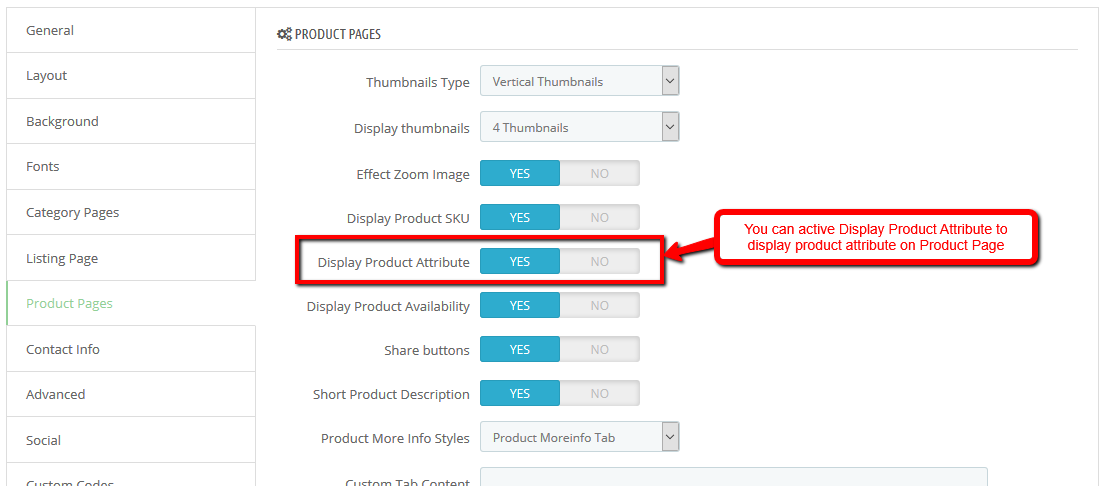
Frontend Appearance:
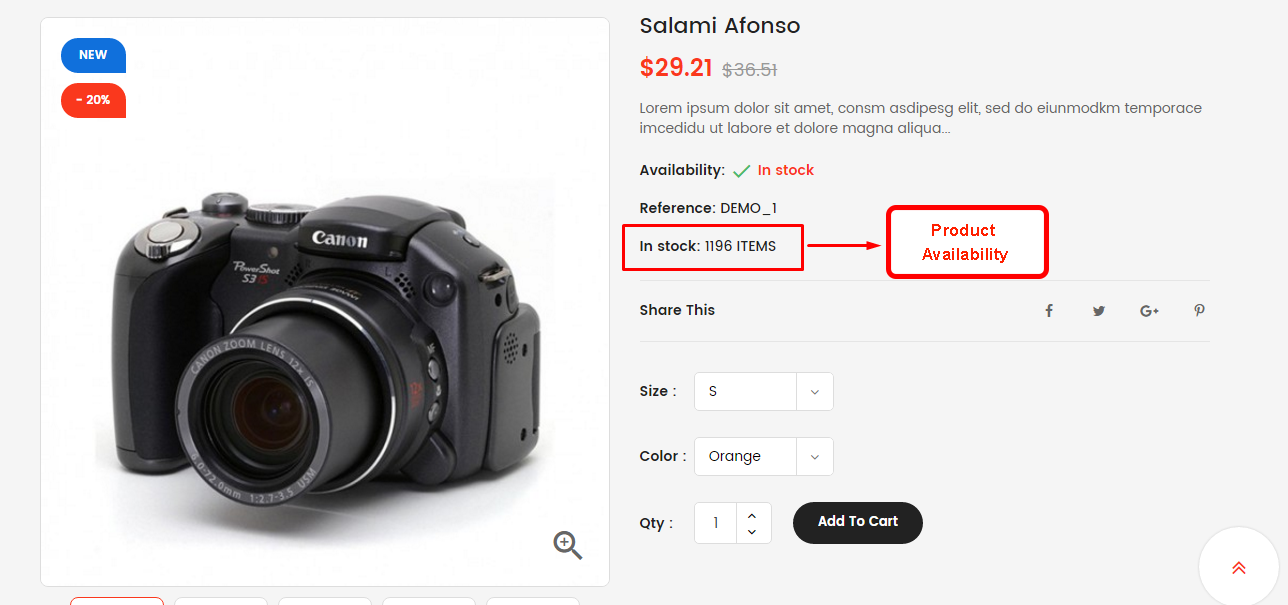
+) Display Product Availability
Show/Hide Product Availability.
Backend Settings:

Frontend Appearance:
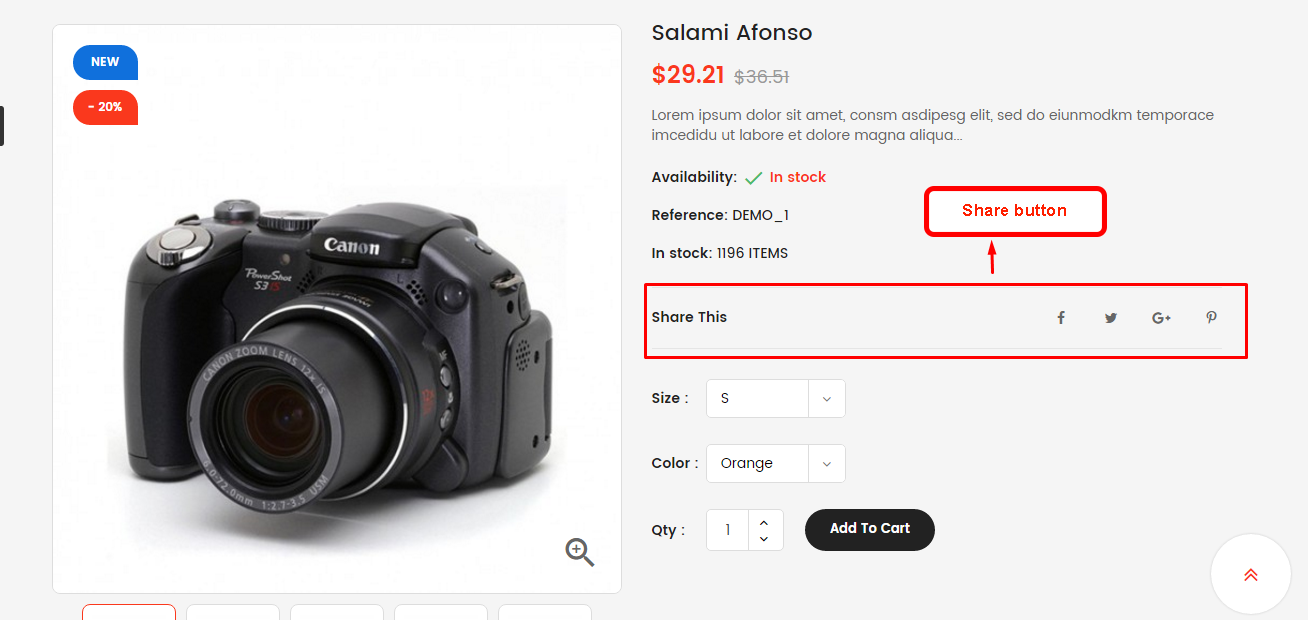
+) Share buttons
Show/Hide Share buttons.
Backend Settings:
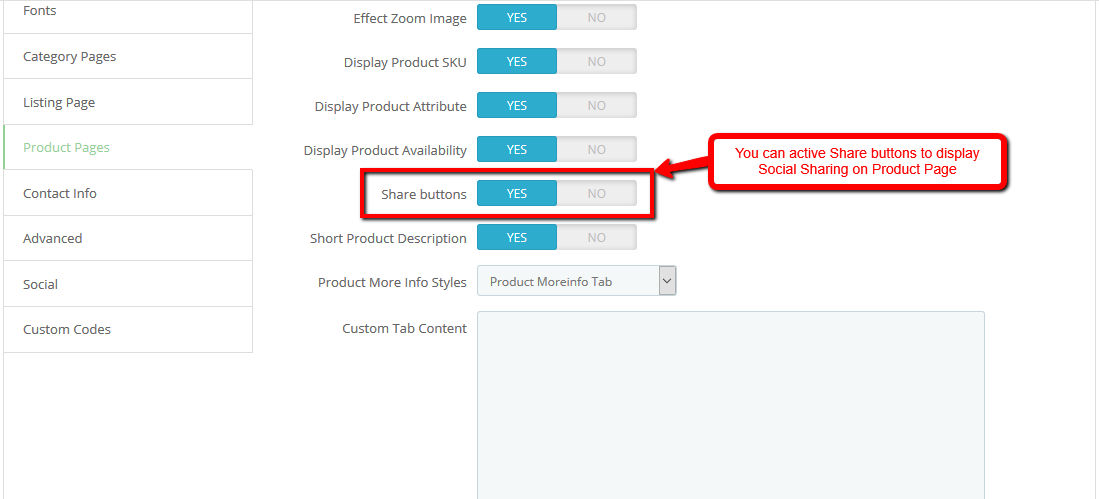
Frontend Appearance:
+) Short Product Description
Show/Hide Short Product Description.
Backend Settings:
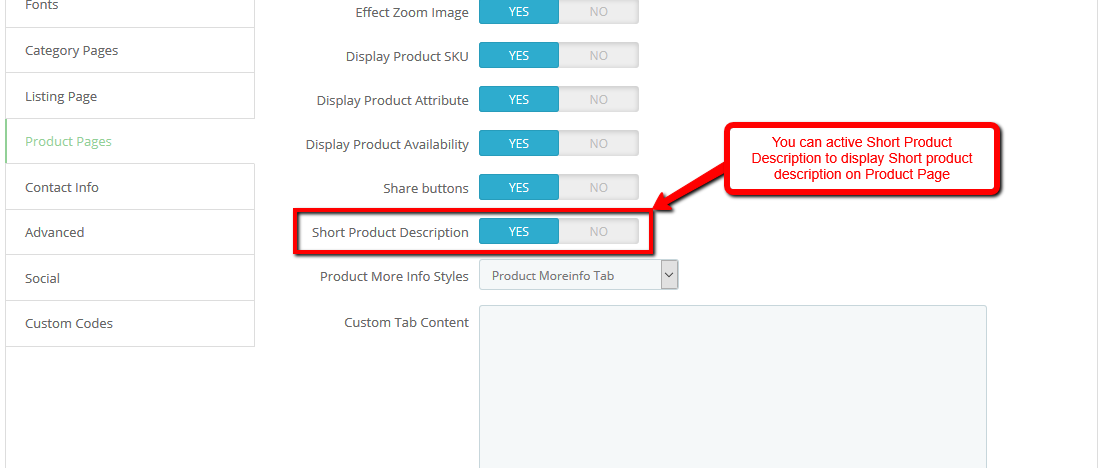
Frontend Appearance:

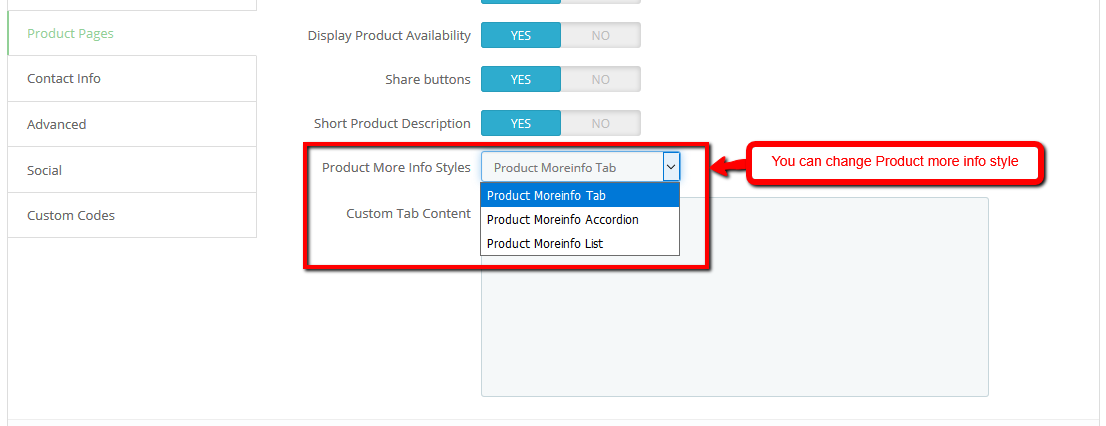
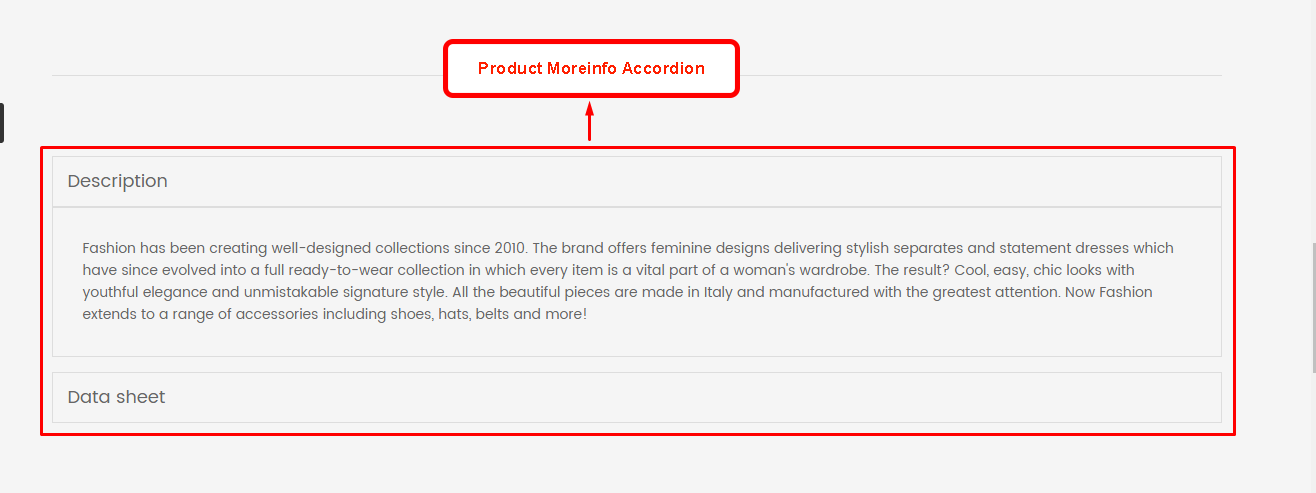
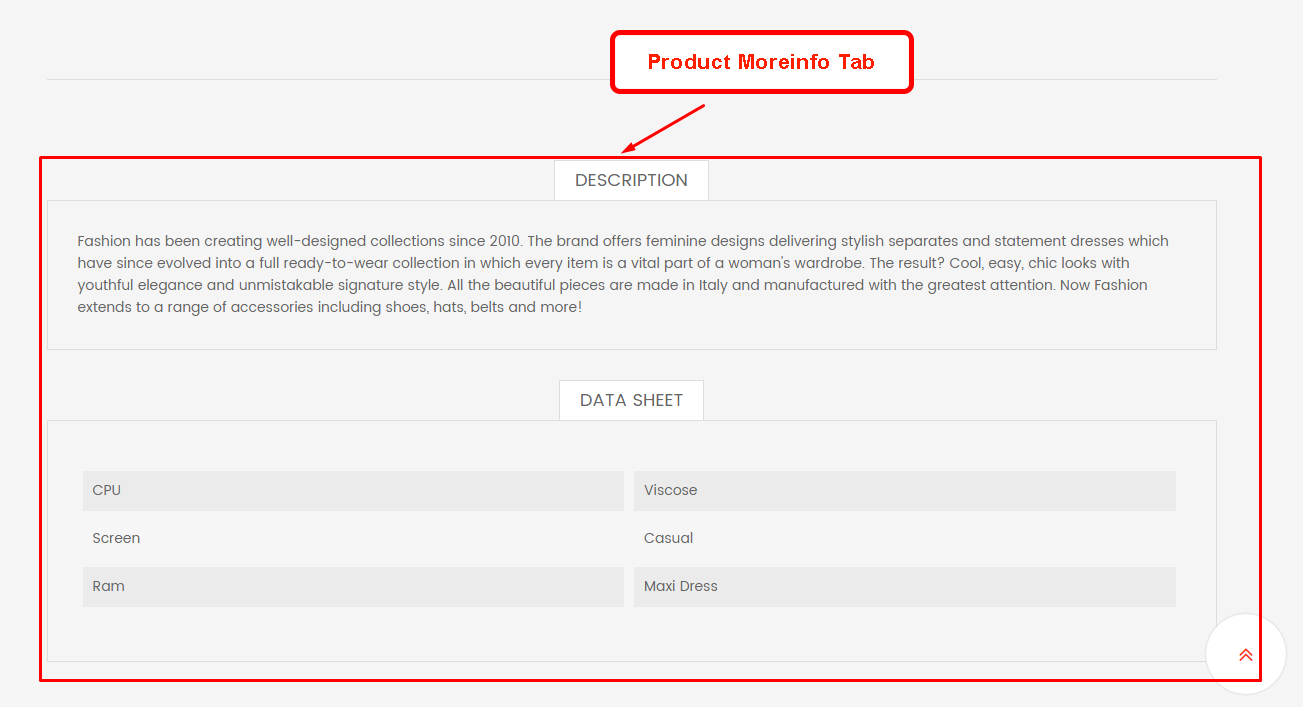
+) Product More Info Styles
Choose style of block "Product more info"
- Product Moreinfo Tab
- Product Moreinfo Accordion
- Product Moreinfo List
Backend Settings:
Frontend Appearance:
-Product Moreinfo Tab
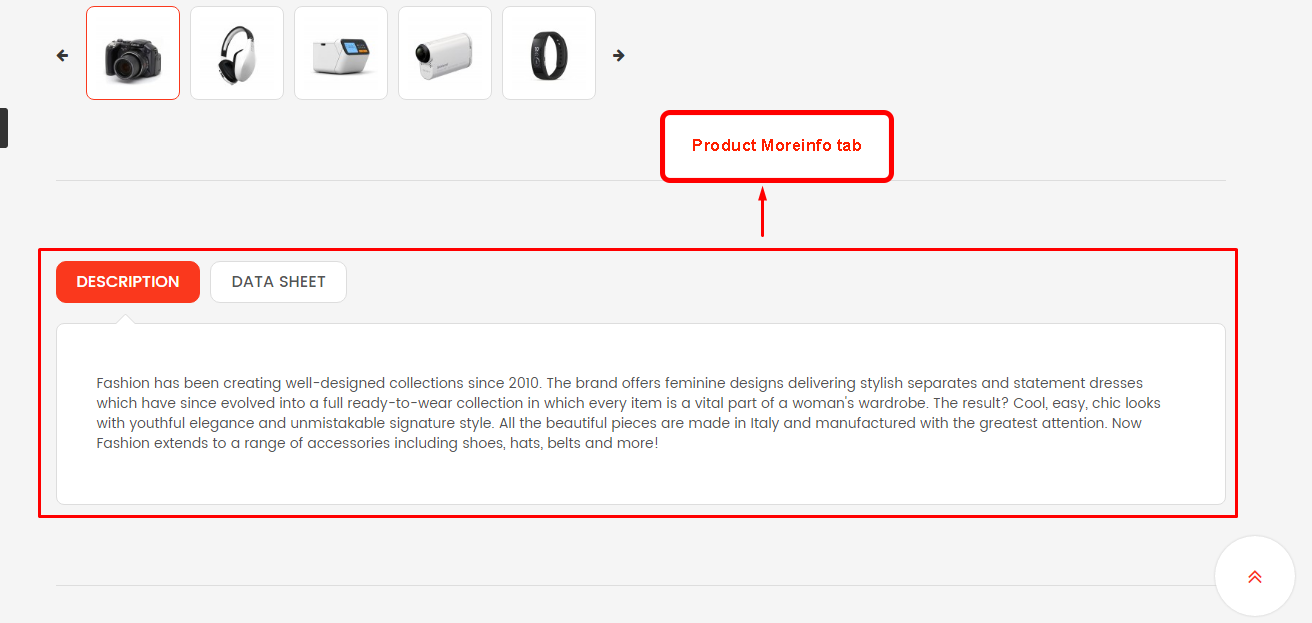
-Product Moreinfo Accordion
-Product Moreinfo List
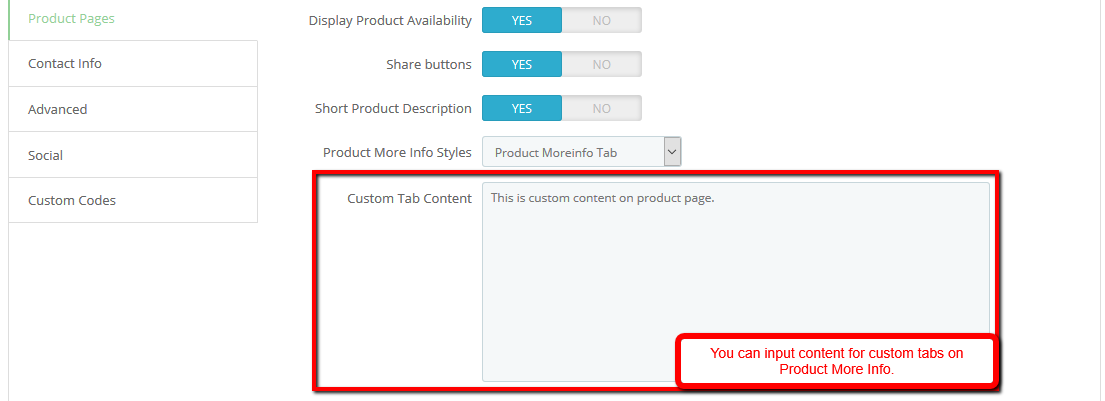
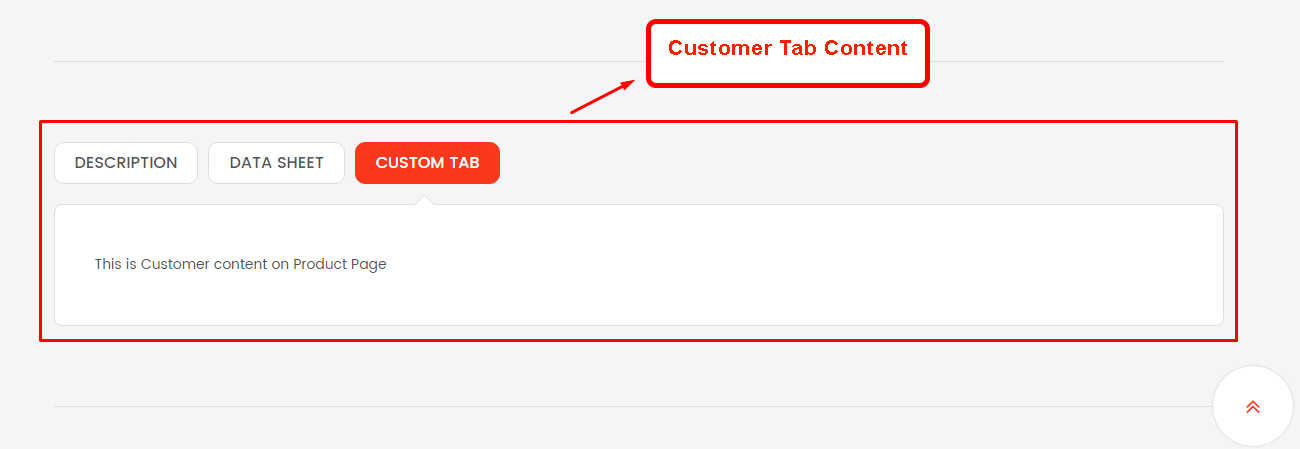
+) Custom Tab Content
Input content for Custom Tab on "Product more info"
Backend Settings:
Frontend Appearance:
Blog Page
Blog Page
Backend Settings:
Step 1:
- Install the "smartblog.zip" file.
- Install the "smartblogcategories.zip" file.
- Install the "smartbloghomelatestnews.zip" file.
- Install the "smartblogrecentposts.zip" file.
Step 2: In the Prestashop Admin Panel, navigate to IMPROVE >> Modules >> Modules and Services >> Installed Modules
- Look for Smart Blog file.
- Look for SmartBlog Home Latest file.
Step 3: You could configure this module like the following image.
- Smart Blog
- SmartBlog Home Latest
Please read more guide for Smartblog at here. SmartBlog Module
Contact Page
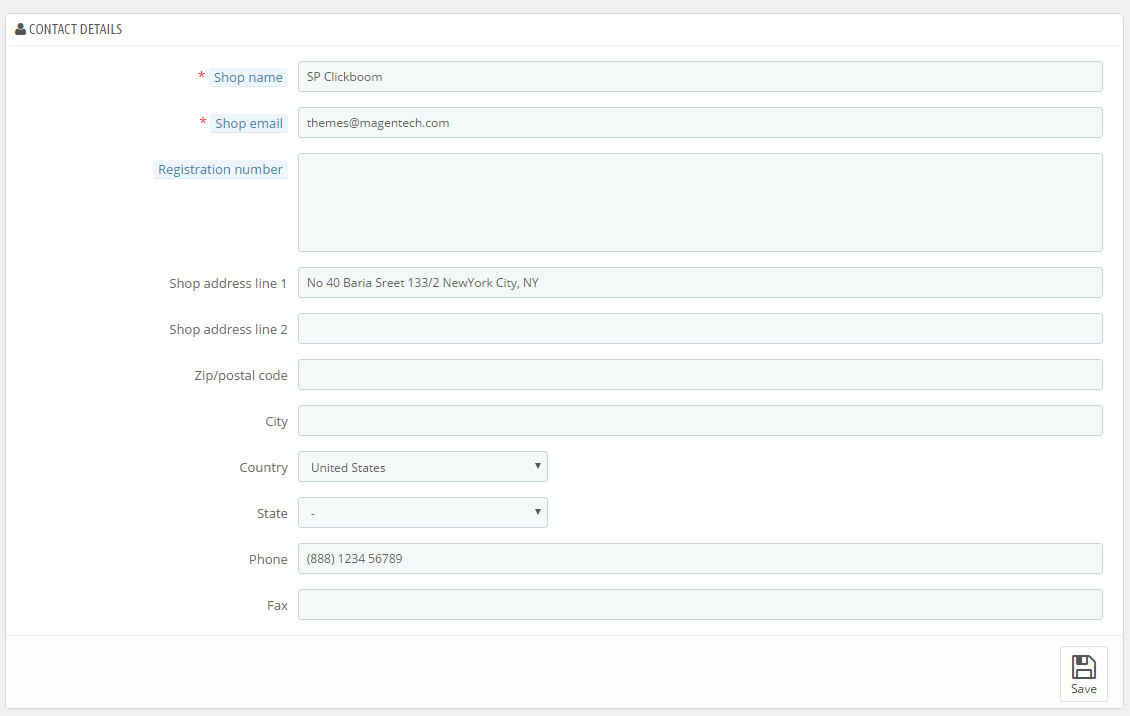
Contact Page

Store information
In the Prestashop Admin Panel, navigate to Shop Parameters >> Contact >> Tabs Stores >> Contact Details
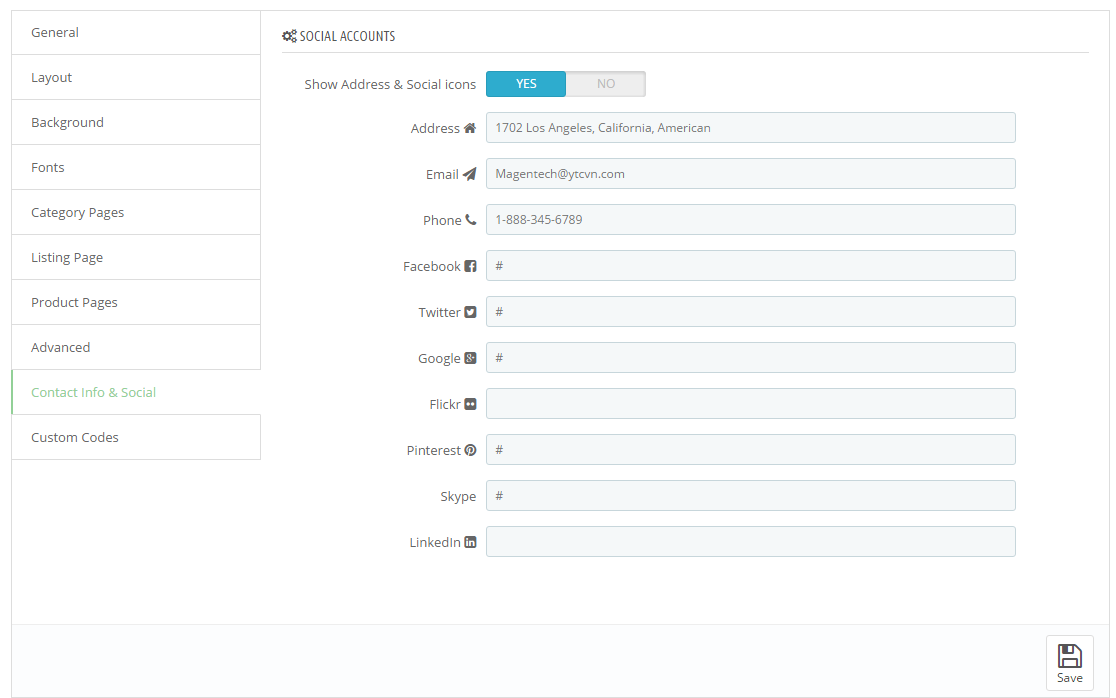
1. In your Prestashop Admin Dashboard, navigate to IMPROVE >> Modules >> Modules and Services >> go to Installed modules section, search for “SP Theme Configuration” module then click on Configure.
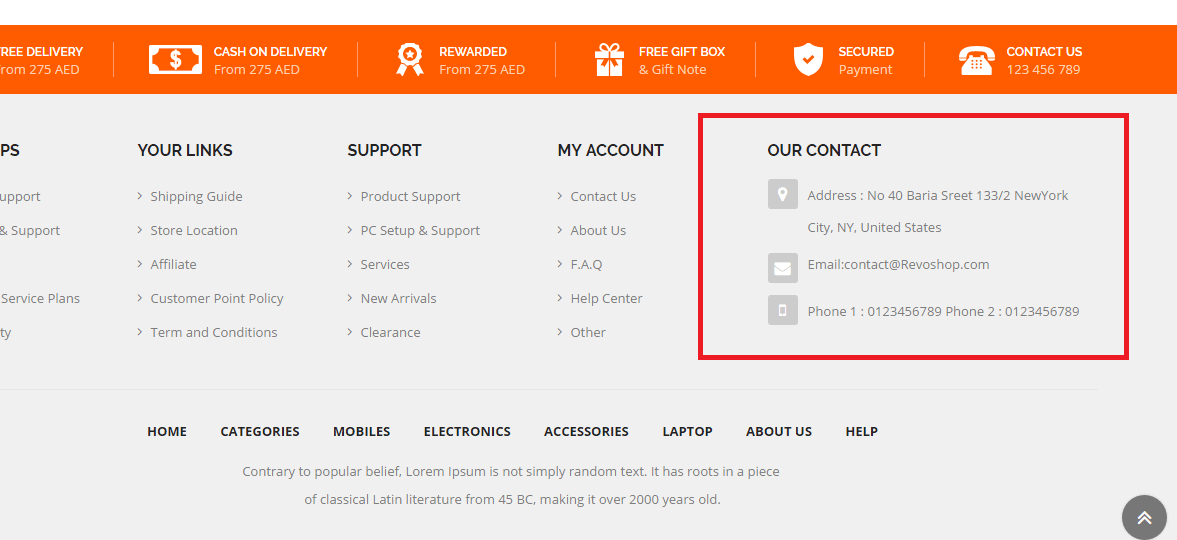
2. In the SP Theme Settings, choose “Contact Info” to configure the parameters in this section. After finishing, you could go to the front-end to view the changes.
- Frontend Appearance:
About us Page
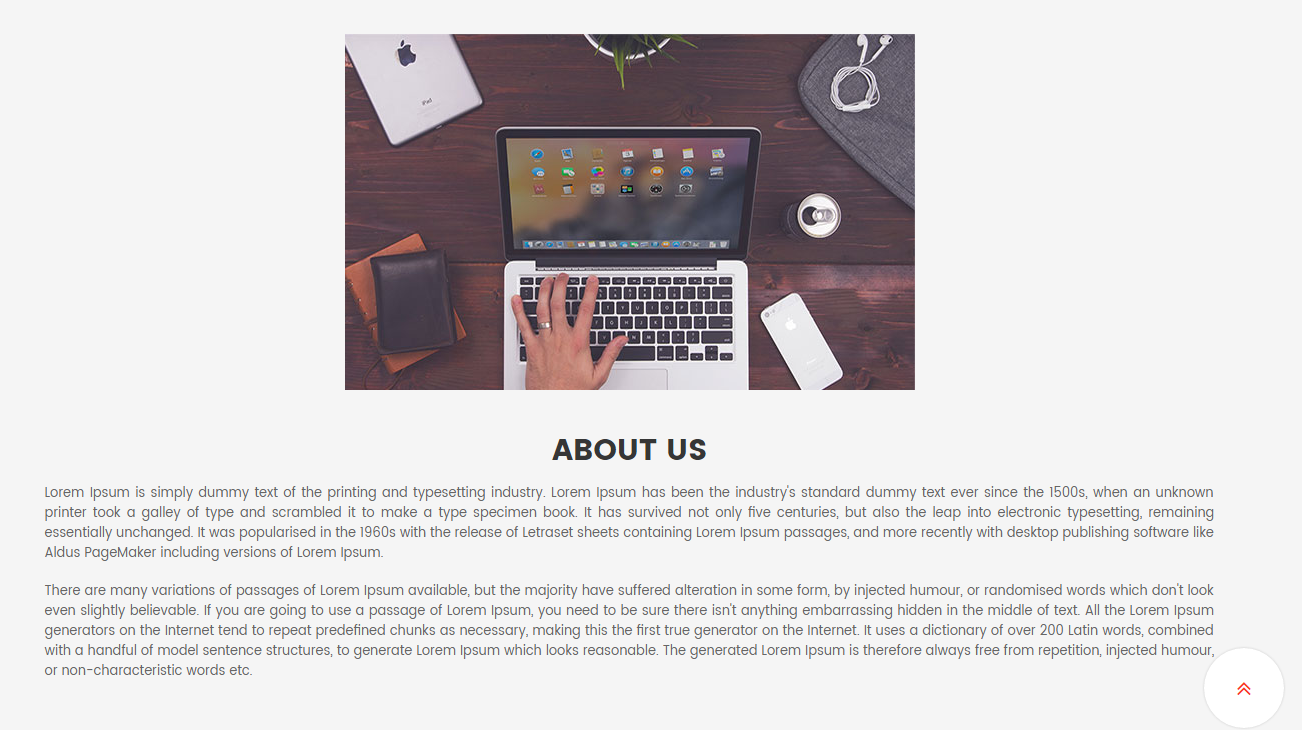
About us Page
Frontend Appearance:
Backend Setting:
Step 1: In the Prestashop Admin Panel, navigate to IMPROVE >> Design >> Pages
Step 2: In the “Pages” configuration page, click 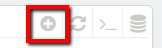 button in the right corner to “ADD NEW”.
Step 3: You could add new cms page like the illustration
Copy and paste the following code into the content:
<div class="about-wrap">
<div class="about">
<div class="image"><a href="#"><img src="http://dev.ytcvn.com/ytc_templates/prestashop/sp_clickboom17/themes/sp_clickboom17/assets/img/cms/aboutus.jpg" alt="" /></a></div>
<div class="text">
<h2>about us</h2>
<p>Lorem Ipsum is simply dummy text of the printing and typesetting industry. Lorem Ipsum has been the industry's standard dummy text ever since the 1500s, when an unknown printer took a galley of type and scrambled it to make a type specimen book. It has survived not only five centuries, but also the leap into electronic typesetting, remaining essentially unchanged. It was popularised in the 1960s with the release of Letraset sheets containing Lorem Ipsum passages, and more recently with desktop publishing software like Aldus PageMaker including versions of Lorem Ipsum.</p>
<p>There are many variations of passages of Lorem Ipsum available, but the majority have suffered alteration in some form, by injected humour, or randomised words which don't look even slightly believable. If you are going to use a passage of Lorem Ipsum, you need to be sure there isn't anything embarrassing hidden in the middle of text. All the Lorem Ipsum generators on the Internet tend to repeat predefined chunks as necessary, making this the first true generator on the Internet. It uses a dictionary of over 200 Latin words, combined with a handful of model sentence structures, to generate Lorem Ipsum which looks reasonable. The generated Lorem Ipsum is therefore always free from repetition, injected humour, or non-characteristic words etc.</p>
</div>
</div>
</div>
Languages
Management Languages
1. Add new Language
Step 1:
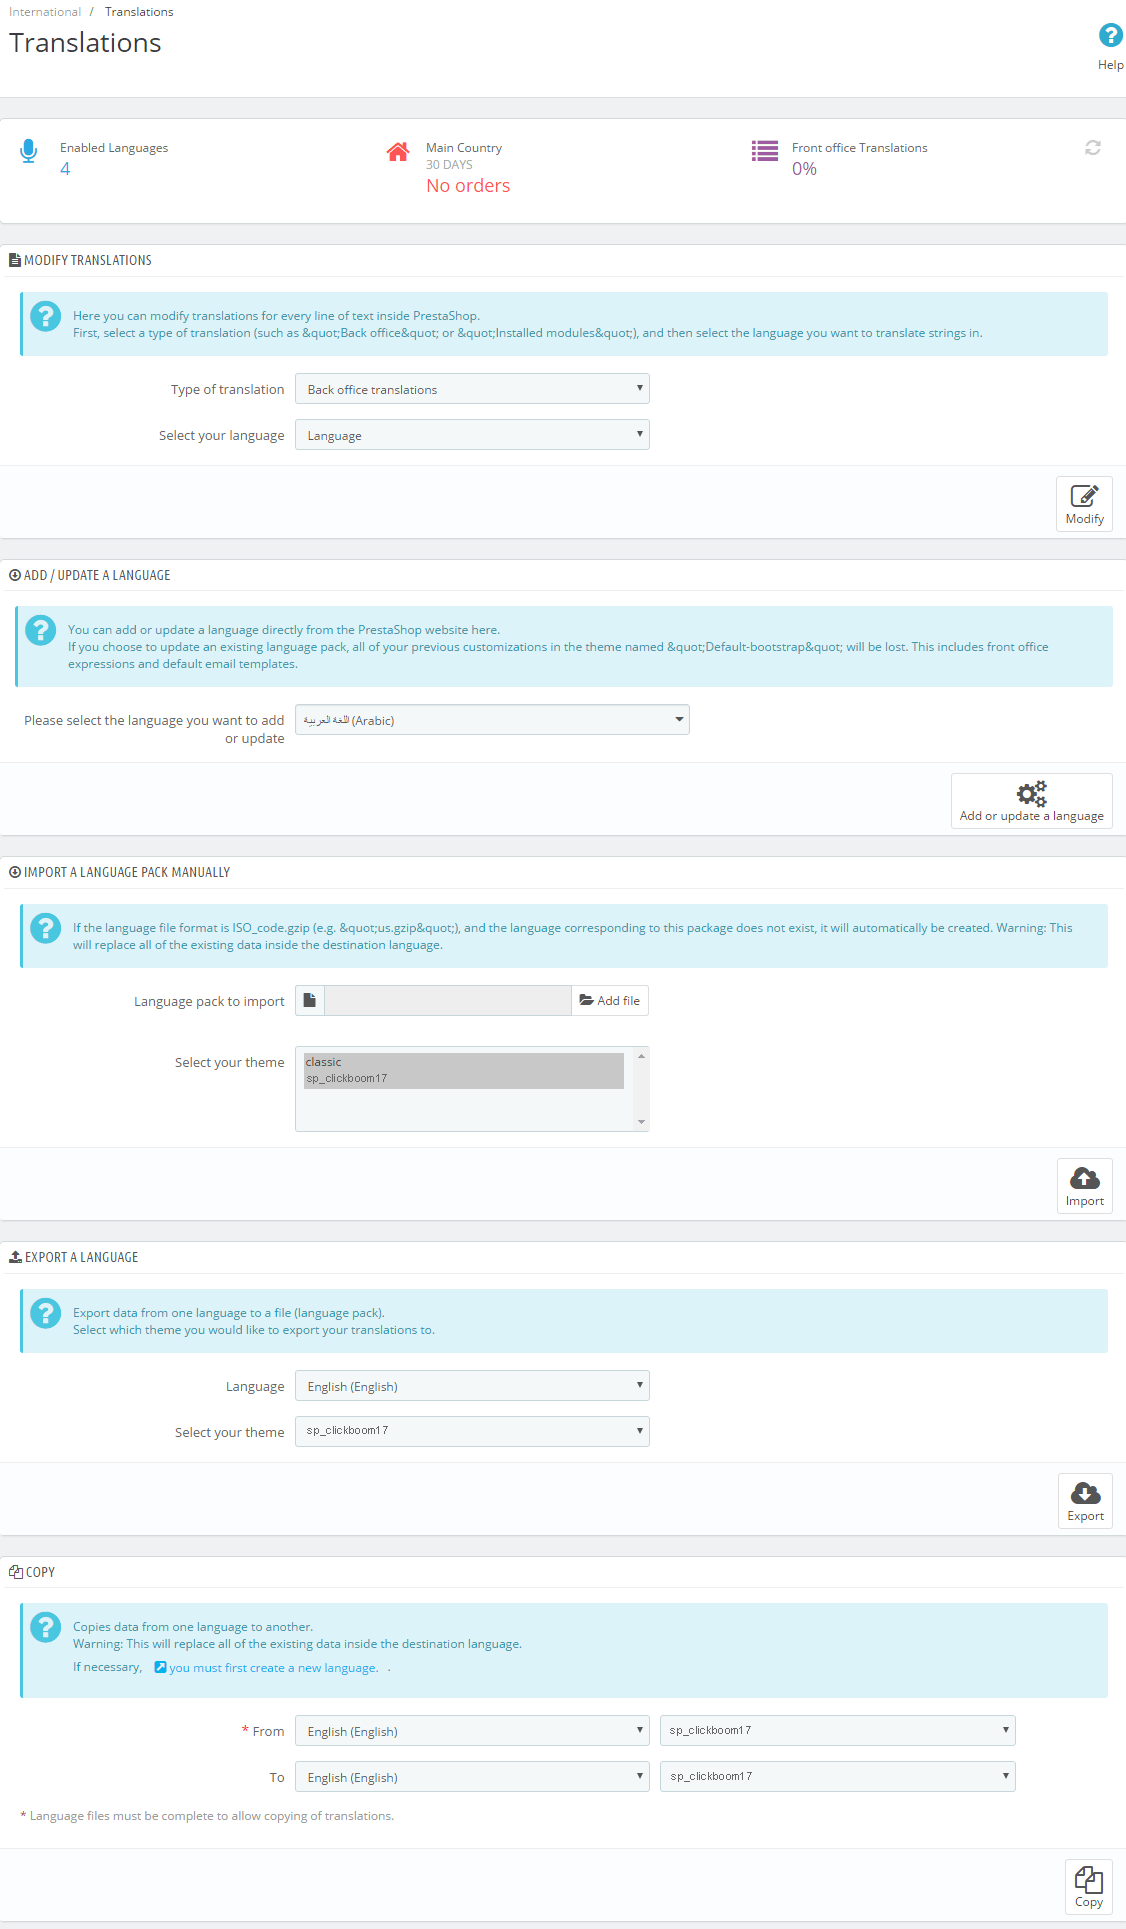
- In the Prestashop Admin Panel, navigate to IMPROVE >> International >> Translations
Step 2:
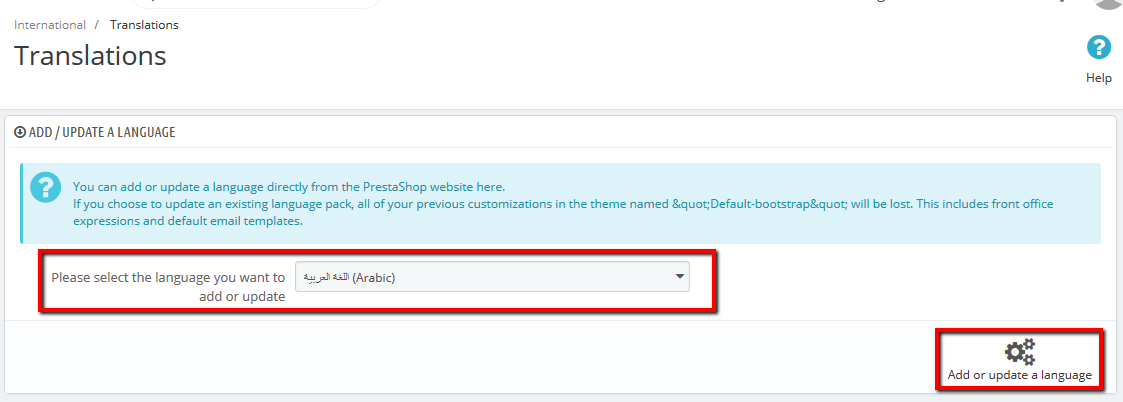
- At here, Scroll to block "ADD / UPDATE A LANGUAGE"
- Then, Select the language you want to add new, and click button "Add or update a language"
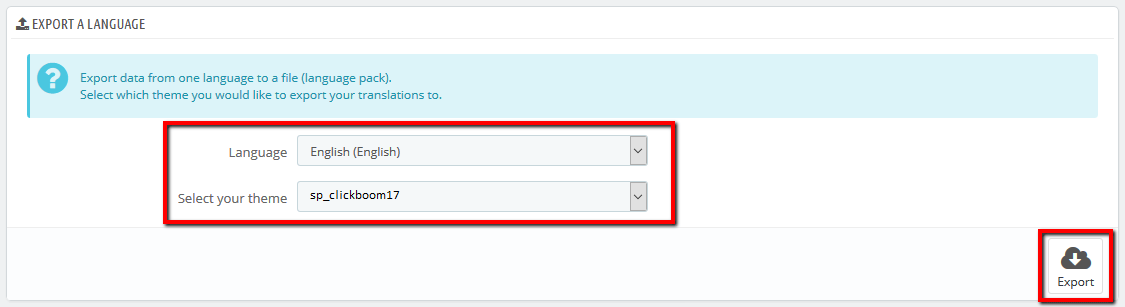
2. Export Language
Step 1:
- In the Prestashop Admin Panel, navigate to IMPROVE >> International >> Translations (Same Add new Language)
Step 2:
- At here, Scroll to block "Export a Language"
- Then, Select Language and Your theme that you want Export, and click button "Export"
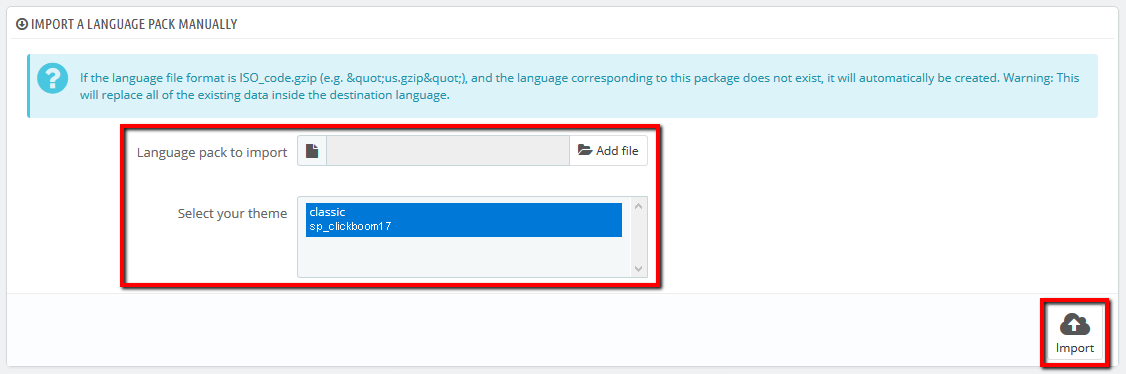
3. Import Language
Step 1:
- In the Prestashop Admin Panel, navigate to IMPROVE >> International >> Translations (Same Add new Language)
Step 2:
- At here, Scroll to block "Import a language pack manually"
- Then, click button "Add file" and choose file language and select your theme, and click button "Import"
4. Management Language
Step 1:
- In the Prestashop Admin Panel, navigate to IMPROVE >> International >> Localization, and choose tab "Languages"
- You can edit or delete language on your store
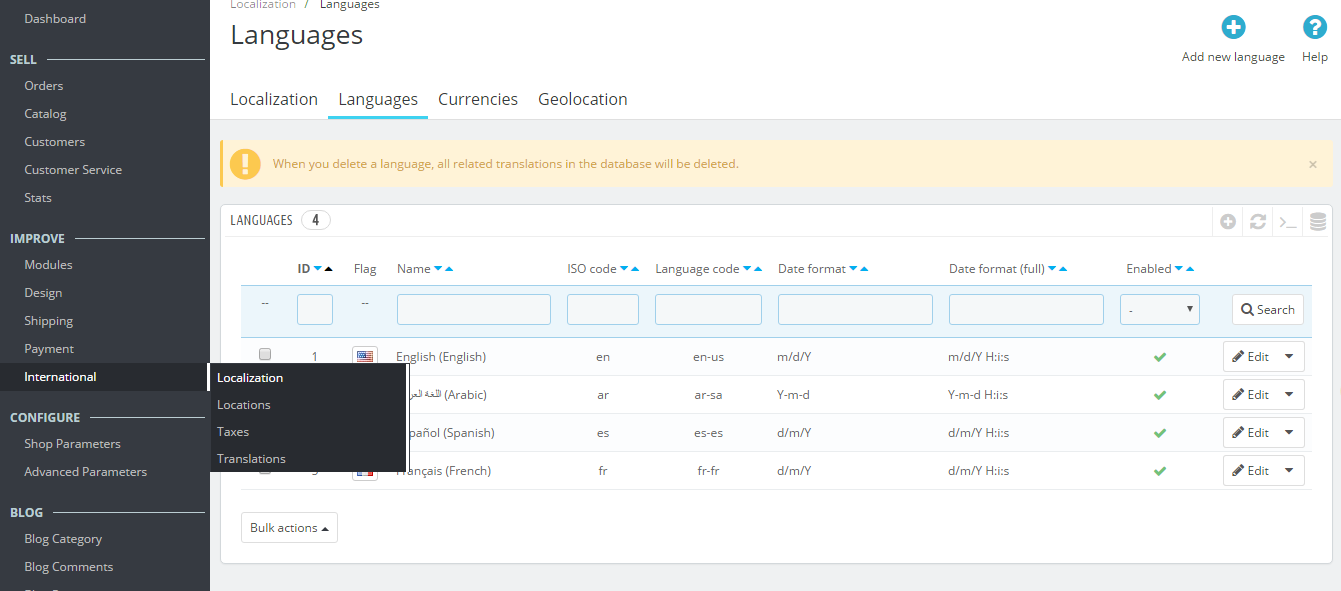
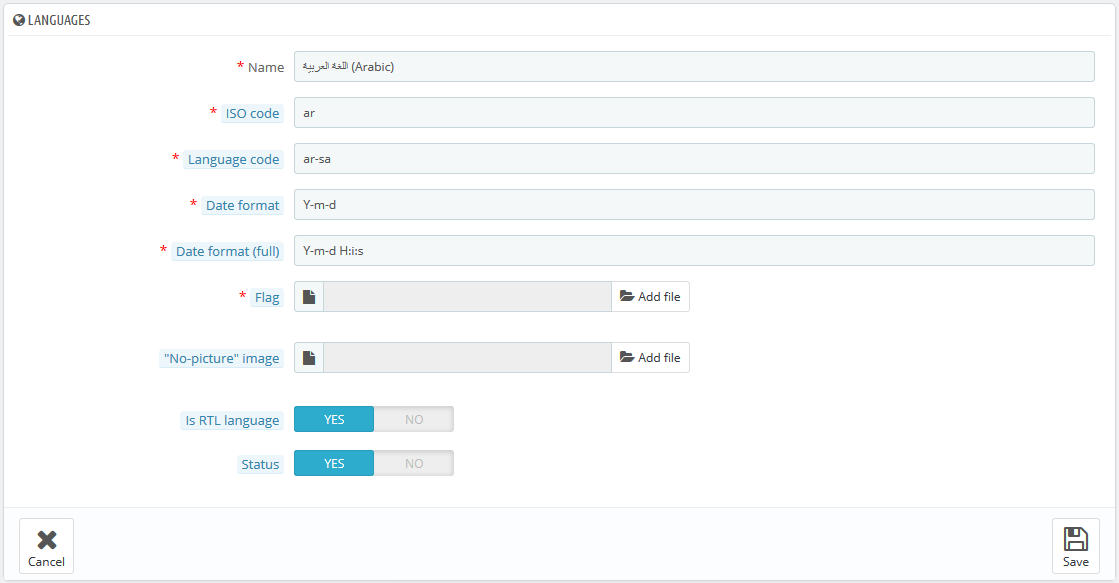
Step 2:
- If you want change language, click button "Edit".
Currencies
Management Currencies
Step 1:
- In the Prestashop Admin Panel, navigate to IMPROVE >> International >> Localization, and choose tab "Currencies"
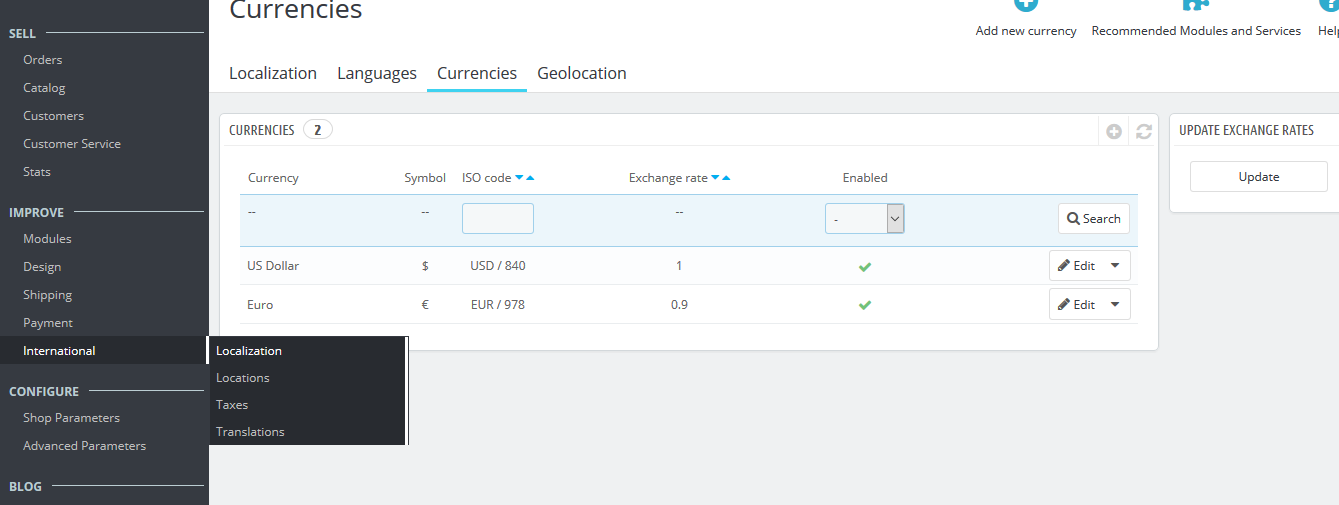
Step 2:
- In the "Currencies" configuration page, click button  in the right corner to “ADD NEW”.
Step 3:
You could configure this module like the illustration
Translation
Management Translation
1. Translations Theme
Step 1:
- In the Prestashop Admin Panel, navigate to IMPROVE >> International >> Translations (Same Add new Language)
Step 2:
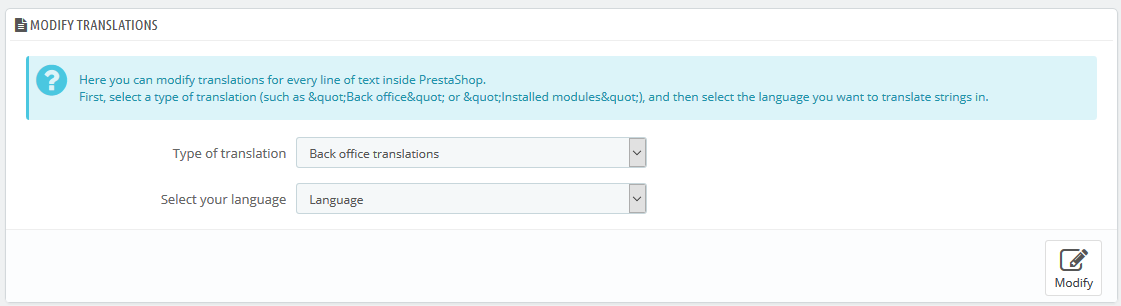
- In the "Translations" configuration page, scroll to block "MODIFY TRANSLATIONS"
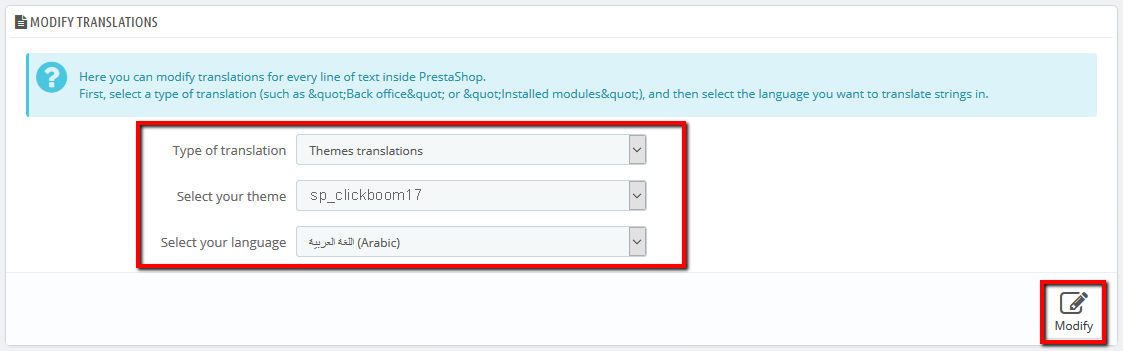
- In the block "MODIFY TRANSLATIONS".
- Choose "Type of translation" is "Theme translations"
- Choose "Select your theme" is your theme you want translated.
- Select your language you want translated
- Then click button "Modify"
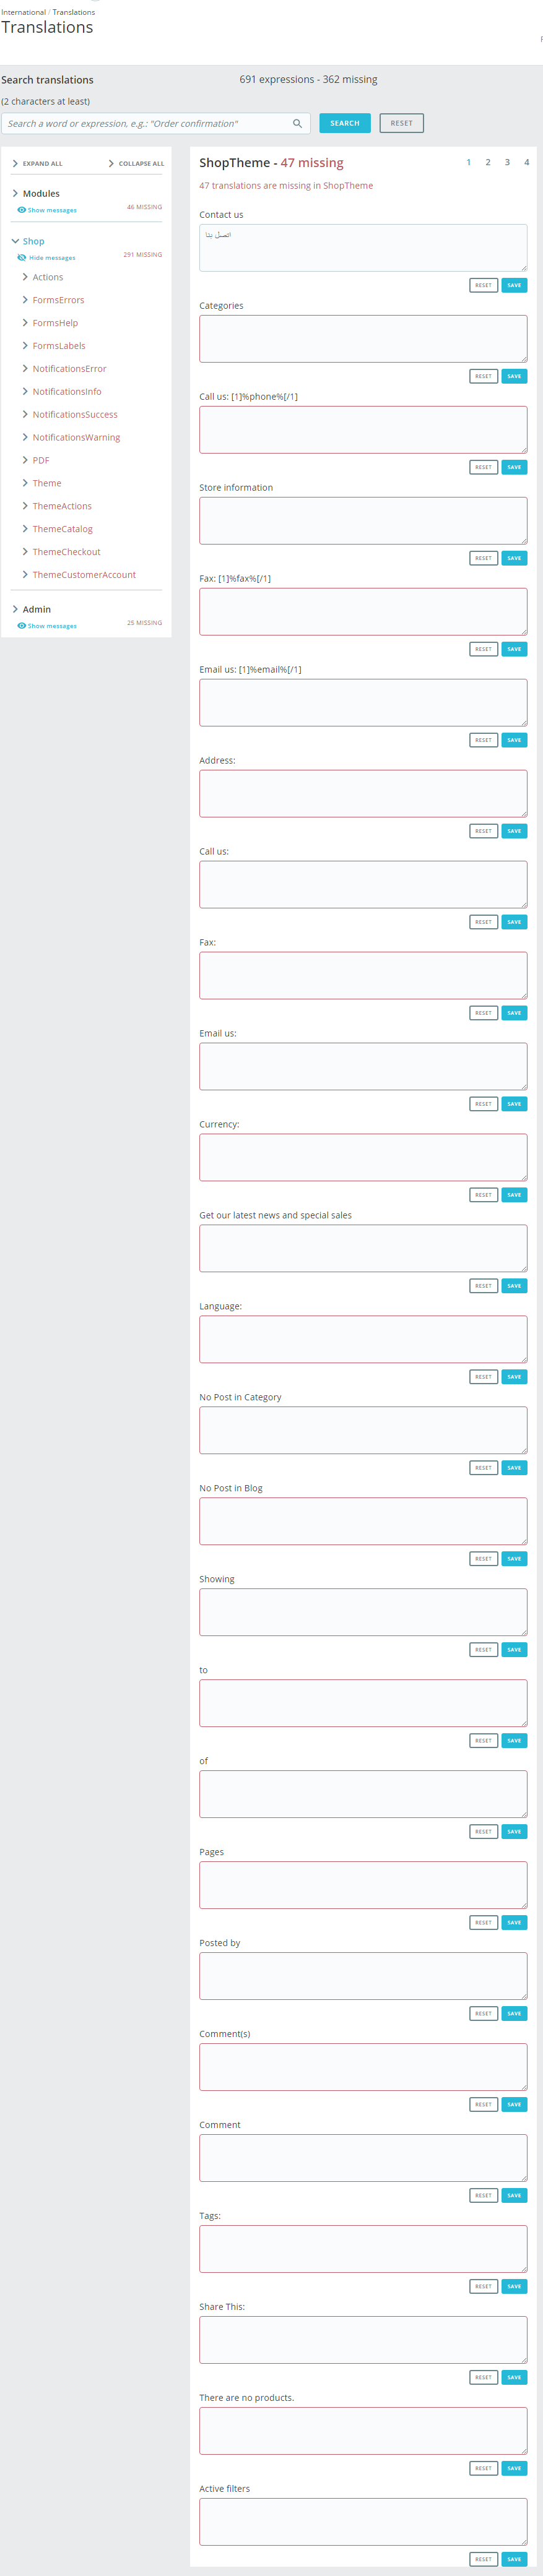
- Here, you can translate the text in the theme.
2. Translations Modules
Step 1:
- In the Prestashop Admin Panel, navigate to IMPROVE >> International >> Translations (Same Add new Language)
Step 2:
- In the "Translations" configuration page, scroll to block "MODIFY TRANSLATIONS"
- In the block "MODIFY TRANSLATIONS".
- Choose "Type of translation" is "Installed modules translations"
- Choose "Select your module" is your module you want translated.
- Select your language you want translated
- Then click button "Modify"
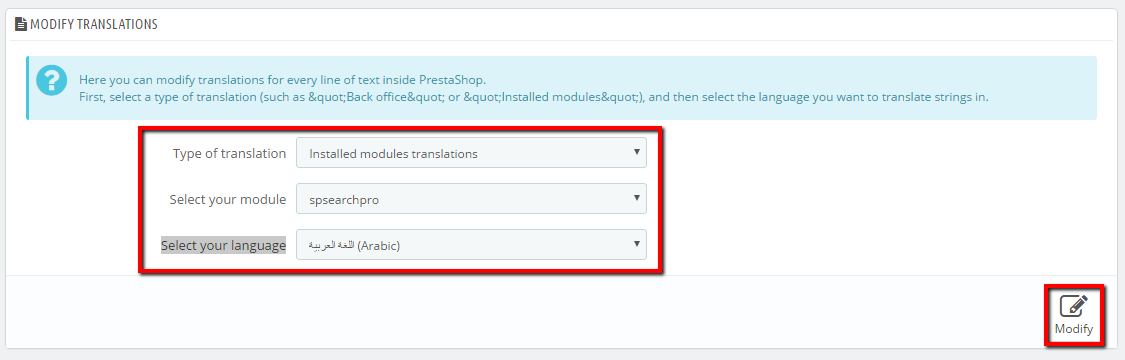
- Here, you can translate the text in the module.

Custom Codes
Custom Codes
1. In your Prestashop Admin Dashboard, navigate to IMPROVE >> Modules >> Modules and Services >> go to Installed modules section, search for “SP Theme Configuration” module then click on Configure.
2. In the SP Theme Settings, choose "Custom Codes" to configure the parameters in this section. After finishing, you could go to the front-end to view the changes.
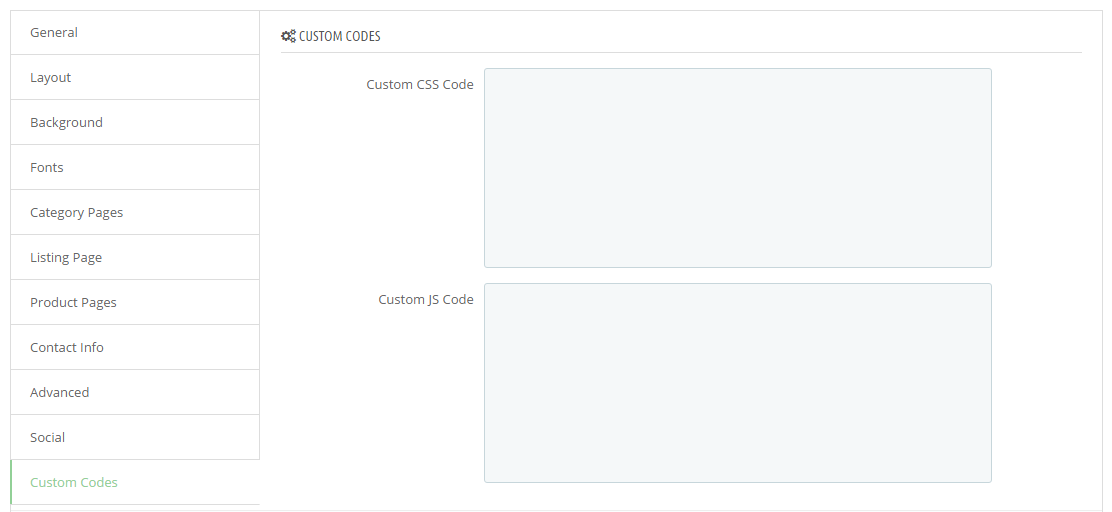
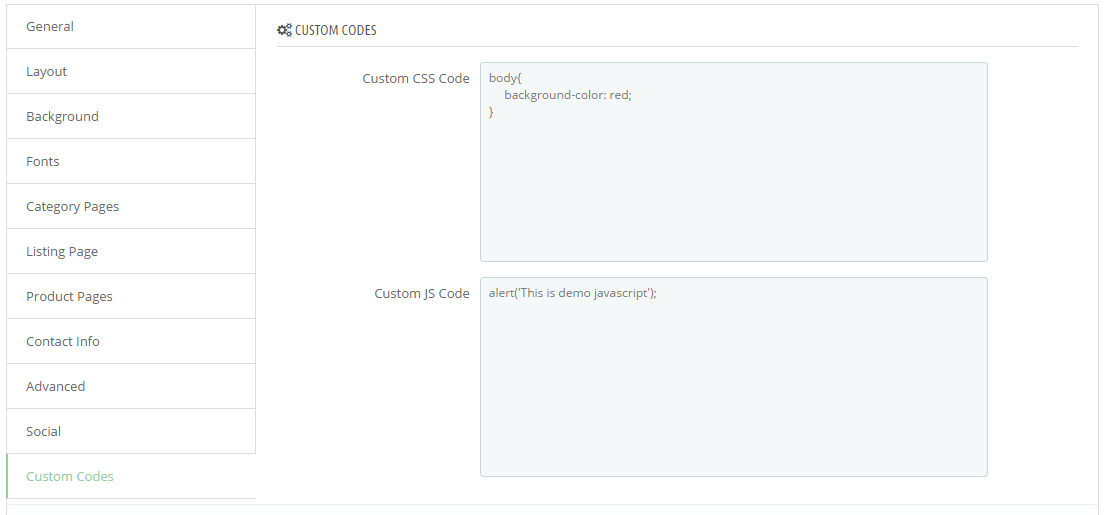
- You can input css or javascript.
Examples code css
body{
	background-color: red;
}
Examples code Javascript
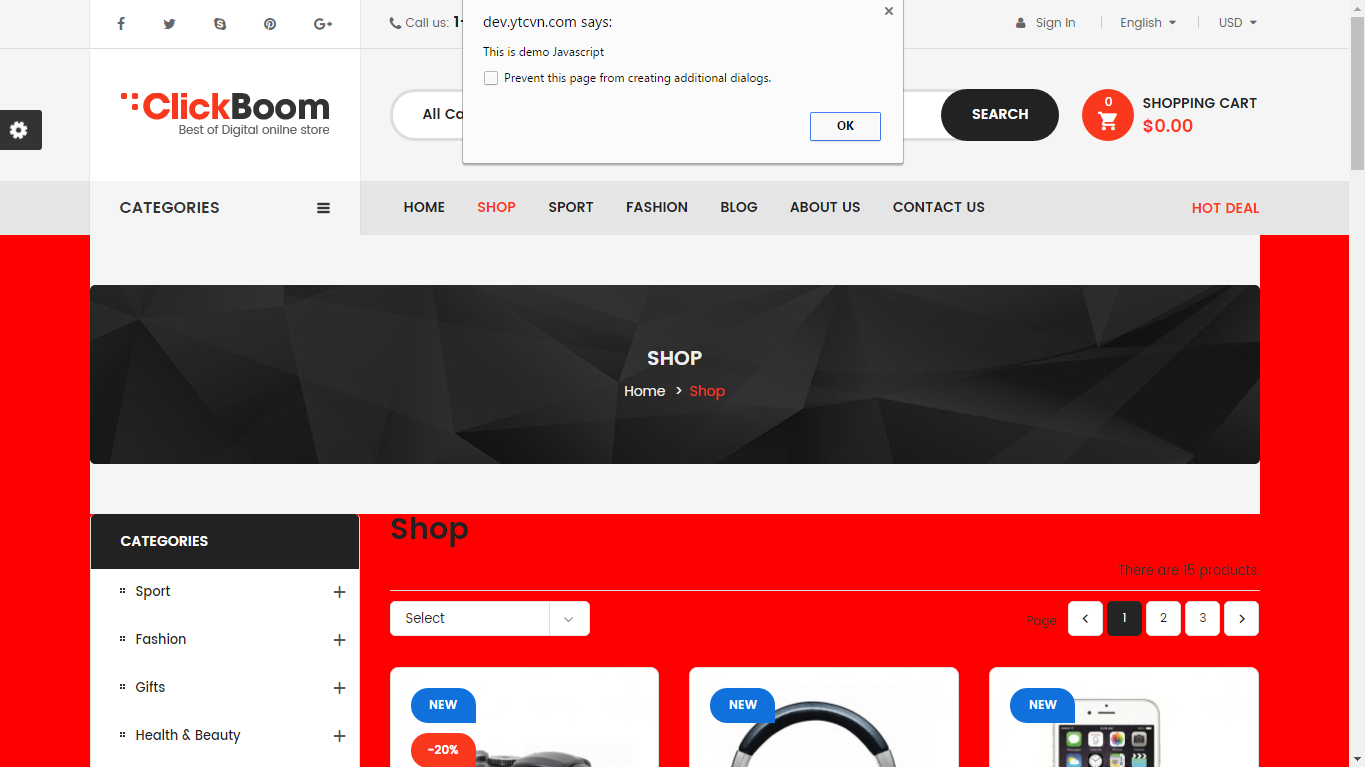
alert('This is demo javascript');
Frontend Appearance
Customize CSS
Customize CSS
- In your Prestashop Admin Dashboard, navigate to IMPROVE >> Modules >> Modules and Services >> go to Installed modules section, search for “SP Theme Configuration” module then click on Configure.
- In the SP Theme Settings, choose “Advanced” to configure the parameters in this section. After finishing, you could go to the front-end to view the changes.
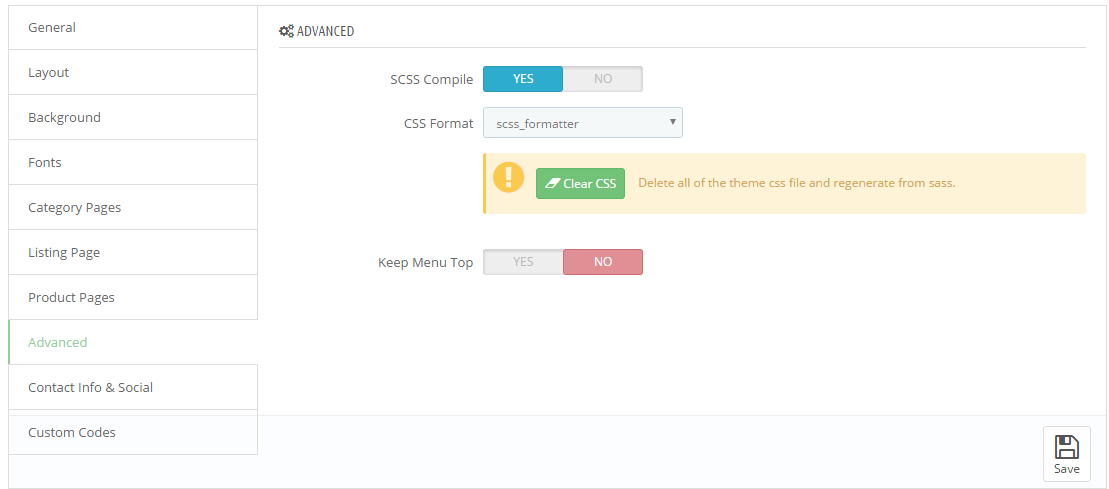
1. SCSS Compile
- Active: The system will automatically compile into CSS from SCSS when you refresh the website
Note: System will change css file theme-...css. Ex: theme-ff0000.css
Do not edit css file when active SCSS Compile
2. CSS Format
Css formatting after compile from sass.
- scss_formatter: Css Normal
- scss_formatter_nested: Css Nested
- scss_formatter_compressed: Css Compressed
3. Keep Menu Top
- Param for Float header. You can use float header.
- Header always display on top when scroll.
Frontend Appearance
Edit file CSS
There are two instances to edit css file via ftp.
- SCSS Compile: Disable
- SCSS Compile: Enable
1. SCSS Compile: Disable
- You can edit css file of modules.
Example: "../themes/sp_clickboom 17/modules/spcustomhtml/views/css/style.css"
- You can edit css file of theme.
Example:
+) "../themes/sp_clickboom 17/assets/css/theme-0083c1.css"
+) "../themes/sp_clickboom 17/assets/css/theme.css"
2. SCSS Compile: Enable
- You can edit css file of modules. (Sample as Disable)
Note: The system will generate css file "theme-0083c1.css, theme-{color code}.css"
Your changes to this file will be lost
- You must edit file "*.scss" in the folder "_dev/css"
Example: "../themes/sp_clickboom 17/_dev/css/themestyles/_content.scss"
Update Prestashop
Updating PrestaShop
- New versions of PrestaShop come every few months, sometimes even weeks apart. Some are major, most are minor, but they all bring a slew of innovations, improvements and bug fixes. It is therefore highly advised to keep up with the latest version.
- There are two ways to upgrade PrestaShop 1.7:
Changelog
Changelog
Click here to view changelog.