This document is for SM Agood Magento Version 2.4.x
Firstly, a huge thanks for purchasing this theme, your support is truly appreciated!
This document covers the installation and use of this theme, reveals some answers to common problems and issues. We encourage you to read throughout this document if you are experiencing any difficulties. If you have any questions that are beyond the scope of document, please feel free to contact us via our Support Tickets System.
Note: This theme has versions for Magento 1.9.x, 2.2.x, 2.3.x and Magento 2.4.x.
| Version | Userguide |
|---|---|
| SM agood Magento Version 2.1.x-2.3.x | Please click Here to view |
| SM agood Magento Version 2.4.x | Please click Here to view |
1 SYSTEM REQUIREMENT
At the basic level, this theme will require the following conditions:
2INSTALLATION
As of Magento 2.4.0, MySQL is no longer used for search. You must use Elasticsearch. Magento supports Elasticsearch 7.6.x.
(Magento no longer supports Elasticsearch 2.x, 5.x, and 6.x.)
There are two ways to install a Magento Theme:
- Quickstart Installation: Suitable if you have your first installation and want to get a whole new fresh site as our Demo.
- Manual Installation (including Theme Installation): Suitable if your store is full with content that you donai??i??t want to overwrite.
2.1 Quickstart Installation:
Magentech provides SM Quickstart package for each theme which aims to ease the installation for users. If you plan to start your site from the beginning, it will help you save much time of installing and configuring. Please follow steps below:
Important: You must use the command line to install Magento 2.4+.
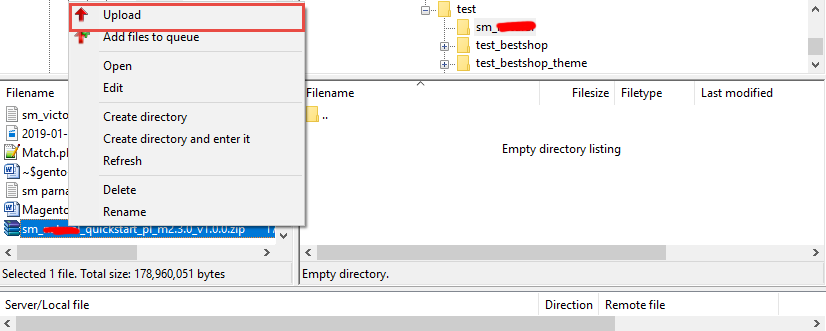
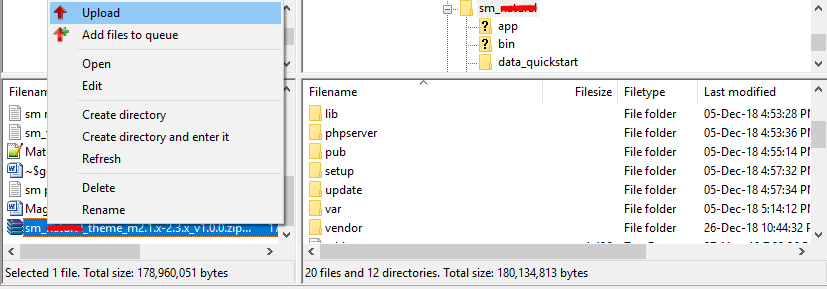
- Step 1: Download the quickstart package named as sm_agood_quickstart_pl_m2.4.0_v2.0.0
- Step 2: Upload and Extract the whole Quickstart package to your server. In Quickstart folder you will see the extracted folder that include all sample data
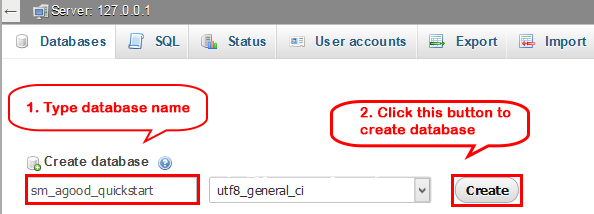
- Step 3: Create a Database for your Magento site
Important!
You need to remember the database name to use in the next steps
- Step 4: Import database sample_data.sql under the folder sm_agood_quickstart_pl_m2.4.0_v2.0.0\data_quickstart
Note: You can import database by run this command
mysql -u root -p database_name < sample_data.sql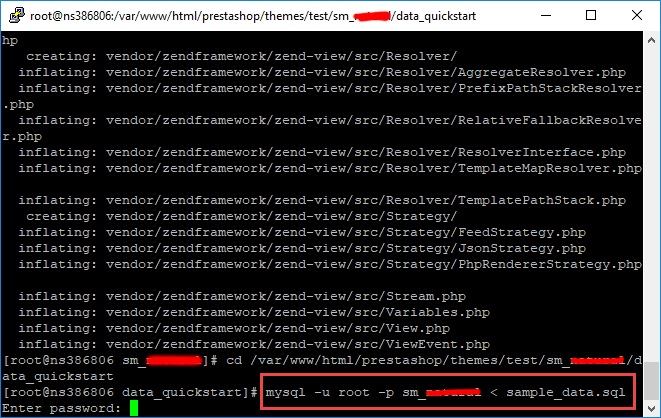
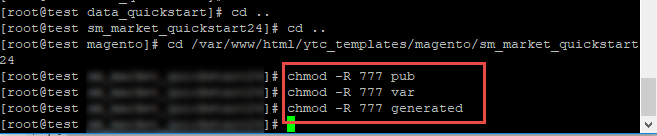
Note: After that please go to folder root and run these command to permissions:chmod -R 777 pub
chmod -R 777 generated
chmod -R 777 var
- Step 5: Install Magento
This example assumes that the Magento install directory is named
sm_agood, the db-host is on the same machine (localhost), and that the db-name, db-user, and db-password are allmagento:php bin/magento setup:install --base-url=http://192.168.1.220/ytc_templates/magento/sm_agood --base-url-secure=https://192.168.1.220/ytc_templates/magento/sm_agood --db-host=localhost --db-name=magento --db-user=magento --db-password=magento --admin-firstname=admin --admin-lastname=admin --admin-email=admin@admin.com --admin-user=admin --admin-password=admin123 --language=en_US --currency=USD --timezone=America/Chicago --use-rewrites=1 --backend-frontname="admin" --search-engine=elasticsearch7 --elasticsearch-index-prefix=agood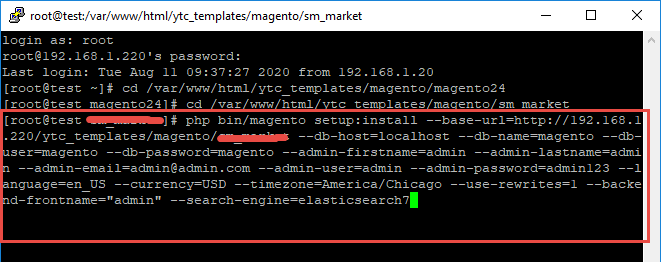
Messages similar to the following display to indicate a successful installation:
Post installation file permissions check...
For security, remove write permissions from these directories: '/var/www/html/ytc_templates/magento/sm_agood/app/etc'
[Progress: 274 / 274] [SUCCESS]: Magento installation complete.
[SUCCESS]: Admin Panel URI: /admin_puu71qNote: You can customize the Admin URI with the
--backend-frontnameoption. However, we recommend omitting this option and allowing the installation command to automatically generate a random URI. A random URI is harder for hackers or malicious software to exploit. The URI displays in your console when installation is complete. - Step 6: Can't login to admin panel
When you login to admin will be display like this image:
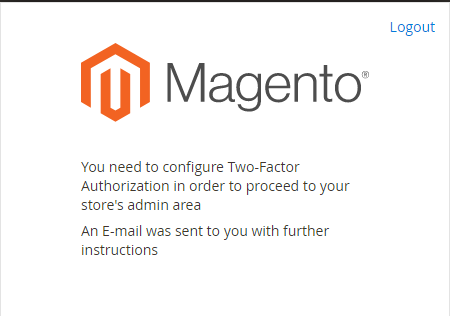
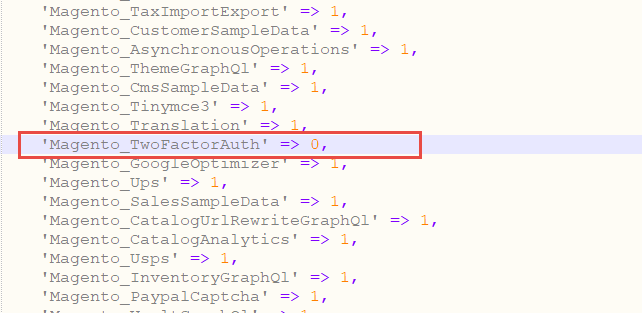
Please open file
app/etc/config.phpand change 'Magento_TwoFactorAuth' => 1 to 'Magento_TwoFactorAuth' => 0
After that run these command:php bin/magento setup:upgrade
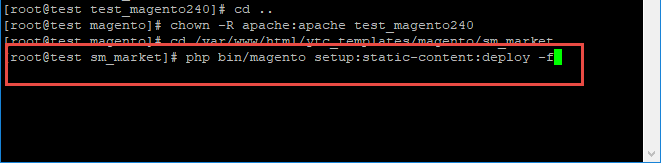
andphp bin/magento setup:static-content:deploy -f - Step 7: Finally, permissions for the following folders by run these commands:
chmod -R 777 pub
chmod -R 777 generated
chmod -R 777 var
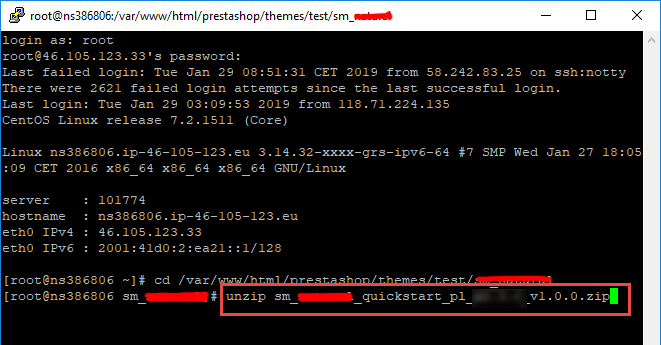
After upload quickstart package, please extract package by this command: unzip file.zip
2.2 Manual Installation
Important!
- We recommend you to duplicate your live store on a development store and try installation on it in advance.
- Backup magento files and the store database.
It's very important to backup all of themes and extensions in Magento before installation, especially when you are working on a live server. We strongly recommend you to do not omit this step.
- Note: Manual Installation can only import CMS Page and Static Block. Products, Categories, Megamenu may not display when you use Manual Installation, you need to configure manually (by yourself >> please read documentation carefully)
- Step 1: Download Magento 2.4.x
https://magento.com/tech-resources/downloadand install on your server - Step 2: Please download 'sm_agood_theme_m2.1.x-2.4.x_v2.0.0.zip' file and upload to the root of your magento site folder on your server, after that unzip by command
unzip name_file.zip.
- Step 3:
Active SM Extensions, open command line in folder root of magento and run commands via ssh using putty or othersphp bin/magento setup:upgrade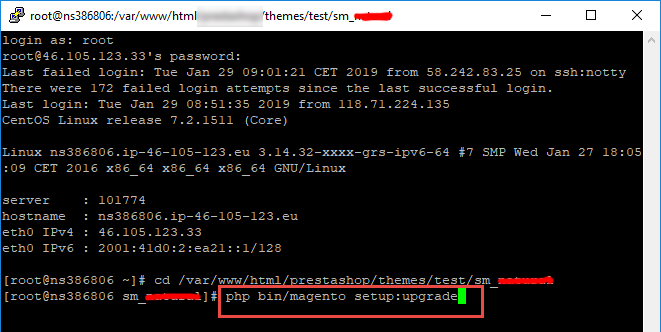
- Step 5:
Navigate to Content > Design > Configuration > Edit Default Store > Select "SM agood" theme.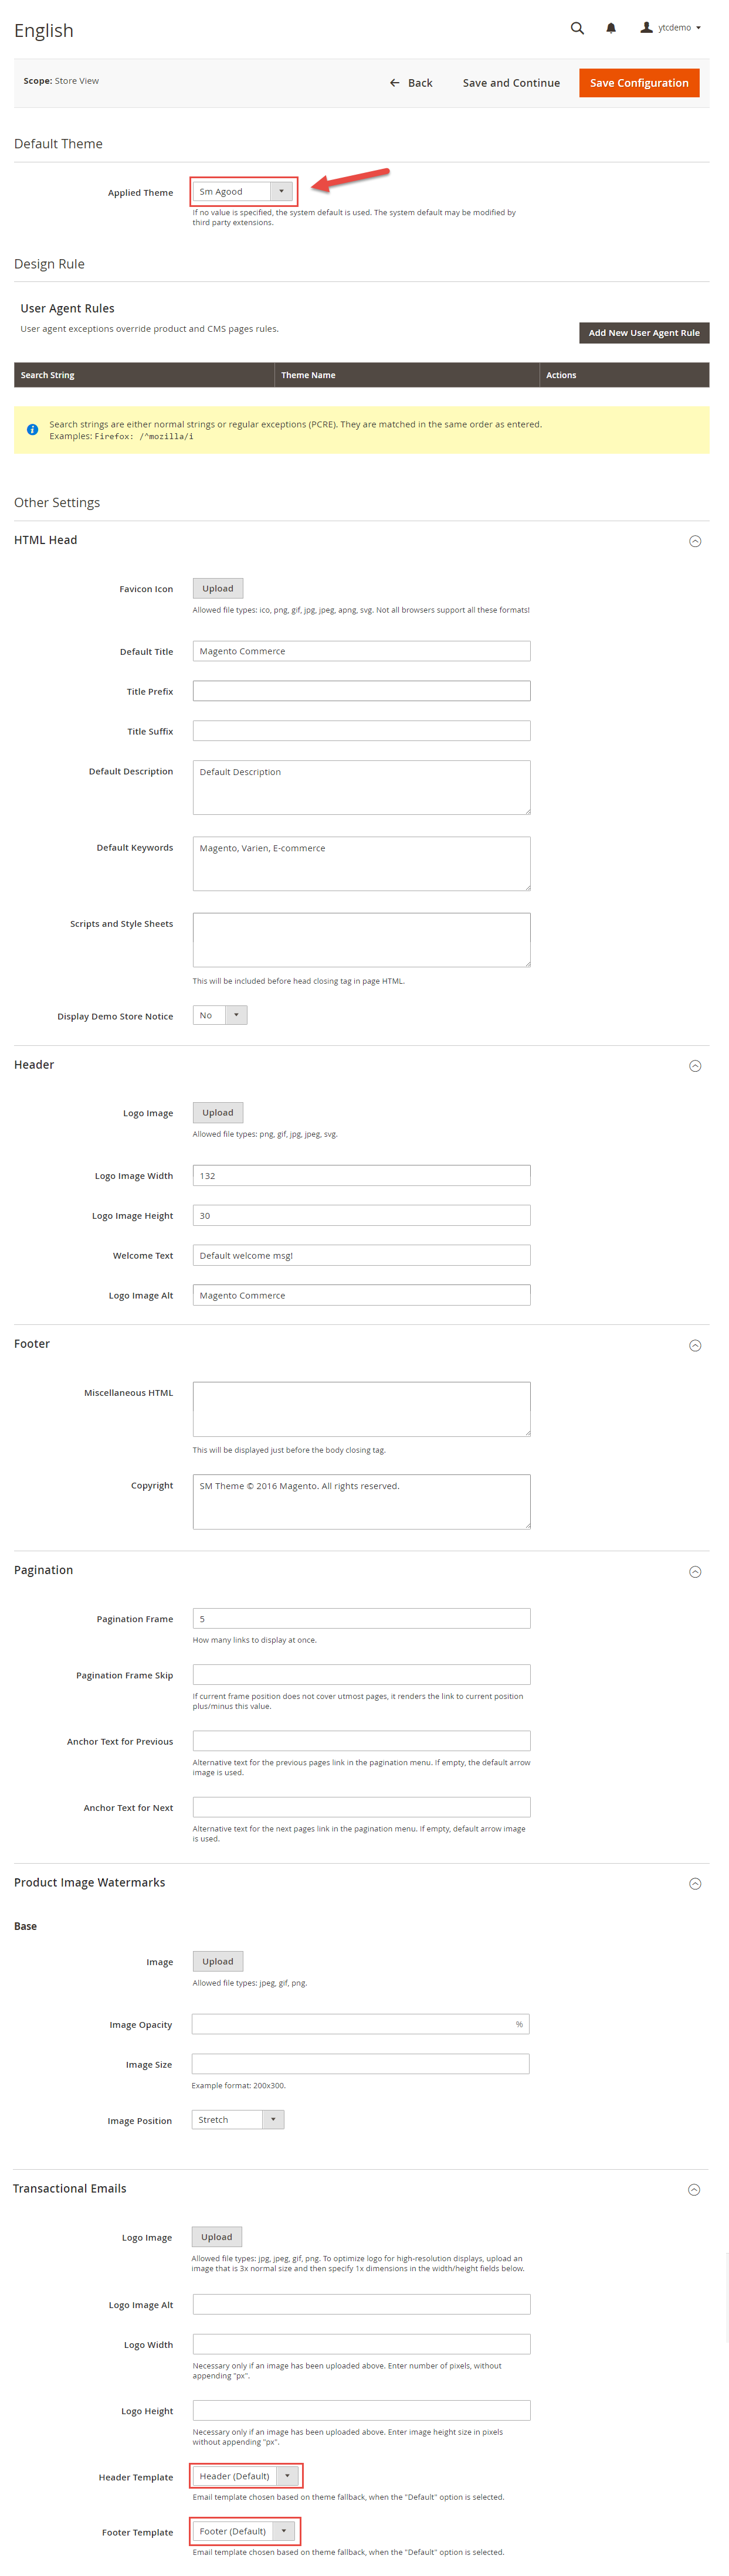
- Step 6: Click "Save Configuarion" button to save your changes.
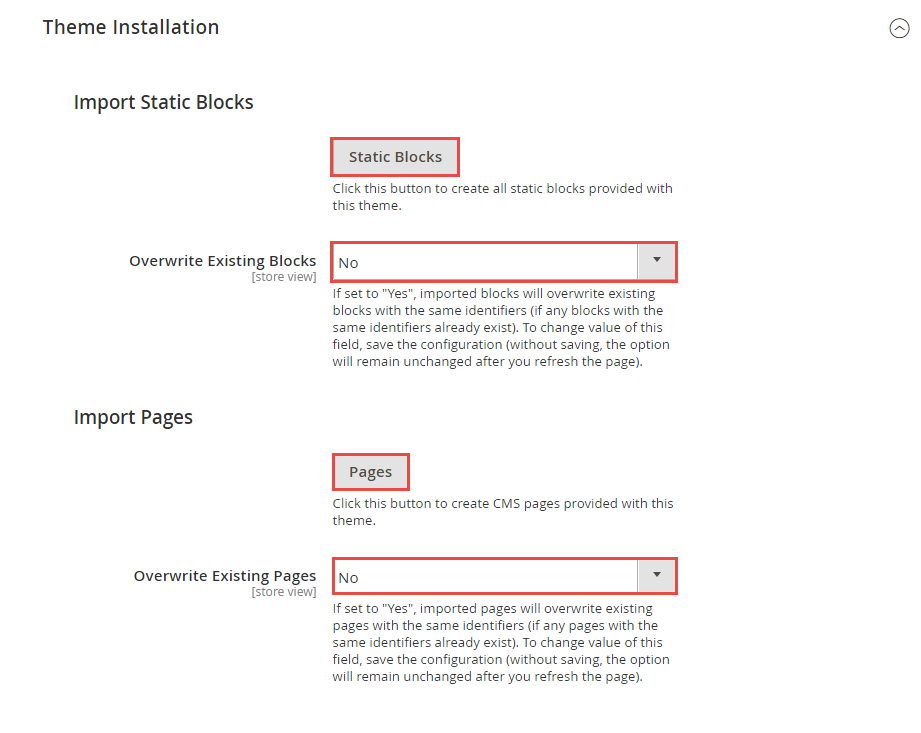
- Step 7: Navigate to Stores>> Settings>> Configuration >> MAGENTECH.COM >> Sm agood >> Theme Installation. Press the buttons named 'Static Blocks' and 'Pages' to import all default blocks and pages. Click "Save Configuarion" button to save your changes.
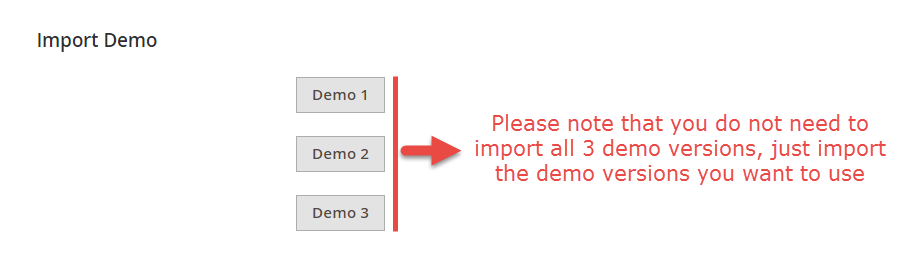
- Step 8: Click "Demo X" button to install demo version that you prefer to install. After that, click "Save config" button on the top.
- Step 9: Flush Cache: After successfully import your demo, save Theme Settings and Design Settings and clear the cache by using this command as php bin/magento cache:flush
in Command Prompt. Or you could go to System >> Tools >> Cache Management, click 'Flush Cache Storage' button to flush all the cache.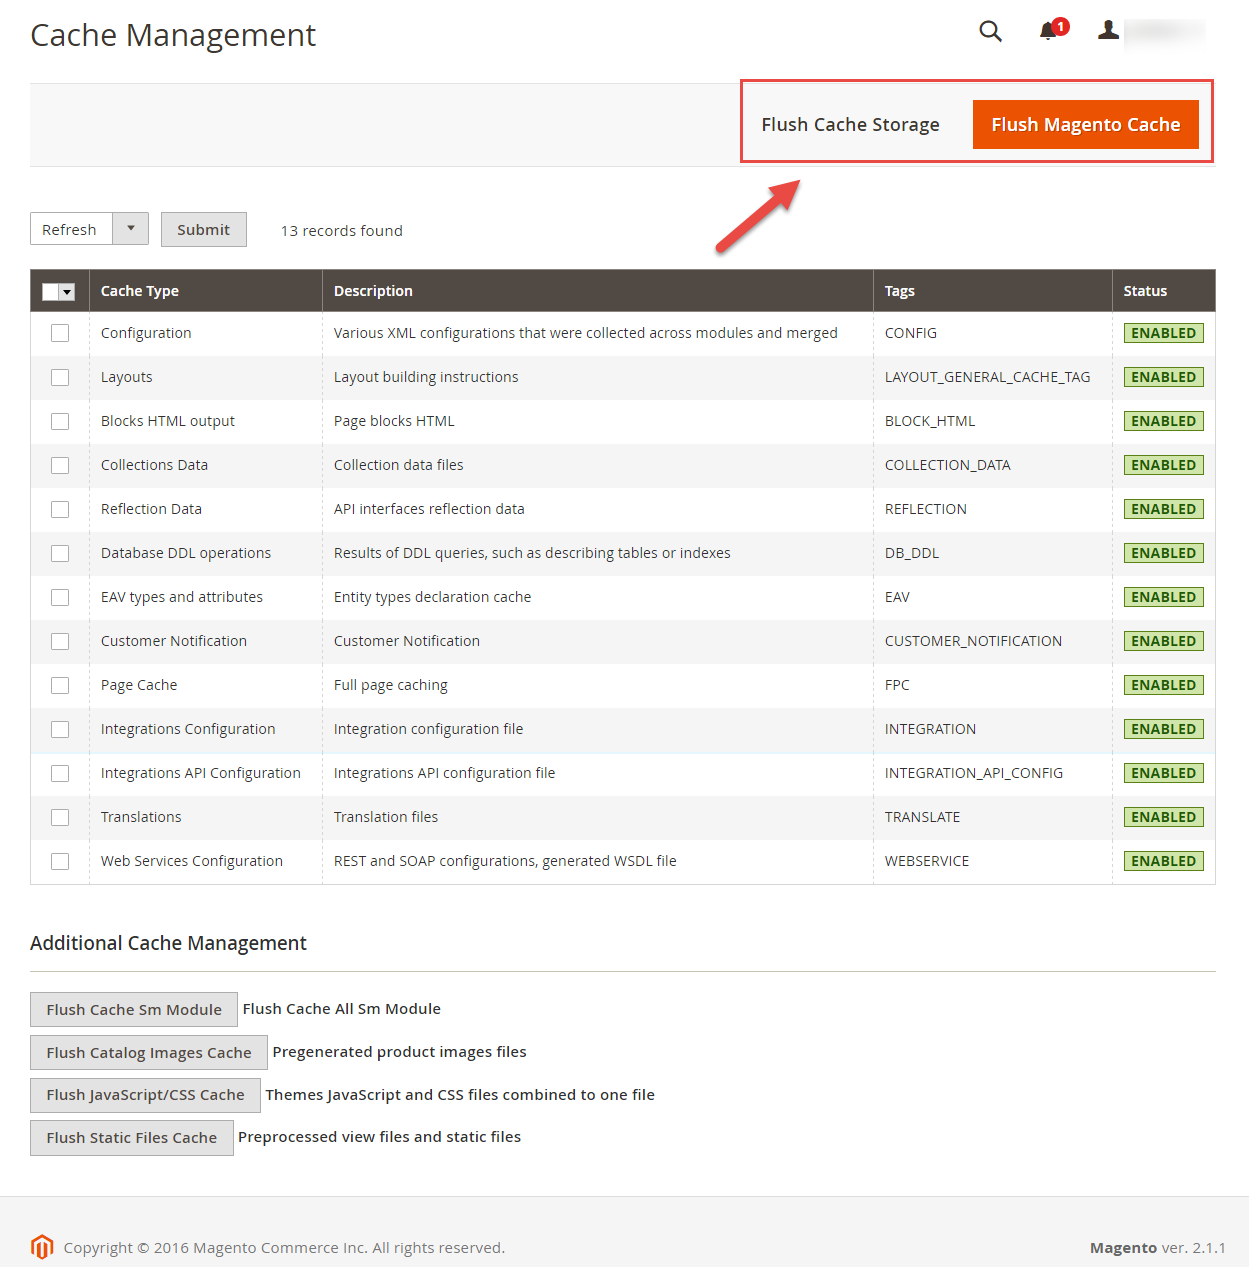
Step 4: Run deploy command: php bin/magento setup:static-content:deploy -f
chmod -R 777 pub
chmod -R 777 generated
chmod -R 777 var
Note. Please remember that: If you have imported these Static Blocks, Pages successfully, you would have all blocks and pages provided with this theme and you do not need to create any static blocks or pages manually as the following instruction of this document.
3.1 Page Configuration
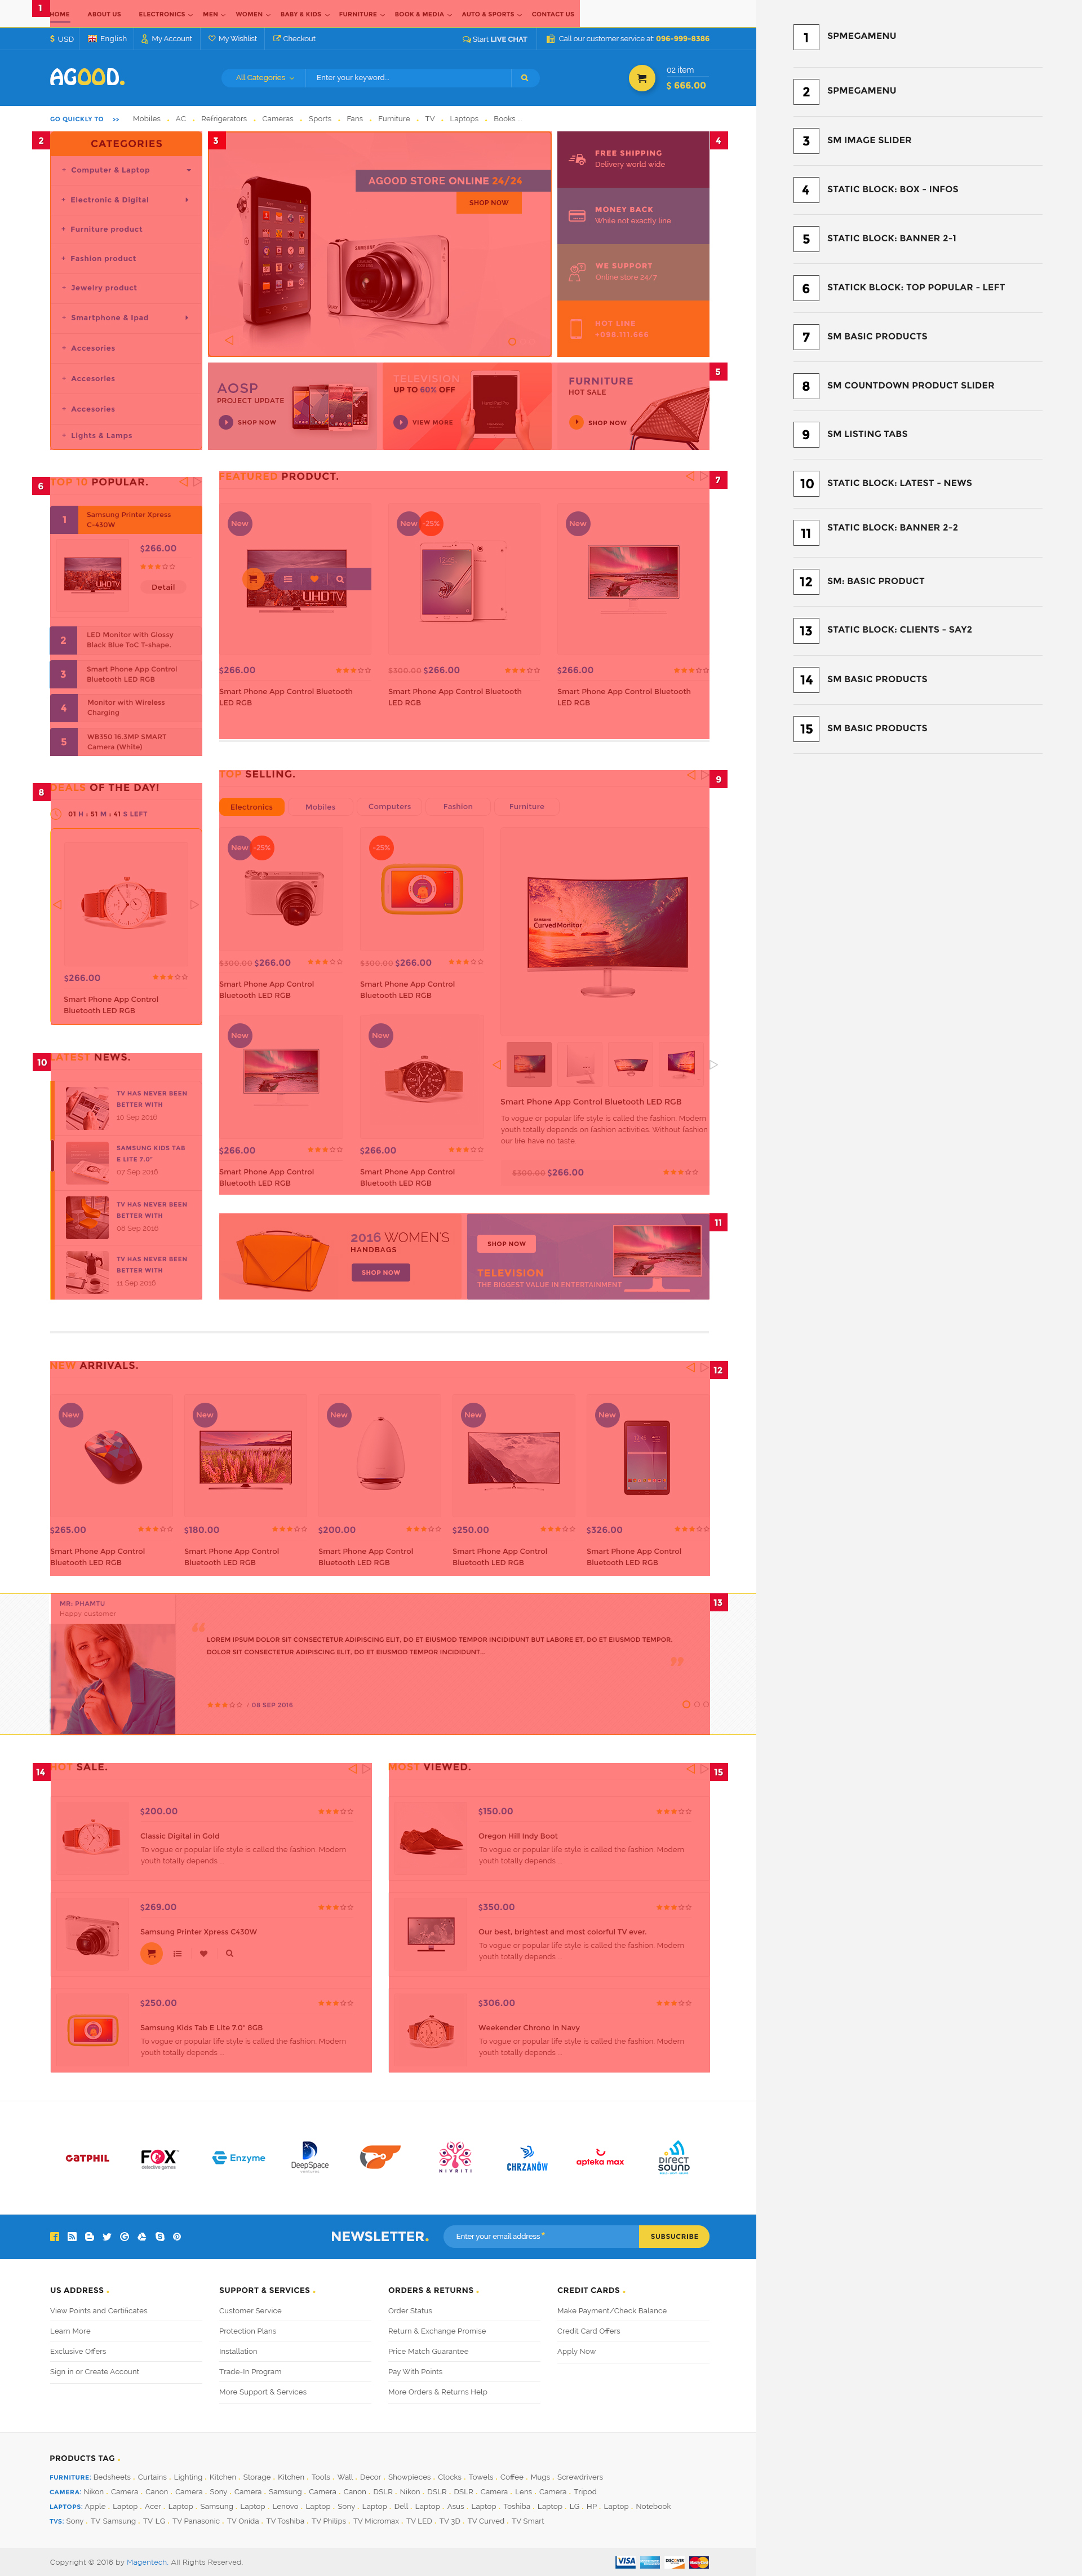
3.1.1 Home Style 1
Frontend of Home Style 1 - Layout Position
In the Admin Panel, please navigate to Content >> Elements >> Pages to create a new page in Pages section.
- Backend Setting: Please click Here to view.
- Copy and paste the following code into the Content field:
<div class="home-default homestyle1">{{block class="Magento\\Cms\\Block\\Block" block_id="quick-access"}}
<div class="row">
<div class="col-lg-9 col-md-9">{{block class="Sm\ImageSlider\Block\ImageSlider" template="Sm_ImageSlider::default.phtml"}}
<div class="countdown-w">{{block class="Sm\CountdownProductSlider\Block\CountdownProductSlider" name="countdownproductslider.default" as="countdownproductslider_default" template="Sm_CountdownProductSlider::default.phtml"}}</div>
{{block class="Magento\\Cms\\Block\\Block" block_id="banner-home1-1"}}</div>
<div class="col-lg-3 col-md-3">{{block class="Magento\\Cms\\Block\\Block" block_id="box-infos"}}
<div class="collection-cates">{{block class="Sm\Categories\Block\Categories" name="categories" as="categories" template="Sm_Categories::default.phtml"}}</div>
</div>
</div>
<div class="box-content-w">{{block class="Sm\ListingTabs\Block\ListingTabs" name="listingtabs.default" as="listingtabs_default" template="Sm_ListingTabs::default.phtml"}}</div>
<div class="box-content-w">
<div class="row">
<div class="col-lg-6 col-md-6 col-sm-12 col-sx-12">{{block class="Sm\BasicProducts\Block\BasicProducts" template="Sm_BasicProducts::product-accor-slider.phtml" title="<span>Top 10</span> Popular." product_limitation="10" product_description_display="1"}}</div>
<div class="col-lg-6 col-md-6 col-sm-12 col-sx-12">{{block class="Magento\\Cms\\Block\\Block" block_id="banner-home1-2"}}</div>
</div>
</div>
<div class="slider-products-w box-content-w">
<div class="row">
<div class="col-lg-6 col-md-6 col-sm-12 col-sx-12">{{block class="Sm\BasicProducts\Block\BasicProducts" template="Sm_BasicProducts::slider-home1.phtml" title="<span>Hot</span> Sale." product_order_by="best_sales" nb_column1="1" nb_column2="1" nb_column3="1" nb_column4="1" product_description_display="1" nb_rows="3"}}</div>
<div class="col-lg-6 col-md-6 col-sm-12 col-sx-12">{{block class="Sm\BasicProducts\Block\BasicProducts" template="Sm_BasicProducts::slider-home1.phtml" title="<span>Viewed</span> Products." product_order_by="most_viewed" nb_column1="1" nb_column2="1" nb_column3="1" nb_column4="1" product_description_display="1" nb_rows="3"}}</div>
</div>
</div>
<div class="box-content-w">{{block class="Magento\\Cms\\Block\\Block" block_id="block-blog"}}</div>
<div class="full-wrapper clients-say-wrap">{{block class="Magento\\Cms\\Block\\Block" block_id="clients-say"}}</div>
</div>
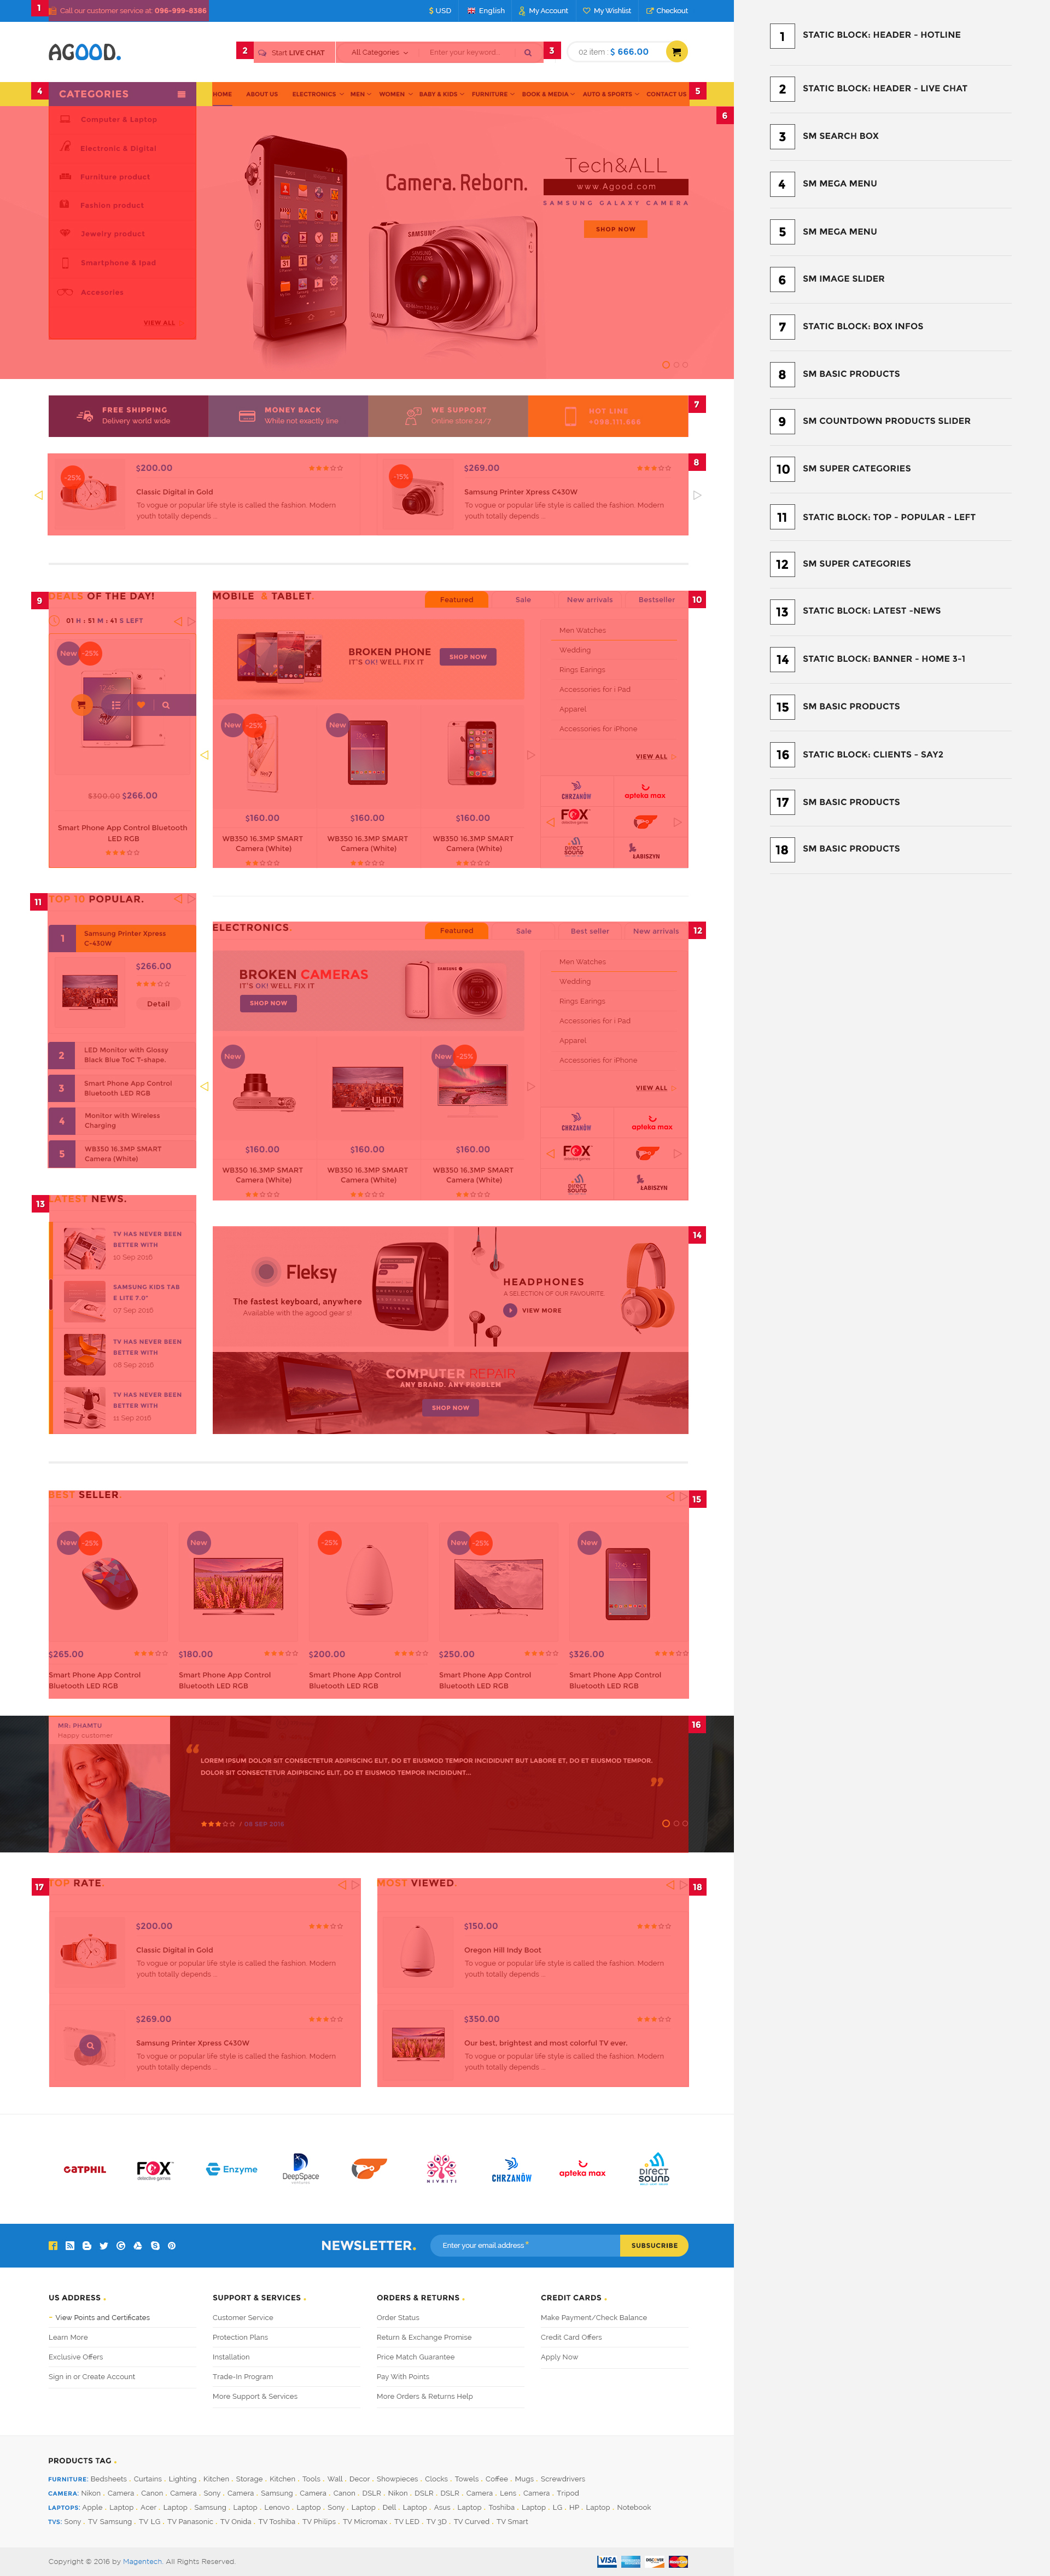
3.1.2 Home Style 2
Frontend of Home Style 2 - Layout Position
In the Admin Panel, please navigate to Content >> Elements >> Pages to create a new page in Pages section.
- Backend Setting: Please click Here to view.
- Copy and paste the following code into the Content field:
<div class="homestyle2">{{block class="Magento\\Cms\\Block\\Block" block_id="quick-access"}}
<div class="row">
<div class="col-lg-3 col-md-4 col-sm-12 col-xs-12 content-left">
<div class="vertical-menu-title">Categories</div>
{{block class="Magento\\Cms\\Block\\Block" block_id="vertical-menu-config"}}</div>
<div class="col-lg-9 col-md-8 col-sm-12 col-xs-12 content-right">{{block class="Sm\ImageSlider\Block\ImageSlider" template="Sm_ImageSlider::default.phtml"}} {{block class="Magento\\Cms\\Block\\Block" block_id="box-infos"}}
<div class="banner-home-w">{{block class="Magento\\Cms\\Block\\Block" block_id="banner2-1"}}</div>
</div>
</div>
<div class="main-content">
<div class="row">
<div class="col-lg-3 col-md-4 col-sm-12 col-xs-12">{{block class="Magento\\Cms\\Block\\Block" block_id="top-popular-left"}}
<div class="countdown-w">{{block class="Sm\CountdownProductSlider\Block\CountdownProductSlider" name="countdownproductslider.default" as="countdownproductslider_default" template="Sm_CountdownProductSlider::default.phtml" nb_column1="1" nb_column2="1" nb_column3="1" nb_column4="1" nb_column5="1"}}</div>
{{block class="Magento\\Cms\\Block\\Block" block_id="latest-news"}}</div>
<div class="col-lg-9 col-md-8 col-sm-12 col-xs-12">
<div class="slider-basic-w">{{block class="Sm\BasicProducts\Block\BasicProducts" template="Sm_BasicProducts::slider-home2.phtml" title="<span>Featured</span> products." product_order_by="top_rating" nb_column1="3" nb_column2="3" nb_column3="3" nb_column4="2" nb_column5="1" product_limitation="6"}}</div>
<div class="box-content-w">{{block class="Sm\ListingTabs\Block\ListingTabs" name="listingtabs.default" as="listingtabs_default" template="Sm_ListingTabs::default.phtml"}}</div>
{{block class="Magento\\Cms\\Block\\Block" block_id="banner2-2"}}</div>
</div>
<div class="slider-basic-w box-content-w">{{block class="Sm\BasicProducts\Block\BasicProducts" template="Sm_BasicProducts::slider-home2-2.phtml" title="<span>New</span> Arrivals." product_order_by="created_at" nb_column1="5" nb_column2="4" nb_column3="3" nb_column4="2" nb_column5="1" product_limitation="10"}}</div>
<div class="full-wrapper clients-say-wrap">{{block class="Magento\\Cms\\Block\\Block" block_id="clients-say2"}}</div>
</div>
<div class="slider-products-w">
<div class="row">
<div class="col-lg-6 col-md-6 col-sm-12 col-sx-12">{{block class="Sm\BasicProducts\Block\BasicProducts" template="Sm_BasicProducts::slider-home1.phtml" title="<span>Hot</span> Sale." product_order_by="best_sales" nb_column1="1" nb_column2="1" nb_column3="1" nb_column4="1" product_description_display="1" nb_rows="3"}}</div>
<div class="col-lg-6 col-md-6 col-sm-12 col-sx-12">{{block class="Sm\BasicProducts\Block\BasicProducts" template="Sm_BasicProducts::slider-home1.phtml" title="<span>Viewed</span> Products." product_order_by="most_viewed" nb_column1="1" nb_column2="1" nb_column3="1" nb_column4="1" product_description_display="1" nb_rows="3"}}</div>
</div>
</div>
</div>
3.1.3 Home Style 3
Frontend of Home Style 3 - Layout Position
In the Admin Panel, please navigate to Content >> Elements >> Pages to create a new page in Pages section.
- Backend Setting: Please click Here to view.
- Copy and paste the following code into the Content field:
<div class="homestyle3">{{block class="Magento\\Cms\\Block\\Block" block_id="box-infos"}} {{block class="Sm\BasicProducts\Block\BasicProducts" template="Sm_BasicProducts::slider-home3.phtml" display_title="0" product_order_by="name" nb_column1="2" nb_column2="2" nb_column3="1" nb_column4="1" product_description_display="1"}} <div class="main-content"> <div class="row"> <div class="col-lg-3 col-md-3 col-sm-12 col-xs-12 content-left"> <div class="countdown-w">{{block class="Sm\CountdownProductSlider\Block\CountdownProductSlider" name="countdownproductslider.default" as="countdownproductslider_default" template="Sm_CountdownProductSlider::default.phtml" nb_column1="1" nb_column2="1" nb_column3="1" nb_column4="1" nb_column5="1"}}</div> {{block class="Magento\\Cms\\Block\\Block" block_id="top-popular-left"}} {{block class="Magento\\Cms\\Block\\Block" block_id="latest-news"}}</div> <div class="col-lg-9 col-md-9 col-sm-12 col-xs-12 content-right">{{block class="Sm\SuperCategories\Block\SuperCategories" name="supercategories" template="Sm_SuperCategories::default.phtml"}} <div class="super-cate2">{{block class="Sm\SuperCategories\Block\SuperCategories" name="supercategories" template="Sm_SuperCategories::default.phtml" product_category="74"}}</div> {{block class="Magento\\Cms\\Block\\Block" block_id="banner-home3-1"}}</div> </div> </div> <div class="slider-basic-w box-content-w">{{block class="Sm\BasicProducts\Block\BasicProducts" template="Sm_BasicProducts::slider-home2-2.phtml" title="<span>New</span> Arrivals." product_order_by="created_at" nb_column1="5" nb_column2="4" nb_column3="3" nb_column4="2" nb_column5="1" product_limitation="10"}}</div> <div class="full-wrapper clients-say-wrap">{{block class="Magento\\Cms\\Block\\Block" block_id="clients-say2"}}</div> <div class="slider-products-w"> <div class="row"> <div class="col-lg-6 col-md-6 col-sm-12 col-sx-12">{{block class="Sm\BasicProducts\Block\BasicProducts" template="Sm_BasicProducts::slider-home1.phtml" title="<span>Hot</span> Sale." product_order_by="best_sales" nb_column1="1" nb_column2="1" nb_column3="1" nb_column4="1" product_description_display="1" nb_rows="2"}}</div> <div class="col-lg-6 col-md-6 col-sm-12 col-sx-12">{{block class="Sm\BasicProducts\Block\BasicProducts" template="Sm_BasicProducts::slider-home1.phtml" title="<span>Viewed</span> Products." product_order_by="most_viewed" nb_column1="1" nb_column2="1" nb_column3="1" nb_column4="1" product_description_display="1" nb_rows="2"}}</div> </div> </div> </div> - Copy and paste the following code into the Layout Update XML field:
<referenceContainer name="columns.top_container">
	<block class="Sm\ImageSlider\Block\ImageSlider" name="imageslider" before="-" template="Sm_ImageSlider::default.phtml">
         </block>
</referenceContainer>
Note: Set Default Page
- To set a default page for your Magento Site, in the Admin Panel you go to Stores>> Settings >>Configuration>>Web>>Default Pages. Please click to see the Backend Setting.
- You need to change to the website / store view that you want to change (the dropdown menu in the upper left corner). You will probably have to create a new CMS page if you want to have something different from your default home page.
3.2 Configure Megamenu
- Step 1: Create a New Menu In Admin Panel, navigate to SM Megamenu >> Add New Menu (add group: "Mega Menu Horizontal", "Mega Menu Vertical".
- Step 2: Navigate to SM Megamenu >> Configuration & fill the ID number for the created menu in step 1
- Step 3: In order to add menu items, go to SM Megamenu >> Menu Manager >> click on 'Edit'to open Menu Items to add items as you want
3.2.1 Horizontal Megamenu:

- Sortable Categories Items Please click Here to view.
Features
Frontend Appearance 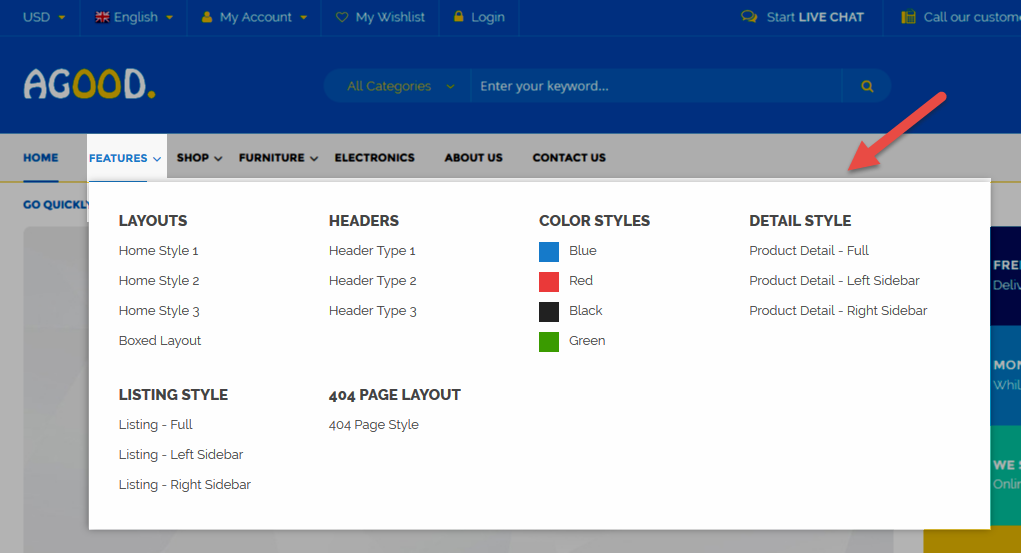
- Backend Setting: Please click Here to view.
- Backend Setting of 'Dropdown Features': Please click Here to view.
Copy and paste the following code into the Content field::
<div class="home-menu-dropdown">
	<ul class="item-home-store layout-home">
		<li class="title-menu-home">Layouts</li>
		<li><a title="Home Style 1" href="{{store url="?___store=default&___from_store=french"}}">Home Style 1</a></li>
		<li><a title="Home Style 2" href="{{store url="?___store=french&___from_store=default"}}">Home Style 2</a></li>
		<li><a title="Home Style 3" href="{{store url="?___store=german&___from_store=default"}}">Home Style 3</a></li>
		<li><a title="Boxed Layout" href="{{store url="?___store=somaliland&___from_store=default"}}">Boxed Layout</a></li>
	</ul>

	<ul class="item-home-store header-home">
		<li class="title-menu-home">Headers</li>
		<li><a title="Header Type 1" href="{{store url="?___store=default&___from_store=french"}}">Header Type 1</a></li>
		<li><a title="Header Type 2" href="{{store url="?___store=french&___from_store=default"}}">Header Type 2</a></li>
		<li><a title="Header Type 3" href="{{store url="?___store=german&___from_store=default"}}">Header Type 3</a></li>
	</ul>

	<ul class="item-home-store theme-color">
		<li class="title-menu-home">Color Styles</li>
		<li class="blue"><a title="Blue" href="{{store url="?___store=belgium&___from_store=default"}}">Blue</a></li>
		<li class="red"><a title="Red" href="{{store url="?___store=barbados&___from_store=default"}}">Red</a></li>
		<li class="black"><a title="Black" href="{{store url="?___store=vietnam&___from_store=default"}}">Black</a></li>
		<li class="green"><a title="Green" href="{{store url="?___store=andorra&___from_store=default"}}">Green</a></li>

	</ul>

	<ul class="item-home-store detail-style">
		<li class="title-menu-home">Detail Style</li>
		<li><a title="Product Detail - Full" href="{{store url="emaset-tumas-same-rumas.html"}}?___store=argentina">Product Detail - Full</a></li>
		<li><a title="Product Detail - Left Sidebar" href="{{store url="emaset-tumas-same-rumas.html"}}?___store=default">Product Detail - Left Sidebar</a></li>
		<li><a title="Product Detail - Right Sidebar" href="{{store url="emaset-tumas-same-rumas.html"}}?___store=bolivia">Product Detail - Right Sidebar</a></li>
	</ul>
	<ul class="item-home-store listing-style">
		<li class="title-menu-home">Listing Style</li>
		<li><a title="Listing - Full" href="{{store url="shopall.html"}}?___store=french">Listing - Full</a></li>
		<li><a title="Listing - Left Sidebar" href="{{store url="shopall.html"}}?___store=default">Listing - Left Sidebar</a></li>
		<li><a title="Listing - Right Sidebar" href="{{store url="shopall.html"}}?___store=bolivia">Listing - Right Sidebar</a></li>

	</ul>
	<ul class="item-home-store layout-404">
		<li class="title-menu-home">404 Page Layout</li>
		<li><a title="404 Page Style 1" href="{{store url="404page"}}">404 Page Style</a></li>
	</ul>
</div>
Shop
Frontend Appearance 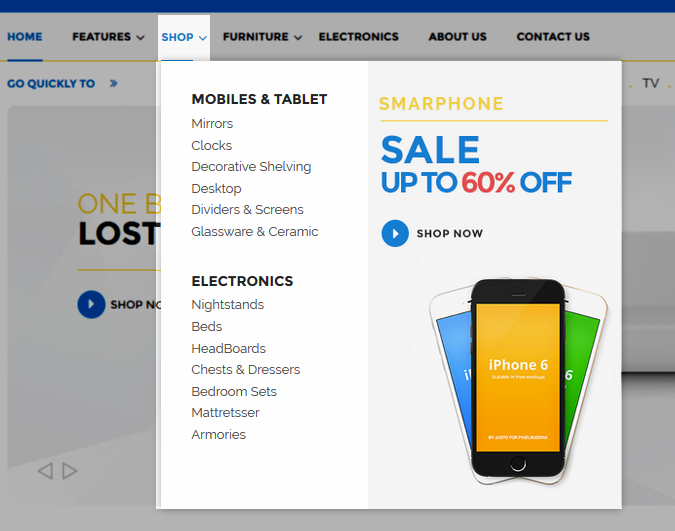
- Backend Setting: Please click Here to view.
- Backend Setting of 'Group 1- Categories': Please click Here to view.
- Backend Setting of 'Categories' in ' Group1- Categories': Please click Here to view.
- Backend Setting of 'Banner': Please click Here to view.
Furnitures
Frontend Appearance 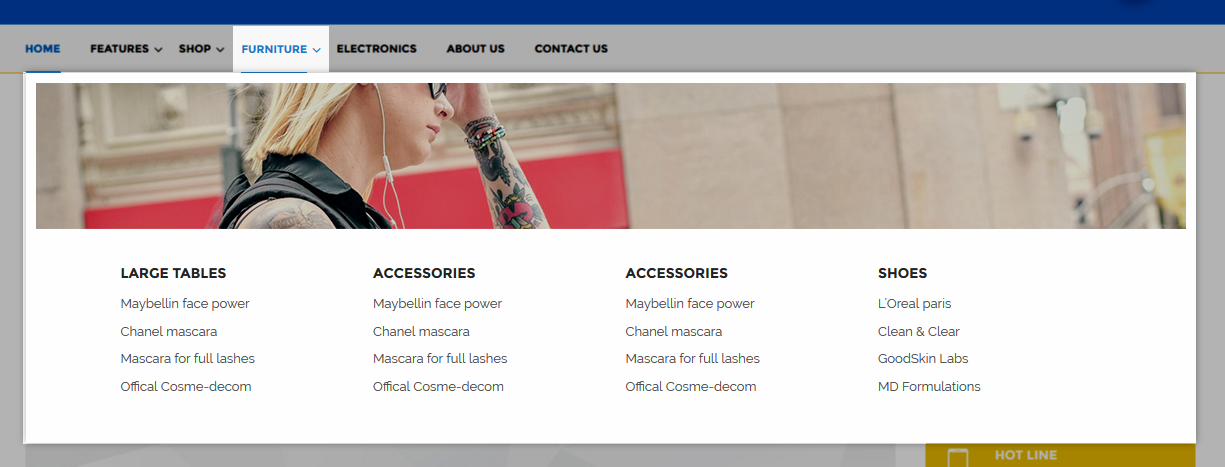
- Backend Setting: Please click Here to view.
- Backend Setting of 'Banner': Please click Here to view.
Copy and paste the following code into the Content field::
<div class="banner h-banner2">
<a title="Static Image" href="#">
<img src="{{media url="wysiwyg/image-megamenu/h-banner2.jpg"}}" alt="Static Image 1" />
</a>
</div>
- Backend Setting of 'Group 1': Please click Here to view.
- Backend Setting of 'New arrivals' in ' Group1': Please click Here to view.
Note: Do the same with the others having same level.
Electronics
Frontend Appearance 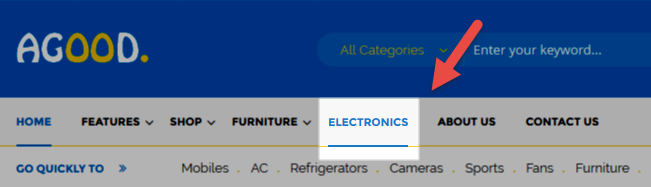
- Backend Setting: Please click Here to view.
Note: Do the same with the others having same level.
3.2.2 Vertical Megamenu:
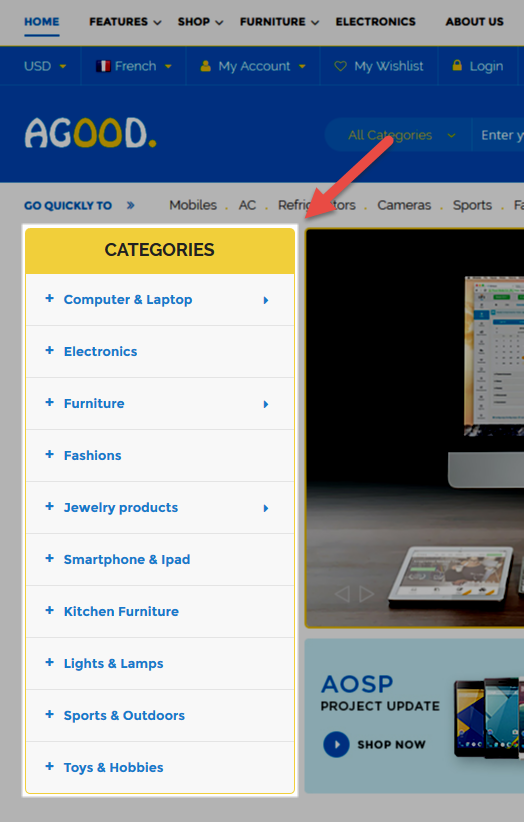
- Sortable Categories Items Please click Here to view.
Computer & Laptop
Frontend Appearance 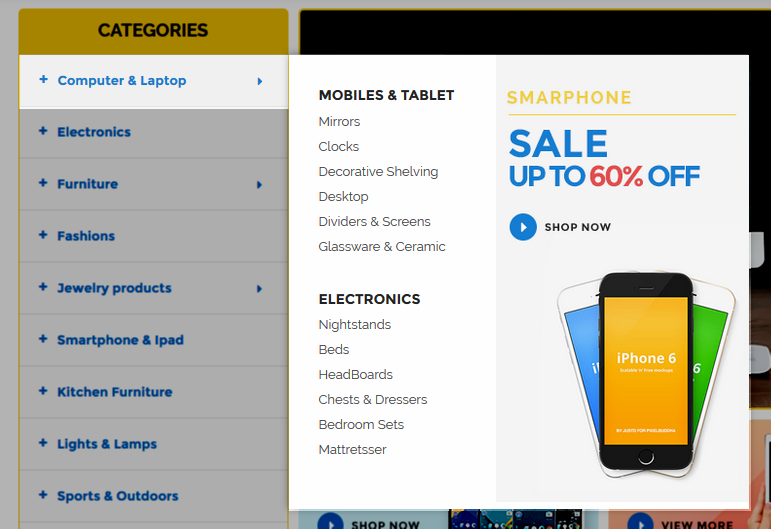
- Backend Setting: Please click Here to view.
- Backend Setting of 'Group 1- Categories': Please click Here to view.
- Backend Setting of 'Categories' in 'Group 1- Categories': Please click Here to view.
- Backend Setting of 'Banner': Please click Here to view.
Electronics
Frontend Appearance 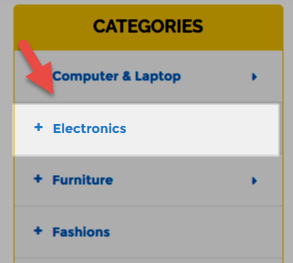
- Backend Setting: Please click Here to view.
Note: Do the same with the others having same level.
Furniture
Frontend Appearance 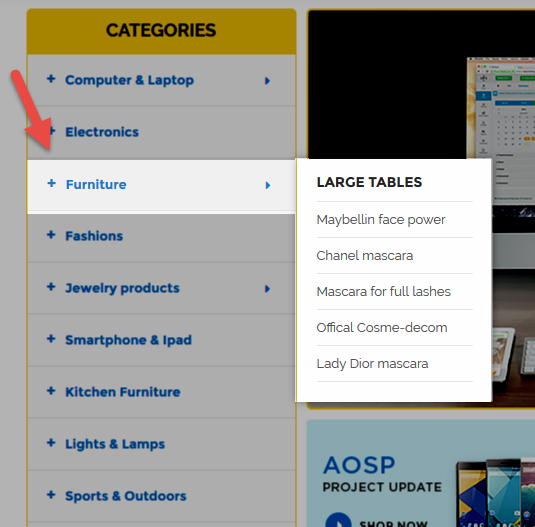
- Backend Setting: Please click Here to view.
- Backend Setting of 'Sub Categories': Please click Here to view.
Copy and paste the following code into the Content field::
Note: Do the same with 'Jewelry products' and its 'Sub Categories'.
3.3 Configure Extensions
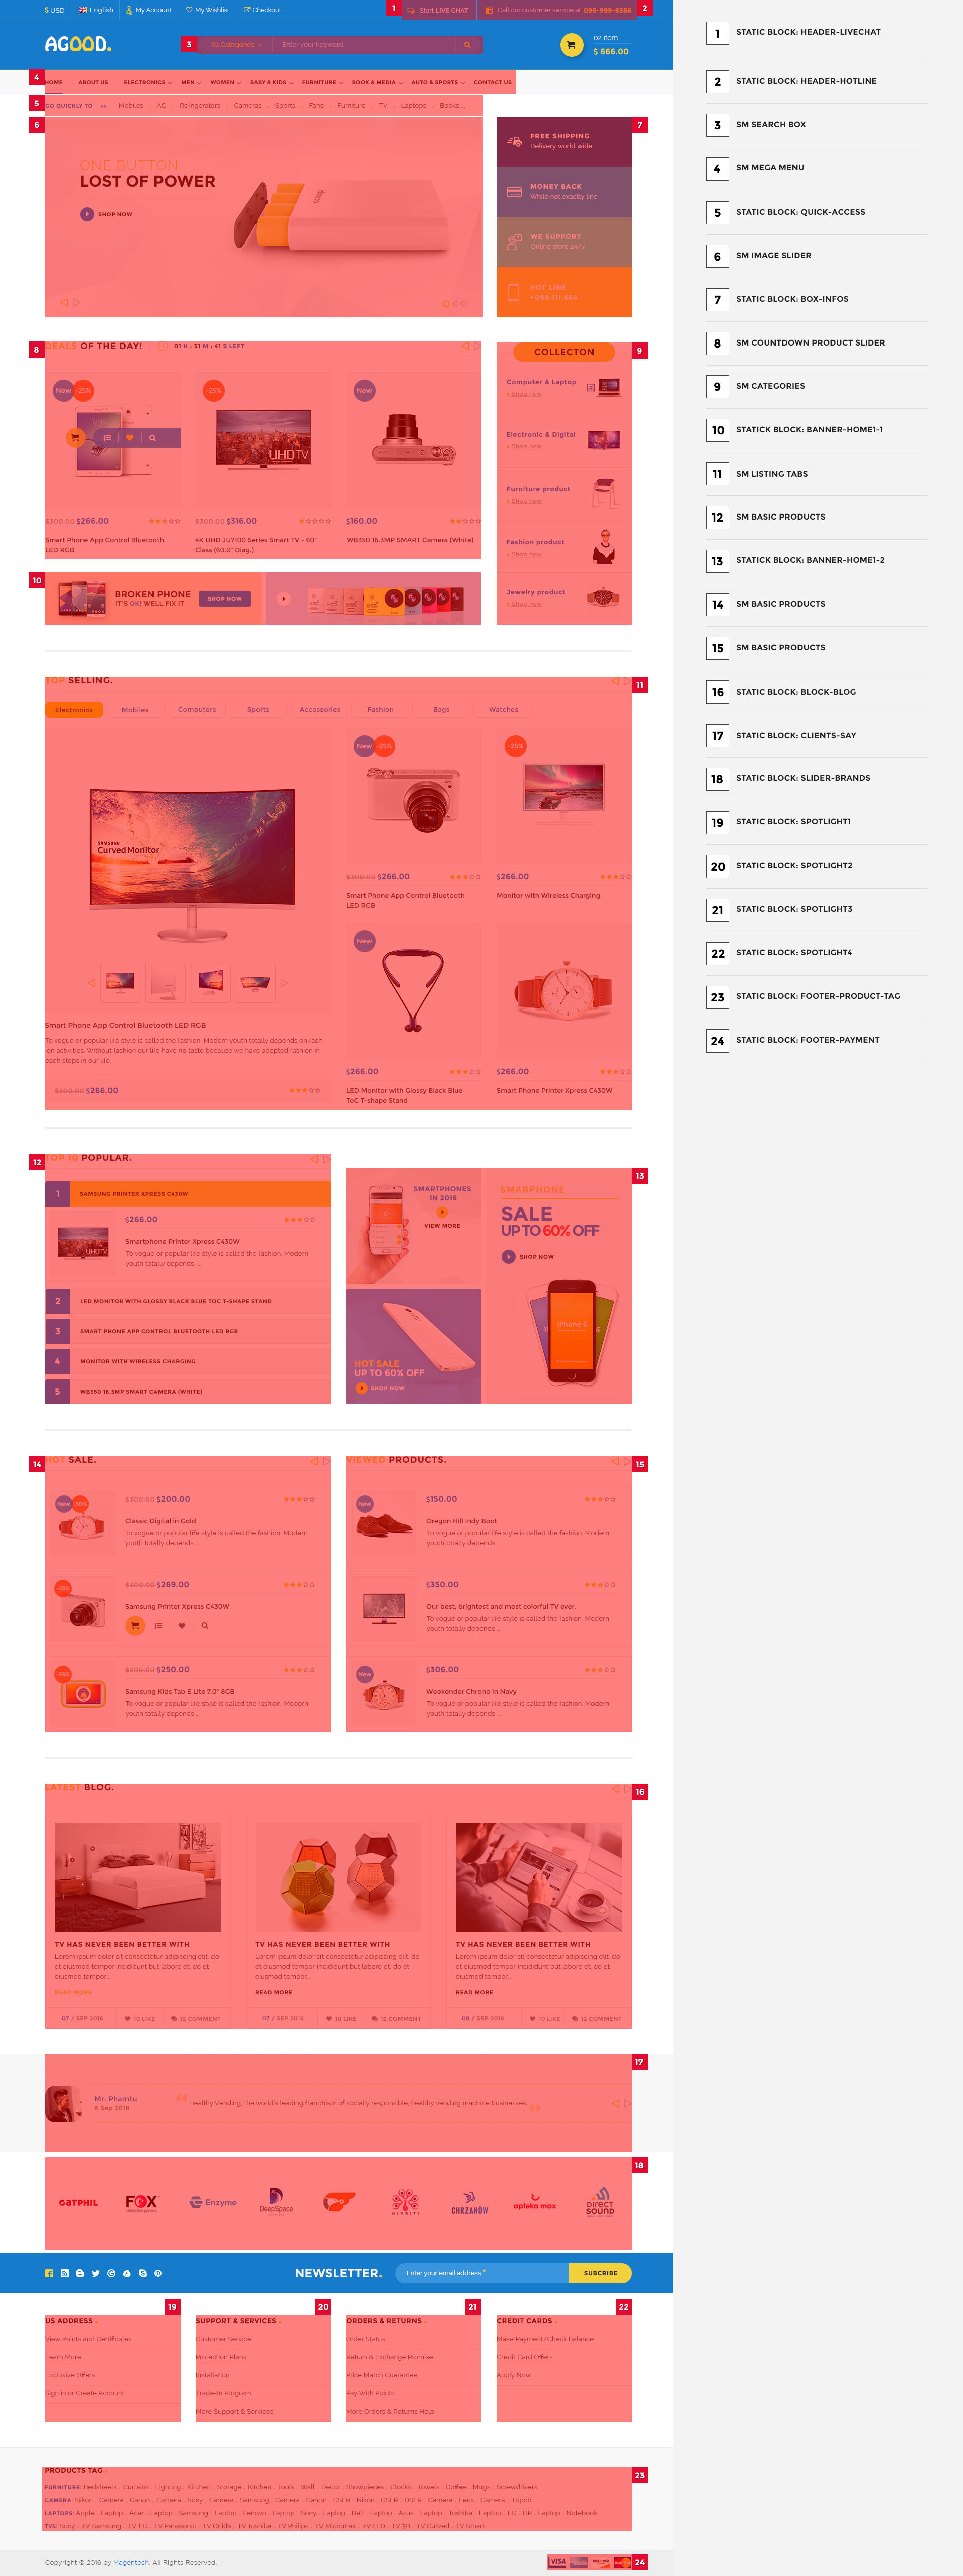
The SM Agood front-page has been integrated with the extensions in the following list:
- SM Search Box
- SM Megamenu
- SM Image Slider
- SM Countdown Product Slider
- SM Categories
- SM Listing Tabs
- SM Basic Products
- SM Super Categories
- SM Quickview
In SM Agood Administration Page, please navigate to Stores>> Settings>> Configuration >> MAGENTECH.COM to configure extensions as you want.
- Position: SM Box Search
- Frontend Appearance

- Backend of SM Search Box: Click Here
- Position: SM Megamenu
- Frontend Appearance
Horizontal Megamenu: 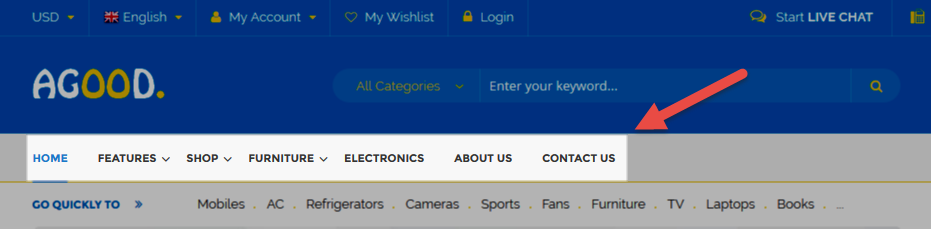
Vertical Megamenu: 
- Backend of SM Megamenu: Click Here
- Position: SM Image Slider
- Frontend Appearance
- Backend of SM Image Slider: Click Here
- Position: SM Countdown Product Slider
- Frontend Appearance
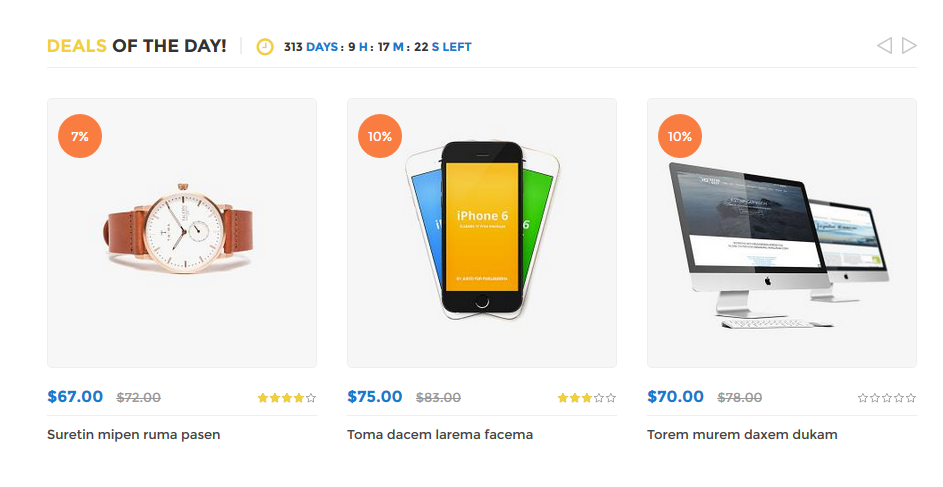
- Backend of SM Countdown Product Slider: Click Here
- Position: SM Categories
- Frontend Appearance
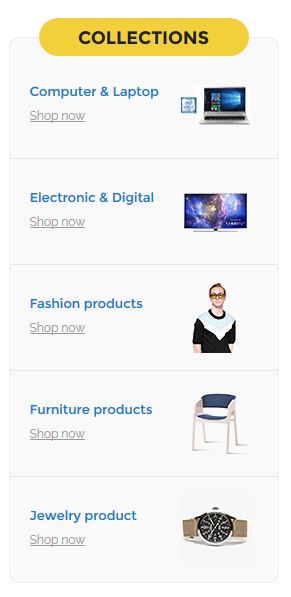
- Backend of SM Categories: Click Here
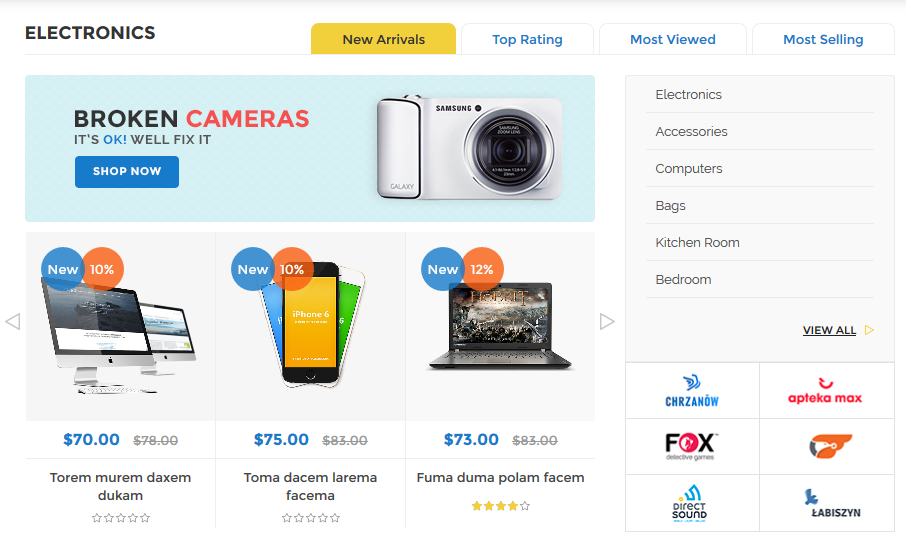
- Position: SM Listing Tabs
- Frontend Appearance
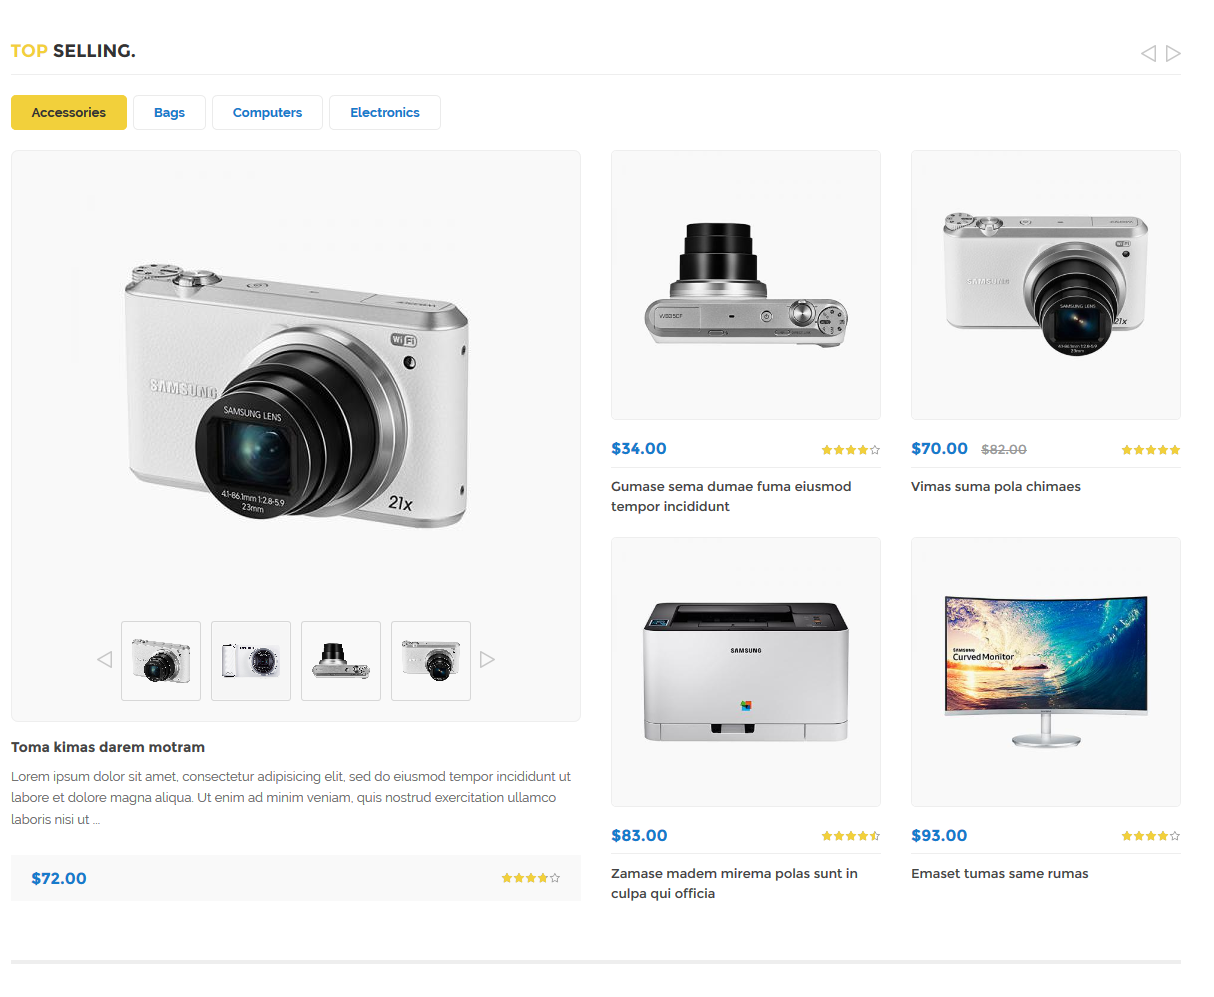
- Backend of SM Listing Tabs: Click Here
- Position: SM Basic Products
- Frontend Appearance
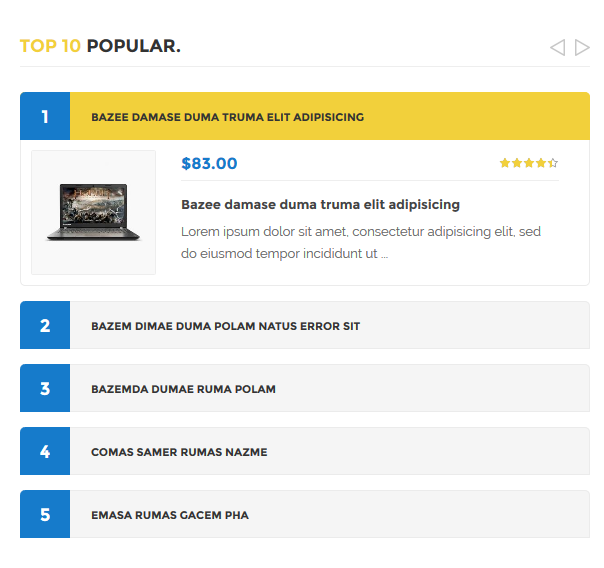
- Backend of SM Basic Products: Click Here
- Position: SM Super Categories
- Frontend Appearance
- Backend of SM Super Categories: Click Here
- Position: SM Quick View
- Frontend Appearance
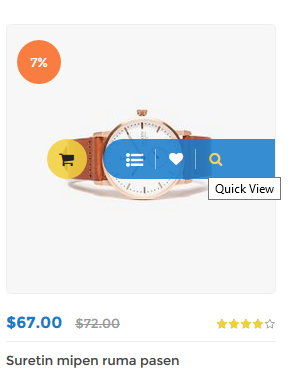
- Backend of SM Quick View: Click Here
3.4 Configure Static Blocks
The SM Agood front-page has the following static blocks in the theme:
- Static Block:header-livechat
- Static Block:header-hotline
- Static Block:quick-access
- Static Block:box-infos
- Static Block:banner-home1-1
- Static Block:banner-home1-2
- Static Block:block-blog
- Static Block:clients-say
- Static Block:slider-brands
- Static Block:spotlight1
- Static Block:spotlight2
- Static Block:spotlight3
- Static Block:spotlight4
- Static Block:footer-product-tag
- Static Block:footer-payment
- Static Block:banner2-1
- Static Block:top-popular-left
- Static Block:latest-news
- Static Block:banner2-2
- Static Block:clients-say2
- Static Block:banner-home3-1
To create a new static block, go to Content>> Elements>> Blocks >> Add new block.
Static Block: header-livechat
To create the static block, go to Content>> Elements>> Blocks with Identifier * : "header-livechat"
Frontend Appearance 
- Backend Setting: Please click Here to view.
Copy and paste the following code into the content tab of this static block:
<div class="livechat"><a href="#">Start <span>live chat</span></a></div>
Static Block: header-hotline
To create the static block, go to Content>> Elements>> Blocks with Identifier * : "header-hotline"
Frontend Appearance 
- Backend Setting: Please click Here to view.
Copy and paste the following code into the content tab of this static block:
<div class="hotline">
<p>Call our customer service at: <span>096-999-8386</span></p>
</div>
Static Block: quick-access
To create the static block, go to Content>> Elements>> Blocks with Identifier * : "quick-access"
Frontend Appearance 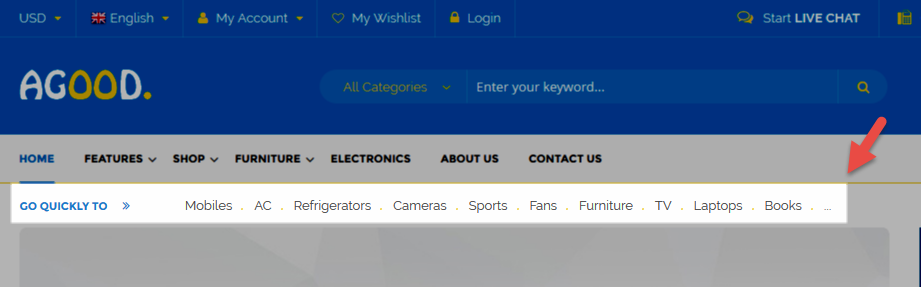
- Backend Setting: Please click Here to view.
Copy and paste the following code into the content tab of this static block:
<div class="quick-access">
<h2 class="font-title">Go quickly to</h2>
<div class="quick-cates"><a href="#">Mobiles</a><a href="#">AC</a><a href="#">Refrigerators</a><a href="#">Cameras</a><a href="#">agoods</a><a href="#">Fans</a><a href="#">Furniture</a><a href="#">TV</a><a href="#">Laptops</a><a href="#">Books </a>...</div>
</div>
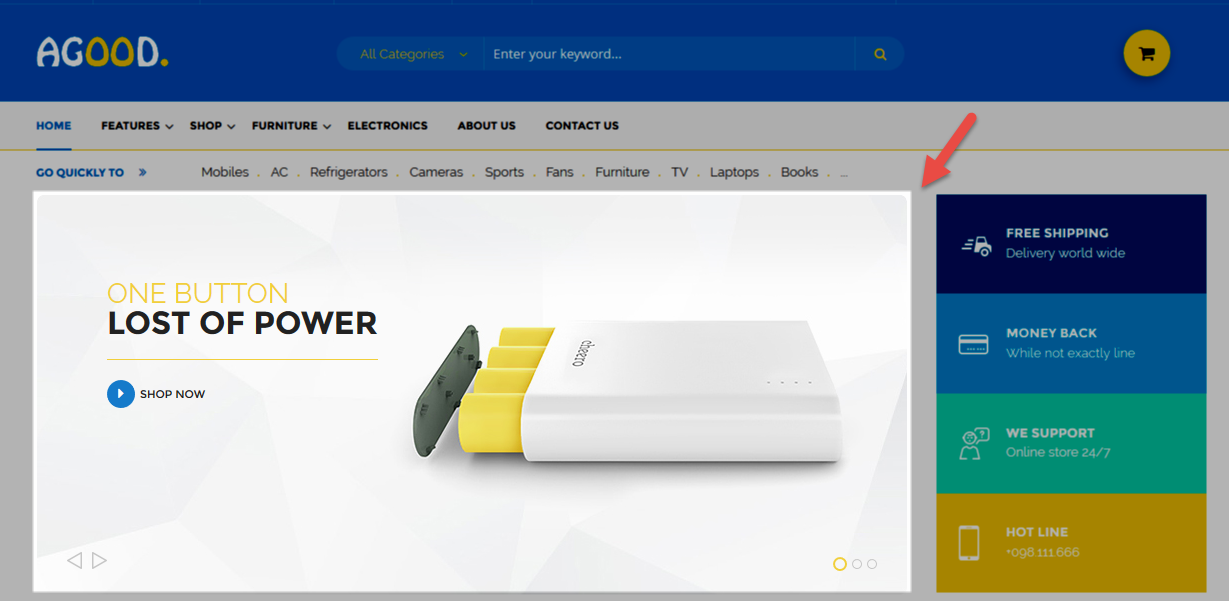
Static Block: box-infos
To create the static block, go to Content>> Elements>> Blocks with Identifier * : "box-infos"
Frontend Appearance 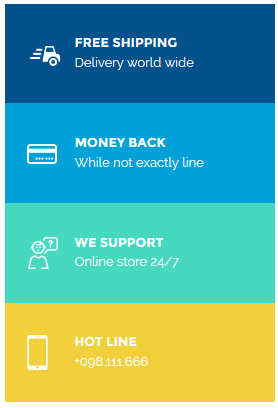
- Backend Setting: Please click Here to view.
Copy and paste the following code into the content tab of this static block:
<div class="box-infos">
<div class="box-info box-info1"><img src="{{media url="wysiwyg/home-page-image/icon1.png"}}" alt="" />
<div class="info">
<p class="font-title">Free shipping</p>
<span>Delivery world wide</span></div>
</div>
<div class="box-info box-info2"><img src="{{media url="wysiwyg/home-page-image/icon2.png"}}" alt="" />
<div class="info">
<p class="font-title">money back</p>
<span>While not exactly line</span></div>
</div>
<div class="box-info box-info3"><img src="{{media url="wysiwyg/home-page-image/icon3.png"}}" alt="" />
<div class="info">
<p class="font-title">we support</p>
<span>Online store 24/7</span></div>
</div>
<div class="box-info box-info4"><img src="{{media url="wysiwyg/home-page-image/icon4.png"}}" alt="" />
<div class="info">
<p class="font-title">hot line</p>
<span>+098.111.666</span></div>
</div>
</div>
To create the static block, go to Content>> Elements>> Blocks with Identifier * : "banner-home1-1"
Frontend Appearance 
- Backend Setting: Please click Here to view.
Copy and paste the following code into the content tab of this static block:
<div class="banner-home1-1">
<div class="banner banner1"><a href="#"><img src="{{media url="wysiwyg/home-page-image/home1/banner1-1.png"}}" alt="" /></a></div>
<div class="banner banner2"><a href="#"><img src="{{media url="wysiwyg/home-page-image/home1/banner1-2.png"}}" alt="" /></a></div>
</div>
To create the static block, go to Content>> Elements>> Blocks with Identifier * : "banner-home1-2"
Frontend Appearance 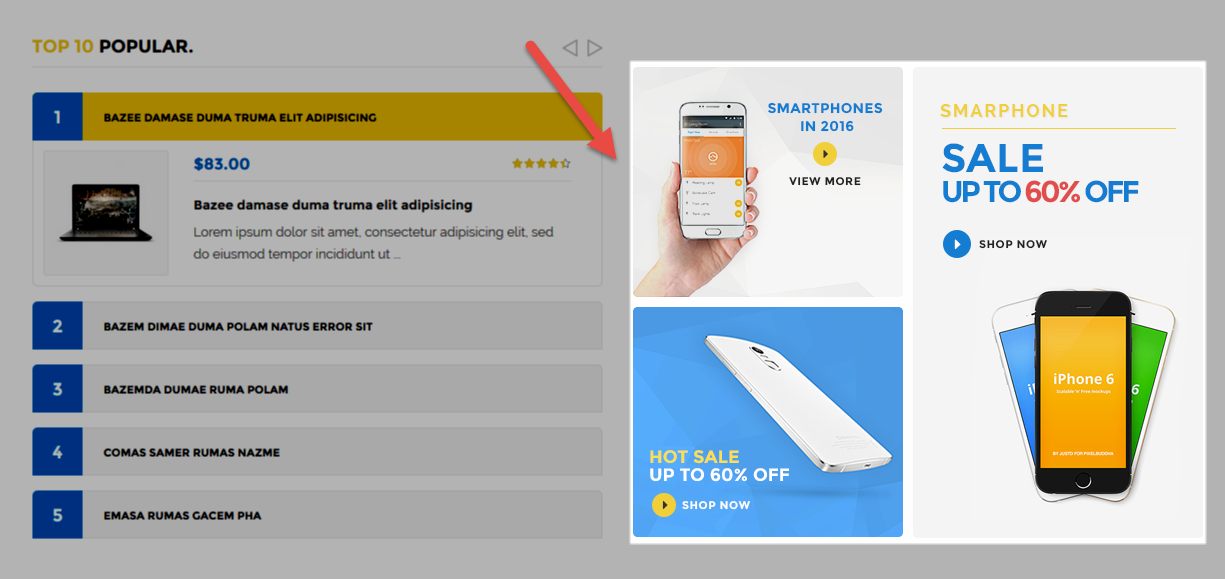
- Backend Setting: Please click Here to view.
Copy and paste the following code into the content tab of this static block:
<div class="banner-home1-2">
<div class="banner-left">
<div class="banner banner1"><a href="#"><img src="{{media url="wysiwyg/home-page-image/home1/banner2-1.png"}}" alt="" /></a></div>
<div class="banner banner2"><a href="#"><img src="{{media url="wysiwyg/home-page-image/home1/banner2-2.png"}}" alt="" /></a></div>
</div>
<div class="banner banner3"><a href="#"><img src="{{media url="wysiwyg/home-page-image/home1/banner2-3.png"}}" alt="" /></a></div>
</div>
Static Block: block-blog
To create the static block, go to Content>> Elements>> Blocks with Identifier * : "block-blog"
Frontend Appearance 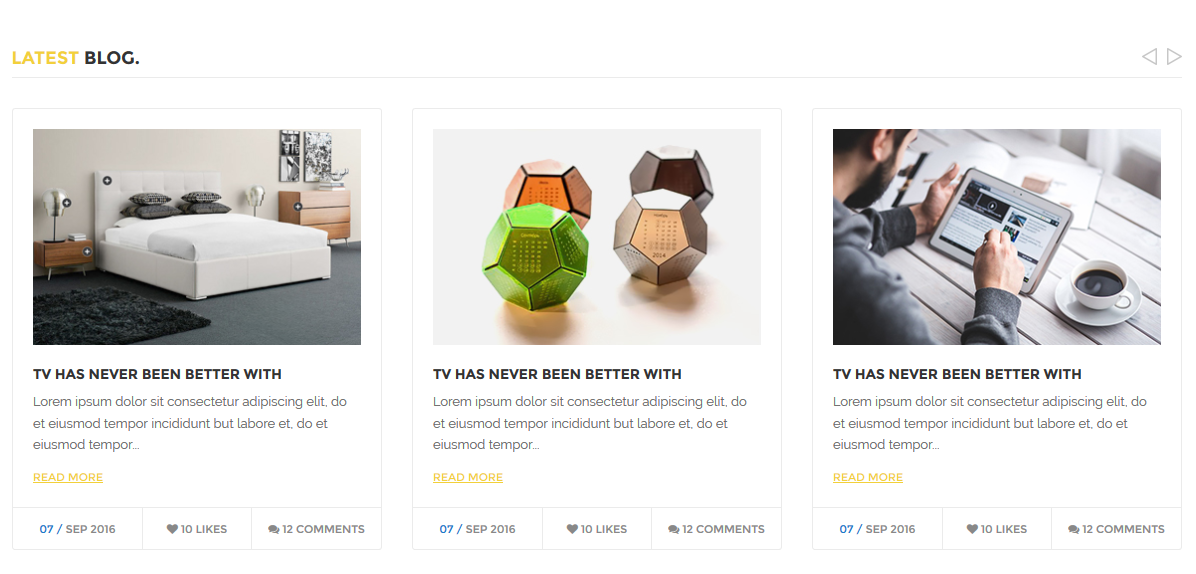
- Backend Setting: Please click Here to view.
Copy and paste the following code into the content tab of this static block:
<div class="latest-blog">
<div class="title-home font-title"><span>Latest</span> blog.</div>
<div class="blog-list">
<div class="item">
<div class="item-inner">
<div class="blog-content"><a class="blog-img" href="#"><img src="{{media url="wysiwyg/blog/blog1.jpg"}}" alt="" /></a> <a class="blog-name font-title" href="#">TV has never been better with</a>
<div class="blog-desc">Lorem ipsum dolor sit consectetur adipiscing elit, do et eiusmod tempor incididunt but labore et, do et eiusmod tempor...</div>
<a class="link-readmore font-title" href="#">Read More</a></div>
<div class="blog-action font-title">
<div class="blog-date"><span>07 /</span> Sep 2016</div>
<div class="blog-like"><em class="fa fa-heart"></em> 10 likes</div>
<div class="blog-comment"><em class="fa fa-comments"></em> 12 comments</div>
</div>
</div>
</div>
<div class="item">
<div class="item-inner">
<div class="blog-content"><a class="blog-img" href="#"><img src="{{media url="wysiwyg/blog/blog2.jpg"}}" alt="" /></a> <a class="blog-name font-title" href="#">TV has never been better with</a>
<div class="blog-desc">Lorem ipsum dolor sit consectetur adipiscing elit, do et eiusmod tempor incididunt but labore et, do et eiusmod tempor...</div>
<a class="link-readmore font-title" href="#">Read More</a></div>
<div class="blog-action font-title">
<div class="blog-date"><span>07 /</span> Sep 2016</div>
<div class="blog-like"><em class="fa fa-heart"></em> 10 likes</div>
<div class="blog-comment"><em class="fa fa-comments"></em> 12 comments</div>
</div>
</div>
</div>
<div class="item">
<div class="item-inner">
<div class="blog-content"><a class="blog-img" href="#"><img src="{{media url="wysiwyg/blog/blog3.jpg"}}" alt="" /></a> <a class="blog-name font-title" href="#">TV has never been better with</a>
<div class="blog-desc">Lorem ipsum dolor sit consectetur adipiscing elit, do et eiusmod tempor incididunt but labore et, do et eiusmod tempor...</div>
<a class="link-readmore font-title" href="#">Read More</a></div>
<div class="blog-action font-title">
<div class="blog-date"><span>07 /</span> Sep 2016</div>
<div class="blog-like"><em class="fa fa-heart"></em> 10 likes</div>
<div class="blog-comment"><em class="fa fa-comments"></em> 12 comments</div>
</div>
</div>
</div>
<div class="item">
<div class="item-inner">
<div class="blog-content"><a class="blog-img" href="#"><img src="{{media url="wysiwyg/blog/blog2.jpg"}}" alt="" /></a> <a class="blog-name font-title" href="#">TV has never been better with</a>
<div class="blog-desc">Lorem ipsum dolor sit consectetur adipiscing elit, do et eiusmod tempor incididunt but labore et, do et eiusmod tempor...</div>
<a class="link-readmore font-title" href="#">Read More</a></div>
<div class="blog-action font-title">
<div class="blog-date"><span>07 /</span> Sep 2016</div>
<div class="blog-like"><em class="fa fa-heart"></em> 10 likes</div>
<div class="blog-comment"><em class="fa fa-comments"></em> 12 comments</div>
</div>
</div>
</div>
</div>
</div>
<script type="text/javascript" xml="space">// <![CDATA[
//
	jQuery(document).ready(function($) {
		var owl_blog = $(".blog-list");
		owl_blog.owlCarousel({

			responsive:{
				0:{
					items:1
				},
				480:{
					items:1
				},
				768:{
					items:2
				},
				992:{
					items:3
				},
				1200:{
					items:3
				}
			},

			autoplay:false,
			loop:true,
			nav : true, // Show next and prev buttons
			dots: false,
			autoplaySpeed : 500,
			navSpeed : 500,
			dotsSpeed : 500,
			autoplayHoverPause: true,
			margin:30,

		});
	});
//
// ]]></script>
Static Block: clients-say
To create the static block, go to Content>> Elements>> Blocks with Identifier * : "clients-say"
Frontend Appearance 
- Backend Setting: Please click Here to view.
Copy and paste the following code into the content tab of this static block:
<div class="clients-say">
<div class="container">
<div class="clients-say-slider">
<div class="item"><img src="{{media url="wysiwyg/testimonial/client3.png"}}" alt="" />
<div class="item-inner">
<div class="client-infos">
<p class="client-name">John Doe</p>
<p class="date">8 June 2016</p>
</div>
<div class="client-des">Healthy Vending, the world’s leading franchisor of socially responsible, healthy vending machine businesses.</div>
</div>
</div>
<div class="item"><img src="{{media url="wysiwyg/testimonial/client2.png"}}" alt="" />
<div class="item-inner">
<div class="client-infos">
<p class="client-name">Anna Kendrick</p>
<p class="date">8 June 2016</p>
</div>
<div class="client-des">Consectetur adipisicing elit, lorem ipsum dolor sit amet, sed do eiusmod tempor incididunt ut labor.</div>
</div>
</div>
<div class="item"><img src="{{media url="wysiwyg/testimonial/client1.png"}}" alt="" />
<div class="item-inner">
<div class="client-infos">
<p class="client-name">Abraham</p>
<p class="date">8 June 2016</p>
</div>
<div class="client-des">Pellentesque commodo posuere maximus. Phasellus pellentesque pellentesque.</div>
</div>
</div>
</div>
</div>
<script type="text/javascript" xml="space">// <![CDATA[
//
	jQuery(document).ready(function($) {
		var owl_testimonial = $(".clients-say-slider");
		owl_testimonial.owlCarousel({

			responsive:{
				0:{
					items:1
				},
				480:{
					items:1
				},
				768:{
					items:1
				},
				992:{
					items:1
				},
				1200:{
					items:1
				}
			},

			autoplay:false,
			loop:true,
			nav : true, // Show next and prev buttons
			dots: false,
			autoplaySpeed : 500,
			navSpeed : 500,
			dotsSpeed : 500,
			autoplayHoverPause: true,
			margin: 0,
			animateOut: 'fadeOut',
        	animateIn: 'fadeIn',

		});
	});
//
// ]]></script>
</div>
Static Block: slider-brands
To create the static block, go to Content>> Elements>> Blocks with Identifier * : "slider-brands"
Frontend Appearance 
- Backend Setting: Please click Here to view.
Copy and paste the following code into the content tab of this static block:
<div class="custom-slider-brands-w">
<div class="container">
<div class="custom-slider-brands">
<div class="item"><a href="#"><img src="{{media url="wysiwyg/brand/br1.png"}}" alt="brand" /></a></div>
<div class="item"><a href="#"><img src="{{media url="wysiwyg/brand/br2.png"}}" alt="brand" /></a></div>
<div class="item"><a href="#"><img src="{{media url="wysiwyg/brand/br3.png"}}" alt="brand" /></a></div>
<div class="item"><a href="#"><img src="{{media url="wysiwyg/brand/br4.png"}}" alt="brand" /></a></div>
<div class="item"><a href="#"><img src="{{media url="wysiwyg/brand/br5.png"}}" alt="brand" /></a></div>
<div class="item"><a href="#"><img src="{{media url="wysiwyg/brand/br6.png"}}" alt="brand" /></a></div>
<div class="item"><a href="#"><img src="{{media url="wysiwyg/brand/br7.png"}}" alt="brand" /></a></div>
<div class="item"><a href="#"><img src="{{media url="wysiwyg/brand/br8.png"}}" alt="brand" /></a></div>
<div class="item"><a href="#"><img src="{{media url="wysiwyg/brand/br9.png"}}" alt="brand" /></a></div>
<div class="item"><a href="#"><img src="{{media url="wysiwyg/brand/br1.png"}}" alt="brand" /></a></div>
<div class="item"><a href="#"><img src="{{media url="wysiwyg/brand/br2.png"}}" alt="brand" /></a></div>
</div>
<script type="text/javascript" xml="space">// <![CDATA[
//
	jQuery(document).ready(function($) {
		var owl_brands = $(".custom-slider-brands");
		owl_brands.owlCarousel({

			responsive:{
				0:{
					items:2
				},
				480:{
					items:3
				},
				768:{
					items:7
				},
				992:{
					items:8
				},
				1200:{
					items:9
				}
			},

			autoplay:false,
			loop:true,
			nav : true, // Show next and prev buttons
			dots: false,
			autoplaySpeed : 500,
			navSpeed : 500,
			dotsSpeed : 500,
			autoplayHoverPause: true,
			margin:1,

		});
	});
//
// ]]></script>
</div>
</div>
Static Block: spotlight1
To create the static block, go to Content>> Elements>> Blocks with Identifier * : "spotlight1"
Frontend Appearance 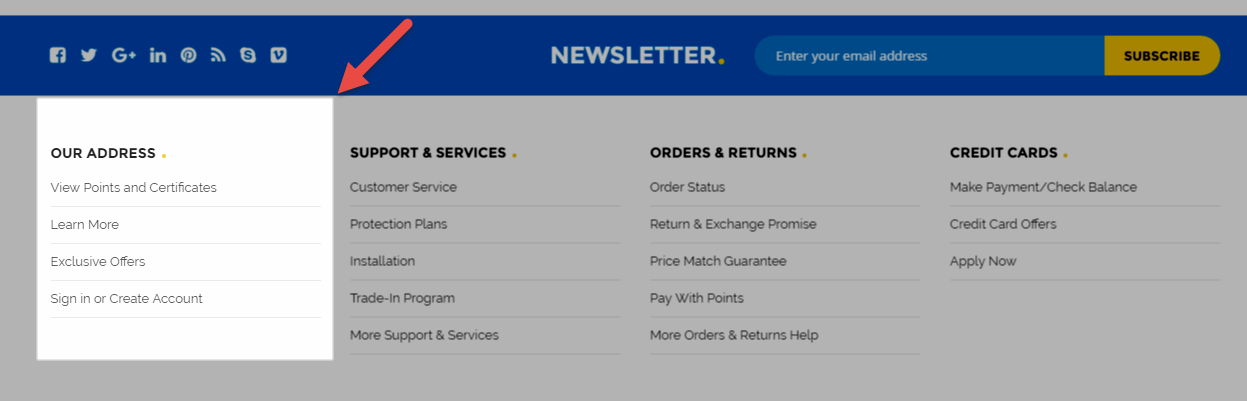
- Backend Setting: Please click Here to view.
Copy and paste the following code into the content tab of this static block:
<div class="spotlight spotlight1 col-lg-3 col-md-3 col-sm-6 col-xs-12">
<div class="block-title">OUR ADDRESS</div>
<div class="block-cont">
<ul>
<li><a href="#">View Points and Certificates</a></li>
<li><a href="#">Learn More</a></li>
<li><a href="#">Exclusive Offers</a></li>
<li><a href="#">Sign in or Create Account</a></li>
</ul>
</div>
</div>
Static Block: spotlight2
To create the static block, go to Content>> Elements>> Blocks with Identifier * : "spotlight2"
Frontend Appearance 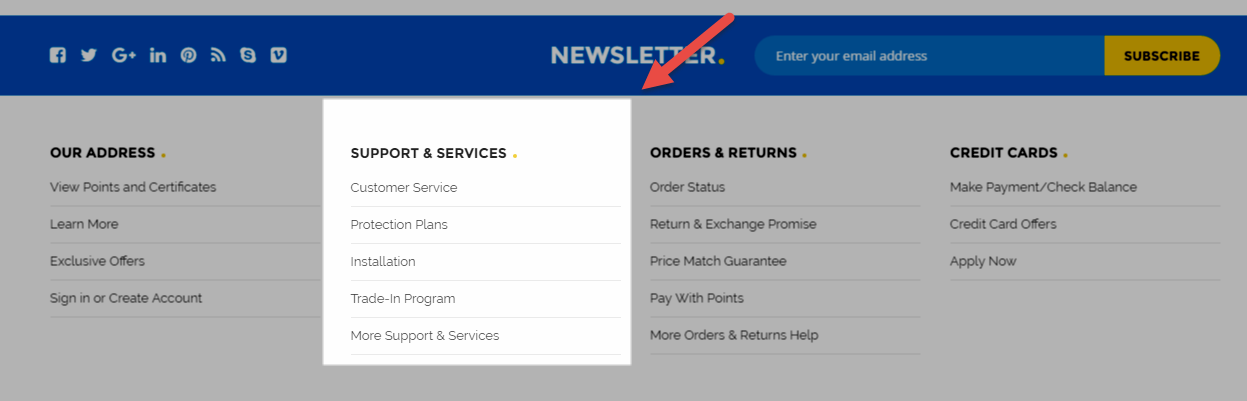
- Backend Setting: Please click Here to view.
Copy and paste the following code into the content tab of this static block:
<div class="spotlight spotlight2 col-lg-3 col-md-3 col-sm-6 col-xs-12">
<div class="block-title">SUPPORT & SERVICES</div>
<div class="block-cont">
<ul>
<li><a href="#">Customer Service</a></li>
<li><a href="#">Protection Plans</a></li>
<li><a href="#">Installation</a></li>
<li><a href="#">Trade-In Program</a></li>
<li><a href="#">More Support & Services</a></li>
</ul>
</div>
</div>
Static Block: spotlight3
To create the static block, go to Content>> Elements>> Blocks with Identifier * : "spotlight3"
Frontend Appearance 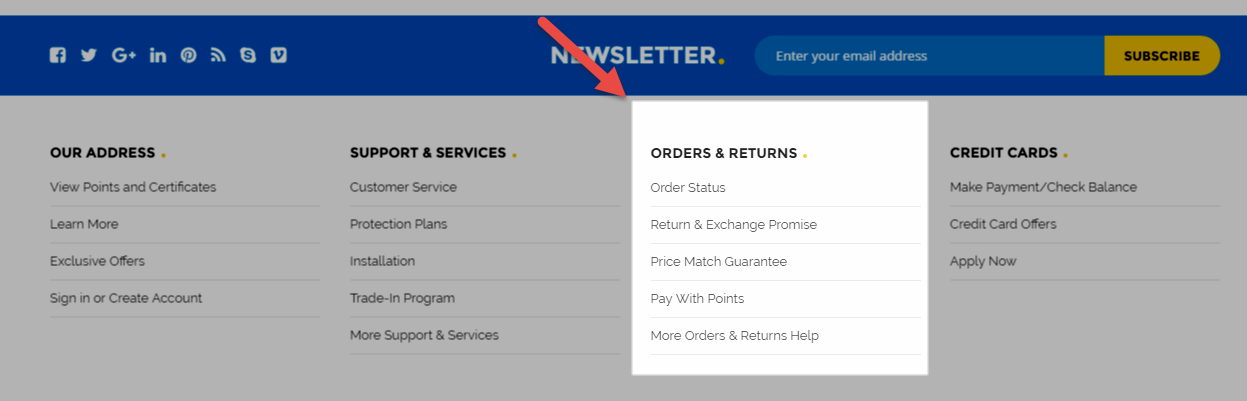
- Backend Setting: Please click Here to view.
Copy and paste the following code into the content tab of this static block:
<div class="spotlight spotlight3 col-lg-3 col-md-3 col-sm-6 col-xs-12">
<div class="block-title">ORDERS & RETURNS</div>
<div class="block-cont">
<ul>
<li><a href="#">Order Status</a></li>
<li><a href="#">Return & Exchange Promise</a></li>
<li><a href="#">Price Match Guarantee</a></li>
<li><a href="#">Pay With Points</a></li>
<li><a href="#">More Orders & Returns Help</a></li>
</ul>
</div>
</div>
Static Block: spotlight4
To create the static block, go to Content>> Elements>> Blocks with Identifier * : "spotlight4"
Frontend Appearance 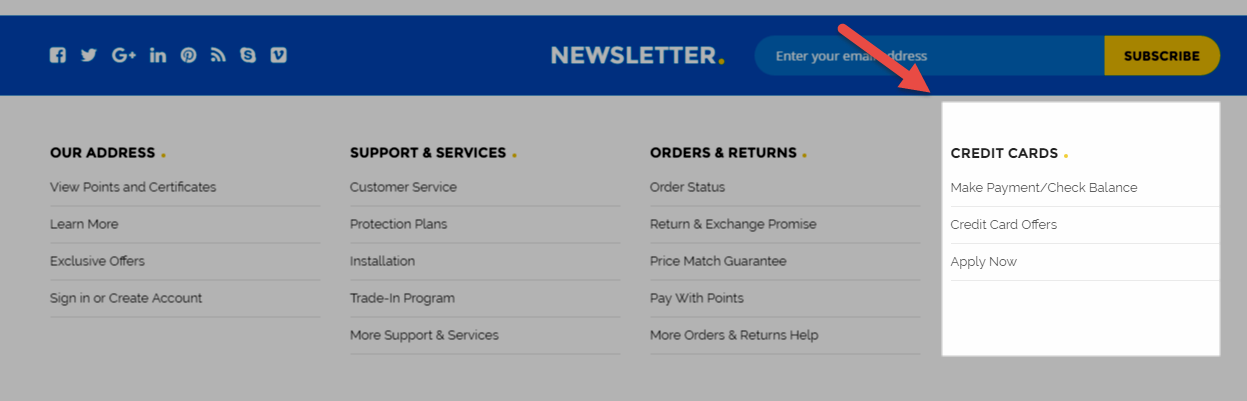
- Backend Setting: Please click Here to view.
Copy and paste the following code into the content tab of this static block:
<div class="spotlight spotlight4 col-lg-3 col-md-3 col-sm-6 col-xs-12">
<div class="block-title">CREDIT CARDS</div>
<div class="block-cont">
<ul>
<li><a href="#">Make Payment/Check Balance</a></li>
<li><a href="#">Credit Card Offers</a></li>
<li><a href="#">Apply Now</a></li>
</ul>
</div>
</div>
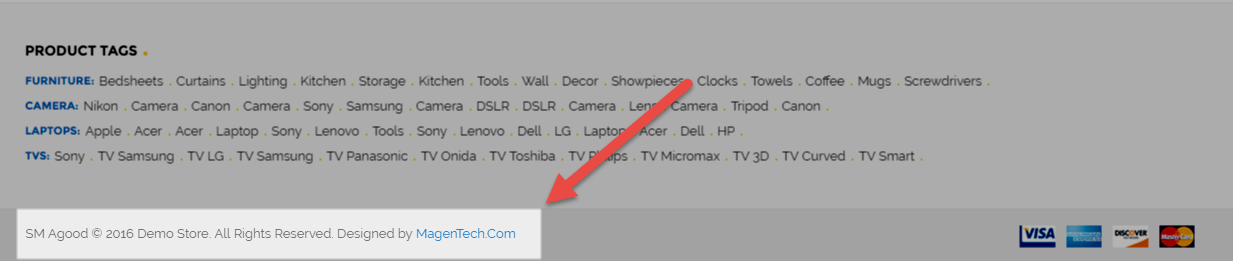
To create the static block, go to Content>> Elements>> Blocks with Identifier * : "footer-product-tag"
Frontend Appearance 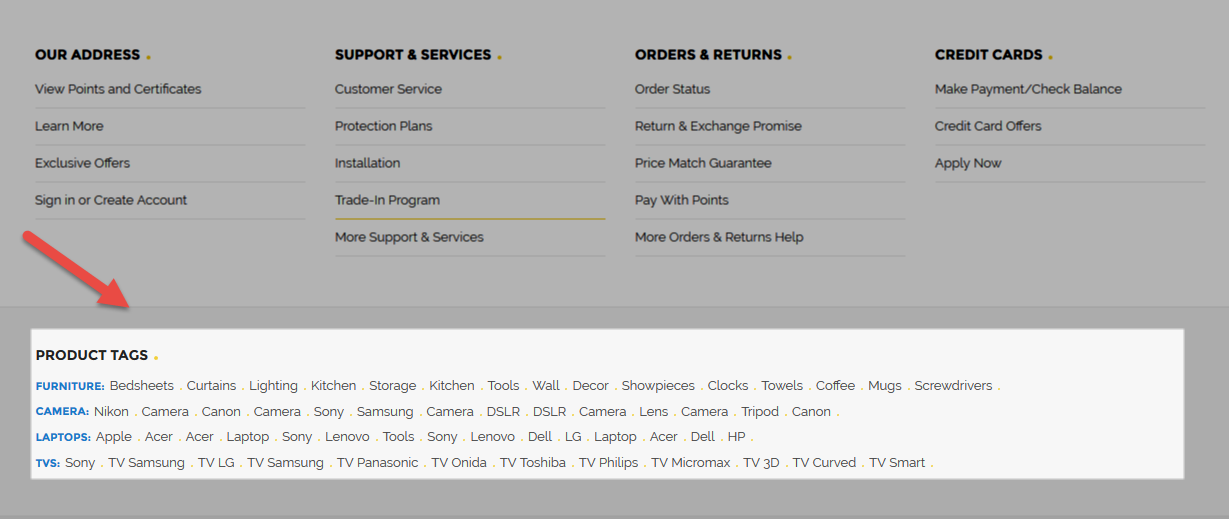
- Backend Setting: Please click Here to view.
Copy and paste the following code into the content tab of this static block:
<div class="footer-product-tags">
<div class="block-title">Product tags</div>
<ul>
<li>
<h2>furniture:</h2>
<a href="#">Bedsheets</a><a href="#">Curtains</a><a href="#">Lighting</a><a href="#">Kitchen</a><a href="#">Storage</a><a href="#">Kitchen</a><a href="#">Tools</a><a href="#">Wall</a><a href="#">Decor</a><a href="#">Showpieces</a><a href="#">Clocks</a><a href="#">Towels</a><a href="#">Coffee</a><a href="#">Mugs</a><a href="#">Screwdrivers</a></li>
<li>
<h2>CAMERA:</h2>
<a href="#">Nikon</a><a href="#">Camera</a><a href="#">Canon</a><a href="#">Camera</a><a href="#">Sony</a><a href="#">Samsung</a><a href="#">Camera</a><a href="#">DSLR</a><a href="#">DSLR</a><a href="#">Camera</a><a href="#">Lens</a><a href="#">Camera</a><a href="#">Tripod</a><a href="#">Canon</a></li>
<li>
<h2>LAPTOPS:</h2>
<a href="#">Apple</a><a href="#">Acer</a><a href="#">Acer</a><a href="#">Laptop</a><a href="#">Sony</a><a href="#">Lenovo</a><a href="#">Tools</a><a href="#">Sony</a><a href="#">Lenovo</a><a href="#">Dell</a><a href="#">LG</a><a href="#">Laptop</a><a href="#">Acer</a><a href="#">Dell</a><a href="#">HP</a></li>
<li>
<h2>TVS:</h2>
<a href="#">Sony</a><a href="#">TV Samsung</a><a href="#">TV LG</a><a href="#">TV Samsung</a><a href="#">TV Panasonic</a><a href="#">TV Onida</a><a href="#">TV Toshiba</a><a href="#">TV Philips</a><a href="#">TV Micromax</a><a href="#">TV 3D</a><a href="#"> TV Curved</a><a href="#">TV Smart</a></li>
</ul>
</div>
To create the static block, go to Content>> Elements>> Blocks with Identifier * : "footer-payment"
Frontend Appearance 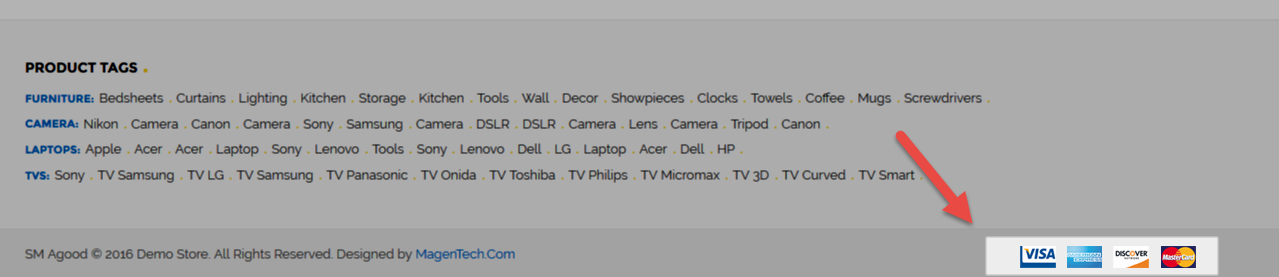
- Backend Setting: Please click Here to view.
Copy and paste the following code into the content tab of this static block:
<div class="payments"><a href="#"><img src="{{media url="wysiwyg/payment/pay1.png"}}" alt="" /></a> <a href="#"><img src="{{media url="wysiwyg/payment/pay2.png"}}" alt="" /></a> <a href="#"><img src="{{media url="wysiwyg/payment/pay3.png"}}" alt="" /></a> <a href="#"><img src="{{media url="wysiwyg/payment/pay4.png"}}" alt="" /></a></div>
To create the static block, go to Content>> Elements>> Blocks with Identifier * : "banner2-1"
Frontend Appearance 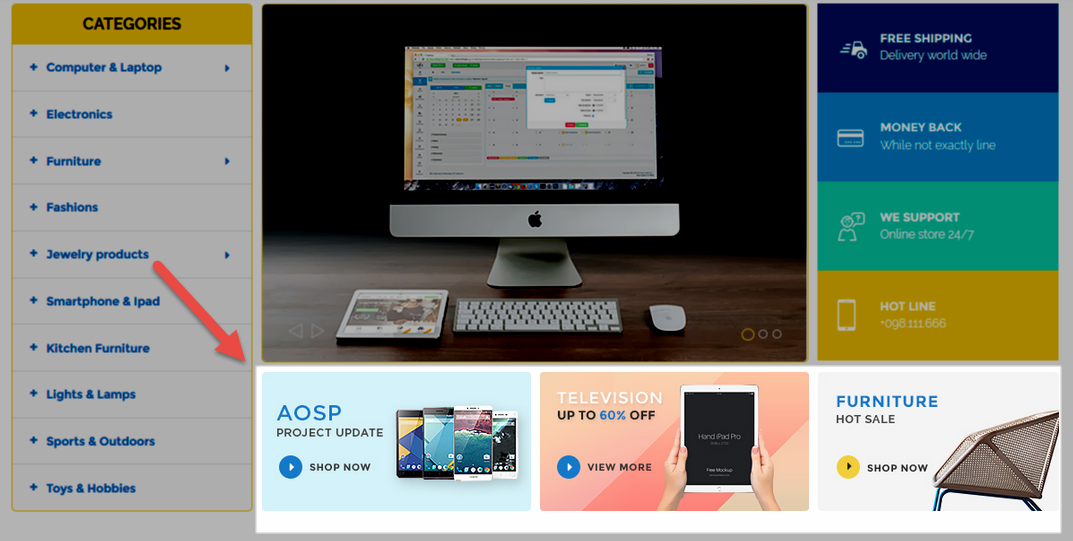
- Backend Setting: Please click Here to view.
Copy and paste the following code into the content tab of this static block:
<div class="banner1-w">
<div class="banner banner1-1"><a href="#"><img src="{{media url="wysiwyg/home-page-image/home2/banner1-1.jpg"}}" alt="" /></a></div>
<div class="banner banner1-2"><a href="#"><img src="{{media url="wysiwyg/home-page-image/home2/banner1-2.jpg"}}" alt="" /></a></div>
<div class="banner banner1-3"><a href="#"><img src="{{media url="wysiwyg/home-page-image/home2/banner1-3.jpg"}}" alt="" /></a></div>
</div>
Static Block: top-popular-left
To create the static block, go to Content>> Elements>> Blocks with Identifier * : "top-popular-left"
Frontend Appearance 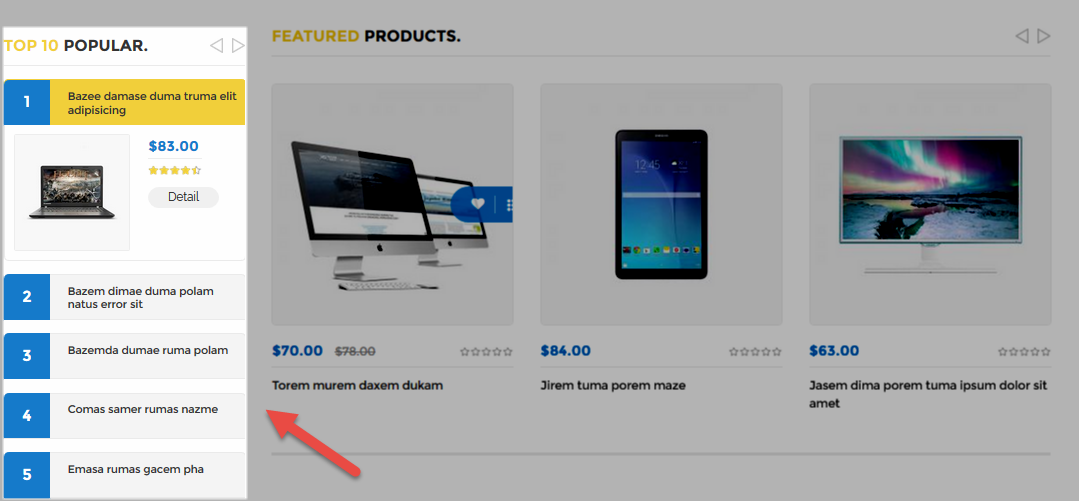
- Backend Setting: Please click Here to view.
Copy and paste the following code into the content tab of this static block:
<p>{{block class="Sm\BasicProducts\Block\BasicProducts" template="Sm_BasicProducts::product-accor-slider.phtml" title="<span>Top 10</span> Popular." product_limitation="10" product_description_display="0"}}</p>
Static Block: latest-news
To create the static block, go to Content>> Elements>> Blocks with Identifier * : "latest-news"
Frontend Appearance 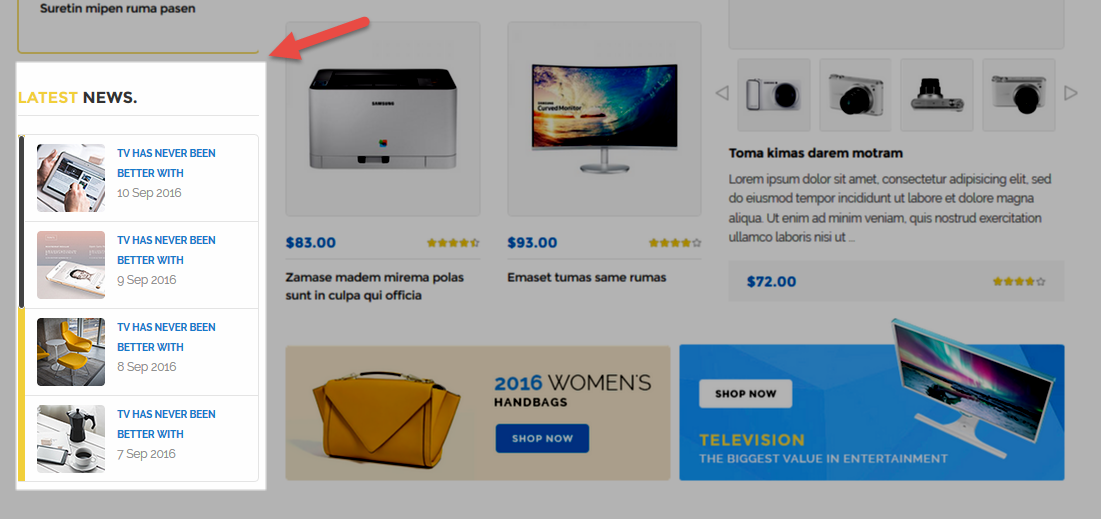
- Backend Setting: Please click Here to view.
Copy and paste the following code into the content tab of this static block:
<div class="latest-news-w">
<div class="home-title font-title"><span>Latest</span> News.</div>
<div class="news-content">
<div class="item">
<div class="item-inner"><img src="{{media url="wysiwyg/news/n1.jpg"}}" alt="" />
<div class="content-right"><a href="#">TV has never been better with</a>
<p>10 Sep 2016</p>
</div>
</div>
</div>
<div class="item">
<div class="item-inner"><img src="{{media url="wysiwyg/news/n2.jpg"}}" alt="" />
<div class="content-right"><a href="#">TV has never been better with</a>
<p>9 Sep 2016</p>
</div>
</div>
</div>
<div class="item">
<div class="item-inner"><img src="{{media url="wysiwyg/news/n3.jpg"}}" alt="" />
<div class="content-right"><a href="#">TV has never been better with</a>
<p>8 Sep 2016</p>
</div>
</div>
</div>
<div class="item">
<div class="item-inner"><img src="{{media url="wysiwyg/news/n4.jpg"}}" alt="" />
<div class="content-right"><a href="#">TV has never been better with</a>
<p>7 Sep 2016</p>
</div>
</div>
</div>
<div class="item">
<div class="item-inner"><img src="{{media url="wysiwyg/news/n1.jpg"}}" alt="" />
<div class="content-right"><a href="#">TV has never been better with</a>
<p>6 Sep 2016</p>
</div>
</div>
</div>
<div class="item">
<div class="item-inner"><img src="{{media url="wysiwyg/news/n2.jpg"}}" alt="" />
<div class="content-right"><a href="#">TV has never been better with</a>
<p>5 Sep 2016</p>
</div>
</div>
</div>
<div class="item">
<div class="item-inner"><img src="{{media url="wysiwyg/news/n3.jpg"}}" alt="" />
<div class="content-right"><a href="#">TV has never been better with</a>
<p>8 Sep 2016</p>
</div>
</div>
</div>
<div class="item">
<div class="item-inner"><img src="{{media url="wysiwyg/news/n4.jpg"}}" alt="" />
<div class="content-right"><a href="#">TV has never been better with</a>
<p>7 Sep 2016</p>
</div>
</div>
</div>
</div>
</div>
<script type="text/javascript" xml="space">// <![CDATA[
//
	jQuery(document).ready(function($) {
		$(".news-content").customScrollbar({
  skin: "default-skin",
  hScroll: false,
  updateOnWindowResize: true
  })

	});
//
// ]]></script>
To create the static block, go to Content>> Elements>> Blocks with Identifier * : "banner2-2"
Frontend Appearance 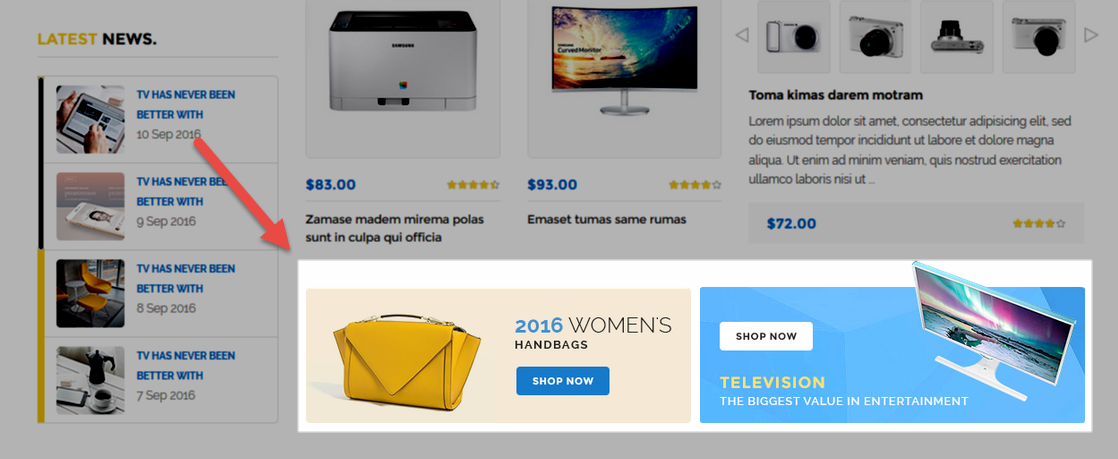
- Backend Setting: Please click Here to view.
Copy and paste the following code into the content tab of this static block:
<div class="banner2-1-w">
<div class="banner banner1"><a href="#"><img src="{{media url="wysiwyg/home-page-image/home2/banner2-1.png"}}" alt="" /></a></div>
<div class="banner banner2"><a href="#"><img src="{{media url="wysiwyg/home-page-image/home2/banner2-2.png"}}" alt="" /></a></div>
</div>
Static Block: clients-say2
To create the static block, go to Content>> Elements>> Blocks with Identifier * : "clients-say2"
Frontend Appearance 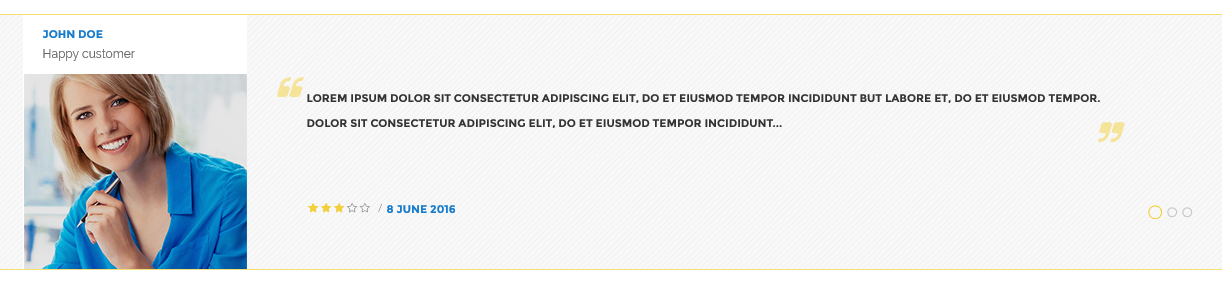
- Backend Setting: Please click Here to view.
Copy and paste the following code into the content tab of this static block:
<div class="clients-say">
<div class="container">
<div class="clients-say-slider">
<div class="item">
<div class="item-inner">
<div class="client-img">
<div class="client-infos">
<p class="client-name font-title">John Doe</p>
<p class="pos">Happy customer</p>
</div>
<img src="{{media url="wysiwyg/testimonial/client-home2.jpg"}}" alt="" /></div>
<div class="client-right">
<div class="client-des font-title">Lorem ipsum dolor sit consectetur adipiscing elit, do et eiusmod tempor incididunt but labore et, do et eiusmod tempor. dolor sit consectetur adipiscing elit, do et eiusmod tempor incididunt...</div>
<div class="date font-title"><img src="{{media url="wysiwyg/testimonial/rating.png"}}" alt="" /> 8 June 2016</div>
</div>
</div>
</div>
<div class="item">
<div class="item-inner">
<div class="client-img">
<div class="client-infos">
<p class="client-name font-title">David Smith</p>
<p class="pos">Happy customer</p>
</div>
<img src="{{media url="wysiwyg/testimonial/client-home2.jpg"}}" alt="" /></div>
<div class="client-right">
<div class="client-des font-title">Lorem ipsum dolor sit consectetur adipiscing elit, do et eiusmod tempor incididunt but labore et, do et eiusmod tempor. dolor sit consectetur adipiscing elit, do et eiusmod tempor incididunt...</div>
<div class="date font-title"><img src="{{media url="wysiwyg/testimonial/rating.png"}}" alt="" /> 7 May 2016</div>
</div>
</div>
</div>
<div class="item">
<div class="item-inner">
<div class="client-img">
<div class="client-infos">
<p class="client-name font-title">Jennifer</p>
<p class="pos">Happy customer</p>
</div>
<img src="{{media url="wysiwyg/testimonial/client-home2.jpg"}}" alt="" /></div>
<div class="client-right">
<div class="client-des font-title">Lorem ipsum dolor sit consectetur adipiscing elit, do et eiusmod tempor incididunt but labore et, do et eiusmod tempor. dolor sit consectetur adipiscing elit, do et eiusmod tempor incididunt...</div>
<div class="date font-title"><img src="{{media url="wysiwyg/testimonial/rating.png"}}" alt="" /> 6 June 2016</div>
</div>
</div>
</div>
</div>
</div>
<script type="text/javascript" xml="space">// <![CDATA[
//
	jQuery(document).ready(function($) {
		var owl_testimonial = $(".clients-say-slider");
		owl_testimonial.owlCarousel({

			responsive:{
				0:{
					items:1
				},
				480:{
					items:1
				},
				768:{
					items:1
				},
				992:{
					items:1
				},
				1200:{
					items:1
				}
			},

			autoplay:false,
			loop:true,
			nav : false, // Show next and prev buttons
			dots: true,
			autoplaySpeed : 500,
			navSpeed : 500,
			dotsSpeed : 500,
			autoplayHoverPause: true,
			margin: 0,
			animateOut: 'fadeOut',
        	animateIn: 'fadeIn',

		});
	});
//
// ]]></script>
</div>
To create the static block, go to Content>> Elements>> Blocks with Identifier * : "banner-home3-1"
Frontend Appearance 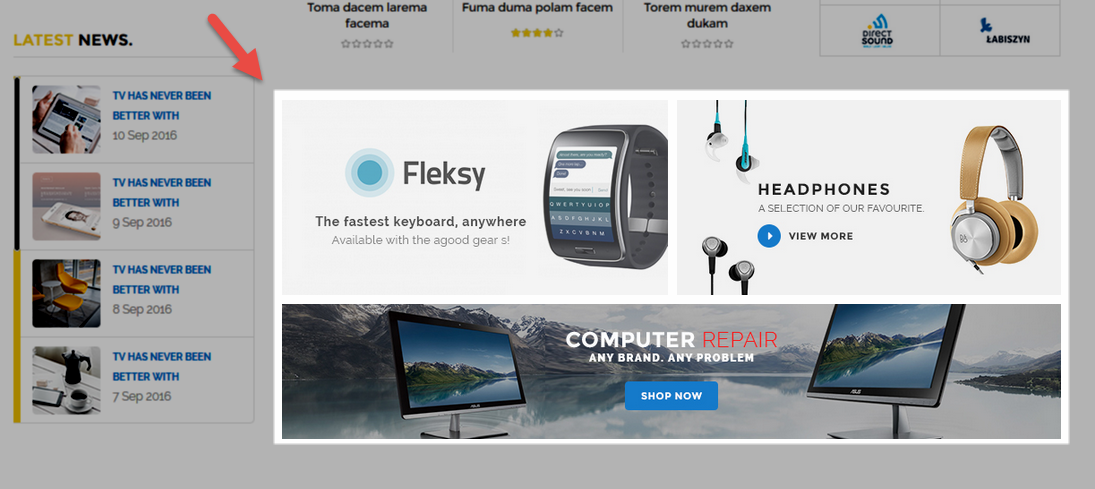
- Backend Setting: Please click Here to view.
Copy and paste the following code into the content tab of this static block:
<div class="banner-home3">
<div class="banner banner1"><a href="#"><img src="{{media url="wysiwyg/home-page-image/home3/bannerh3-1.jpg"}}" alt="" /></a></div>
<div class="banner banner2"><a href="#"><img src="{{media url="wysiwyg/home-page-image/home3/bannerh3-2.jpg"}}" alt="" /></a></div>
<div class="banner banner3"><a href="#"><img src="{{media url="wysiwyg/home-page-image/home3/bannerh3-3.jpg"}}" alt="" /></a></div>
</div>
3.5 How To Edit Copyright in Admin Panel
Frontend Appearance
In SM Agood Administration Page, please navigate to Stores>> Settings>> Configuration >> MAGENTECH.COM >> SM Agood >> Advanced to configure this theme's copyright.
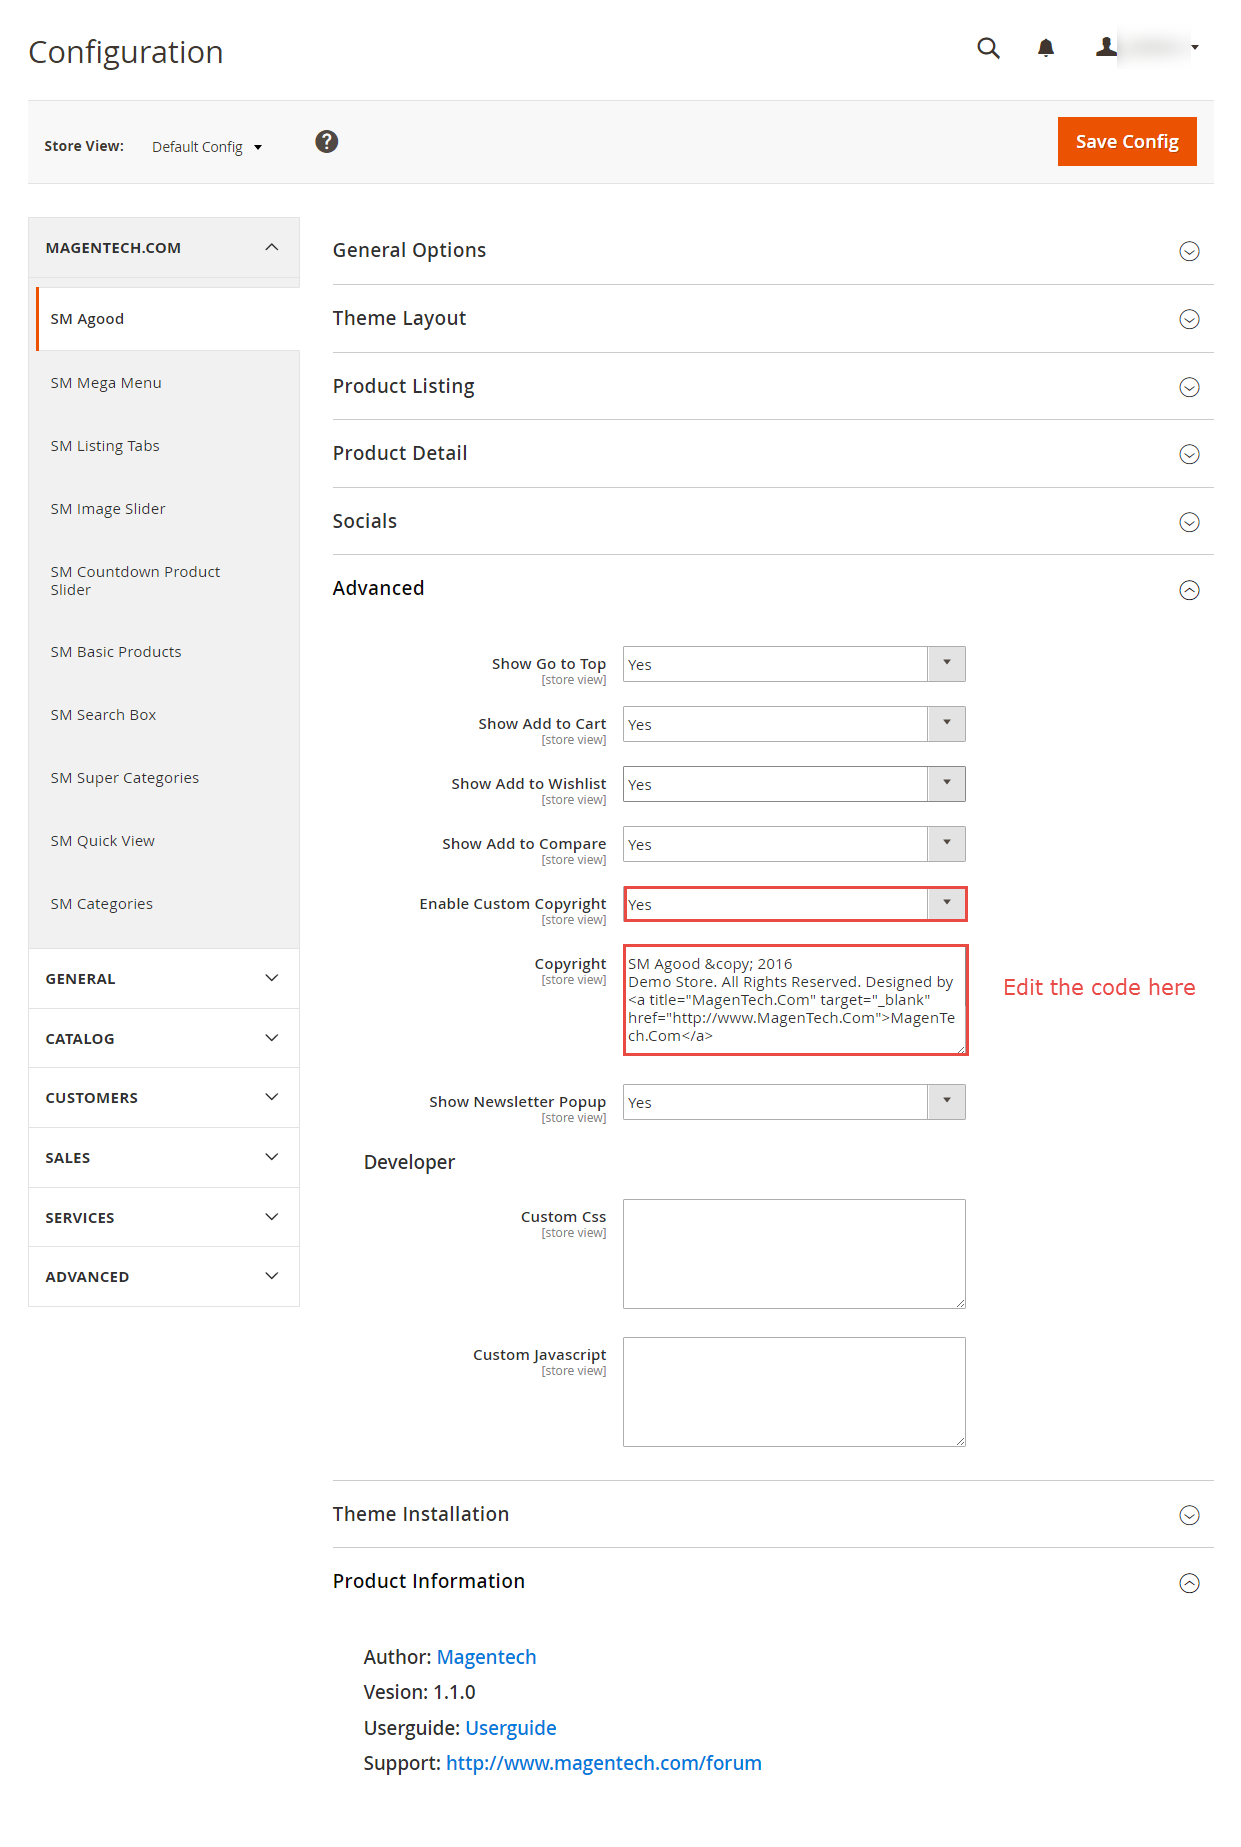
Edit the code here:
SM Agood © 2016 Demo Store. All Rights Reserved. Designed by </a title="MagenTech.Com" target="_blank" href="http://www.MagenTech.Com">MagenTech.Com<//a>
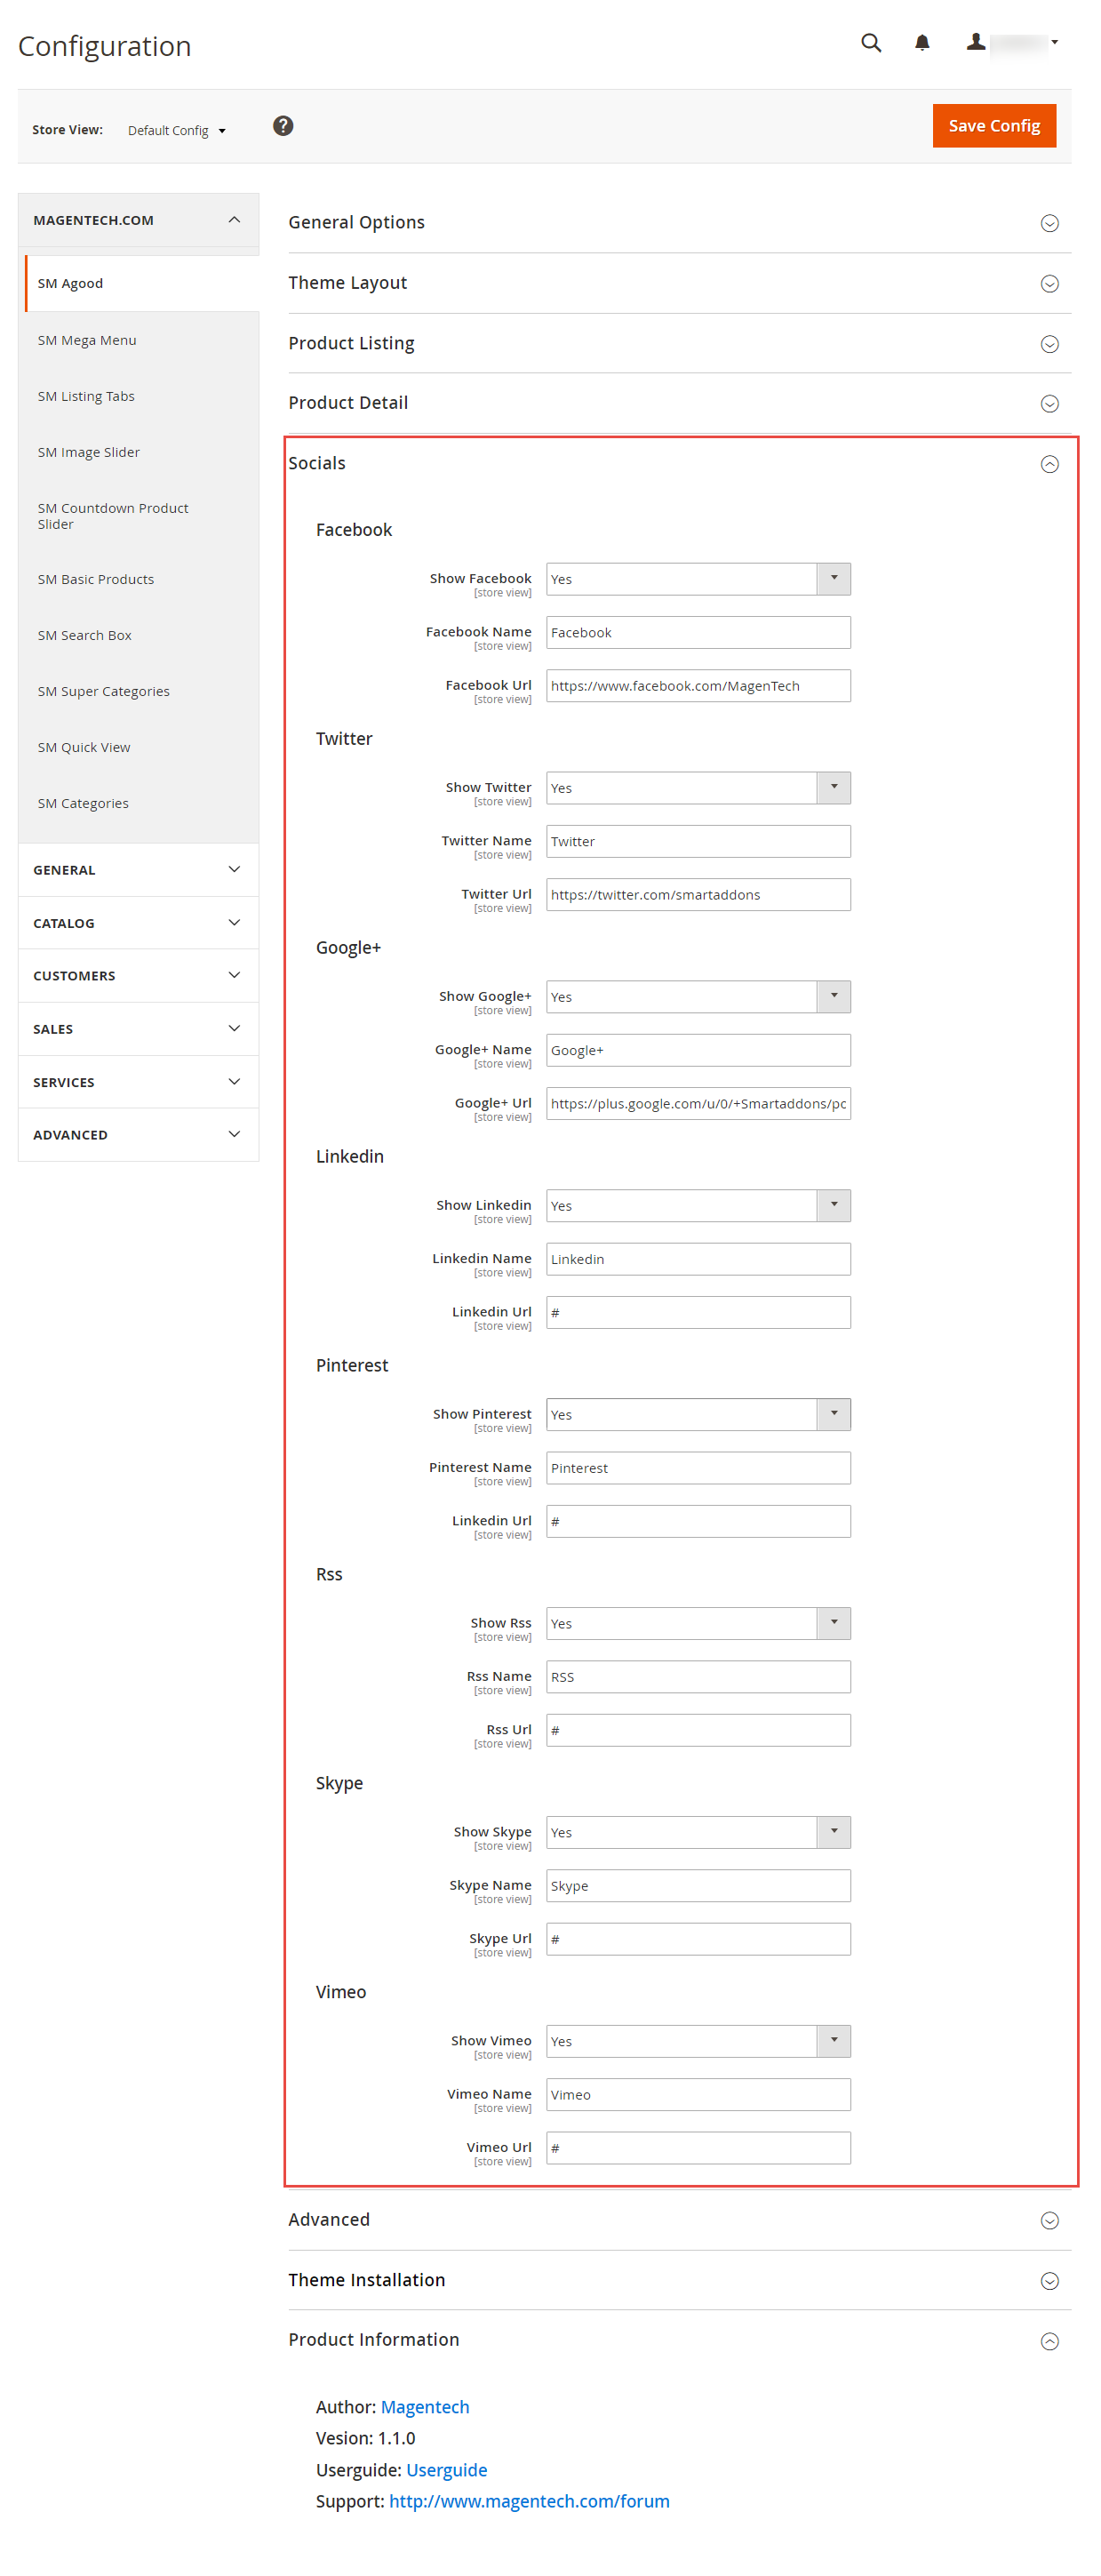
3.6 How To Customize the Social symbols in admin panel
Frontend Appearance

In SM Agood Administration Page, please navigate to Stores>> Settings >> Configuration >> MAGENTECH.COM >> SM Agood >> Socials.
1. NEWSLETTER
Frontend Appearance 
In your Website's Directory, go to app\design\frontend\Sm\agood\Magento_Newsletter\templates folder. To change the text in this part, in this folder, you could open the file named subscribe.phtml by your editor program.
Find and change the following text in this file as you want:
Enter your email address, Subscribe
- Backend Setting: Please click Here to view.
2. NEWSLETTER POP-UP
Frontend Appearance 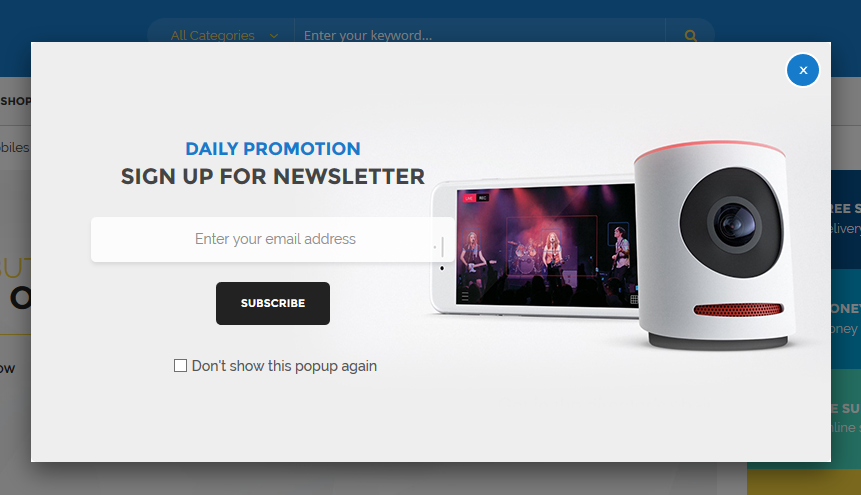
In your Website's Directory, go to app\design\frontend\Sm\agood\Magento_Newsletter\templates folder. To change the text in this part, in this folder, you could open the file named subscribe-popup.phtml by your editor program, and find the word Submit to change.
- Backend Setting: Please click Here to view.
Find and change the following text in this file as you want:
Daily Promotion, SIGN UP FOR NEWSLETTER, Enter your email address, Subscribe, Don\'t show this popup again
In your Website's Directory, go to app\design\frontend\Sm\agood\web\images folder. To change the image in this part, in this folder, you could replace the image named bg-popupnews.jpg by your image.
- Please click Here to view.
4SUPPORT
- SUPPORT - If you have any questions that are beyond the scope of this help file, please feel free to send us via: Support Tickets System
- FAQs - Go to Here to view more the Frequently Asked Questions.