Firstly, a huge thanks for purchasing this theme, your support is truly appreciated!
This document covers the installation and use of this theme, reveals some answers to common problems and issues. We encourage you to read this document throughtly if you are experiencing any difficulties. If you have any questions that are beyond the scope of document, please feel free to contact us via our Support Tickets System.
Note: This theme has versions for Magento 1.9.x, 2.2.x and Magento 2.3.x.
| Version | Userguide |
|---|---|
| SM Paco Magento Version 2.1.x-2.3.x | Please click Here to view |
| SM Paco Magento Version 2.4.x | Please click Here to view |
1 SYSTEM REQUIREMENT
At the basic level, this theme will require the following conditions:
2INSTALLATION
As of Magento 2.4.0, MySQL is no longer used for search. You must use Elasticsearch. Magento supports Elasticsearch 7.6.x.
(Magento no longer supports Elasticsearch 2.x, 5.x, and 6.x.)
There are two ways to install a Magento Theme:
- Quickstart Installation: Suitable if you have your first installation and want to get a whole new fresh site as our Demo.
- Manual Installation (including Theme Installation): Suitable if your store is full with content that you donai??i??t want to overwrite.
2.1 Quickstart Installation:
Magentech provides SM Quickstart package for each theme which aims to ease the installation for users. If you plan to start your site from the beginning, it will help you save much time of installing and configuring. Please follow steps below:
Important: You must use the command line to install Magento 2.4+.
- Step 1: Download the quickstart package named as sm_paco_quickstart_pl_m2.4.0_v3.0.0
- Step 2: Upload and Extract the whole Quickstart package to your server. In Quickstart folder you will see the extracted folder that include all sample data
- Step 3: Create a Database for your Magento site
Important!
You need to remember the database name to use in the next steps

- Step 4: Import database sample_data.sql under the folder sm_paco_quickstart_pl_m2.4.0_v3.0.0\data_quickstart
Note: You can import database by run this command
mysql -u root -p database_name < sample_data.sql
Note: After that please go to folder root and run these command to permissions:chmod -R 777 pub
chmod -R 777 generated
chmod -R 777 var

- Step 5: Install Magento
This example assumes that the Magento install directory is named
sm_paco, the db-host is on the same machine (localhost), and that the db-name, db-user, and db-password are allmagento:php bin/magento setup:install --base-url=http://192.168.1.220/ytc_templates/magento/sm_paco --base-url-secure=https://192.168.1.220/ytc_templates/magento/sm_paco --db-host=localhost --db-name=magento --db-user=magento --db-password=magento --admin-firstname=admin --admin-lastname=admin --admin-email=admin@admin.com --admin-user=admin --admin-password=admin123 --language=en_US --currency=USD --timezone=America/Chicago --use-rewrites=1 --backend-frontname="admin" --search-engine=elasticsearch7 --elasticsearch-index-prefix=paco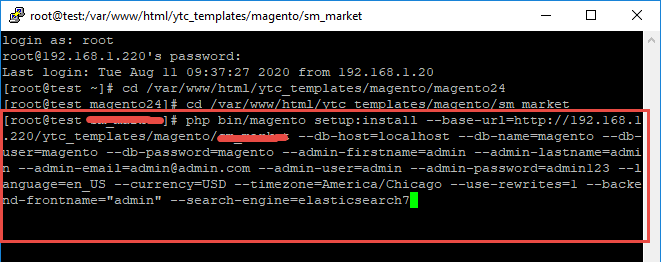
Messages similar to the following display to indicate a successful installation:
Post installation file permissions check...
For security, remove write permissions from these directories: '/var/www/html/ytc_templates/magento/sm_paco/app/etc'
[Progress: 274 / 274] [SUCCESS]: Magento installation complete.
[SUCCESS]: Admin Panel URI: /admin_puu71qNote: You can customize the Admin URI with the
--backend-frontnameoption. However, we recommend omitting this option and allowing the installation command to automatically generate a random URI. A random URI is harder for hackers or malicious software to exploit. The URI displays in your console when installation is complete. - Step 6: Can't login to admin panel
When you login to admin will be display like this image:

Please open file
app/etc/config.phpand change 'Magento_TwoFactorAuth' => 1 to 'Magento_TwoFactorAuth' => 0

After that run these command:php bin/magento setup:upgrade
andphp bin/magento setup:static-content:deploy -f - Step 7: Finally, permissions for the following folders by run these commands:
chmod -R 777 pub
chmod -R 777 generated
chmod -R 777 var

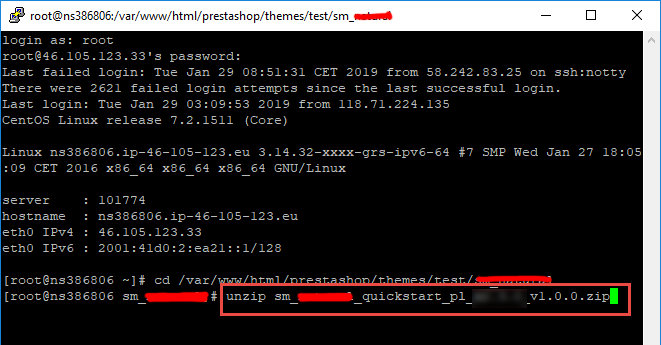
After upload quickstart package, please extract package by this command: unzip file.zip
2.2 Manual Installation
Important!
- We recommend you to duplicate your live store on a development store and try installation on it in advance.
- Backup magento files and the store database.
It's very important to backup all of themes and extensions in Magento before installation, especially when you are working on a live server. We strongly recommend you to do not omit this step.
- Note: Manual Installation can only import CMS Page and Static Block. Products, Categories, Megamenu may not display when you use Manual Installation, you need to configure manually (by yourself >> please read documentation carefully)
- Step 1: Download Magento 2.4.x
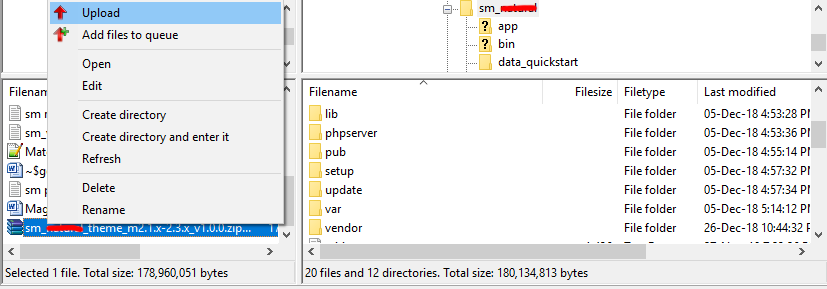
https://magento.com/tech-resources/downloadand install on your server - Step 2: Please download 'sm_paco_theme_m2.1.x-2.4.x_v3.0.0.zip' file and upload to the root of your magento site folder on your server, after that unzip by command
unzip name_file.zip.
- Step 3:
Active SM Extensions, open command line in folder root of magento and run commands via ssh using putty or othersphp bin/magento setup:upgrade
- Step 5:
Navigate to Content > Design > Configuration > Edit Default Store > Select "SM paco" theme.
- Step 6: Click "Save Configuarion" button to save your changes.
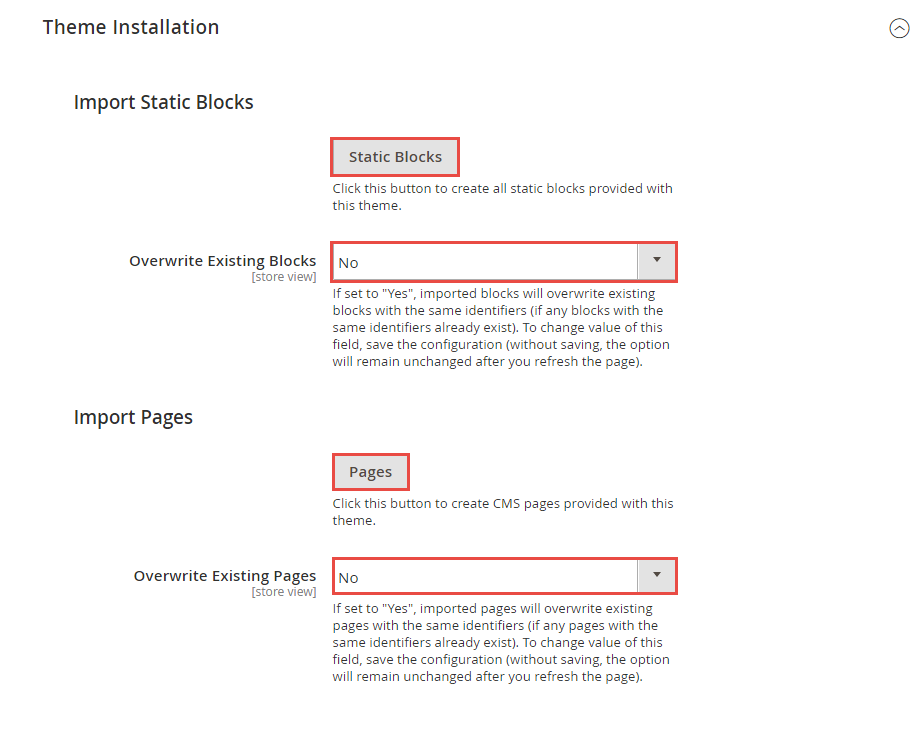
- Step 7: Navigate to Stores>> Settings>> Configuration >> MAGENTECH.COM >> Sm paco >> Theme Installation. Press the buttons named 'Static Blocks' and 'Pages' to import all default blocks and pages. Click "Save Configuarion" button to save your changes.
- Step 8: Click "Demo X" button to install demo version that you prefer to install. After that, click "Save config" button on the top.

- Step 9: Flush Cache: After successfully import your demo, save Theme Settings and Design Settings and clear the cache by using this command as php bin/magento cache:flush
in Command Prompt. Or you could go to System >> Tools >> Cache Management, click 'Flush Cache Storage' button to flush all the cache.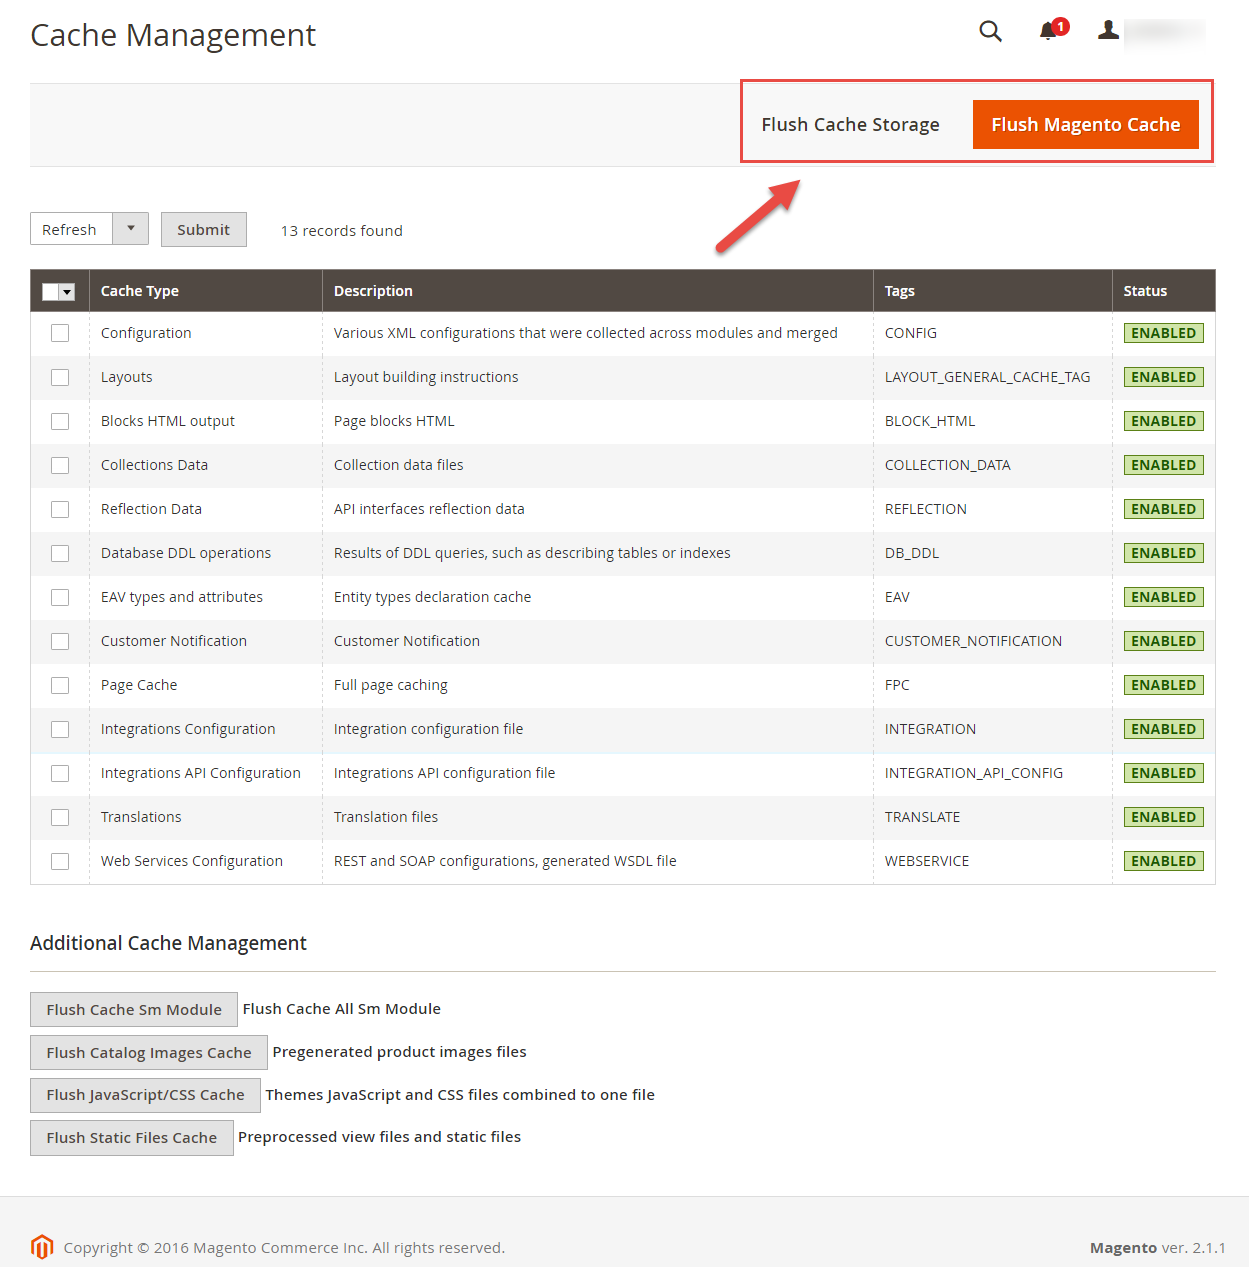
Step 4: Run deploy command: php bin/magento setup:static-content:deploy -f

chmod -R 777 pub
chmod -R 777 generated
chmod -R 777 var
Note. Please remember that: If you have imported these Static Blocks, Pages successfully, you would have all blocks and pages provided with this theme and you do not need to create any static blocks or pages manually as the following instruction of this document.
3.1 Page Configuration
3.1.1 Home Style 1
Frontend of Home Style 1 - Layout Position

In the Admin Panel, please navigate to Content >> Elements >> Pages to create a new page in Pages section. Here is the list of steps in this style's configuration process:
- Page Information Tab: Please click to see the Backend Settings.
- Content Tab: Please click to see the Backend Settings.
Copy and paste the following code into the Content field::
<div class="homepage-wrapper home-style-1">
<div class="full-wrapper">
<div class="container-full">
<div class="boxed-container">{{block class="Magento\\Cms\\Block\\Block" block_id="static-image-1"}}</div>
</div>
</div>
<div class="boxed-container bestsellers-wrap">{{block class="Sm\BasicProducts\Block\BasicProducts" template="Sm_BasicProducts::sm/basicproducts/slider-index1.phtml" title="PACO BEST SELLERS" product_order_by="best_sales" product_category="11" product_limitation="6" nb_column1="4" nb_column2="4" nb_column3="3" nb_column4="2" nb_column5="1" pretext="The point of using Lorem Ipsum is that it has a more-or-less normal distribution of letters, as opposed to using 'Content here"}}</div>
<div class="full-wrapper best-deal-wrap">
<div class="container">
<div class="boxed-container">{{block class="Sm\CountdownProductSlider\Block\CountdownProductSlider" name="countdownproductslider.default" as="countdownproductslider_default" template="Sm_CountdownProductSlider::sm/countdownproductslider/default-index1.phtml" title="Best smartphone 2016" pretext="Get 45% Off Your Order Of $500 And More" posttext="best-smartphone.html"}}</div>
</div>
</div>
<div class="boxed-container">{{block class="Sm\ProductsDetailSliders\Block\ProductsDetailSliders" name="productsdetailsliders" template="Sm_ProductsDetailSliders::default.phtml"}}</div>
<div class="full-wrapper client-say-wrap">
<div class="container">
<div class="boxed-container">{{block class="Magento\\Cms\\Block\\Block" block_id="static-testimonial"}}</div>
</div>
</div>
<div class="boxed-container">{{block class="Magento\\Cms\\Block\\Block" block_id="blog-block"}}</div>
</div>
Copy and paste the following code into the Content field::
<referenceContainer name="main.content"> <block class="Sm\ImageSlider\Block\ImageSlider" name="imageslider" before="-" template="Sm_ImageSlider::default.phtml"/> </referenceContainer>
3.1.2 Home Style 2
Frontend of Home Style 2 - Layout Position

In the Admin Panel, please navigate to Content >> Elements >> Pages to create a new page in Pages section. Here is the list of steps in this style's configuration process:
- Page Information Tab: Please click to see the Backend Settings.
- Content Tab: Please click to see the Backend Settings.
Copy and paste the following code into the Content field::
<div class="homepage-wrapper home-style-2">
<div class="full-wrapper">
<div class="container-full">
<div class="boxed-container">{{block class="Magento\\Cms\\Block\\Block" block_id="cb-list"}}</div>
</div>
</div>
<div class="boxed-container new-arivals-wrap">{{block class="Sm\BasicProducts\Block\BasicProducts" name="basicproducts.new.index2" template="Sm_BasicProducts::sm/basicproducts/slider-index2.phtml" title="New arrivals" product_order_by="lastest_product" product_category="11" product_limitation="8" nb_column1="4" nb_column2="4" nb_column3="3" nb_column4="2" nb_column5="1" pretext="The point of using Lorem Ipsum is that it has a more-or-less normal distribution of letters, as opposed to using 'Content here"}}</div>
<div class="full-wrapper">
<div class="container-full">
<div class="boxed-container">{{block class="Magento\\Cms\\Block\\Block" block_id="static-image-1-index2"}}</div>
</div>
</div>
<div class="full-wrapper">
<div class="container">
<div class="boxed-container">
<div class="row">
<div class="col-lg-4 col-md-5 col-sm-5 deal-week-wrap">{{block class="Sm\Deals\Block\Deals" name="deals" template="Sm_Deals::default-index2.phtml" title="Deals of the week" posttext="" pretext="The point of using Lorem Ipsummore-or-less" nb_column4="2" margin="30"}}</div>
<div class="col-lg-8 col-md-7 col-sm-7 bestseller-wrap">{{block class="Sm\BasicProducts\Block\BasicProducts" template="Sm_BasicProducts::sm/basicproducts/slider-list-index2.phtml" title="PACO BEST SELLERS" product_order_by="price" product_category="11" product_limitation="12" nb_column1="2" nb_column2="1" nb_column3="1" nb_column4="1" nb_column5="1" pretext="The point of using Lorem Ipsum is that it" img_width="183" img_height="277"}}</div>
</div>
</div>
</div>
</div>
<div class="full-wrapper client-say-wrap">
<div class="container">
<div class="boxed-container">{{block class="Magento\\Cms\\Block\\Block" block_id="static-testimonial-index2"}}</div>
</div>
</div>
<div class="boxed-container">{{block class="Magento\\Cms\\Block\\Block" block_id="blog-block"}}</div>
</div>
Copy and paste the following code into the Content field::
<referenceContainer name="main.content"> <block class="Sm\ImageSlider\Block\ImageSlider" name="imageslider" before="-" template="Sm_ImageSlider::default.phtml"/> </referenceContainer>
- To set a default page for your Magento Site, in the Admin Panel you go to Stores>> Settings >>Configuration>>Web>>Default Pages. Please click to see the Backend Settings.
- You need to change to the website / store view that you want to change (the dropdown menu in the upper left corner). You will probably have to create a new CMS page if you want to have something different from your default home page.
3.2 Configure Megamenu
- Step 1: Create a New Menu In Admin Panel, navigate to SM Megamenu >> Add New Menu (add group: "Mega Menu Horizontal".)
- Step 2: Navigate to SM Megamenu >> Configuration & fill the ID number for the created menu in step 1
- Step 3: In order to add menu items, go to SM Megamenu >> Menu Manager >> click on 'Edit'to open Menu Items to add items as you want
3.2.1 Horizontal Megamenu:

- Sortable Categories Items Please click Here to view.
Features
Frontend Appearance 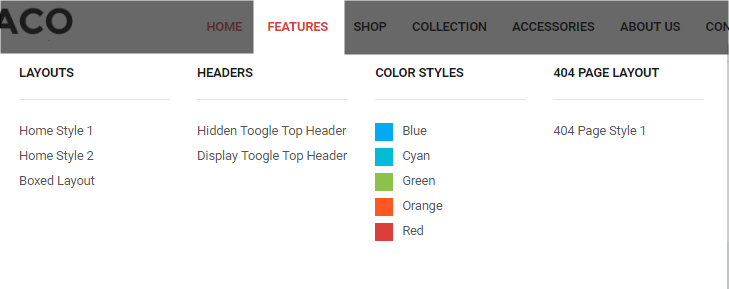
- Backend Settings: Please click Here to view.
- Backend of 'Dropdown Features': Please click Here to view.
Copy and paste the following code into the Content field::
<div class="home-menu-dropdown">
<ul class="item-home-store layout-home">
<li class="title-menu-home">Layouts</li>
<li><a title="Home Style 1" href="{{store url="?___store=default&___from_store=default"}}">Home Style 1</a></li>
<li><a title="Home Style 2" href="{{store url="?___store=french&___from_store=default"}}">Home Style 2</a></li>
<li><a title="Boxed Layout" href="{{store url="?___store=somaliland&___from_store=default"}}">Boxed Layout</a></li>
</ul>
<ul class="item-home-store header-home">
<li class="title-menu-home">Headers</li>
<li><a title="Header Type 1" href="{{store url="?___store=default&___from_store=french"}}">Hidden Toogle Top Header</a></li>
<li><a title="Header Type 2" href="{{store url="?___store=french&___from_store=default"}}">Display Toogle Top Header</a></li>
</ul>
<ul class="item-home-store theme-color">
<li class="title-menu-home">Color Styles</li>
<li class="blue"><a title="Blue" href="{{store url="?___store=belgium&___from_store=default"}}">Blue</a></li>
<li class="cyan"><a title="Cyan" href="{{store url="?___store=japan&___from_store=default"}}">Cyan</a></li>
<li class="green"><a title="Green" href="{{store url="?___store=andorra&___from_store=default"}}">Green</a></li>
<li class="orange"><a title="Orange" href="{{store url="?___store=vietnam&___from_store=default"}}">Orange</a></li>
<li class="red"><a title="Red" href="{{store url="?___store=default&___from_store=default"}}">Red</a></li>
</ul>
<ul class="item-home-store layout-home">
<li class="title-menu-home">404 Page Layout</li>
<li><a title="404 Page Style 1" href="{{store url="404page"}}">404 Page Style 1</a></li>
</ul>
<div style="clear:both;"> </div>
</div>
Shop
Frontend Appearance 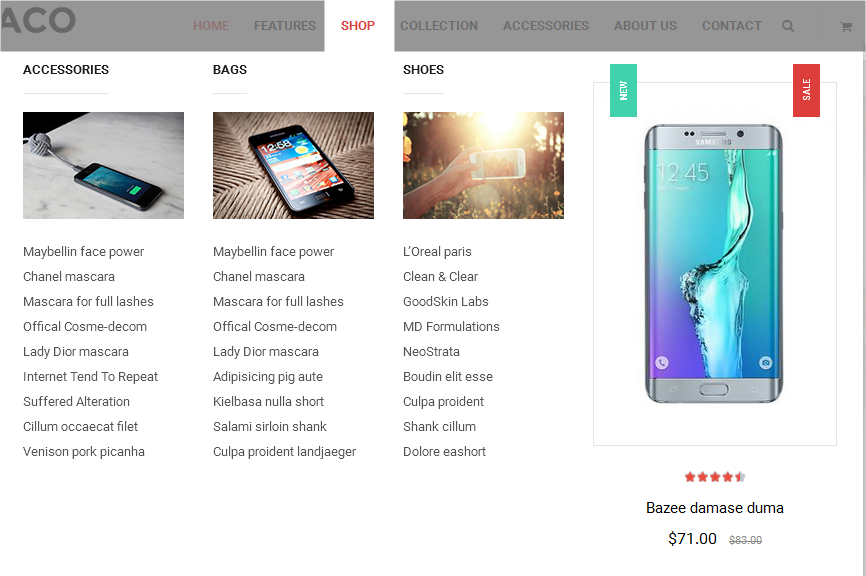
- Backend Settings: Please click Here to view.
- Backend of 'Group 1': Please click Here to view.
- Backend of 'Iphone collection' in 'Group 1': Please click Here to view.
- Backend of 'Banner 1' in 'Iphone collection': Please click Here to view.
Copy and paste the following code into the Content field::
<div class="static-image-menu">
<a title="Static Image" href="#">
<img src="{{media url="wysiwyg/image-megamenu/img-megamenu-1.jpg"}}" alt="Static Image" />
</a>
</div>
- Backend of 'Samsung collection' in 'Group 1': Please click Here to view.
- Backend of 'Banner 2' in 'Samsung collection': Please click Here to view.
Copy and paste the following code into the Content field::
<div class="static-image-menu">
<a title="Static Image" href="#">
<img src="{{media url="wysiwyg/image-megamenu/img-megamenu-2.jpg"}}" alt="Static Image" />
</a>
</div>
- Backend of 'Group 2': Please click Here to view.
- Backend of 'Sony collection' in 'Group 2': Please click Here to view.
- Backend of 'Banner 3' in 'Sony collection': Please click Here to view.
- Backend of 'Product Slider - Collection' in 'Group 2': Please click Here to view.
Collection
Frontend Appearance 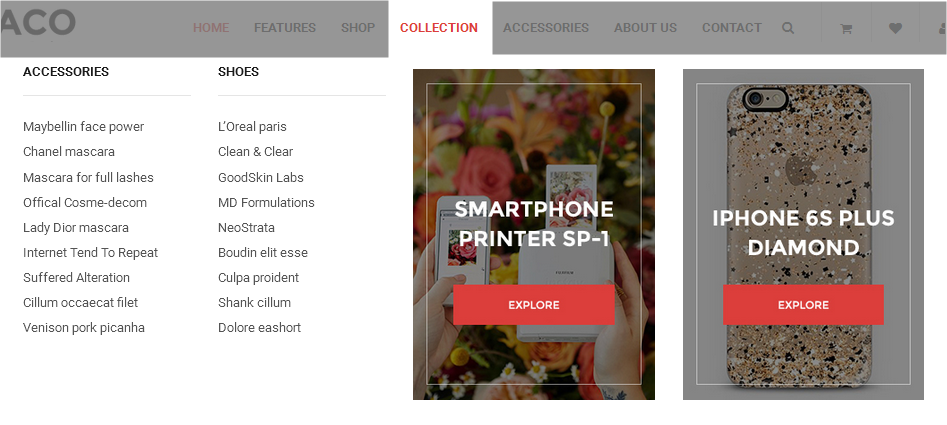
- Backend Settings: Please click Here to view.
- Backend of 'Group 1': Please click Here to view.
- Backend of 'Iphone collection' in 'Group 1': Please click Here to view.
- Backend of 'Sony collection' in 'Group 1': Please click Here to view.
- Backend of 'Group 2' in 'Collection': Please click Here to view.
- Backend of 'Image 1' in 'Group 2': Please click Here to view.
Copy and paste the following code into the Content field::
<div class="static-image-menu">
<a title="Static Image" href="#">
<img src="{{media url="wysiwyg/image-megamenu/img-megamenu-4.jpg"}}" alt="Static Image" />
</a>
</div>
- Backend of 'Image 2' in 'Group 2': Please click Here to view.
Copy and paste the following code into the Content field::
<div class="static-image-menu">
<a title="Static Image" href="#">
<img src="{{media url="wysiwyg/image-megamenu/img-megamenu-5.jpg"}}" alt="Static Image" />
</a>
</div>
Accessories
Frontend Appearance 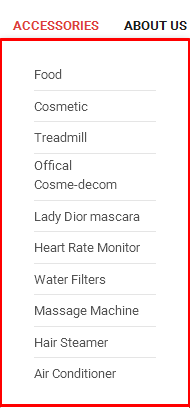
- Backend Settings: Please click Here to view.
- Backend of 'Accessories' in 'Accessories': Please click Here to view.
About Us
Frontend Appearance 
- Backend Settings: Please click Here to view.
Contact
Frontend Appearance 
- Backend Settings: Please click Here to view.
3.3 Configure Extensions
The SM Paco front-page has been integrated with the extensions in the following list:
- SM Countdown Product Slider
- SM Product Detail Sliders
- SM Basic Products
- SM Megamenu
- SM Image Slider
- SM Deals
- SM Quick View
In SM Paco Administration Page, please navigate to Stores>> Settings>> Configuration >> MAGENTECH.COM to configure extensions as you want.
- Position: SM Coundownt Product Slider
- Frontend Appearance

- Backend of SM Coundownt Product Slider: Click Here
- Position: SM Product Detail Sliders
- Frontend Appearance
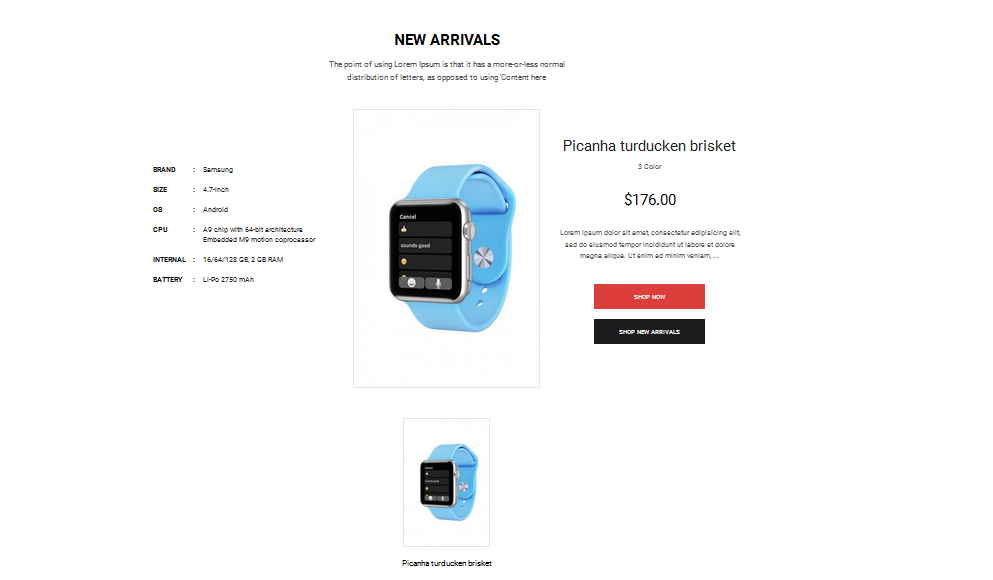
- Backend of SM Product Detail Sliders: Click Here
- Position: SM Basic Products
- Frontend Appearance
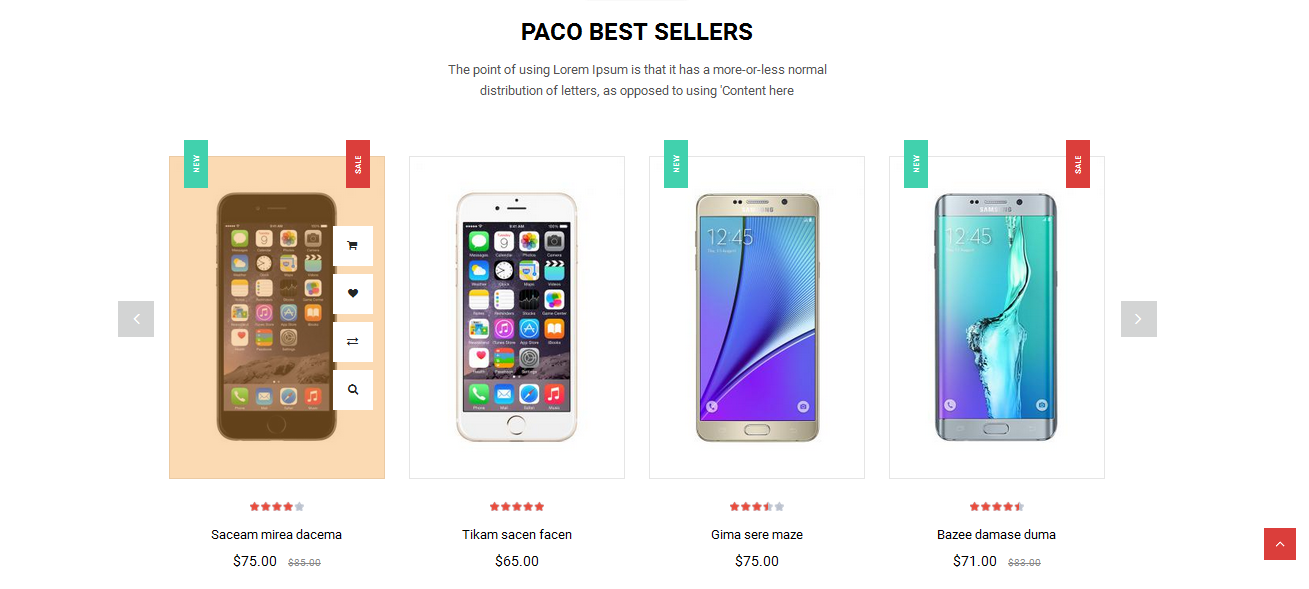
- Backend of SM Basic Products: Click Here
- Position: SM Megamenu
- Frontend Appearance

- Backend of SM Megamenu: Click Here
- Position: SM Image Slider
- Frontend Appearance
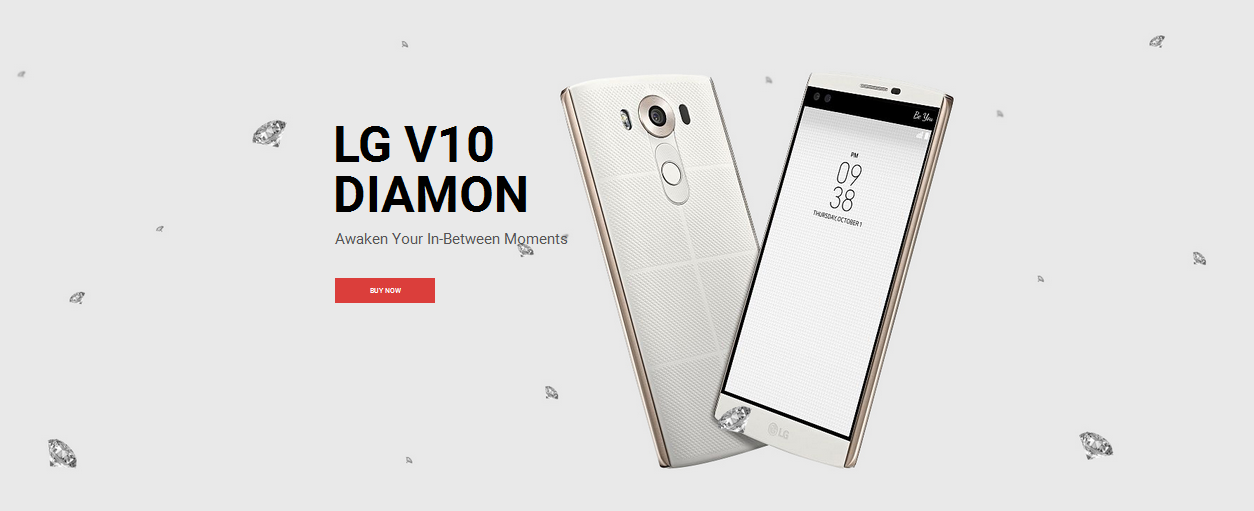
- Backend of SM Image Slider: Click Here
- Position: SM Deals
- Frontend Appearance

- Backend of SM Listing Tabs: Click Here
- Position: SM Quick View
- Frontend Appearance
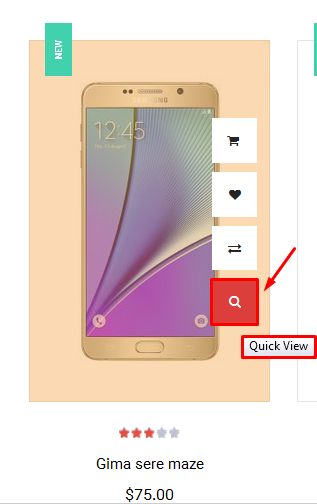
- Backend of SM Quick View: Click Here
3.4 Configure Static Blocks
The SM paco front-page has the following static blocks in the theme:
- Static Block:hotline
- Static Block:top-social
- Static Block:static-image-1
- Static Block:static-testimonials
- Static Block:blog-block
- Static Block:brand-block
- Static Block:ft-contact-us
- Static Block:ft-opening-time
- Static Block:ft-my-account
- Static Block:ft-information
- Static Block:ft-other-pages
- Static Block:ft-customer-service
- Static Block:intro-coppyright
- Static Block:payment-footer
- Static Block:header-policy-top
- Static Block:cb-list
- Static Block:static-testimonials-index2
To create a new static block, go to Content>> Elements>> Blocks >> Add new block.
Static Block: hotline
To create the static block, go to Content>> Elements>> Blocks with Title * : "Paco hotline" and Identifier * : "hotline"
Frontend Appearance 
- Backend Setting: Please click Here to view.
Copy and paste the following code into the content tab of this static block:
<p>Contact us 24/7: +44 573 222 7439 | Paradis Store, Portland Street, Manchester City, Manchester</p>
To create the static block, go to Content>> Elements>> Blocks with Title * : "Paco - Top social" and Identifier * : "top-social"
Frontend Appearance 
- Backend Setting: Please click Here to view.
Copy and paste the following code into the content tab of this static block:
<div class="top-social"> <ul> <li class="li-social facebook-social"><a title="Facebook" href="https://www.facebook.com/MagenTech" target="_blank"> <span class="name-social">Facebook</span> </a></li> <li class="li-social twitter-social"><a title="Twitter" href="https://twitter.com/smartaddons" target="_blank"> <span class="name-social">Twitter</span> </a></li> <li class="li-social google-social"><a title="Google+" href="https://plus.google.com/u/0/+Smartaddons/posts" target="_blank"> <span class="name-social">Google+</span> </a></li> <li class="li-social pinterest-social"><a title="Pinterest" href="#" target="_blank"> <span class="name-social">Pinterest</span> </a></li> </ul> </div>
Static Block: static-image-1
To create the static block, go to Content>> Elements>> Blocks with Title * : "Paco - Static Image 1" and Identifier * : "static-image-1"
Frontend Appearance 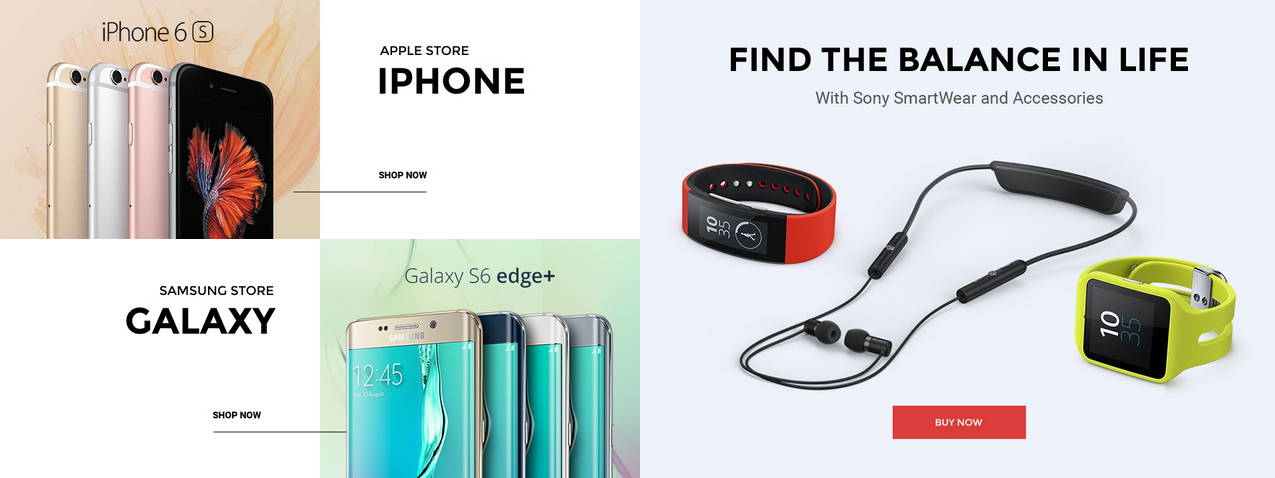
- Backend Setting: Please click Here to view.
Copy and paste the following code into the content tab of this static block:
<div class="row banner-list static-image-1">
<div class="col-lg-6 col-md-6 col-xs-6">
<div class="row">
<div class="col-lg-12 col-md-12"><a class="first-image" title="Static Image" href="#"><img class="img-static" src="{{media url="wysiwyg/home-page-image/home-1/image-1.jpg"}}" alt="Static Image" /></a></div>
</div>
<div class="row">
<div class="col-lg-12 col-md-12"><a class="first-image" title="Static Image" href="#"><img class="img-static" src="{{media url="wysiwyg/home-page-image/home-1/image-2.jpg"}}" alt="Static Image" /></a></div>
</div>
</div>
<div class="col-lg-6 col-md-6 col-xs-6"><a class="first-image" title="Static Image" href="#"><img class="img-static" src="{{media url="wysiwyg/home-page-image/home-1/image-3.jpg"}}" alt="Static Image" /></a></div>
</div>
<div class="row banner-list static-image-1">
<div class="col-lg-6 col-md-6 col-xs-6"><a class="first-image" title="Static Image" href="#"><img class="img-static" src="{{media url="wysiwyg/home-page-image/home-1/image-4.jpg"}}" alt="Static Image" /></a></div>
<div class="col-lg-6 col-md-6 col-xs-6">
<div class="row">
<div class="col-lg-6 col-md-6 col-xs-6"><a class="first-image" title="Static Image" href="#"><img class="img-static" src="{{media url="wysiwyg/home-page-image/home-1/image-5.jpg"}}" alt="Static Image" /></a></div>
<div class="col-lg-6 col-md-6 col-xs-6"><a class="first-image" title="Static Image" href="#"><img class="img-static" src="{{media url="wysiwyg/home-page-image/home-1/image-6.jpg"}}" alt="Static Image" /></a></div>
</div>
</div>
</div>
Static Block: static-testimonials
To create the static block, go to Content>> Elements>> Blocks with Title * : "Paco - Static Testimonial" and Identifier * : "static-testimonials"
Frontend Appearance 
- Backend Setting: Please click Here to view.
Copy and paste the following code into the content tab of this static block:
<div id="testimonials-home" class="testimonials-home">
<div class="title-home">
<h2>What Our Clients Say</h2>
</div>
<div class="navslider"> </div>
<div class="margin-slider">
<ul class="testimonials-slider">
<li class="item">
<div class="client-child">
<div class="image-client"><img src="{{media url="wysiwyg/testimonial/client-1.png"}}" alt="Kenvin" /></div>
<div class="comment">
<div class="content">"Lorem ipsum dolor sit amet, consectetur adipisicing elit, sed do eiusmod tempor incididunt ut labore et dolore magna aliqua. Ut enim ad minim veniam, quis nostrud exercitation ullamco laboris nisi ut aliquip ex ea commodo consequat. Duis aute irure dolor in reprehenderit in voluptate velit esse cillum dolore eu fugiat nulla pariatur.."</div>
<h2 class="client-name">Donald Berry</h2>
<h3 class="client-job">Web Developer</h3>
</div>
</div>
</li>
<li class="item">
<div class="client-child">
<div class="image-client"><img src="{{media url="wysiwyg/testimonial/client-2.png"}}" alt="Venus" /></div>
<div class="comment">
<div class="content">"Lorem ipsum dolor sit amet, consectetur adipisicing elit, sed do eiusmod tempor incididunt ut labore et dolore magna aliqua. Ut enim ad minim veniam, quis nostrud exercitation ullamco laboris nisi ut aliquip ex ea commodo consequat. Duis aute irure dolor in reprehenderit in voluptate velit esse cillum dolore eu fugiat nulla pariatur.."</div>
<h2 class="client-name">David</h2>
<h3 class="client-job">Market Research</h3>
</div>
</div>
</li>
<li class="item">
<div class="client-child">
<div class="image-client"><img src="{{media url="wysiwyg/testimonial/client-3.png"}}" alt="Venus" /></div>
<div class="comment">
<div class="content">"Lorem ipsum dolor sit amet, consectetur adipisicing elit, sed do eiusmod tempor incididunt ut labore et dolore magna aliqua. Ut enim ad minim veniam, quis nostrud exercitation ullamco laboris nisi ut aliquip ex ea commodo consequat. Duis aute irure dolor in reprehenderit in voluptate velit esse cillum dolore eu fugiat nulla pariatur.."</div>
<h2 class="client-name">Venus</h2>
<h3 class="client-job">Designer</h3>
</div>
</div>
</li>
<li class="item">
<div class="client-child">
<div class="image-client"><img src="{{media url="wysiwyg/testimonial/client-4.png"}}" alt="Venus" /></div>
<div class="comment">
<div class="content">"Lorem ipsum dolor sit amet, consectetur adipisicing elit, sed do eiusmod tempor incididunt ut labore et dolore magna aliqua. Ut enim ad minim veniam, quis nostrud exercitation ullamco laboris nisi ut aliquip ex ea commodo consequat. Duis aute irure dolor in reprehenderit in voluptate velit esse cillum dolore eu fugiat nulla pariatur.."</div>
<h2 class="client-name">Anna</h2>
<h3 class="client-job">Market Research</h3>
</div>
</div>
</li>
<li class="item">
<div class="client-child">
<div class="image-client"><img src="{{media url="wysiwyg/testimonial/client-5.png"}}" alt="Venus" /></div>
<div class="comment">
<div class="content">"Lorem ipsum dolor sit amet, consectetur adipisicing elit, sed do eiusmod tempor incididunt ut labore et dolore magna aliqua. Ut enim ad minim veniam, quis nostrud exercitation ullamco laboris nisi ut aliquip ex ea commodo consequat. Duis aute irure dolor in reprehenderit in voluptate velit esse cillum dolore eu fugiat nulla pariatur.."</div>
<h2 class="client-name">Black Smith</h2>
<h3 class="client-job">Web Development</h3>
</div>
</div>
</li>
<li class="item">
<div class="client-child">
<div class="image-client"><img src="{{media url="wysiwyg/testimonial/client-6.png"}}" alt="Venus" /></div>
<div class="comment">
<div class="content">"Lorem ipsum dolor sit amet, consectetur adipisicing elit, sed do eiusmod tempor incididunt ut labore et dolore magna aliqua. Ut enim ad minim veniam, quis nostrud exercitation ullamco laboris nisi ut aliquip ex ea commodo consequat. Duis aute irure dolor in reprehenderit in voluptate velit esse cillum dolore eu fugiat nulla pariatur.."</div>
<h2 class="client-name">Kenvin</h2>
<h3 class="client-job">Market Research</h3>
</div>
</div>
</li>
</ul>
</div>
<script type="text/javascript">// <![CDATA[
jQuery(document).ready(function($) {
$(window).load(function(){
$('#testimonials-home .testimonials-slider').owlCarousel({
items: 3,
loop:true,
nav: false,
dots: false,
slideSpeed : 1,
center: true,
autoplay: true,
autoplayTimeout: 30000,
autoplayHoverPause: true,
addClassActive: true,
margin:0,
onInitialized: callback
});
function callback(event) {
if(this._items.length > this.options.items){
$('#testimonials-home .navslider').show();
}else{
$('#testimonials-home .navslider').hide();
}
}
$('#testimonials-home .navslider .prev').on('click', function(e){
e.preventDefault();
$('#testimonials-home .testimonials-slider').trigger('prev.owl.carousel');
});
$('#testimonials-home .navslider .next').on('click', function(e){
e.preventDefault();
$('#testimonials-home .testimonials-slider').trigger('next.owl.carousel');
});
});
});
// ]]></script>
</div>
Static Block: blog-block
To create the static block, go to Content>> Elements>> Blocks with Title * : "Paco Blog" and Identifier * : "blog-block"
Frontend Appearance 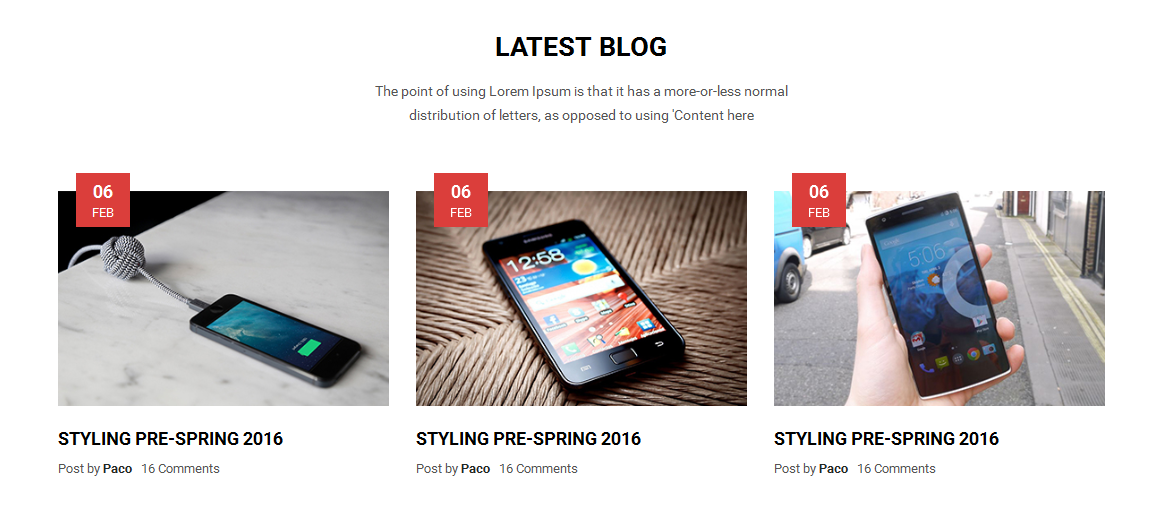
- Backend Setting: Please click Here to view.
Copy and paste the following code into the content tab of this static block:
<div class="box-content latest-post-block">
<div class="slider-latest-blog">
<div class="title-home">
<h2>Latest Blog</h2>
</div>
<div class="pretext">The point of using Lorem Ipsum is that it has a more-or-less normal distribution of letters, as opposed to using 'Content here</div>
<div class="slider-blog latest-post">
<div class="item">
<div class="blog-item-content">
<div class="image-blog"><a class="img-link" title="Vestibulum sit amet libero vel neque dapibus ultrices" href="#"><img class="img-static" src="{{media url="wysiwyg/blog/blog-1.jpg"}}" alt="Image Blog" /></a>
<div class="postDate"><span class="date">06</span><span class="month">Feb</span></div>
</div>
<div class="info-blog">
<div class="postTitle">
<h2><a href="#">Styling Pre-Spring 2016</a></h2>
</div>
<div class="postInfo"><span class="post-author">Post by <strong>Paco</strong></span><span class="post-comment">16 Comments</span></div>
</div>
</div>
</div>
<div class="item">
<div class="blog-item-content">
<div class="image-blog"><a class="img-link" title="Vestibulum sit amet libero vel neque dapibus ultrices" href="#"><img class="img-static" src="{{media url="wysiwyg/blog/blog-2.jpg"}}" alt="Image Blog" /></a>
<div class="postDate"><span class="date">06</span><span class="month">Feb</span></div>
</div>
<div class="info-blog">
<div class="postTitle">
<h2><a href="#">Styling Pre-Spring 2016</a></h2>
</div>
<div class="postInfo"><span class="post-author">Post by <strong>Paco</strong></span><span class="post-comment">16 Comments</span></div>
</div>
</div>
</div>
<div class="item">
<div class="blog-item-content">
<div class="image-blog"><a class="img-link" title="Vestibulum sit amet libero vel neque dapibus ultrices" href="#"><img class="img-static" src="{{media url="wysiwyg/blog/blog-3.jpg"}}" alt="Image Blog" /></a>
<div class="postDate"><span class="date">06</span><span class="month">Feb</span></div>
</div>
<div class="info-blog">
<div class="postTitle">
<h2><a href="#">Styling Pre-Spring 2016</a></h2>
</div>
<div class="postInfo"><span class="post-author">Post by <strong>Paco</strong></span><span class="post-comment">16 Comments</span></div>
</div>
</div>
</div>
</div>
<script type="text/javascript">// <![CDATA[
jQuery(document).ready(function($) {
var post_slider = $(".slider-blog.latest-post");
post_slider.owlCarousel({
responsive:{
0:{
items:1
},
480:{
items:1
},
768:{
items:2
},
992:{
items:2
},
1200:{
items:3
}
},
autoplay:false,
loop:false,
nav : false,
dots: false,
autoplaySpeed : 500,
navSpeed : 500,
dotsSpeed : 500,
autoplayHoverPause: true,
margin:30,
});
});
// ]]></script>
</div>
</div>
Static Block: brand-block
To create the static block, go to Content>> Elements>> Blocks with Title * : "Paco - Brands" and Identifier * : "brand-block"
Frontend Appearance 
- Backend Setting: Please click Here to view.
Copy and paste the following code into the content tab of this static block:
<div class="brand-block">
<div class="brand-content">
<ul class="list-brands row">
<li class="col-lg-2 col-md-2 col-sm-4"><a title="Brand" href="#"><img src="{{media url="wysiwyg/brand/br01.png"}}" alt="Brand" /></a></li>
<li class="col-lg-2 col-md-2 col-sm-4"><a title="Brand" href="#"><img src="{{media url="wysiwyg/brand/br02.png"}}" alt="Brand" /></a></li>
<li class="col-lg-2 col-md-2 col-sm-4"><a title="Brand" href="#"><img src="{{media url="wysiwyg/brand/br03.png"}}" alt="Brand" /></a></li>
<li class="col-lg-2 col-md-2 col-sm-4"><a title="Brand" href="#"><img src="{{media url="wysiwyg/brand/br04.png"}}" alt="Brand" /></a></li>
<li class="col-lg-2 col-md-2 col-sm-4"><a title="Brand" href="#"><img src="{{media url="wysiwyg/brand/br05.png"}}" alt="Brand" /></a></li>
<li class="col-lg-2 col-md-2 col-sm-4"><a title="Brand" href="#"><img src="{{media url="wysiwyg/brand/br06.png"}}" alt="Brand" /></a></li>
</ul>
</div>
</div>
Static Block: ft-contact-us
To create the static block, go to Content>> Elements>> Blocks with Title * : "Paco - Contact us footer" and Identifier * : "ft-contact-us"
Frontend Appearance 
- Backend Setting: Please click Here to view.
Copy and paste the following code into the content tab of this static block:
<div class="block ft-contact-us"> <div class="title">Store Information</div> <div class="content"> <p class="address"><em class="fa fa-home"></em>Ranelagh Place, Liverpool, L3 5UL, England</p> <p class="phone"><em class="fa fa-phone"></em><a title="Telephone" href="#">8 (495) 989 906 743</a></p> <p class="email"><em class="fa fa-envelope"></em><a title="Mail to: topshop@co.uk.com" href="mailto:paco@co.uk.com">paco@co.uk.com</a></p> </div> </div>
Static Block: ft-opening-time
To create the static block, go to Content>> Elements>> Blocks with Title * : "Paco - Opening time footer" and Identifier * : "ft-opening-time"
Frontend Appearance 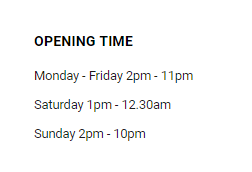
- Backend Setting: Please click Here to view.
Copy and paste the following code into the content tab of this static block:
<div class="block ft-opening-time"> <div class="title">Opening time</div> <div class="content"> <p>Monday - Friday 2pm - 11pm</p> <p>Saturday 1pm - 12.30am</p> <p>Sunday 2pm - 10pm</p> </div> </div>
Static Block: ft-my-account
To create the static block, go to Content>> Elements>> Blocks with Title * : "Paco - My accout footer" and Identifier * : "ft-my-account"
Frontend Appearance 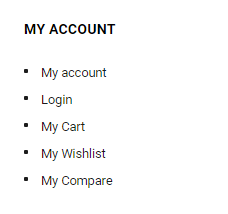
- Backend Setting: Please click Here to view.
Copy and paste the following code into the content tab of this static block:
<div class="block ft-my-account">
<div class="title">MY ACCOUNT</div>
<div class="content">
<ul>
<li><a title="My account" href="{{config path="web/secure/base_url"}}customer/account/">My account</a></li>
<li><a title="Login" href="{{config path="web/secure/base_url"}}customer/login/">Login</a></li>
<li><a title="My Cart" href="{{config path="web/secure/base_url"}}checkout/cart/">My Cart</a></li>
<li><a title="My Wishlist" href="{{config path="web/secure/base_url"}}wishlist/">My Wishlist</a></li>
<li><a title="My Compare" href="{{config path="web/secure/base_url"}}catalog/product_compare/index/">My Compare</a></li>
</ul>
</div>
</div>
Static Block: ft-information
To create the static block, go to Content>> Elements>> Blocks with Title * : "Paco - Information footer" and Identifier * : "ft-information"
Frontend Appearance 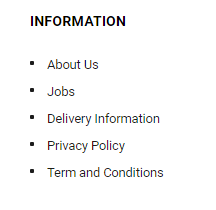
- Backend Setting: Please click Here to view.
Copy and paste the following code into the content tab of this static block:
<div class="block ft-information">
<div class="title">INFORMATION</div>
<div class="content">
<ul>
<li><a title="About Us" href="{{config path="web/secure/base_url"}}about-us.html">About Us</a></li>
<li><a title="Jobs" href="#">Jobs</a></li>
<li><a title="Delivery Information" href="#">Delivery Information</a></li>
<li><a title="Privacy Policy" href="#">Privacy Policy</a></li>
<li><a title="Term and Conditions" href="#">Term and Conditions</a></li>
</ul>
</div>
</div>
Static Block: ft-other-pages
To create the static block, go to Content>> Elements>> Blocks with Title * : "Paco - Other pages" and Identifier * : "ft-other-pages"
Frontend Appearance 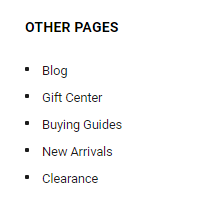
- Backend Setting: Please click Here to view.
Copy and paste the following code into the content tab of this static block:
<div class="block ft-other-pages"> <div class="title">Other pages</div> <div class="content"> <ul> <li><a title="Blog" href="#">Blog</a></li> <li><a title="Jobs" href="#">Gift Center</a></li> <li><a title="Buying Guides" href="#">Buying Guides</a></li> <li><a title="New Arrivals" href="#">New Arrivals</a></li> <li><a title="Clearance" href="#">Clearance</a></li> </ul> </div> </div>
Static Block: ft-customer-service
To create the static block, go to Content>> Elements>> Blocks with Title * : "Paco - Customer service footer" and Identifier * : "ft-customer-service"
Frontend Appearance 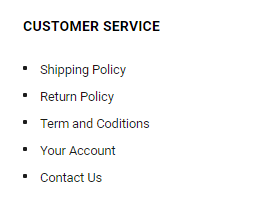
- Backend Setting: Please click Here to view.
Copy and paste the following code into the content tab of this static block:
<div class="block ft-customer-service"> <div class="title">Customer service</div> <div class="content"> <ul> <li><a title="Shipping Policy" href="#">Shipping Policy</a></li> <li><a title="Return Policy" href="#">Return Policy</a></li> <li><a title="Term and Coditions" href="#">Term and Coditions</a></li> <li><a title="Your Account" href="#">Your Account</a></li> <li><a title="Contact Us" href="#">Contact Us</a></li> </ul> </div> </div>
Static Block: intro-coppyright
To create the static block, go to Content>> Elements>> Blocks with Title * : "Paco Intro Coppyright" and Identifier * : "intro-coppyright"
Frontend Appearance 
- Backend Setting: Please click Here to view.
Copy and paste the following code into the content tab of this static block:
<p>There are many variations of passages of Lorem Ipsum available, but the majority have suffered alteration in some form, by injected humour, or randomised words which don't look even slightly believable. If you are going to use a passage of Lorem Ipsum</p>
To create the static block, go to Content>> Elements>> Blocks with Title * : "Theme - Payment Footer" and Identifier * : "payment-footer"
Frontend Appearance 
- Backend Setting: Please click Here to view.
Copy and paste the following code into the content tab of this static block:
<p><img src="{{media url="wysiwyg/payment/payment.png"}}" alt="Payment" /></p>
Static Block: header-policy-top
To create the static block, go to Content>> Elements>> Blocks with Title * : "Paco - Header policy" and Identifier * : "header-policy-top"
Frontend Appearance 
- Backend Setting: Please click Here to view.
Copy and paste the following code into the content tab of this static block:
<div class="row wrap-policy-top"> <div class="col-lg-4 col-md-4 col-sm-12 policy-item"> <div class="policy-icon"> </div> <div class="policy-info"> <h2 class="title">Free Shipping</h2> <p class="desc">Free Shipping On Orders Over $35</p> </div> </div> <div class="col-lg-4 col-md-4 col-sm-12 policy-item"> <div class="policy-icon"> </div> <div class="policy-info"> <h2 class="title">Money back 100%</h2> <p class="desc">Within 30 Days after delivery</p> </div> </div> <div class="col-lg-4 col-md-4 col-sm-12 policy-item"> <div class="policy-icon"> </div> <div class="policy-info"> <h2 class="title">Security Protection</h2> <p class="desc">100% Safe Shopping Guarantee</p> </div> </div> </div>
Static Block: cb-list
To create the static block, go to Content>> Elements>> Blocks with Title * : "Paco - Collection Brand" and Identifier * : "cb-list"
Frontend Appearance 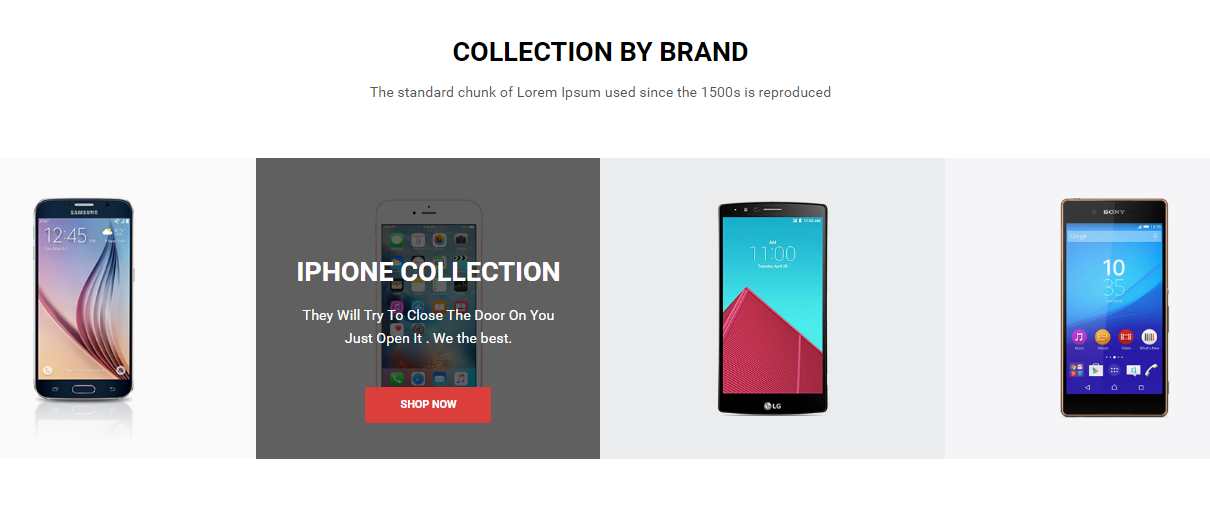
- Backend Setting: Please click Here to view.
Copy and paste the following code into the content tab of this static block:
<div class="cb-wrap">
<div class="title-home">
<h2>Collection by brand</h2>
</div>
<div class="desc">The standard chunk of Lorem Ipsum used since the 1500s is reproduced</div>
<div class="row cb-list">
<div class="col-lg-3 col-md-3 col-sm-6 cb-item">
<div class="cb-image"><img class="img-static" src="{{media url="wysiwyg/home-page-image/home-2/cb-1.jpg"}}" alt="Static Image" /></div>
<div class="cb-info">
<div class="title">
<h3><a href="#">Samsung collection</a></h3>
<p class="desc">They Will Try To Close The Door On You<br /> Just Open It . We the best.</p>
<p class="action"><a href="#">Shop now</a></p>
</div>
</div>
</div>
<div class="col-lg-3 col-md-3 col-sm-6 cb-item">
<div class="cb-image"><img class="img-static" src="{{media url="wysiwyg/home-page-image/home-2/cb-2.jpg"}}" alt="Static Image" /></div>
<div class="cb-info">
<div class="title">
<h3><a href="#">Iphone collection</a></h3>
<p class="desc">They Will Try To Close The Door On You<br /> Just Open It . We the best.</p>
<p class="action"><a href="#">Shop now</a></p>
</div>
</div>
</div>
<div class="col-lg-3 col-md-3 col-sm-6 cb-item">
<div class="cb-image"><img class="img-static" src="{{media url="wysiwyg/home-page-image/home-2/cb-3.jpg"}}" alt="Static Image" /></div>
<div class="cb-info">
<div class="title">
<h3><a href="#">LG collection</a></h3>
<p class="desc">They Will Try To Close The Door On You<br /> Just Open It . We the best.</p>
<p class="action"><a href="#">Shop now</a></p>
</div>
</div>
</div>
<div class="col-lg-3 col-md-3 col-sm-6 cb-item">
<div class="cb-image"><img class="img-static" src="{{media url="wysiwyg/home-page-image/home-2/cb-4.jpg"}}" alt="Static Image" /></div>
<div class="cb-info">
<div class="title">
<h3><a href="#">Sony collection</a></h3>
<p class="desc">They Will Try To Close The Door On You<br /> Just Open It . We the best.</p>
<p class="action"><a href="#">Shop now</a></p>
</div>
</div>
</div>
</div>
</div>
Static Block: static-testimonials-index2
To create the static block, go to Content>> Elements>> Blocks with Title * : "Paco - Static Testimonial index 2" and Identifier * : "static-testimonials-index2"
Frontend Appearance 
- Backend Setting: Please click Here to view.
Copy and paste the following code into the content tab of this static block:
<div class="row banner-list static-image-1-index2">
<div class="col-lg-6 col-md-6 col-sm-12"><a class="first-image" title="Static Image" href="#"><img class="img-static" src="{{media url="wysiwyg/home-page-image/home-2/image-1.jpg"}}" alt="Static Image" /></a></div>
<div class="col-lg-6 col-md-6 col-sm-12"><a class="first-image" title="Static Image" href="#"><img class="img-static" src="{{media url="wysiwyg/home-page-image/home-2/image-2.jpg"}}" alt="Static Image" /></a></div>
</div>
3.5 How To Edit Copyright in Admin Panel
Frontend Appearance

In SM Paco Administration Page, please navigate to Stores>> Settings>> Configuration >> MAGENTECH.COM >> SM Paco >> Advanced to configure this theme's copyright.
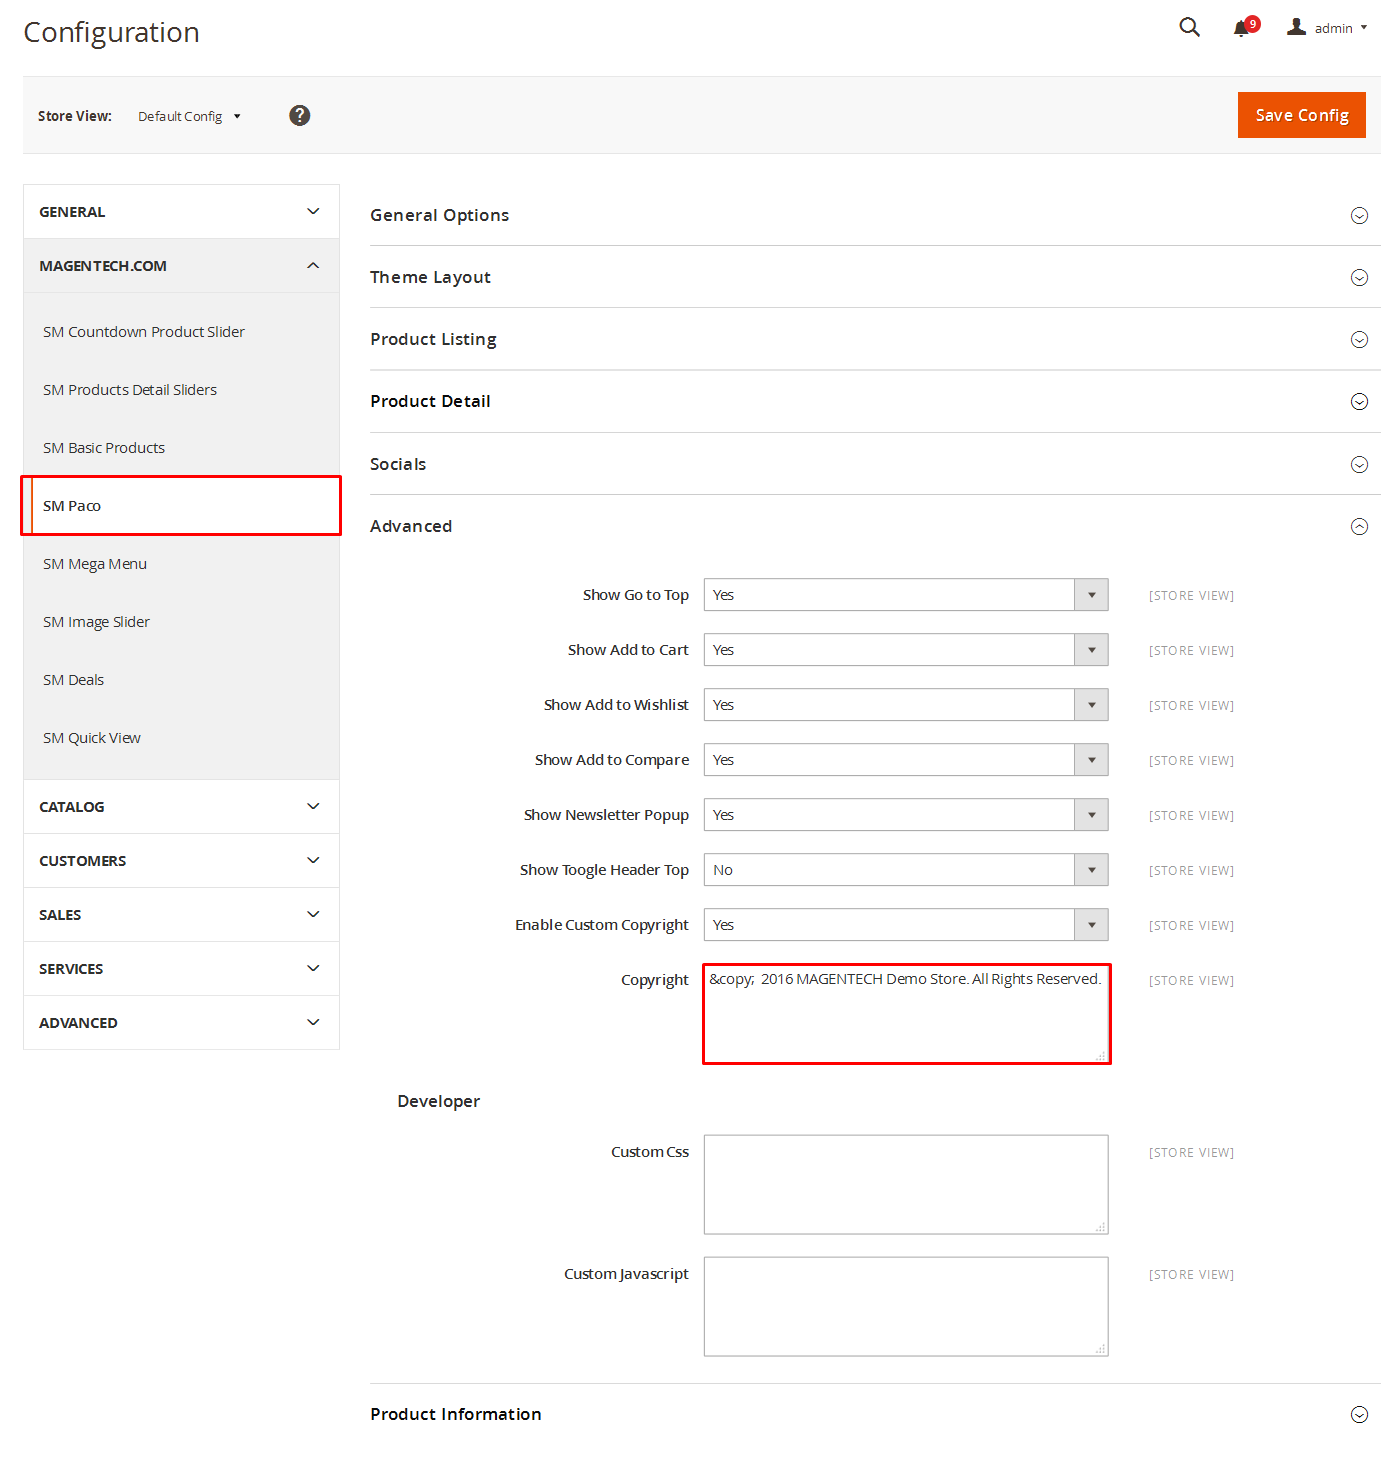
Edit the code here:
© 2016 MAGENTECH Demo Store. All Rights Reserved
3.6 How To Customize the Social symbols in admin panel
Frontend Appearance

In SM paco Administration Page, please navigate to Stores>> Settings >> Configuration >> MAGENTECH.COM >> SM Paco >> Socials.
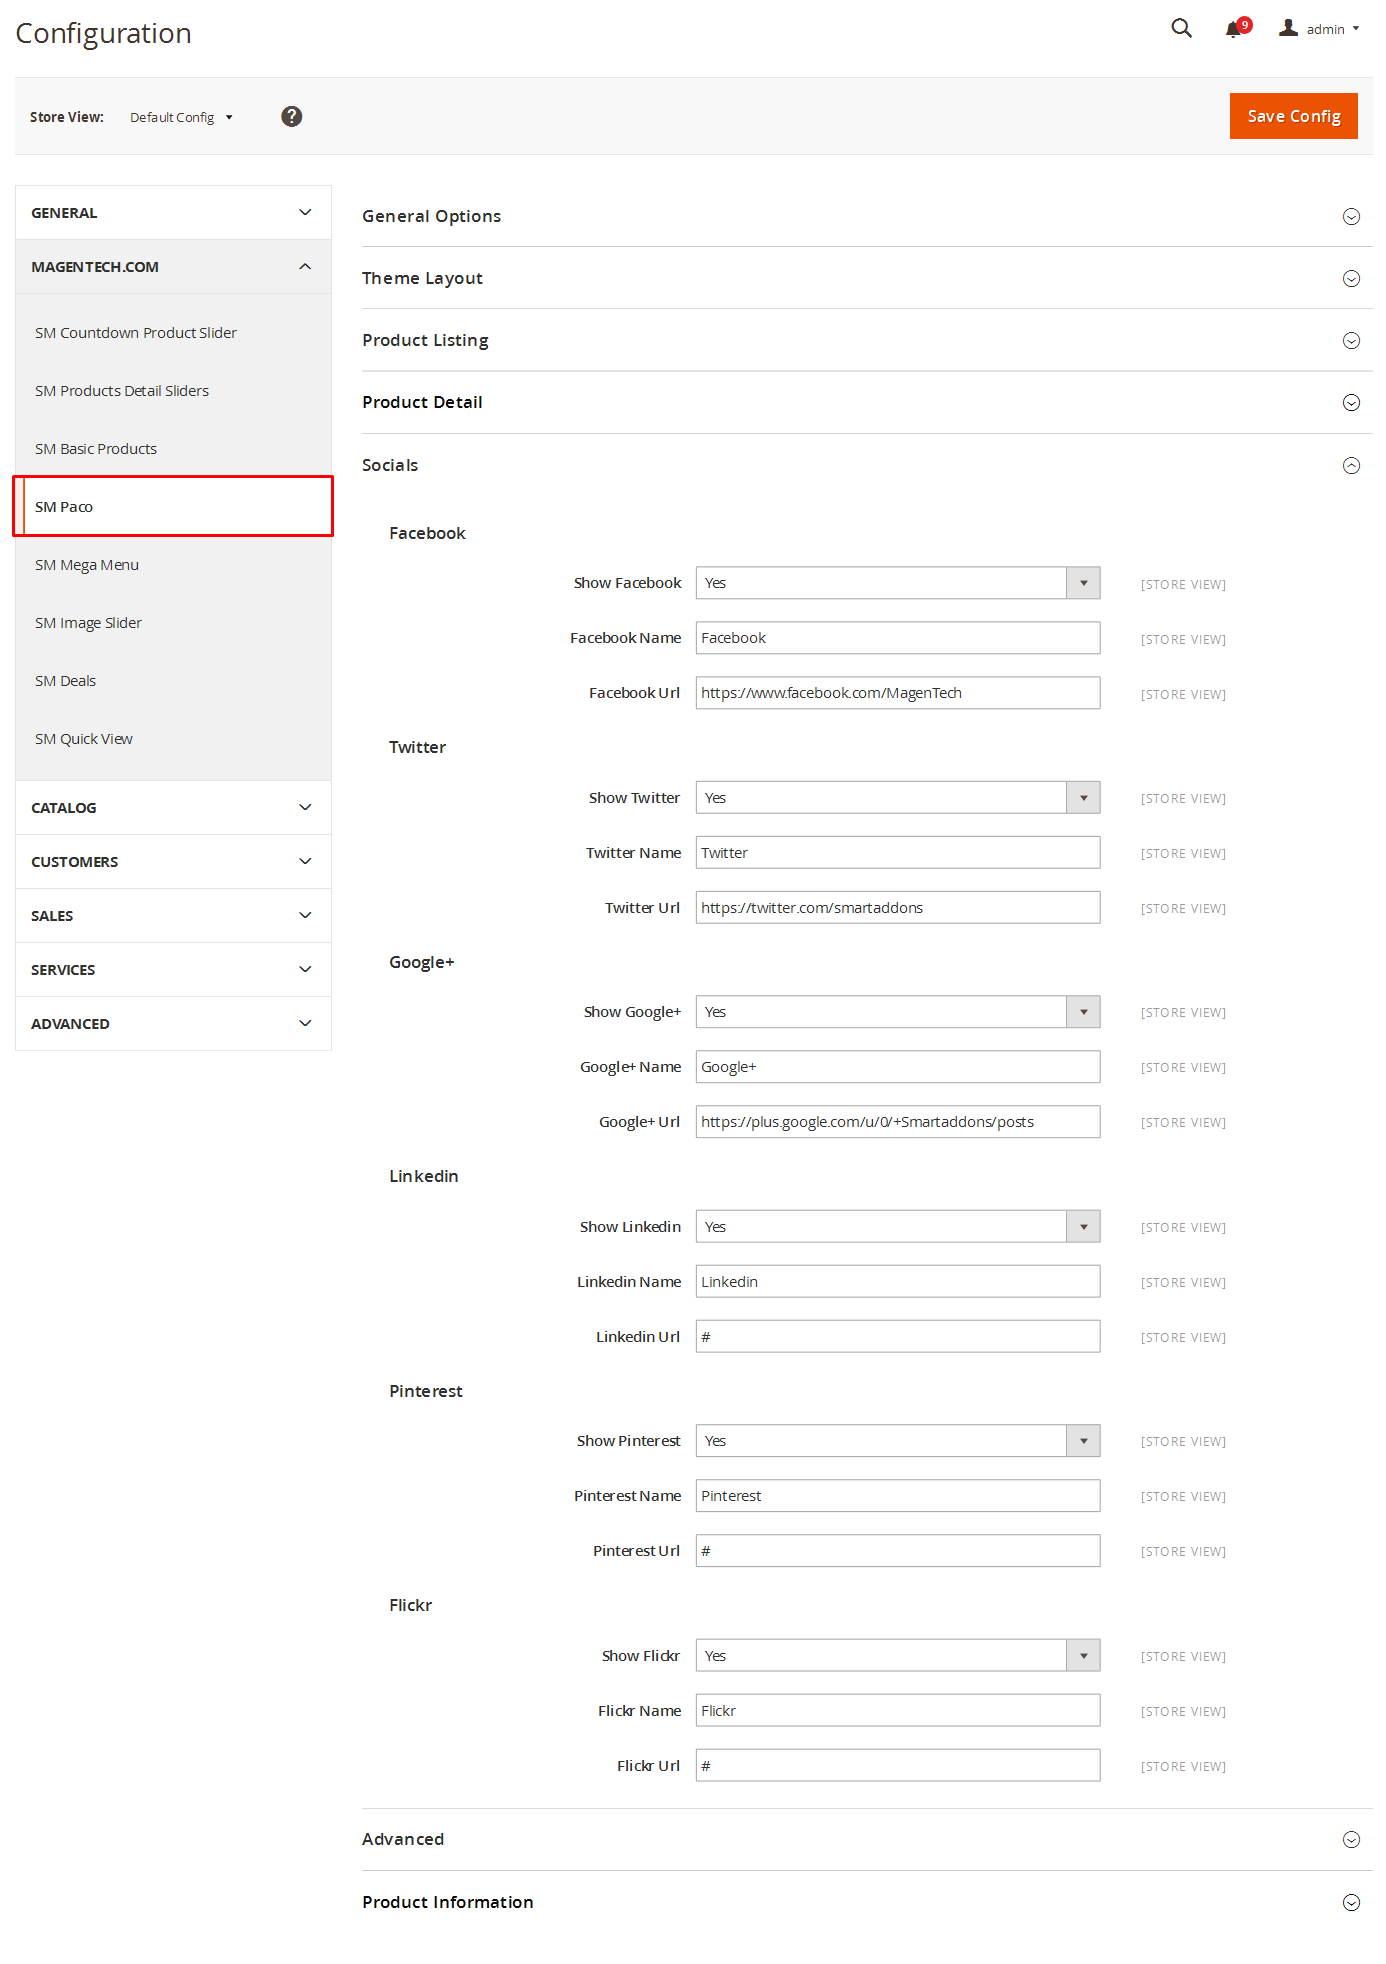
3.7 Newsletter pop-up
Frontend Appearance 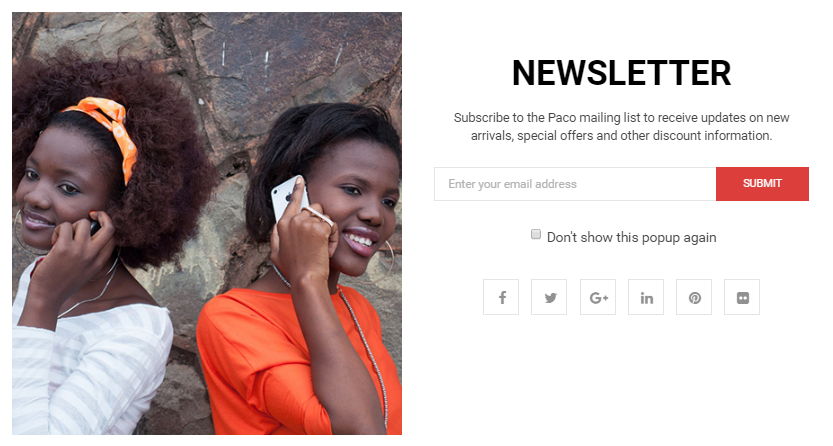
In your Website’s Directory, go to app/design/frontend/Sm/paco/Magento_Newsletter/templates folder. To change the text SUBMIT in the red button, in this folder, you could open the file named subscribe-popup.phtml by your editor program, and find the word Submit to change.
- Backend Setting: Please click Here to view.
4SUPPORT
- SUPPORT - If you have any questions that are beyond the scope of this help file, please feel free to send us via: Support Tickets System
- FAQs - Go to Here to view more the Frequently Asked Questions.
