1 Installation
- Firstly, you must install Prestashop version 1.7.x.
- Secondly, prepare for installing the Sp Countdown Timer. The installation contains 4 steps as following:
Step 1: Login to your Prestashop admin panel and Go to Improve >> Modules >> Modules Services. At the top of the page, click the Upload a Module button. 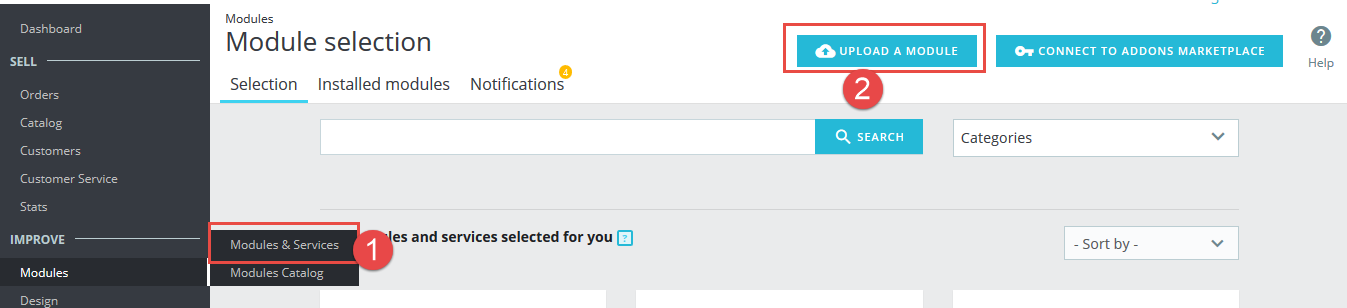
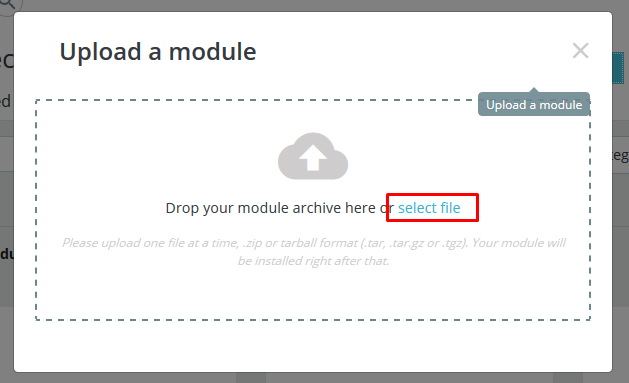
Step 2: Click “Select File” to select your module .zip file “sp_countdown_timer_p1.6-res_v1.0.0.zip” that you have downloaded.
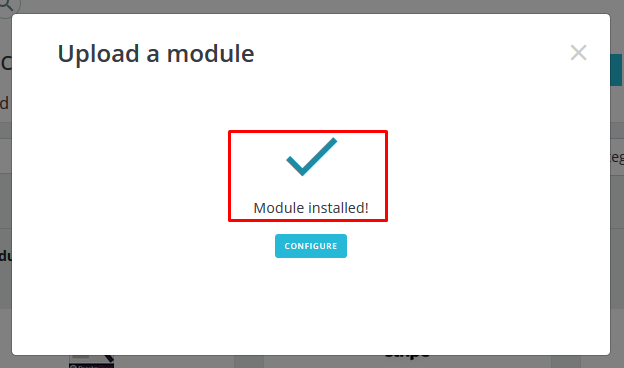
Step 3: The uploading process will be started. You will see the message that “Module installed”.
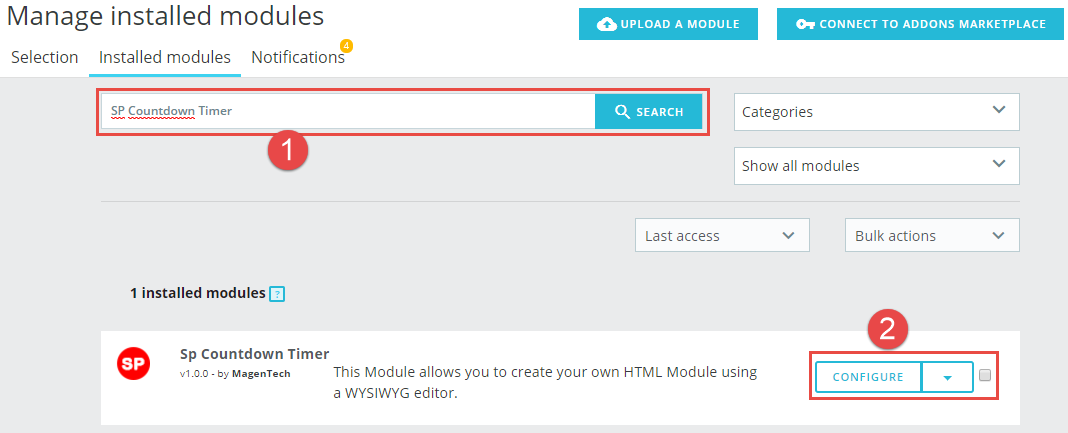
Step 4: Finally, the new module will be located in the modules list. Search the name of module and Click on the Configure button to configure the module.
2 Configuration
Below is a complete interface of SP Home Slider module

Please find to the module that you have completely installed to configure this module.
The parameters are divided into the following groups:
- SETTINGS
Let’s look at the parameters in detail:
GENERAL OPTIONS
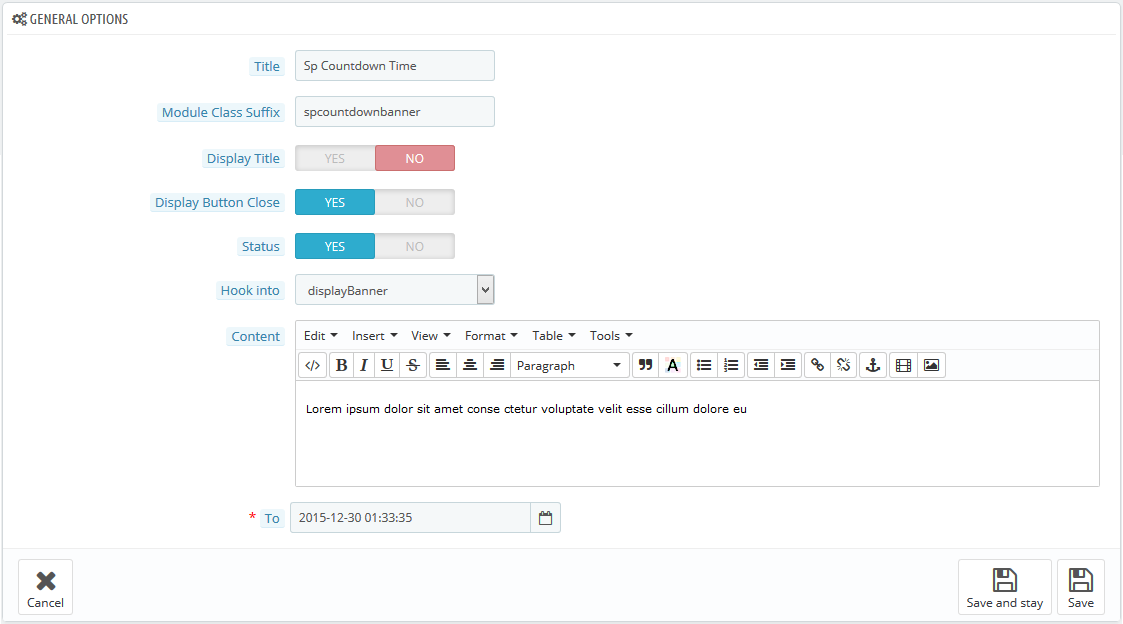
- Title – Input title for the module.
- Module Class Suffix – A suffix is applied to the CSS class of module. This allows for individual module styling.
- Display Title – Enable/Disable title of module.
- Display Button Close – Allow to Enable/Disable button close.
- Status – Set status enable/disable for the module.
- Hook into – Select Hook into in list box. Please click Here to read more How To Create Custom CMS Hook Page.
- Content – Allow to set content of module.
- To – Allow to set date with format 2015-10-30 and Countdown timer = input date – current date
3SUPPORT – Back to top
Thank you so much for purchasing this module. If you have any questions that are beyond the scope of this help file, please send us via: Support Tickets System
Thanks so much!