1 Installation
- Firstly, you must install Prestashop version 1.7.x.
- Secondly, prepare for installing the SP Custom HTML Module. The installation contains 4 steps as following:
Step 1: Login to your Prestashop admin panel and Go to Improve >> Modules >> Modules Services. At the top of the page, click the Upload a Module button. 
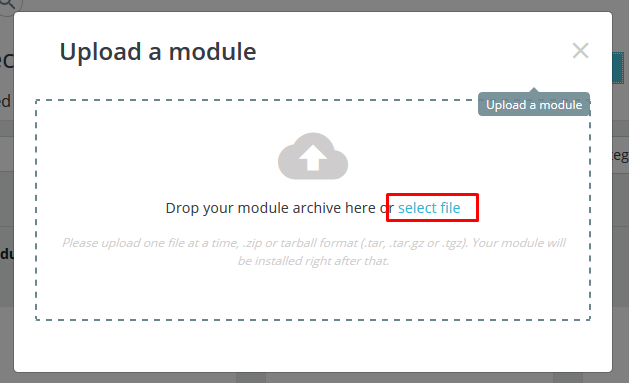
Step 2: Click “Select File” to select your module .zip file “sp_customhtml_p1.6-res_v1.1.1.zip” that you have downloaded.

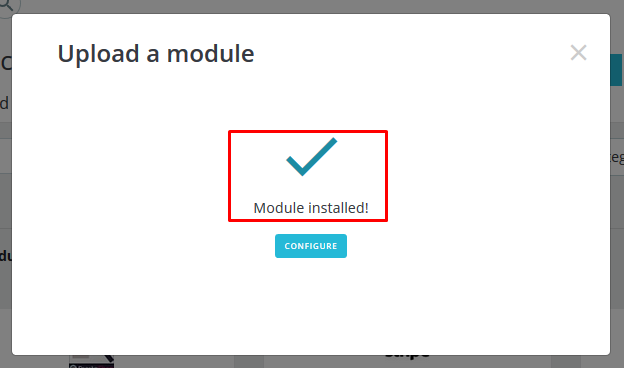
Step 3: The uploading process will be started. You will see the message that “Module installed”.

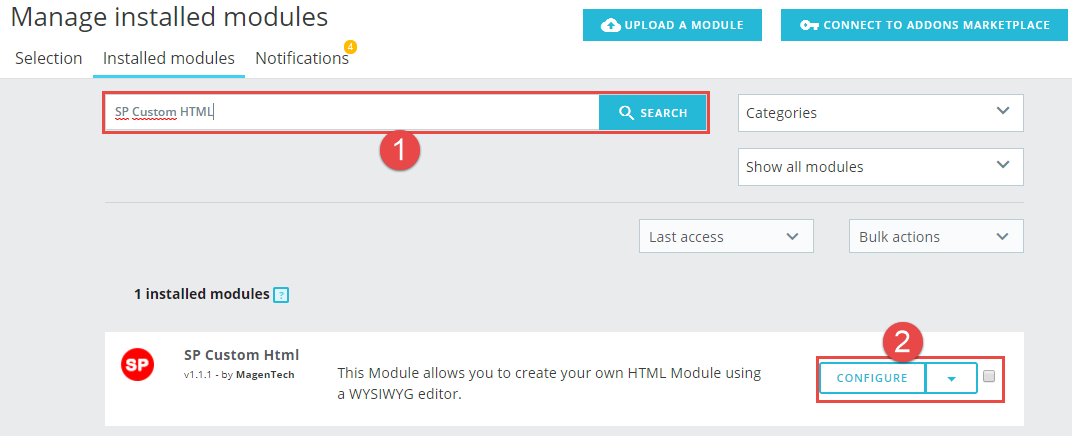
Step 4: Finally, the new module will be located in the modules list. Search the name of module and Click on the Configure button to configure the module.

2 Configuration
You can edit, duplicate, delete and add new module in this page.

In this layout, can change ordering of category by dragging the box contain ordering. And this module can work with different Hook into, can change in the param Hook into.

The parameters are divided into the following groups:
- General Options
Let’s look at the parameters in detail:
General Options

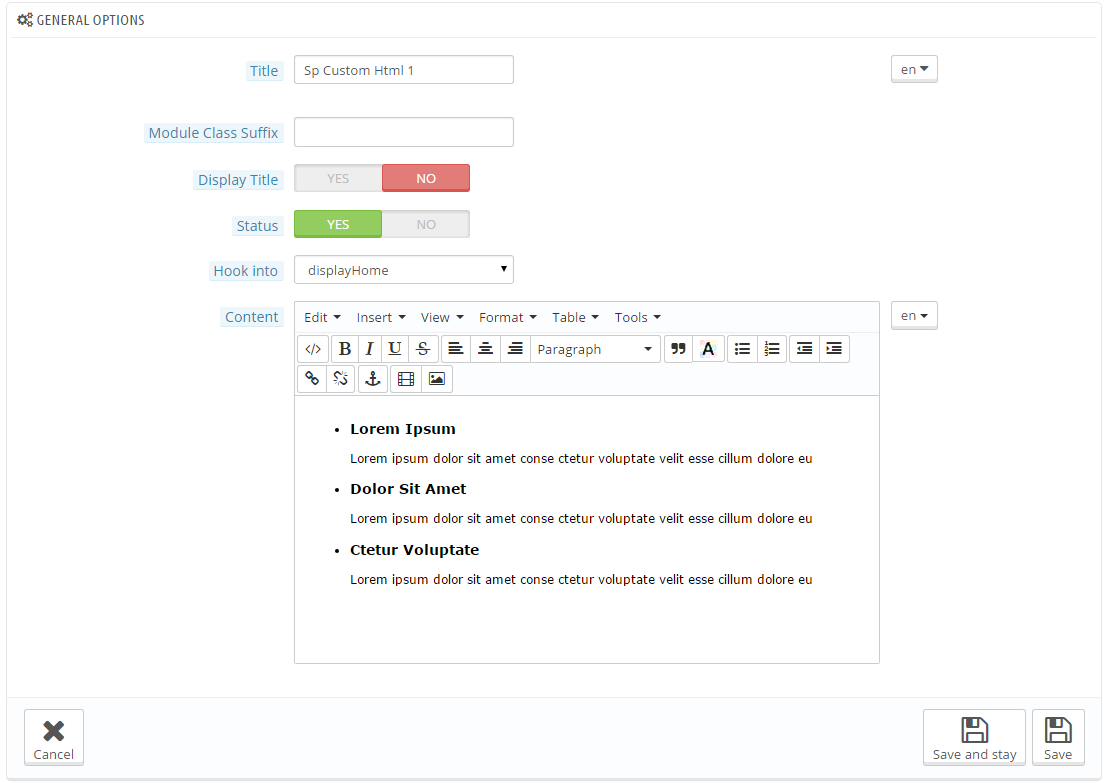
- Title – Input title for the module.
- Display Title – Display title of module Or not.
- Module Class Suffix – A suffix is applied to the CSS class of module. This allows for individual module styling.
- Status – Set status enable/disable for the module.
- Hook into – Select Hook into in list box.
- Content – Allow to input content of module, can input code HTML.
3SUPPORT – Back to top
Thank you so much for purchasing this module. If you have any questions that are beyond the scope of this help file, please send us via: Support Tickets System
Thanks so much!
