1 Installation - Back to top
- Firstly, you must install Prestashop version 1.7.x.
- Secondly, when you are ready to install SP Instagram Gallery, please follow 4 steps as following:
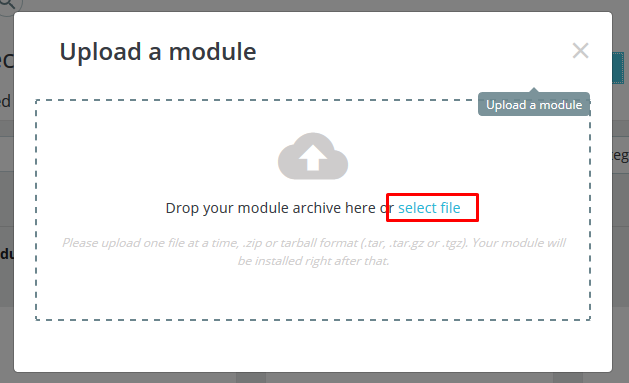
Step 1: Login to your Prestashop admin panel and Go to Improve >> Modules >> Modules Services. At the top of the page, click the Upload a Module button. 
Step 2: Click “Select File” to select your module .zip file “sp_instagramgallery_p1.6-res_v1.0.0.zip” that you have downloaded.

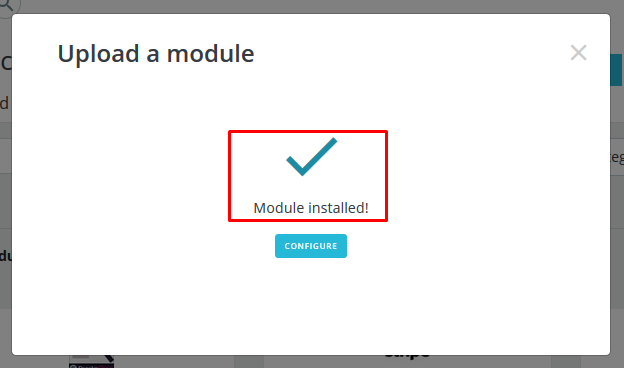
Step 3: The uploading process will be started. You will see the message that “Module installed”.

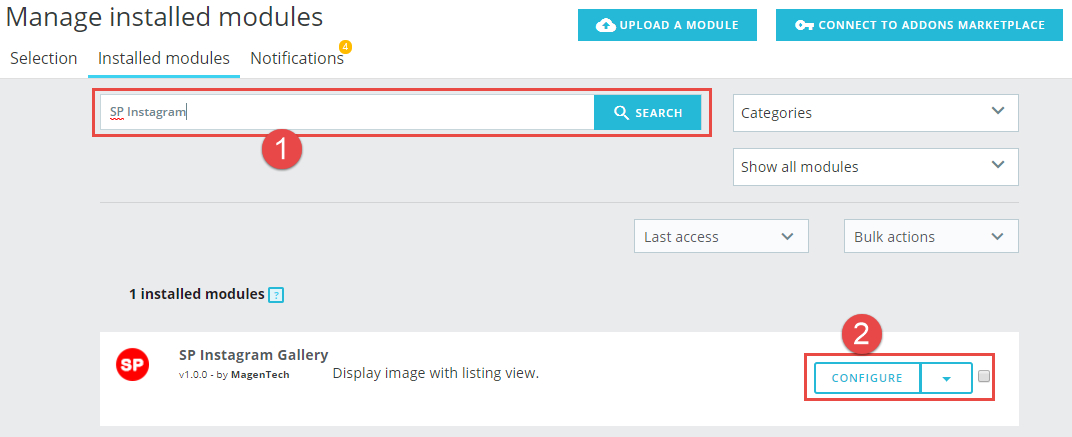
Step 4: Finally, the new module will be located in the modules list. Search the name of module and Click on the Configure button to configure the module.

2 Configuration - Back to top
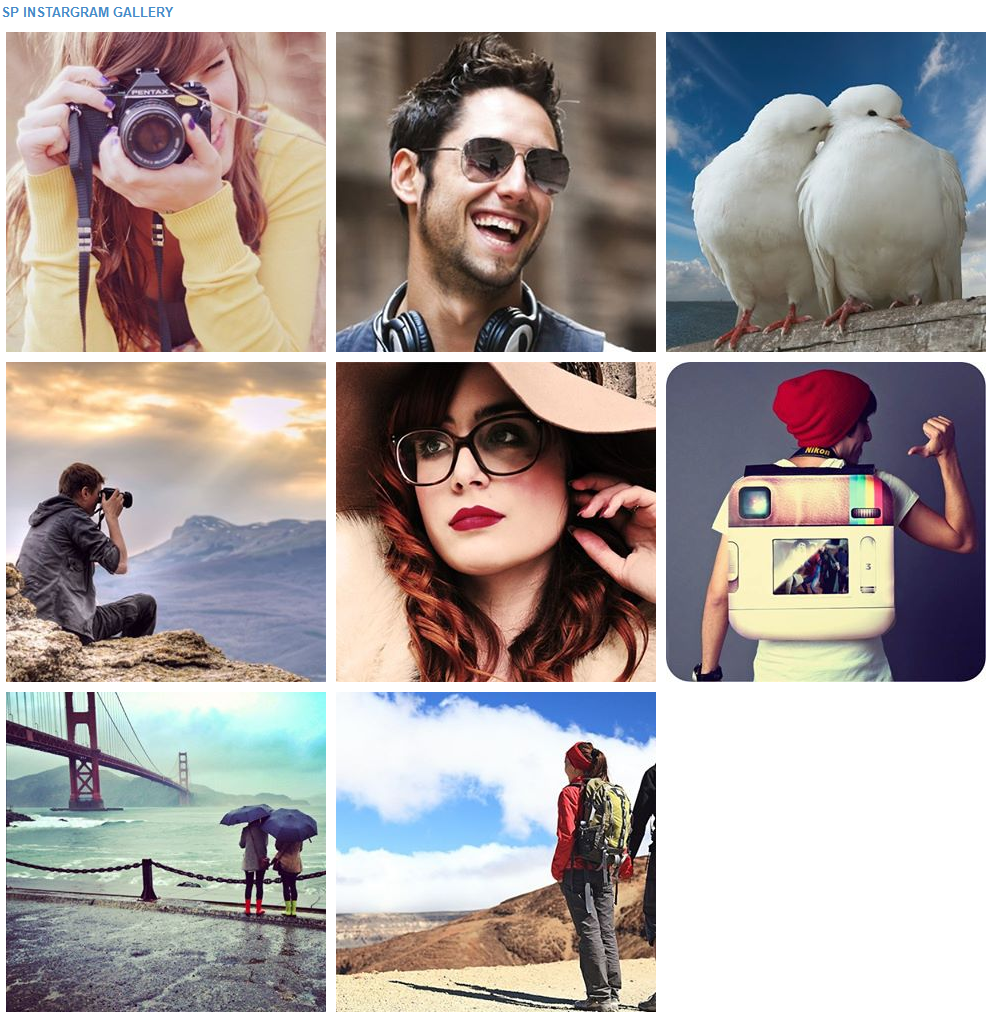
You could see the appearance of SP Instagram Gallery module as following:

To configure this module, please find the module that you have completely installed in the module list and start setting its options.
The parameters are divided into the following groups:
- GENERAL OPTIONS
- EFFECT OPTIONS
Let's look at the parameters in detail:
GENERAL OPTIONS

- Title - Enter the title of the module.
- Module Class Suffix - Enter the suffix which is applied to the CSS class of module. This allows to style an individual module easily.
- Display Title Module - Allow to show/hide title of the module.
- Status - Allow to enable/disable the status of the module.
- Owl Carousel – Allow to enable/disable the effect options of the module. When you choose “Yes” here, you could enable all the effects being set in the EFFECT OPTIONS
- Hook into - Select Hook into in list box. Please click Here to read more How To Create Custom CMS Hook Page.
- # Column - Set quantity of image column for each device
- For devices have screen width from 1200px to greater.
- For devices have screen width from 768px up to 1199px.
- For devices have screen width from 480px up to 767px.
- For devices have screen width less than or equal 479px.
- Limit Image - Enter the quantity of images you want to display, for example: When you enter number ‘8’ here, eight images will be displayed
- User ID - Input User ID of your instagram into textbox
- Access Token - Input Access Token of your instagram into textbox
FOR IMAGES
To Get User ID & Access Token of Instagram. Firstly, you must create your Instagram account by using the Instagram mobile app. Please click here to read more about how to create an instagram account. And then you could go to the URL http://www.pinceladasdaweb.com.br/instagram/access-token/ and login to get the Access Token and User ID.
EFFECT OPTIONS
In General Options Panel, when you choose “Yes” in Owl Carousel parameter, you could enable all the effects being set in the EFFECT OPTIONS.
You could see the appearance of SP Instagram Gallery module when applying effects as following:

You could configure the Effect Options as following:

- Auto Play - Allow to enable/disable the auto-play effect for slider.
- Auto Interval Timeout - Allow to autoplay interval timeout for slider
- Auto Play Speed - Allow to set the speed to autoplay
- Auto Play Hover Pause - Allow to pause the slider whenever moving the mouse cursor over it
- Start Position Item - Allow to set item to be displayed at first when you run slider effect.
- Mouse Drag - Allow to drag the images by using mouse cursor
- Touch Drag - Allow to drag the images by touching when using any touchscreen device
- Show Navigation - Allow to show navigation pointer
- Effect - Allow to choose the effect for the module here
- Duration - Determining how long the animation will run.
- Delay - Allow to set a timer to delay the execution of the next item in the queue.
- Loop - Allow to loop the effects or not.
3SUPPORT - Back to top
Thank you so much for using this extension, your support is truly appreciated. If you have any questions that are beyond the scope of this document, please feel free to contact us via our Support Tickets System
