Documentation for Revo Ultimate Prestashop Theme
Firstly, a huge thanks for purchasing this theme, your support is truly appreciated!
This document covers the installation and use of this theme, reveals some answers to common problems and issues. We encourage you to read throughout this document if you are experiencing any difficulties. If you have any questions that are beyond the scope of document, please feel free to contact us via our Support Tickets System.
Revo PrestaShop Theme is fully compatible with Prestashop version 1.7.x
There are two ways to install SP Revo Theme
We provide Quickstart package for each theme which aims to ease the installation for users. It will help you save much time of installing and configuring if you plan to start your site from the beginning.
Please following steps below:
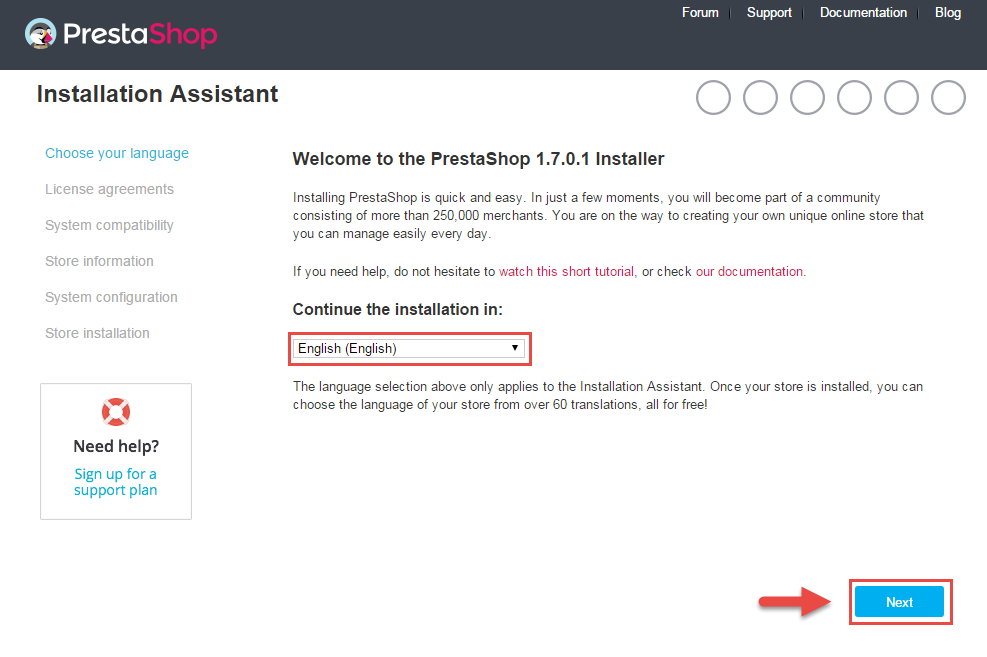
Please note: The installation language option will not affect your store language. By default PrestaShop is offered in English. You can install additional localization packages to change the store language.
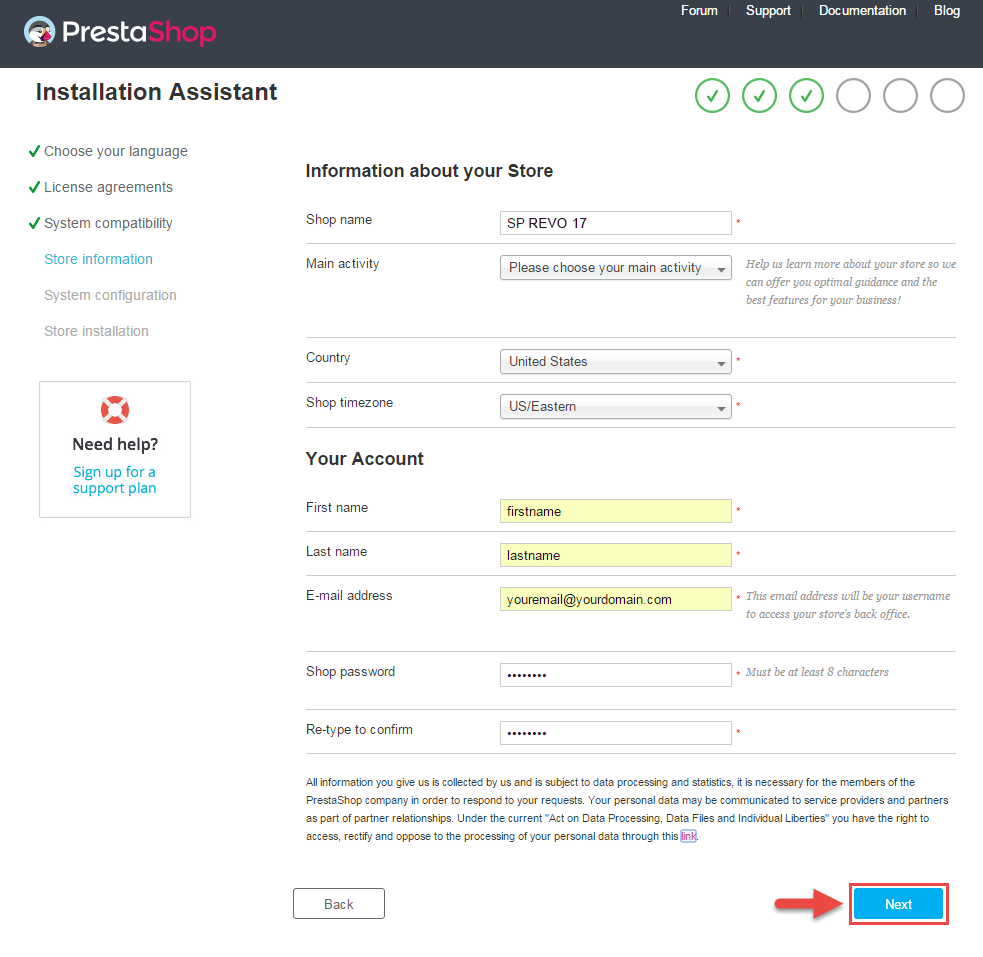
Now add required information for your store: Shop name, Main activity, Country, Shop timezone and add the account info: first name, last name, email and password. Click “Next” to next step.
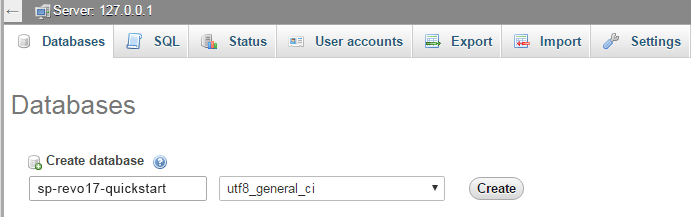
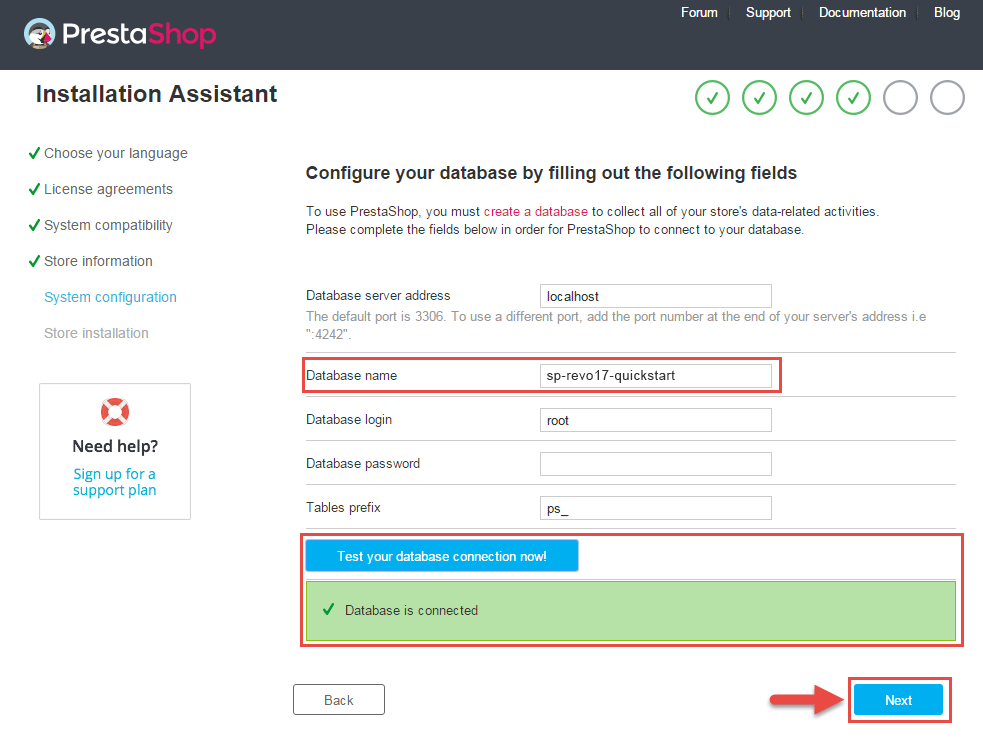
Enter your database in step 3, then click the “Test your database connection now!” button to make sure that the entered settings are correct. After that, click Next button.
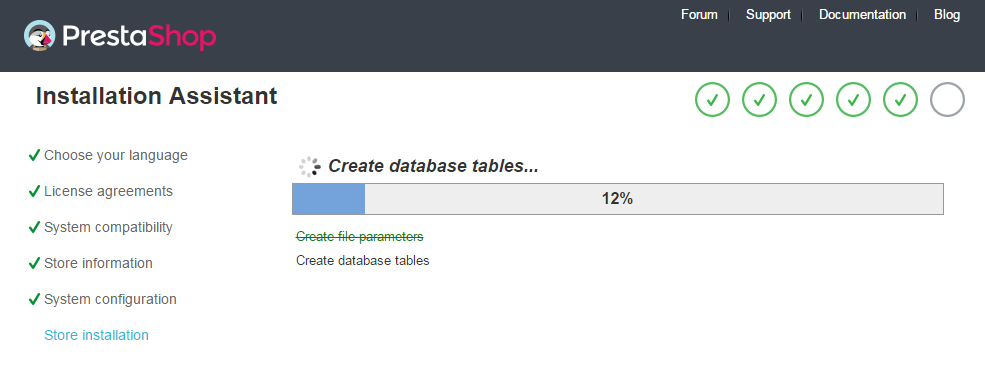
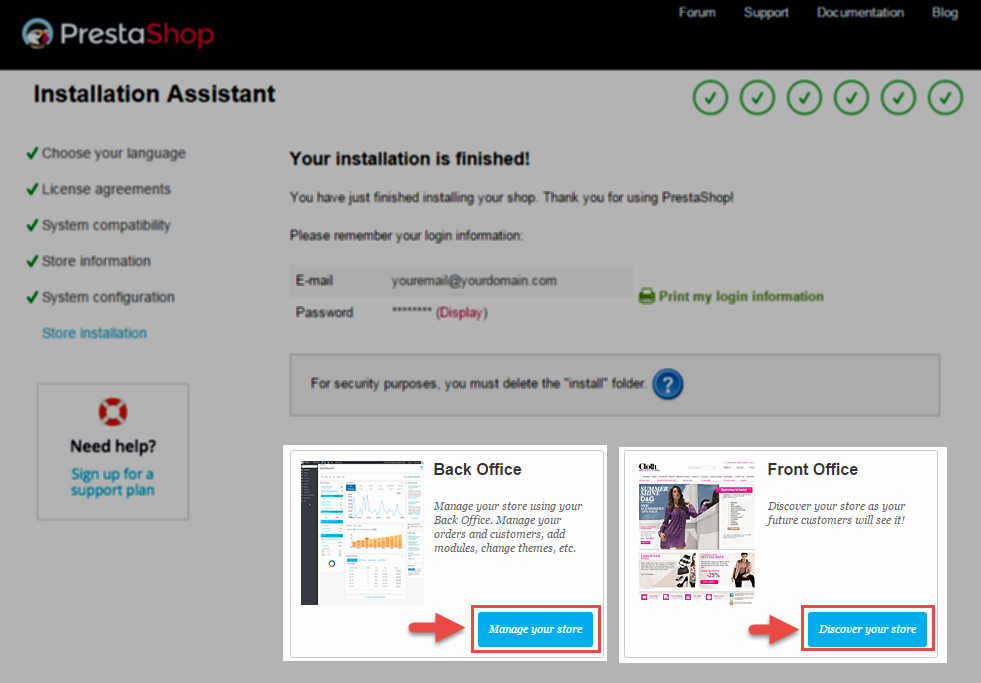
Note: For security reasons you need to delete the install/ directory on your hosting server.
And finally, go to the Frontend or Backend as you want:
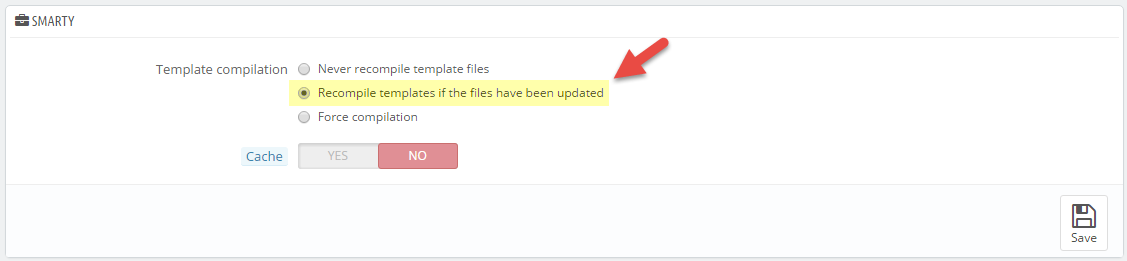
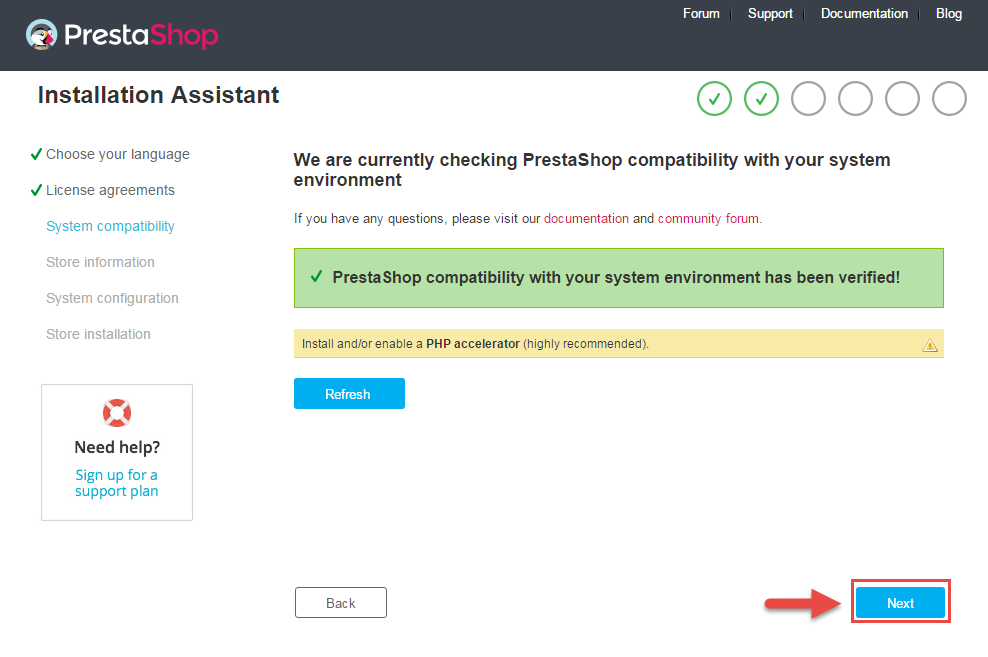
Note: Before installing theme, you must disable the cache. In your back office, please go to CONFIGURE >> Advanced Parameters >> Performance >> find “Cache” parameter >> Set “No” to disable cache >> Click “Save”.
1. Login to your Prestashop admin panel and navigate to IMPROVE >> Design >> Theme & Logo. At the top of the page click the Add a new theme button.

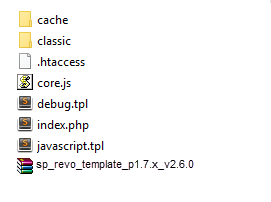
2. Navigate to “Import from your computer” >> choose the zip theme file as named “sp_Revo_template_p1.7.x_v2.7.0.zip” >> Save.

With either case, you must upload theme file in the "/themes" folder.
- Login to your Prestashop admin panel and navigate to IMPROVE >> Design >> Theme & Logo. At the top of the page click the Add a new theme button.
- Navigate to “Import from FTP” >> choose the zip theme file as named “sp_revo_template_p1.7.x_v2.7.0.zip” >> Save.

3. When your choice is successfully validated , the new theme will be shown in the section named as Select a theme for your “[name]” shop . Then Click "Use this theme" button to replace your current theme with SP Revo theme.

Note: After click button, your site may be broken. If your site was broken, please run this command: chown -R apache:apache sp_revo
4. Click "Save" button and go to front-end to view your website.
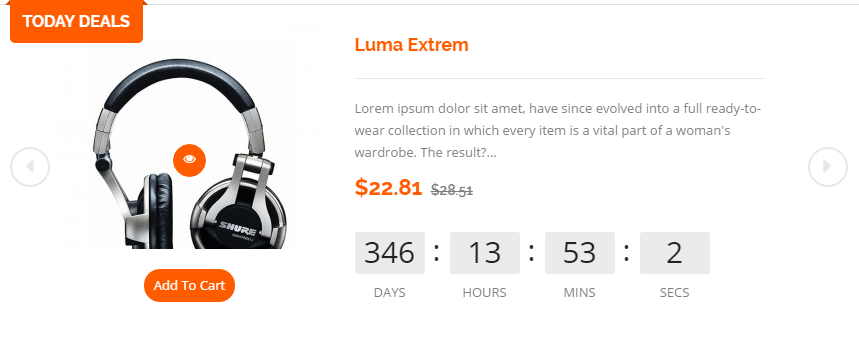
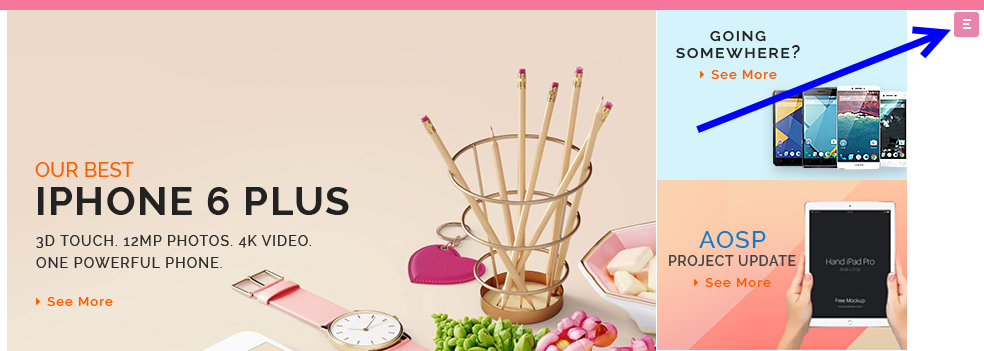
SP Deal – Today Deals
Frontend Appearance:
Backend Settings:
Step 1: In the Prestashop Admin Panel, navigate to IMPROVE >> Modules >> Modules and Services >> Installed Modules look for “SP Deal module.
Step 2: In the “SP Deal” configuration page, click  button in the right corner to “ADD NEW MODULE”.
Step 3: You could configure this module like the illustration
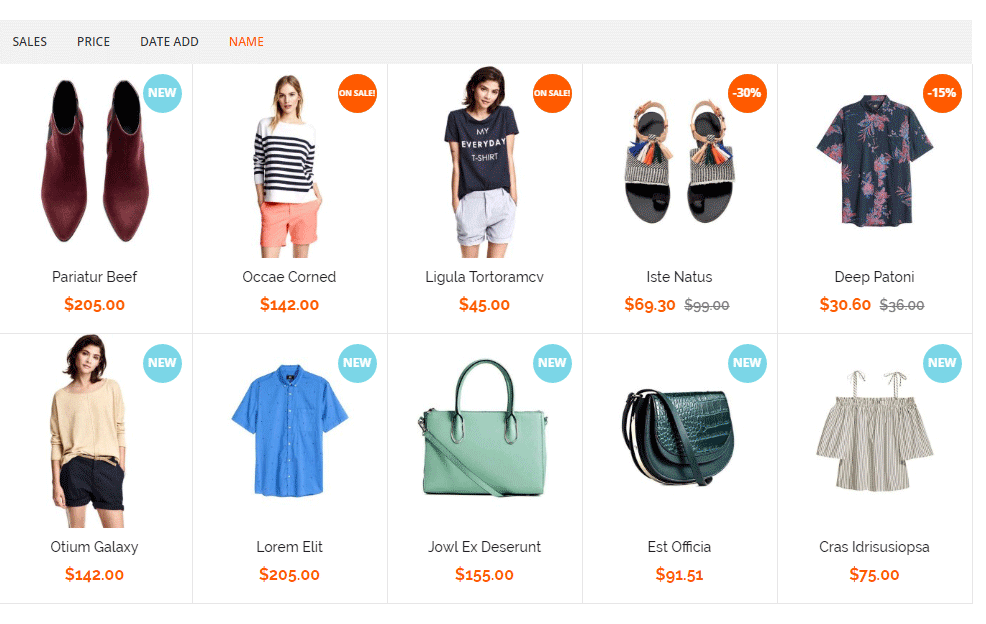
SP Listing Tabs – Fashion
Frontend Appearance:
Backend Settings:
Step 1: In the Prestashop Admin Panel, navigate to IMPROVE >> Modules >> Modules and Services >> Installed Modules look for “SP Listing Tabs module.
Step 2: In the “SP Extra Slider” configuration page, click button in the right corner to “ADD NEW MODULE”.
Step 3: You could configure this module like the illustration
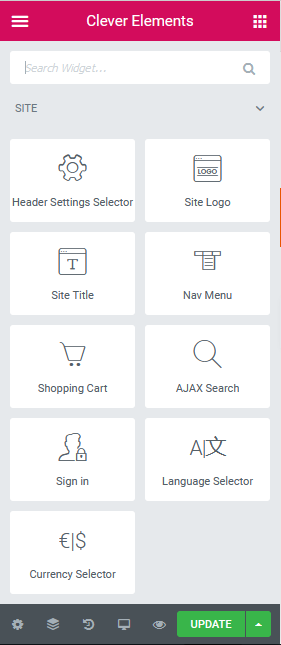
Clever Elements offers an intuitive design for users. So, you can learn the basics of the editor in a couple of minutes.
Step 1: To use Clever Elements please login Admin panel then go to front-end to start using Clever Elements.
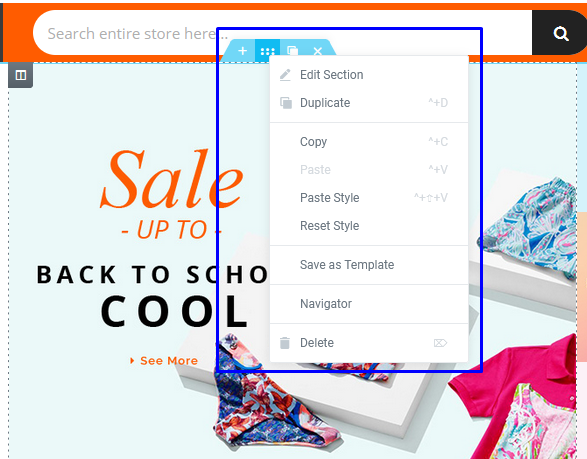
Step 2: To get started click the icon on the right
You’ll enter the Clever Elements page editor. This is what your page will look like:

In your Prestashop Admin Dashboard, navigate to IMPROVE >> Modules >> Modules and Services >> go to Installed modules section, search for “SP Theme Configuration” module then click on Configure.
In the SP Theme Configuration, choose “Product Pages” to configure the parameters in this section. After finishing, you could go to the front-end to view the changes.
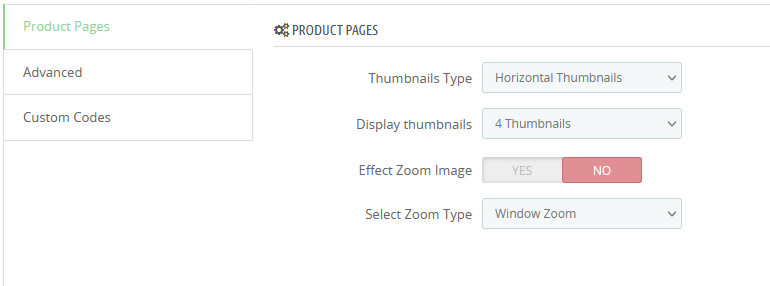
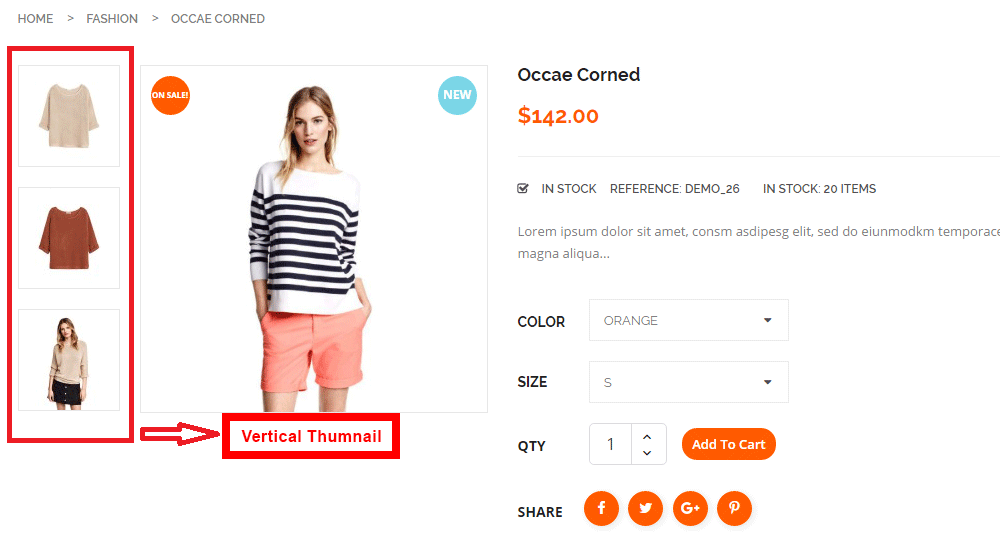
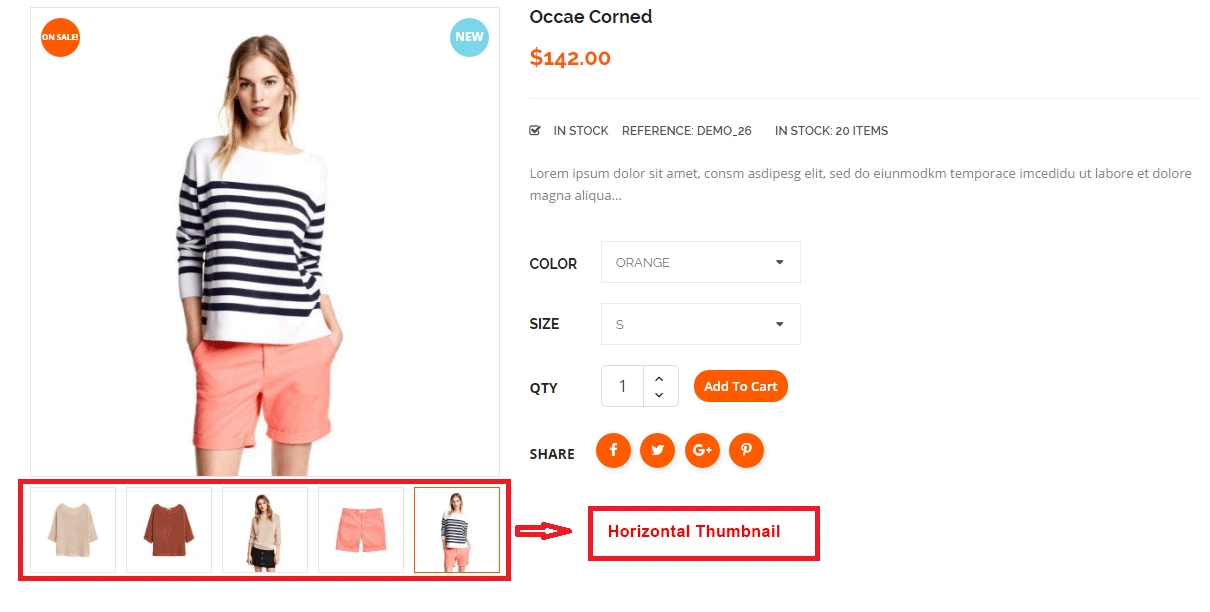
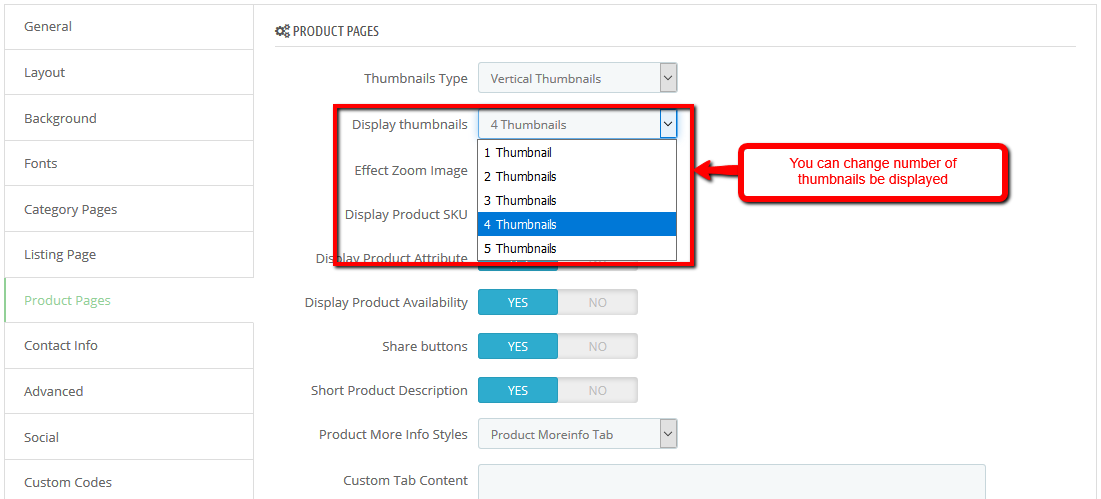
Choose type display of thumbnails block on product page.
Frontend Appearance:
-Vertical Thumbnails
-Horizontal Thumbnails
Number of thumbnails be displayed.
Backend Settings:
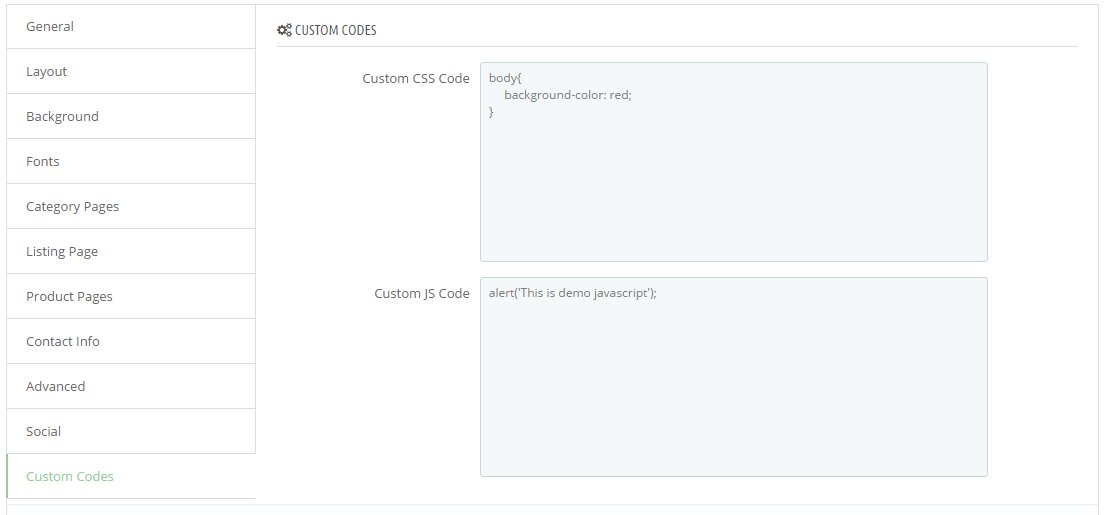
In the SP Theme Configuration, choose "Custom Codes" to configure the parameters in this section. After finishing, you could go to the front-end to view the changes.
Frontend Appearance
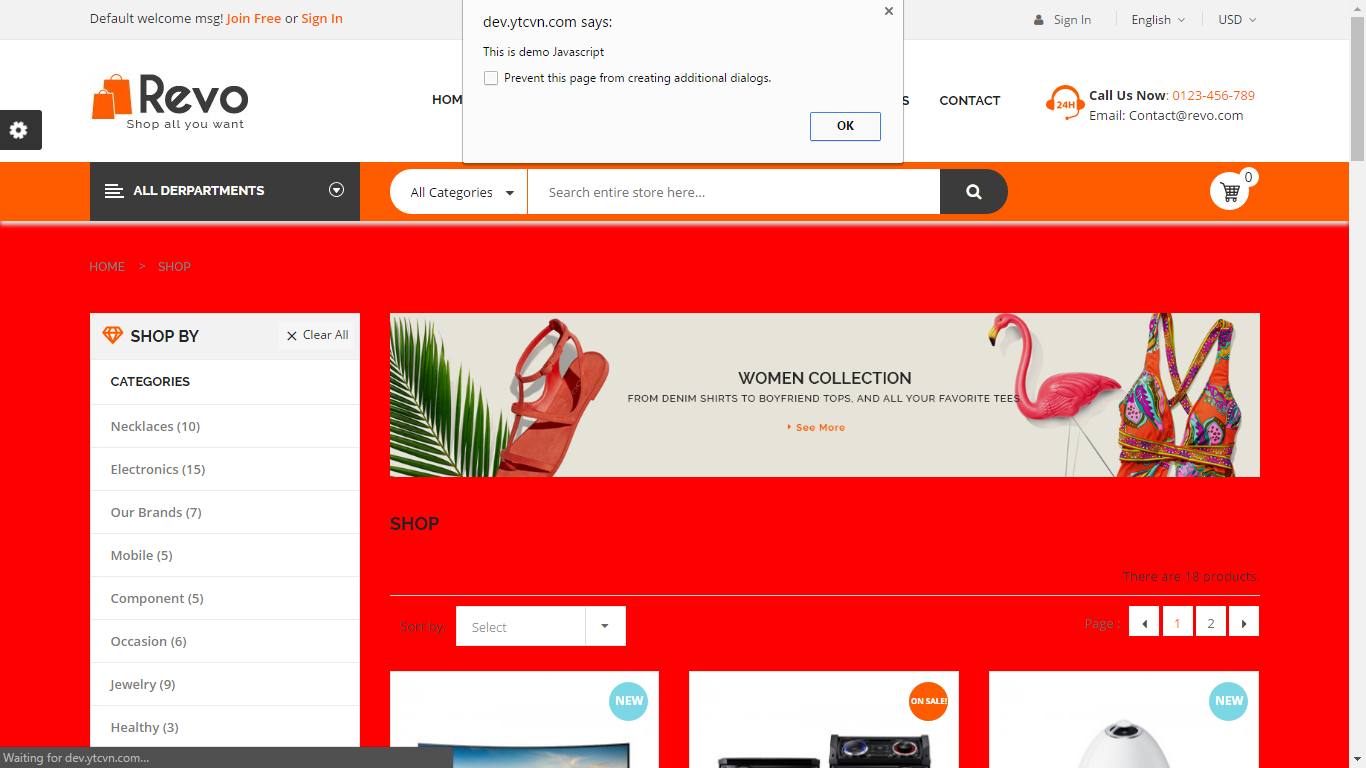
- You can input css or javascript.
Examples code css
body{
	background-color: red;
}
Examples code Javascript
alert('This is demo javascript');
- In the SP Theme Settings, choose “Advanced” to configure the parameters in this section. After finishing, you could go to the front-end to view the changes.
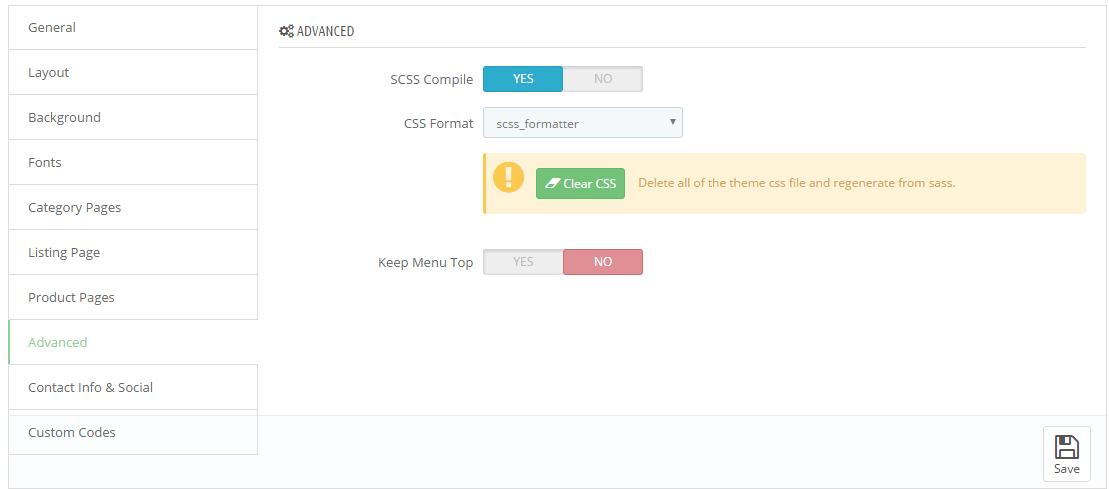
- Active: The system will automatically compile into CSS from SCSS when you refresh the website
Note: System will change css file theme-...css. Ex: theme-ff0000.css
Do not edit css file when active SCSS Compile
Css formatting after compile from sass.
There are two instances to edit css file via ftp.
1. SCSS Compile: Disable
- You can edit css file of modules.
Example: "../themes/sp_Revo/modules/spcustomhtml/views/css/style.css"
- You can edit css file of theme.
Example:
+) "../themes/sp_Revo/assets/css/theme-0083c1.css"
+) "../themes/sp_Revo/assets/css/theme.css"
2. SCSS Compile: Enable
- You can edit css file of modules. (Sample as Disable)
Note: The system will generate css file "theme-0083c1.css, theme-{color code}.css"
Your changes to this file will be lost
- You must edit file "*.scss" in the folder "_dev/css"
Example: "../themes/sp_Revo/_dev/css/themestyles/_content.scss"
Click Here to view documentation of SP MegaMenu module.

1. Navigate to IMPROVE >> Modules >> Modules and Services go to Installed modules section and look for SP Mega Menu >> Click the Configure button to access the module configuration page.
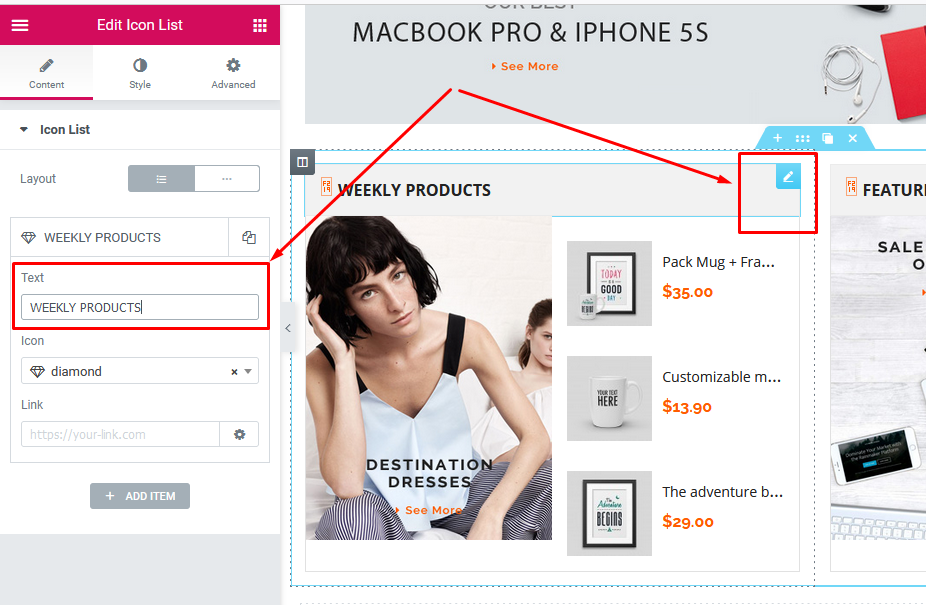
2. In the SP Mega Menu Panel, you could Add New Module by click on the button like the following image:

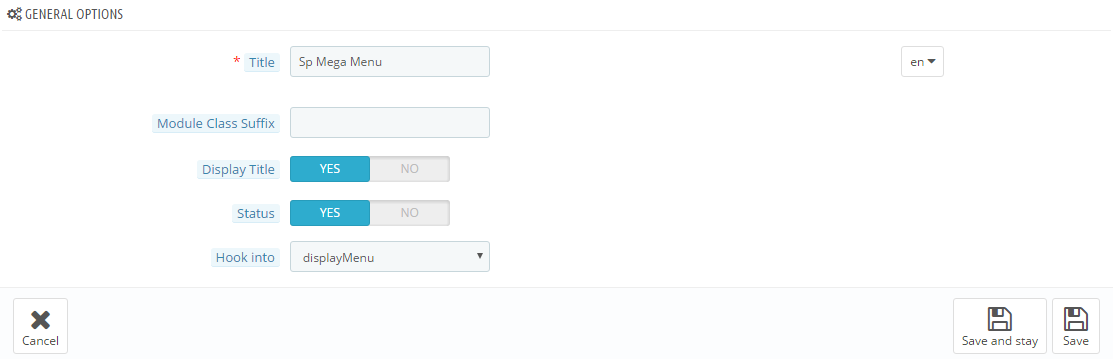
3. You could configure General Options then click "Save" or "Save and stay" button.
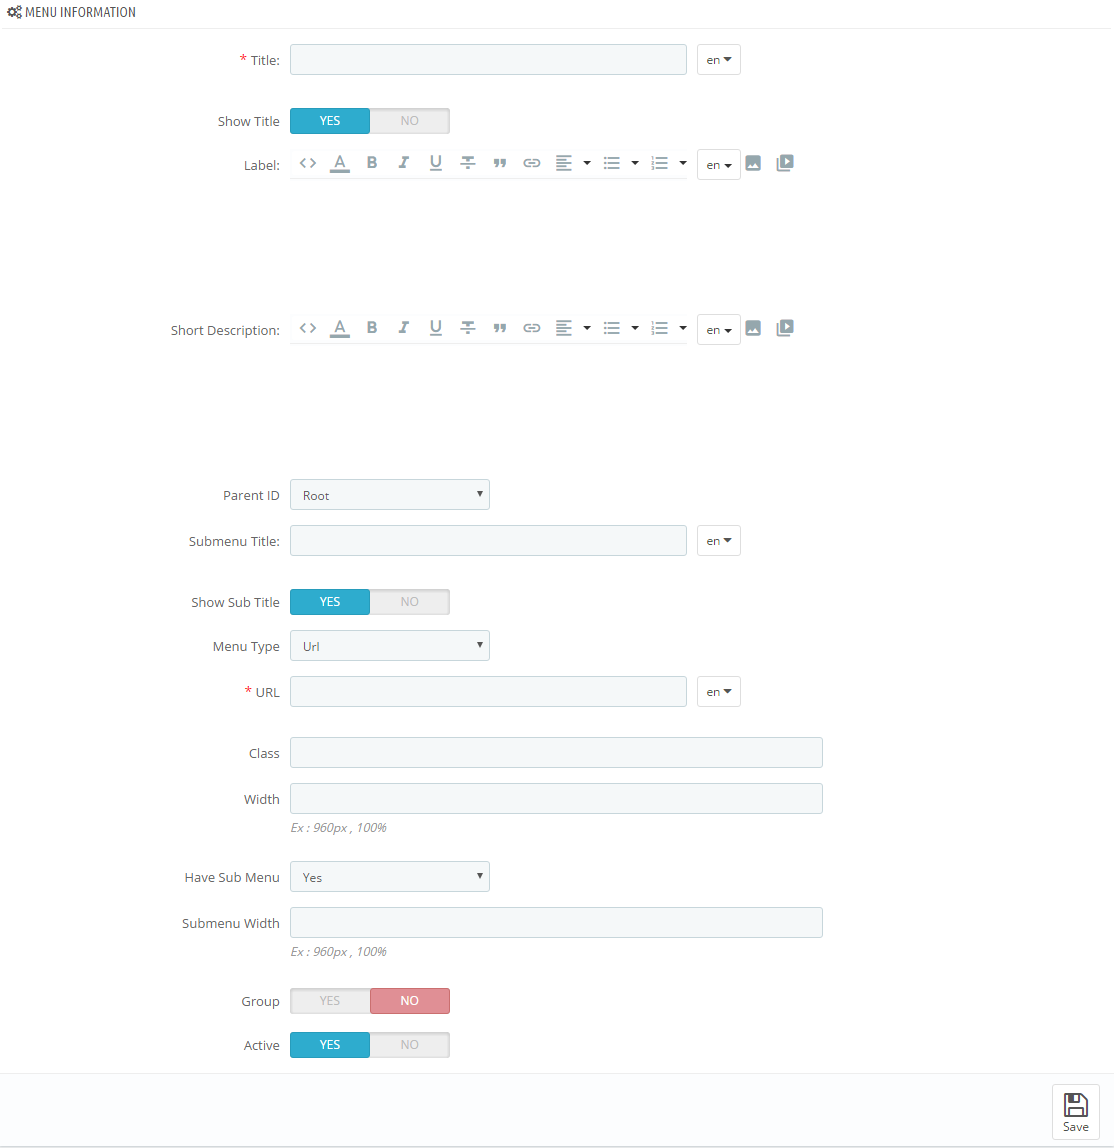
4. After, scroll down you could configure Menu Information as follows
5. Click Add New button to add items as you want.

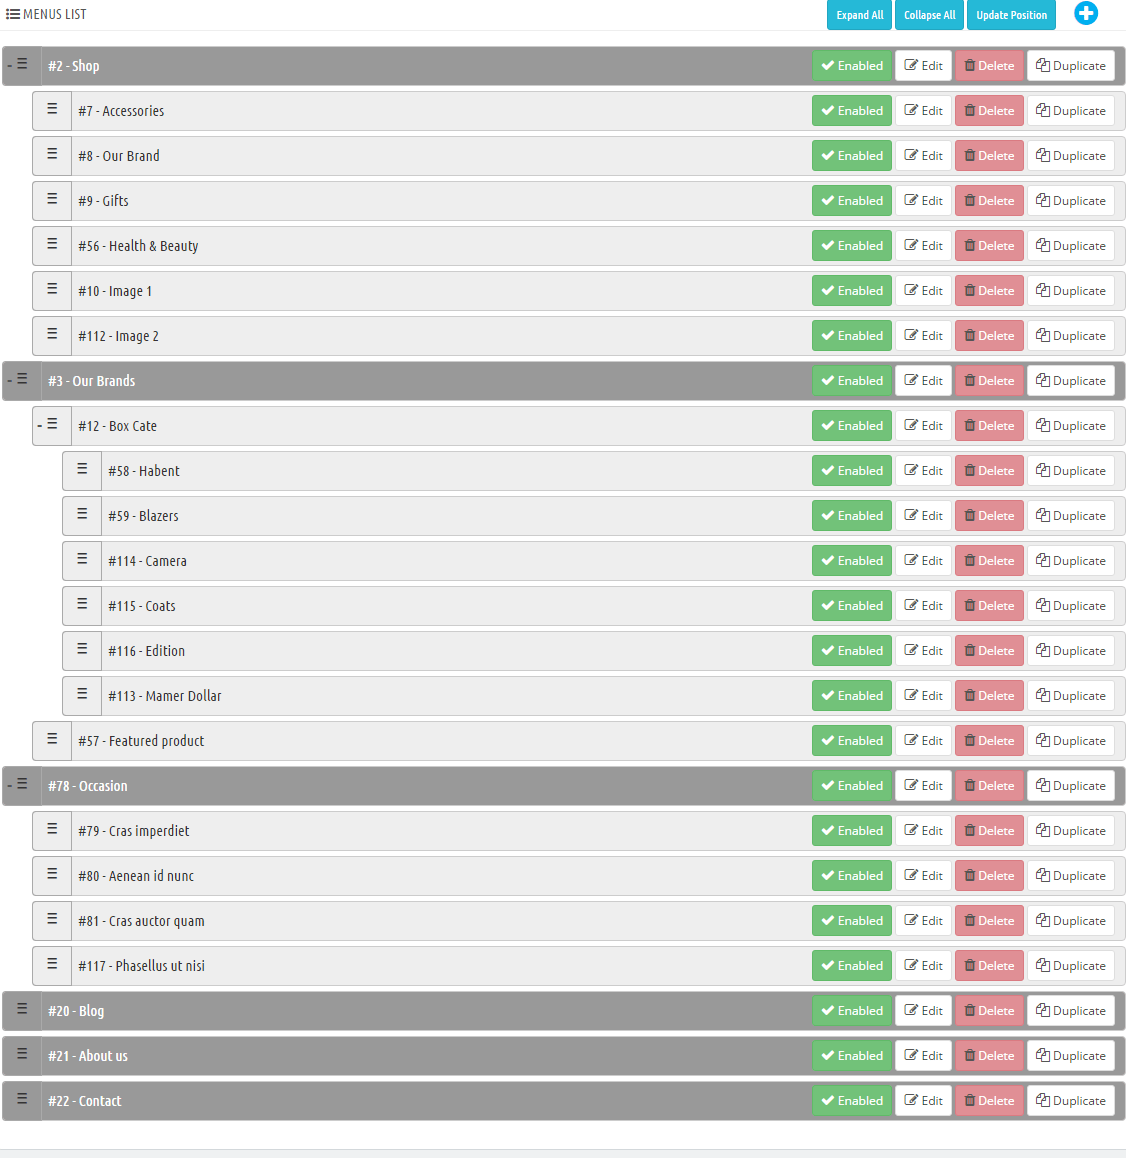
6. Menu list of Mega Menu. You need to look at the menu list to configure easily.
7. To configure each item, you need to click Edit button.
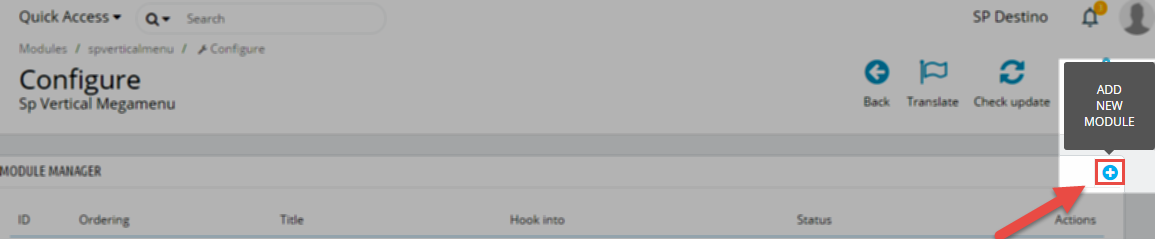
Click Here to view documentation of SP Vertical MegaMenu module.
1. Navigate to IMPROVE >> Modules >> Modules and Services go to Installed modules section and look for SP Vertical Mega Menu >> Click the Configure button to access the module configuration page.
2. In the SP Vertical Megamenu Panel, you could Add New Module by click on the button like the following image:
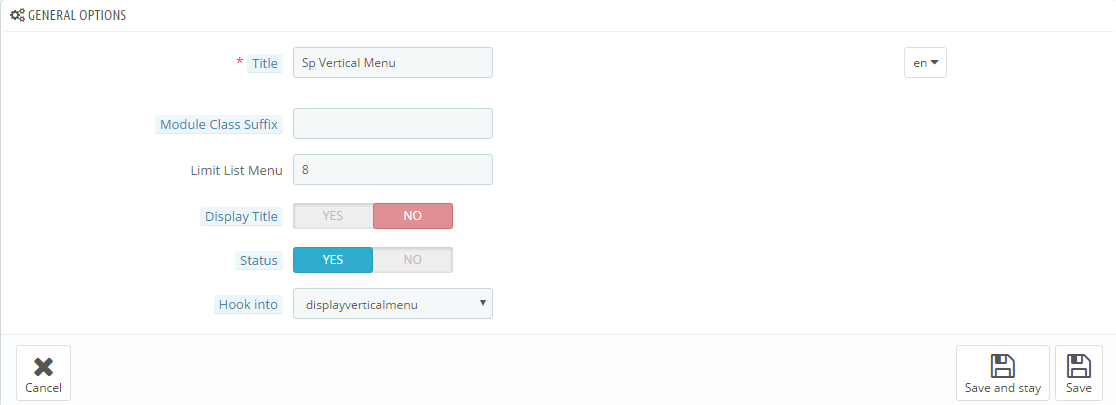
3. You could configure General Options as follows
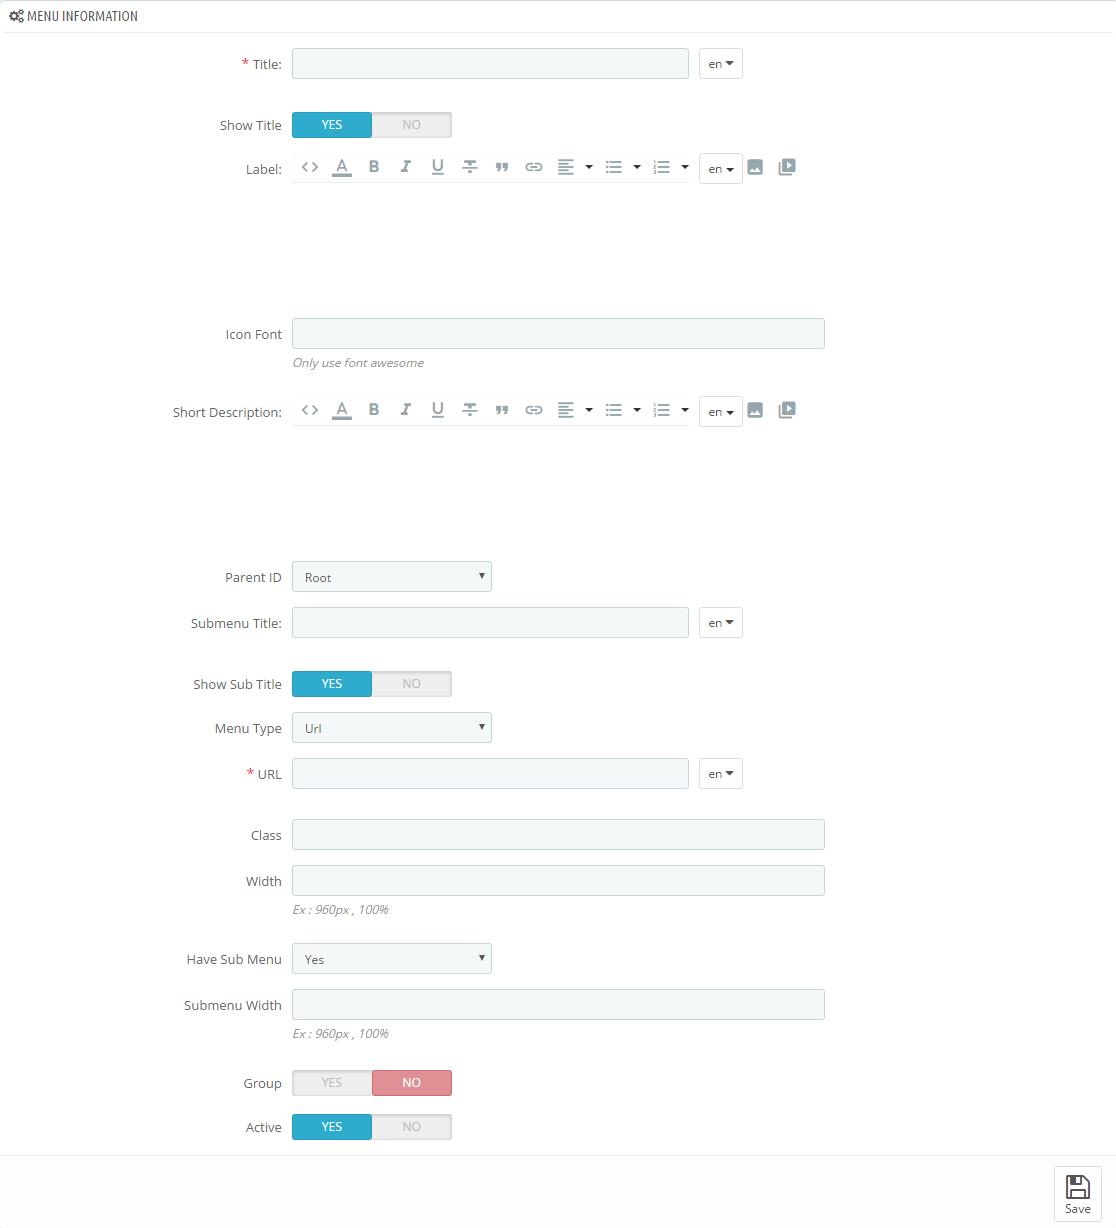
4. After, scroll down you could configure Menu Information as follows
5. Click Add New button to add items as you want.

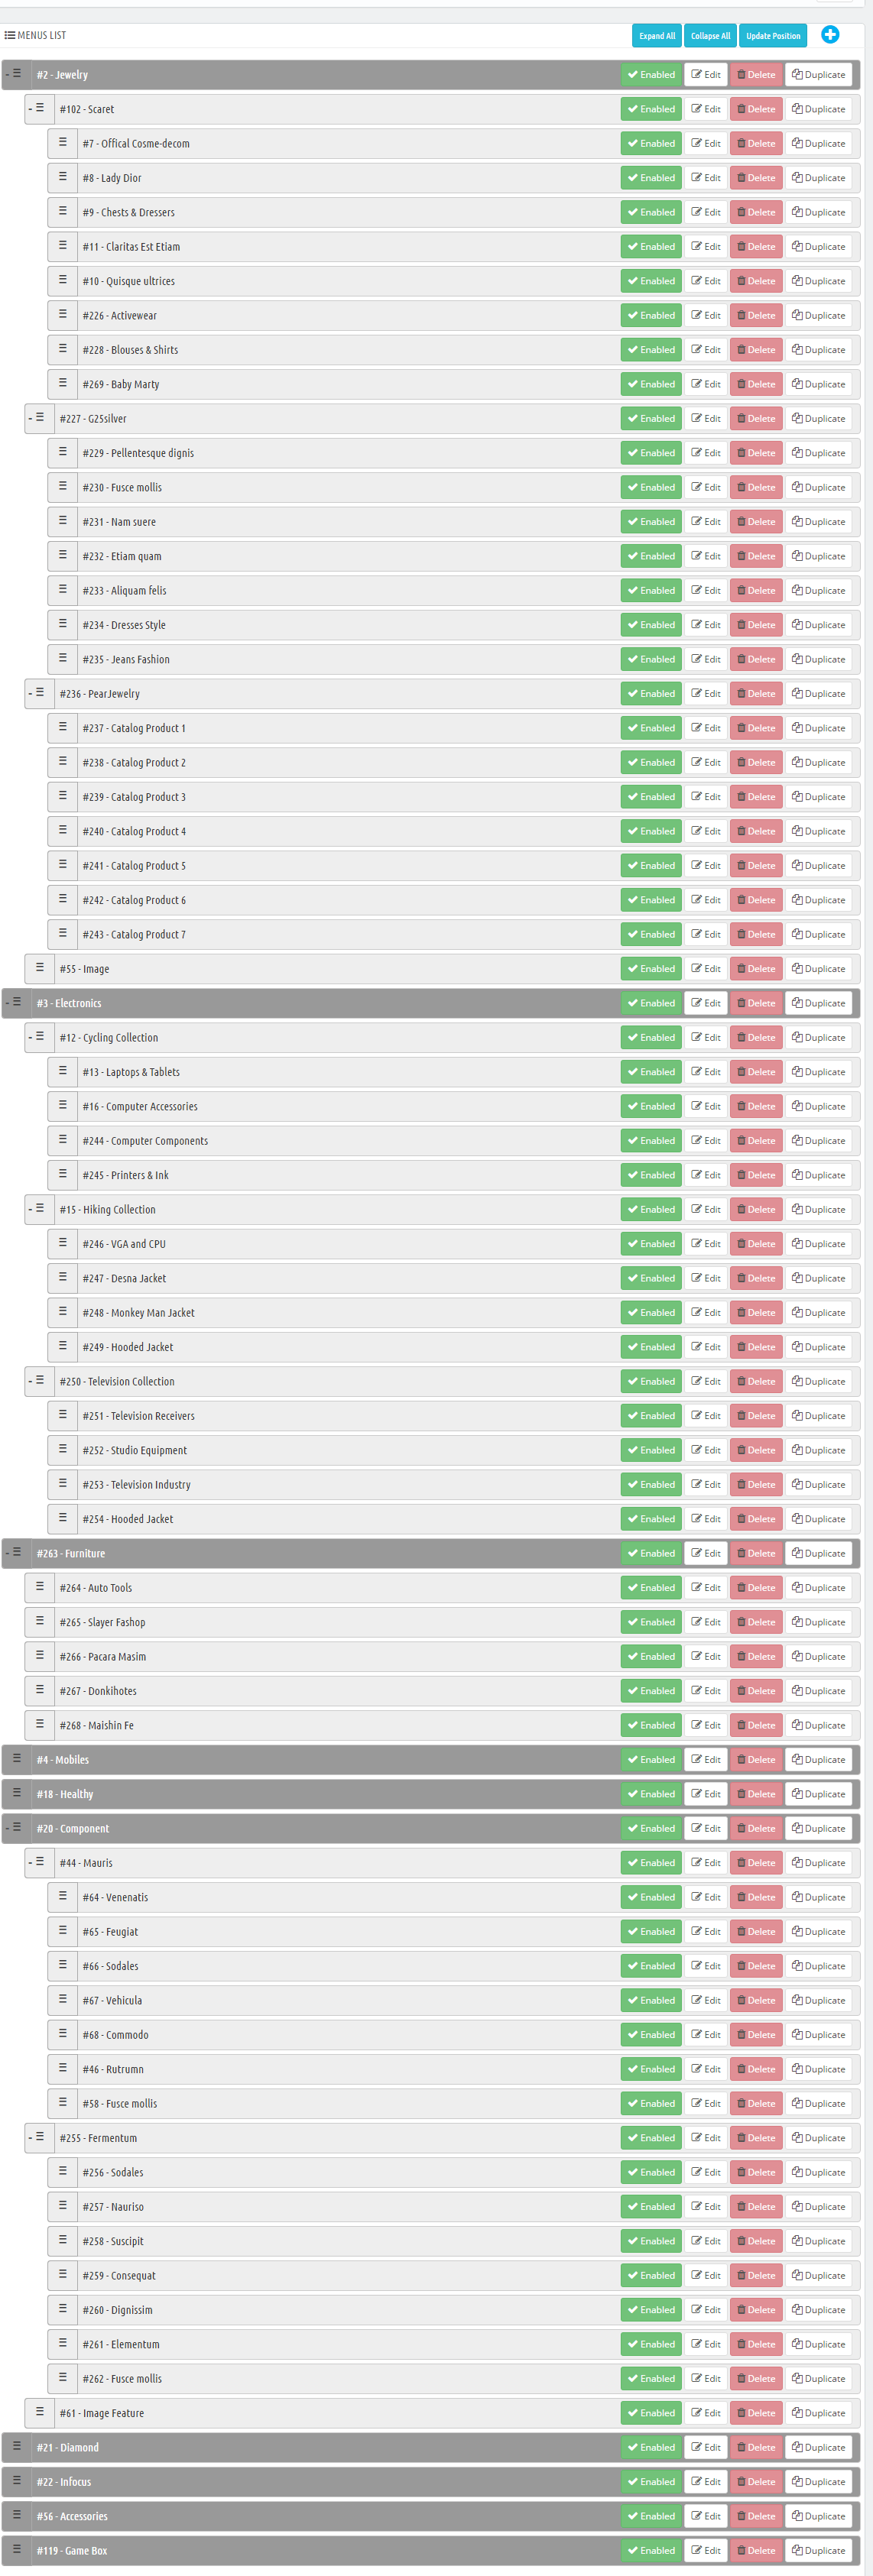
6. Menu list of Vertical Megamenu. You need to look at the menu list to configure easily.
7. To configure each item, you need to click Edit button.
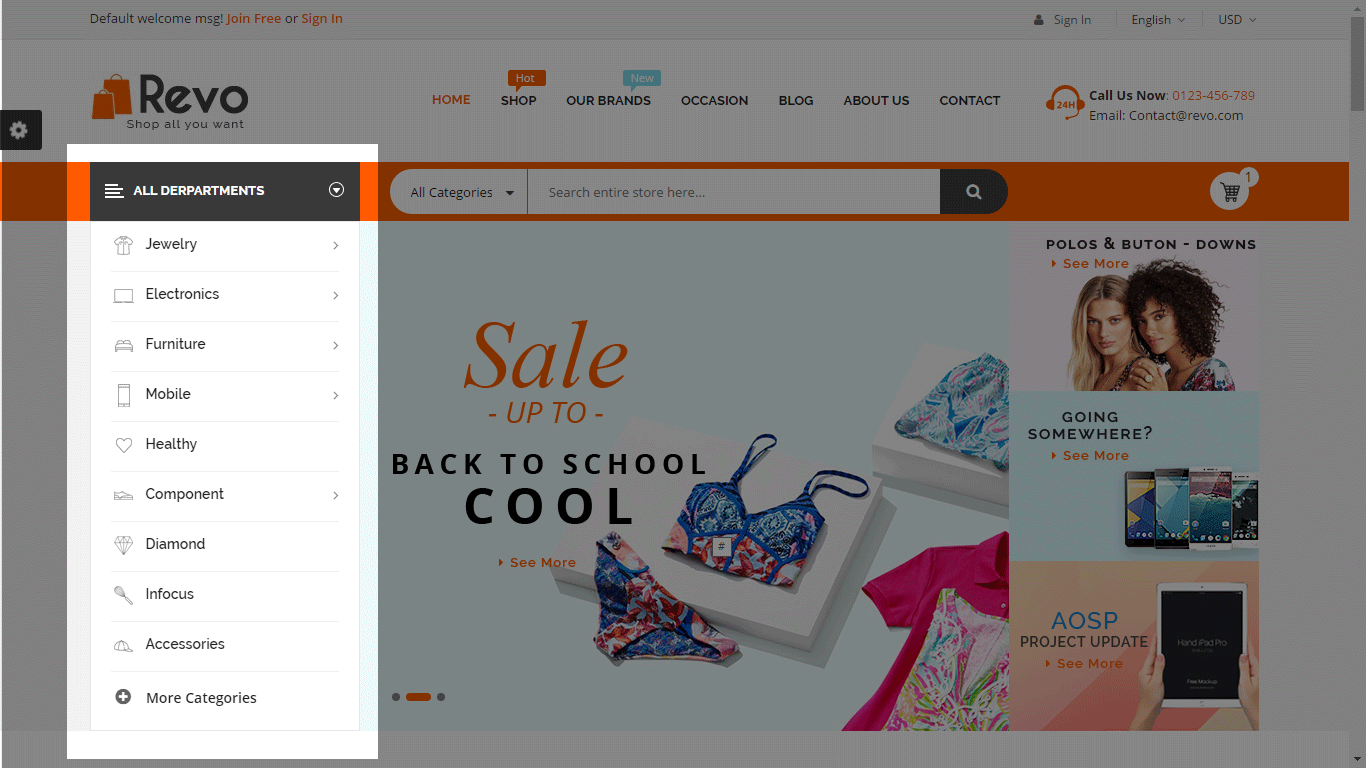
Frontend:
Backend Settings:
Step 1:
Step 2: In the Prestashop Admin Panel, navigate to IMPROVE >> Modules >> Modules and Services >> Installed Modules
Step 3: You could configure this module like the following image.
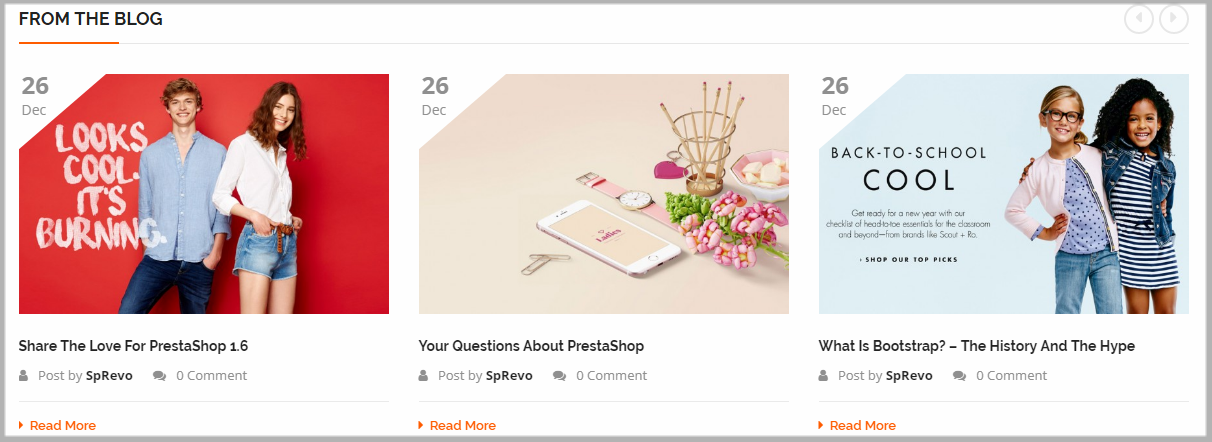
- Smart Blog
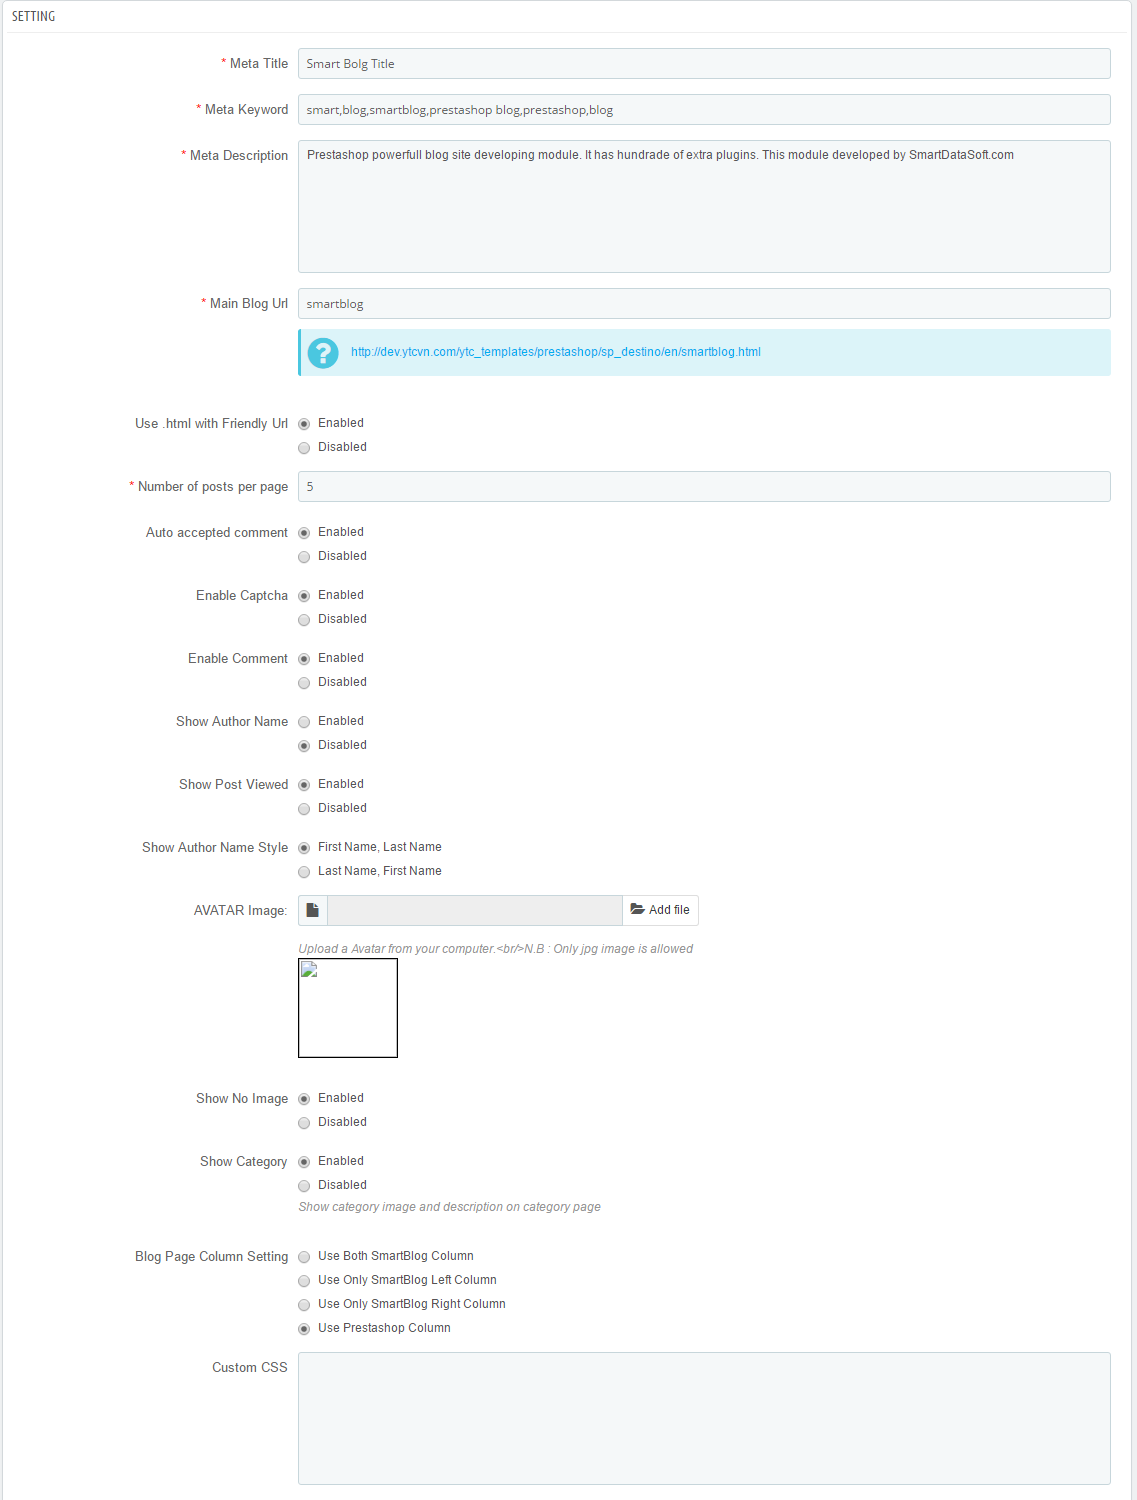
- SmartBlog Home Latest

Please read more guide for Smartblog at here. SmartBlog Module
Backend Setting:
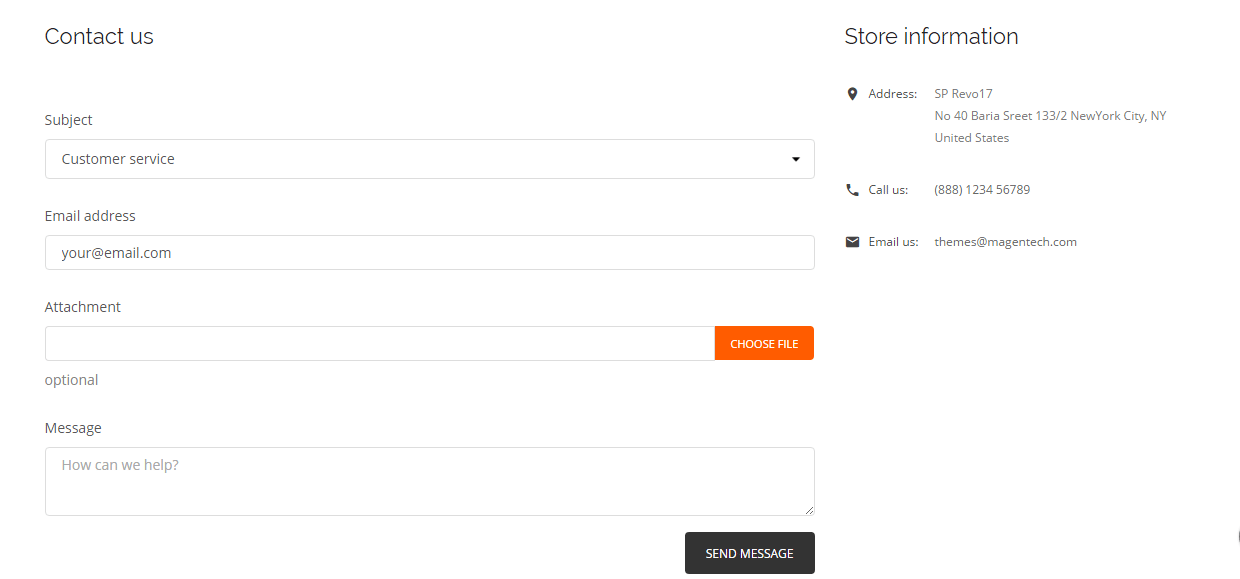
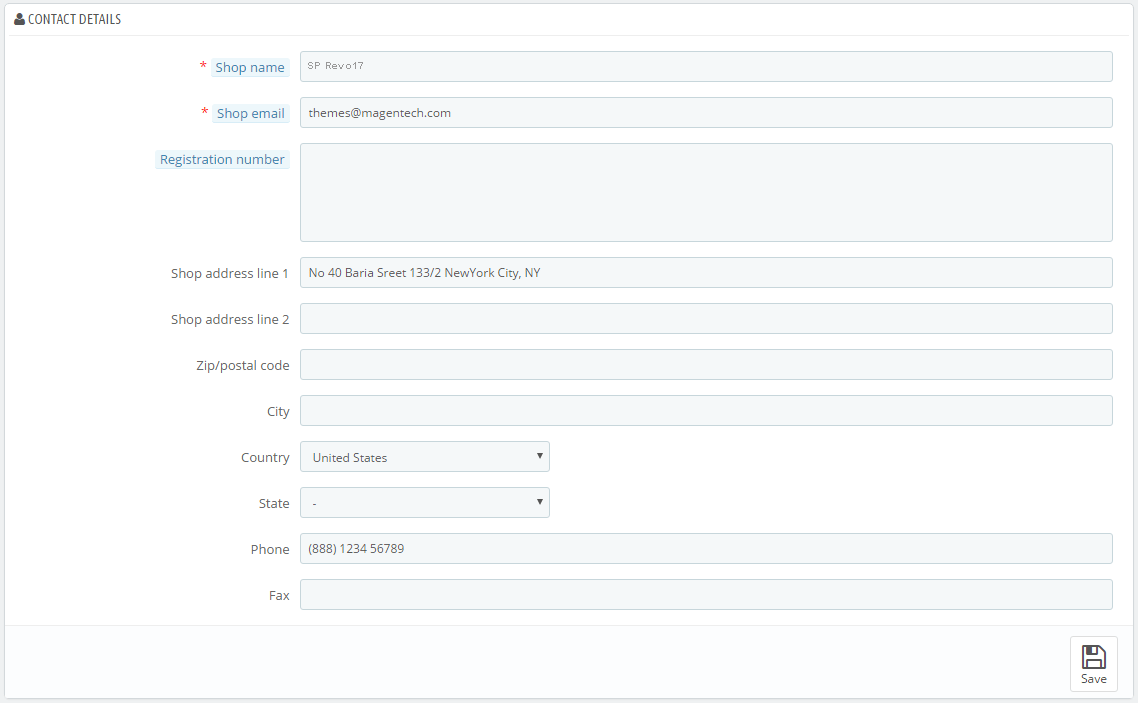
In the Prestashop Admin Panel, navigate to Shop Parameters >> Contact >> Tabs Stores >> Contact Details
Frontend Appearance:
Backend Setting:
Step 1: In the Prestashop Admin Panel, navigate to IMPROVE >> Design >> Pages
Step 2: In the “Pages” configuration page, click 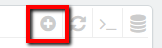 button in the right corner to “ADD NEW”.
Step 3: You could add new cms page like the illustration
Copy and paste the following code into the content:
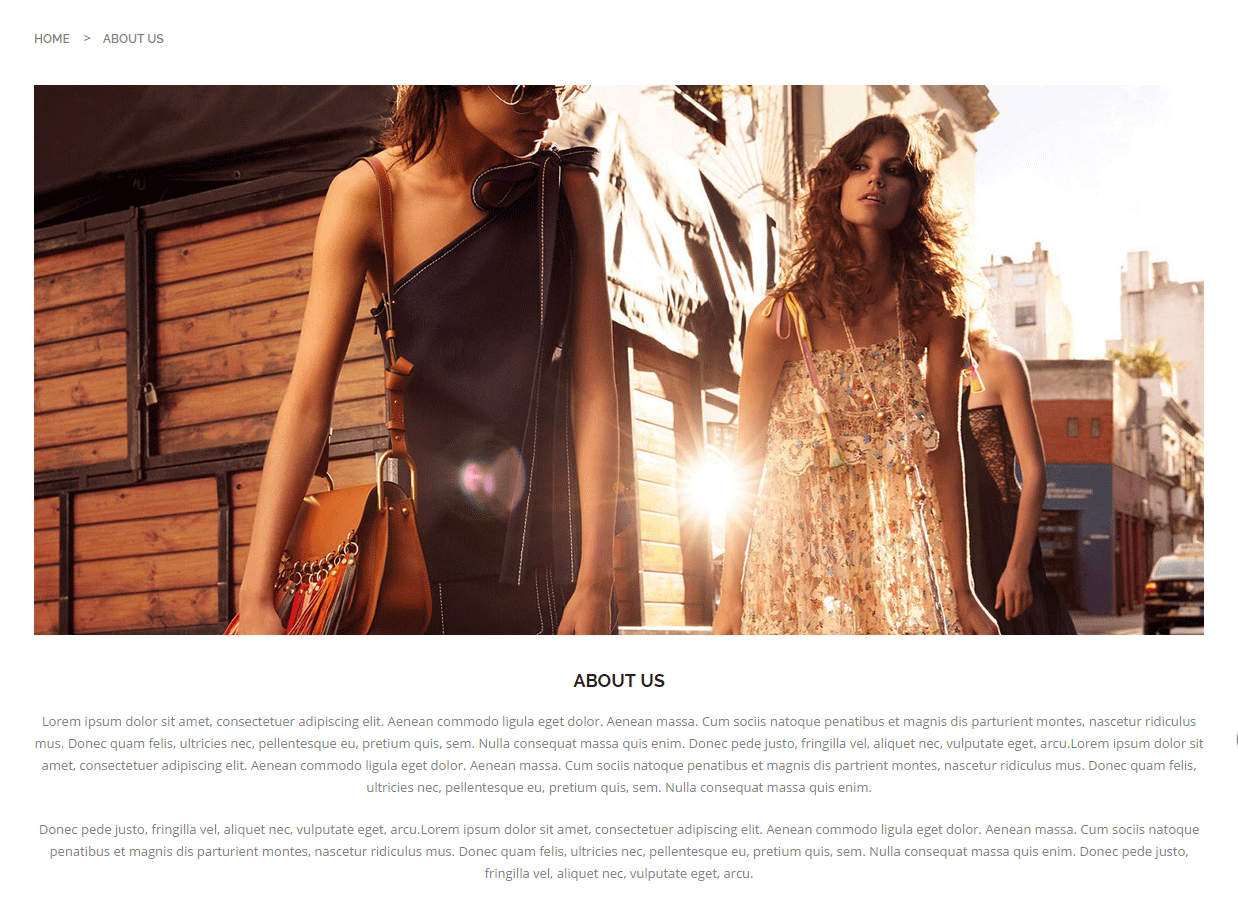
<div class="about-wrap">
<div class="image"><img src="/themes/sp_Revo17/themes/sp_Revo/assets/img/cms/image-about-us.jpg" alt="#" /></div>
<div class="content">
<div class="title">
<h1>About Us</h1>
</div>
<div class="text">
<p>Lorem ipsum dolor sit amet, consectetuer adipiscing elit. Aenean commodo ligula eget dolor. Aenean massa. Cum sociis natoque penatibus et magnis dis parturient montes, nascetur ridiculus mus. Donec quam felis, ultricies nec, pellentesque eu, pretium quis, sem. Nulla consequat massa quis enim. Donec pede justo, fringilla vel, aliquet nec, vulputate eget, arcu.Lorem ipsum dolor sit amet, consectetuer adipiscing elit. Aenean commodo ligula eget dolor. Aenean massa. Cum sociis natoque penatibus et magnis dis partrient montes, nascetur ridiculus mus. Donec quam felis, ultricies nec, pellentesque eu, pretium quis, sem. Nulla consequat massa quis enim.</p>
<p>Donec pede justo, fringilla vel, aliquet nec, vulputate eget, arcu.Lorem ipsum dolor sit amet, consectetuer adipiscing elit. Aenean commodo ligula eget dolor. Aenean massa. Cum sociis natoque penatibus et magnis dis parturient montes, nascetur ridiculus mus. Donec quam felis, ultricies nec, pellentesque eu, pretium quis, sem. Nulla consequat massa quis enim. Donec pede justo, fringilla vel, aliquet nec, vulputate eget, arcu.</p>
</div>
</div>
</div>
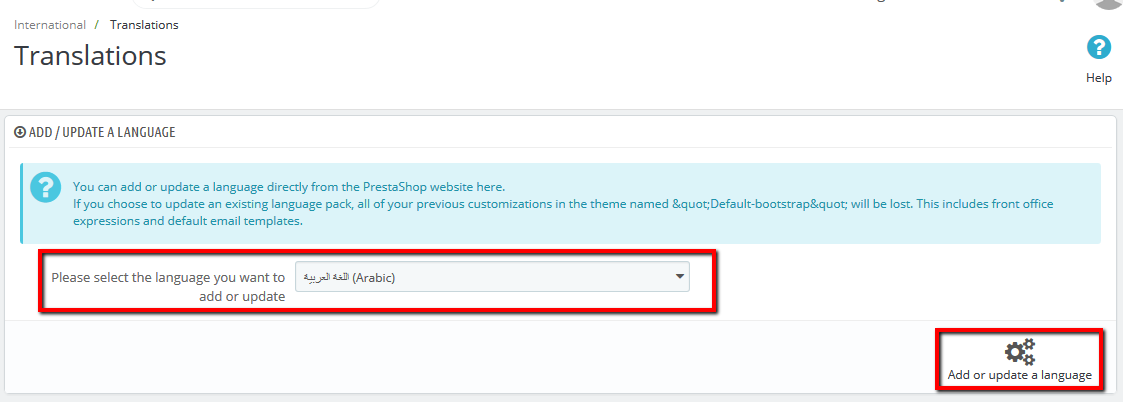
- In the Prestashop Admin Panel, navigate to IMPROVE >> International >> Translations
![]()
- At here, Scroll to block "ADD / UPDATE A LANGUAGE"
- Then, Select the language you want to add new, and click button "Add or update a language"
- In the Prestashop Admin Panel, navigate to IMPROVE >> International >> Translations (Same Add new Language)
- At here, Scroll to block "Export a Language"
- Then, Select Language and Your theme that you want Export, and click button "Export"

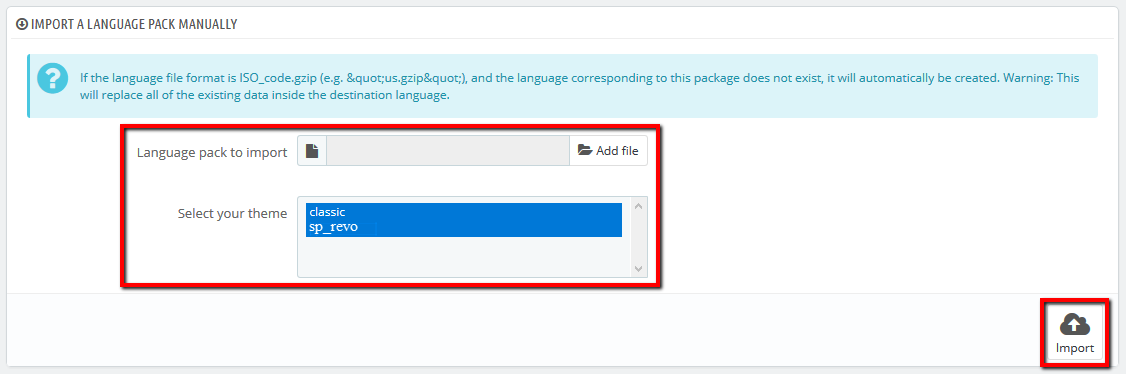
- In the Prestashop Admin Panel, navigate to IMPROVE >> International >> Translations (Same Add new Language)
- At here, Scroll to block "Import a language pack manually"
- Then, click button "Add file" and choose file language and select your theme, and click button "Import"
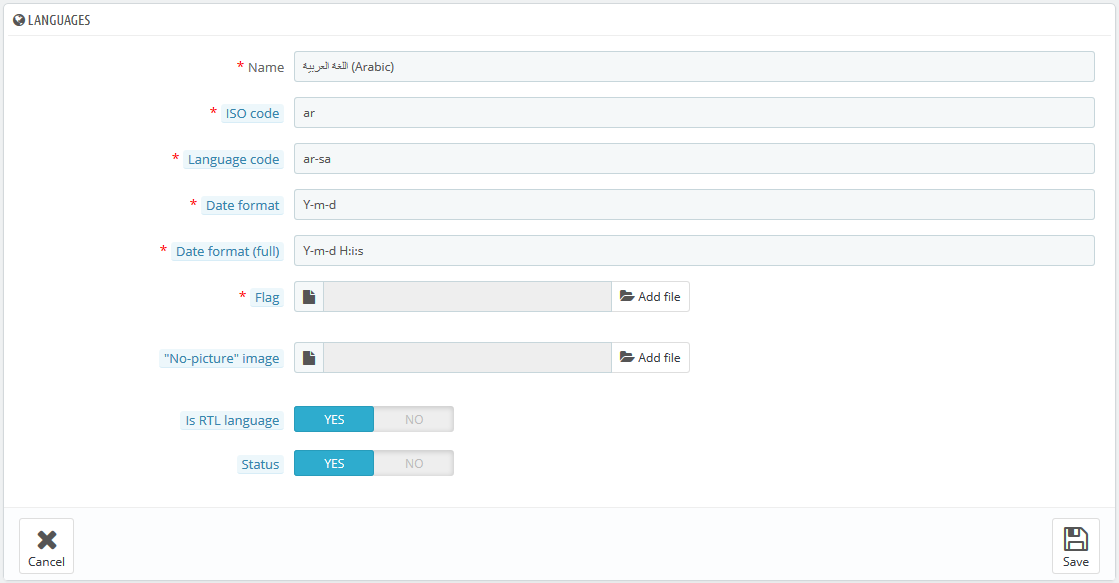
- In the Prestashop Admin Panel, navigate to IMPROVE >> International >> Localization, and choose tab "Languages"
- You can edit or delete language on your store
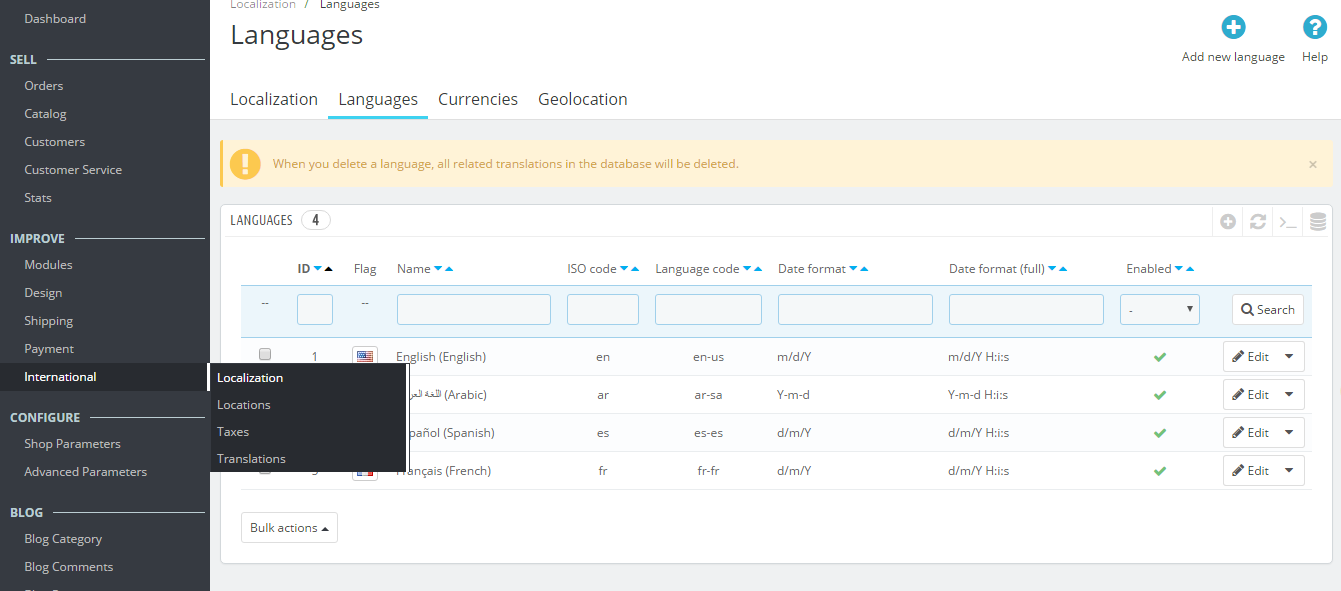
- If you want change language, click button "Edit".
- In the Prestashop Admin Panel, navigate to IMPROVE >> International >> Localization, and choose tab "Currencies"
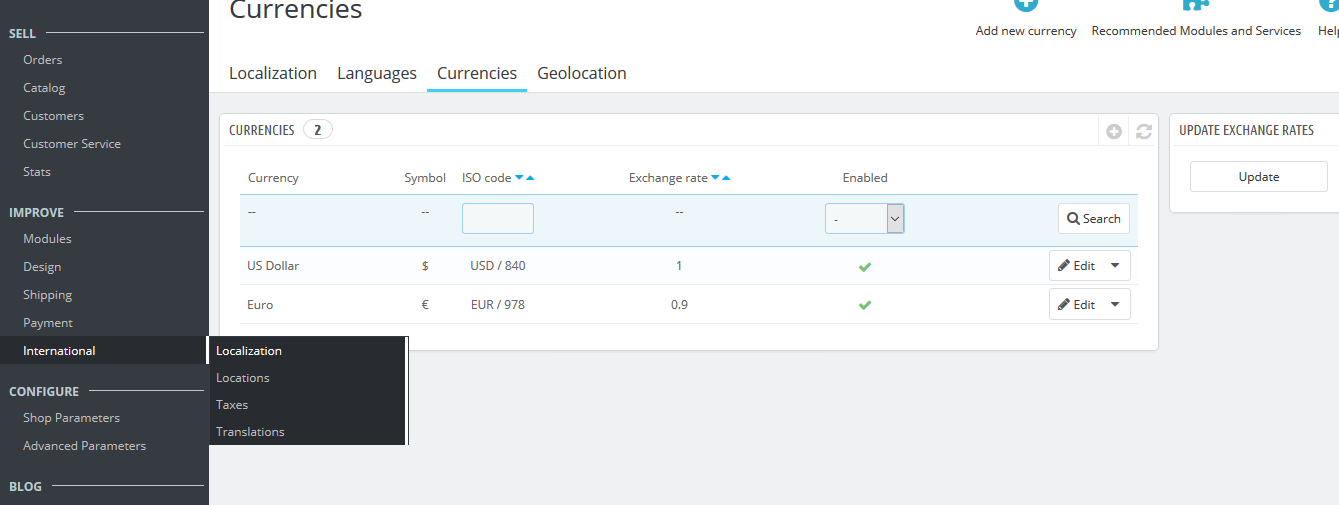
- In the "Currencies" configuration page, click button  in the right corner to “ADD NEW”.
You could configure this module like the illustration
- In the Prestashop Admin Panel, navigate to IMPROVE >> International >> Translations (Same Add new Language)
- In the "Translations" configuration page, scroll to block "MODIFY TRANSLATIONS"
- Then click button "Modify"
![]()
- Here, you can translate the text in the theme.
![]()
- In the Prestashop Admin Panel, navigate to IMPROVE >> International >> Translations (Same Add new Language)
- In the "Translations" configuration page, scroll to block "MODIFY TRANSLATIONS"
- Then click button "Modify"
![]()
- Here, you can translate the text in the module.
![]()
SUPPORT - If you have any questions that are beyond the scope of this help file, please feel free to send us via:
Support Tickets System
FAQs - Go to
Here to view more the Frequently Asked Questions.


Click here to view changelog.