Documentation for Metro Ultimate Prestashop Theme
Firstly, a huge thanks for purchasing this theme, your support is truly appreciated!
This document covers the installation and use of this theme, reveals some answers to common problems and issues. We encourage you to read throughout this document if you are experiencing any difficulties. If you have any questions that are beyond the scope of document, please feel free to contact us via our Support Tickets System.
Metro PrestaShop Theme is fully compatible with Prestashop version 1.7.x
There are two ways to install SP Metro Theme
We provide Quickstart package for each theme which aims to ease the installation for users. It will help you save much time of installing and configuring if you plan to start your site from the beginning.
Please following steps below:
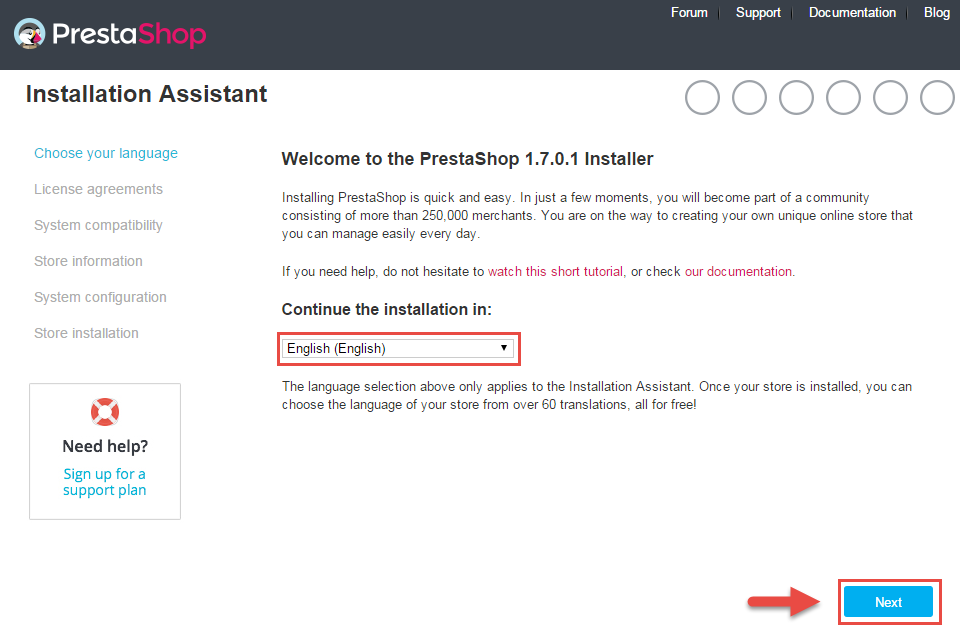
Please note: The installation language option will not affect your store language. By default PrestaShop is offered in English. You can install additional localization packages to change the store language.
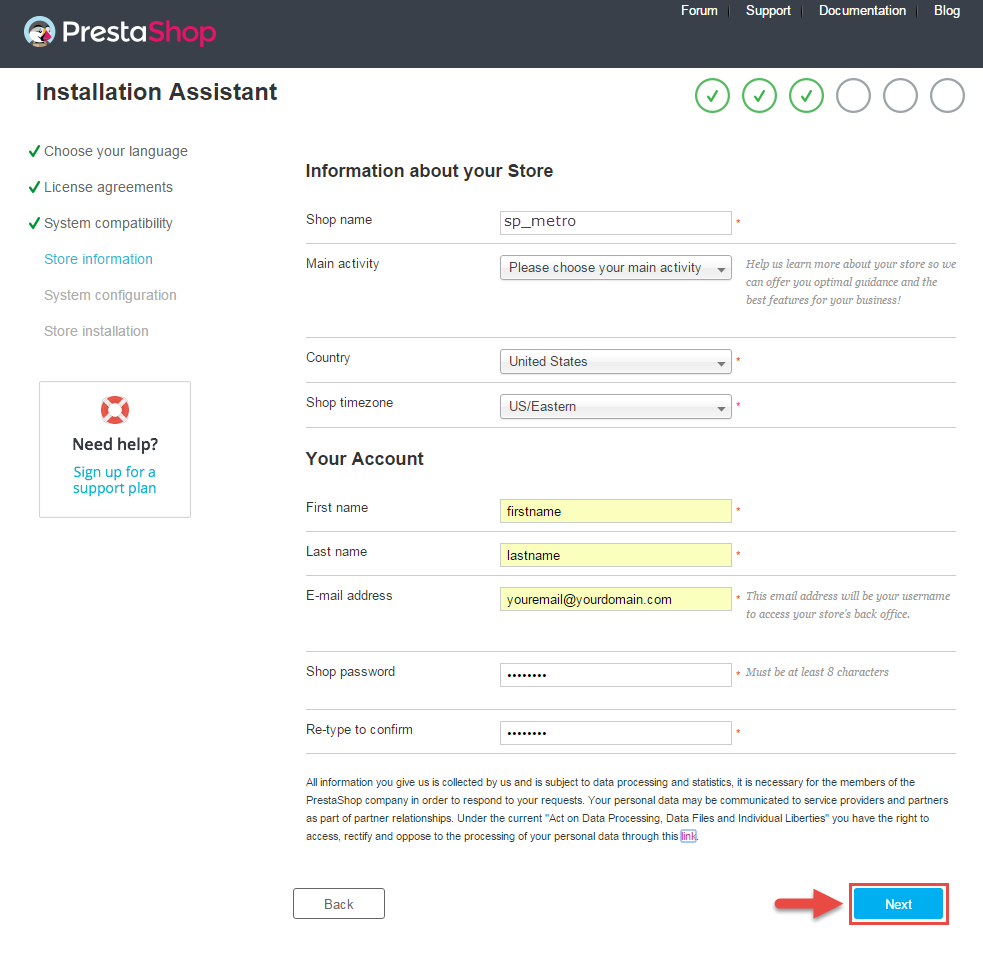
Now add required information for your store: Shop name, Main activity, Country, Shop timezone and add the account info: first name, last name, email and password. Click “Next” to next step.
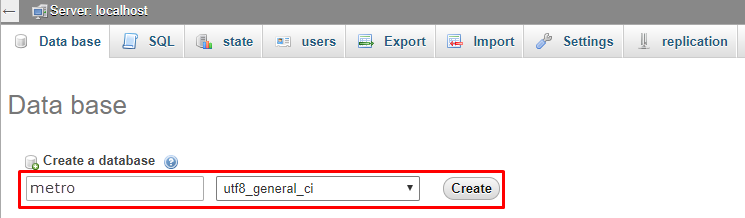
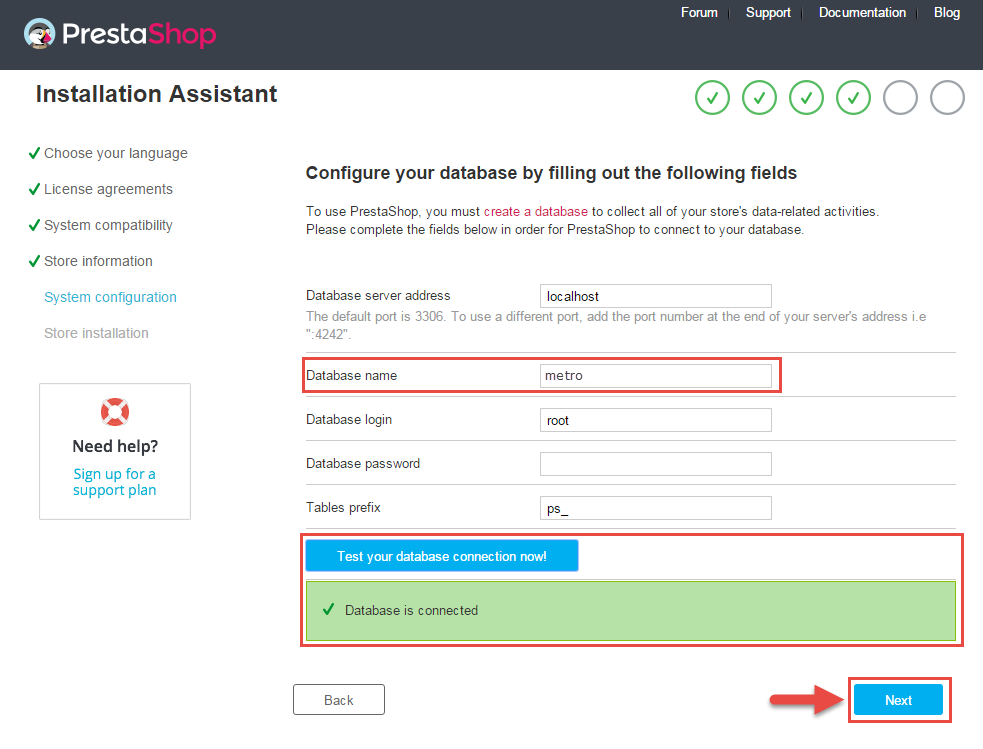
Enter your database in step 3, then click the “Test your database connection now!” button to make sure that the entered settings are correct. After that, click Next button.
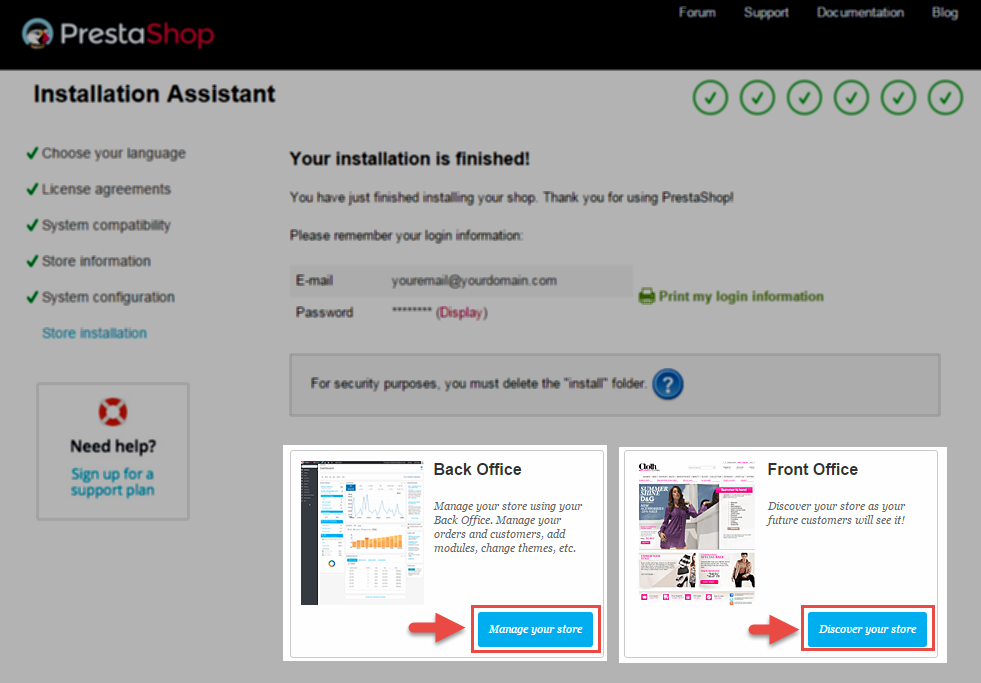
Note: For security reasons you need to delete the install/ directory on your hosting server.
And finally, go to the Frontend or Backend as you want:
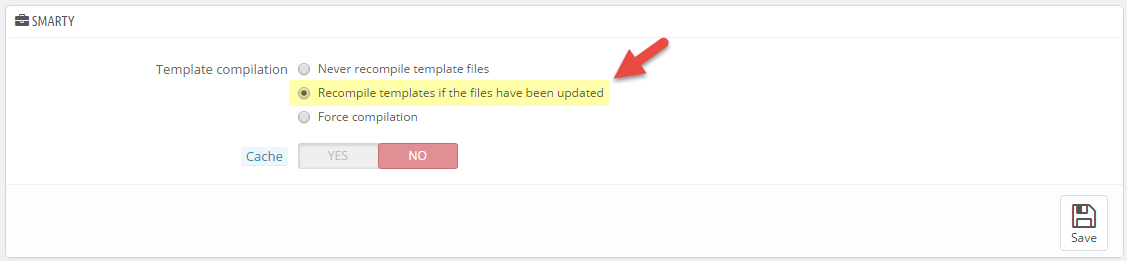
Note: Before installing theme, you must disable the cache. In your back office, please go to CONFIGURE >> Advanced Parameters >> Performance >> find “Cache” parameter >> Set “No” to disable cache >> Click “Save”.
1. Login to your Prestashop admin panel and navigate to IMPROVE >> Design >> Theme & Logo. At the top of the page click the Add a new theme button.

2. Navigate to “Import from your computer” >> choose the zip theme file as named “sp_metro_template_p1.7.x_v1.1.0.zip” >> Save.

With either case, you must upload theme file in the "/themes" folder.
- Login to your Prestashop admin panel and navigate to IMPROVE >> Design >> Theme & Logo. At the top of the page click the Add a new theme button.
- Navigate to “Import from FTP” >> choose the zip theme file as named “sp_metro_template_p1.7.x_v1.1.0.zip” >> Save.

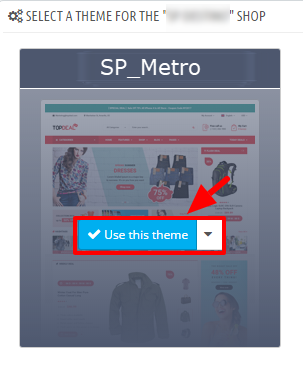
3. When your choice is successfully validated , the new theme will be shown in the section named as Select a theme for your “[name]” shop . Then Click "Use this theme" button to replace your current theme with SP Metro theme.
Note: After click button, your site may be broken. If your site was broken, please run this command: chown -R apache:apache sp_metro
4. Click "Save" button and go to front-end and view your website.
 Home Style 1
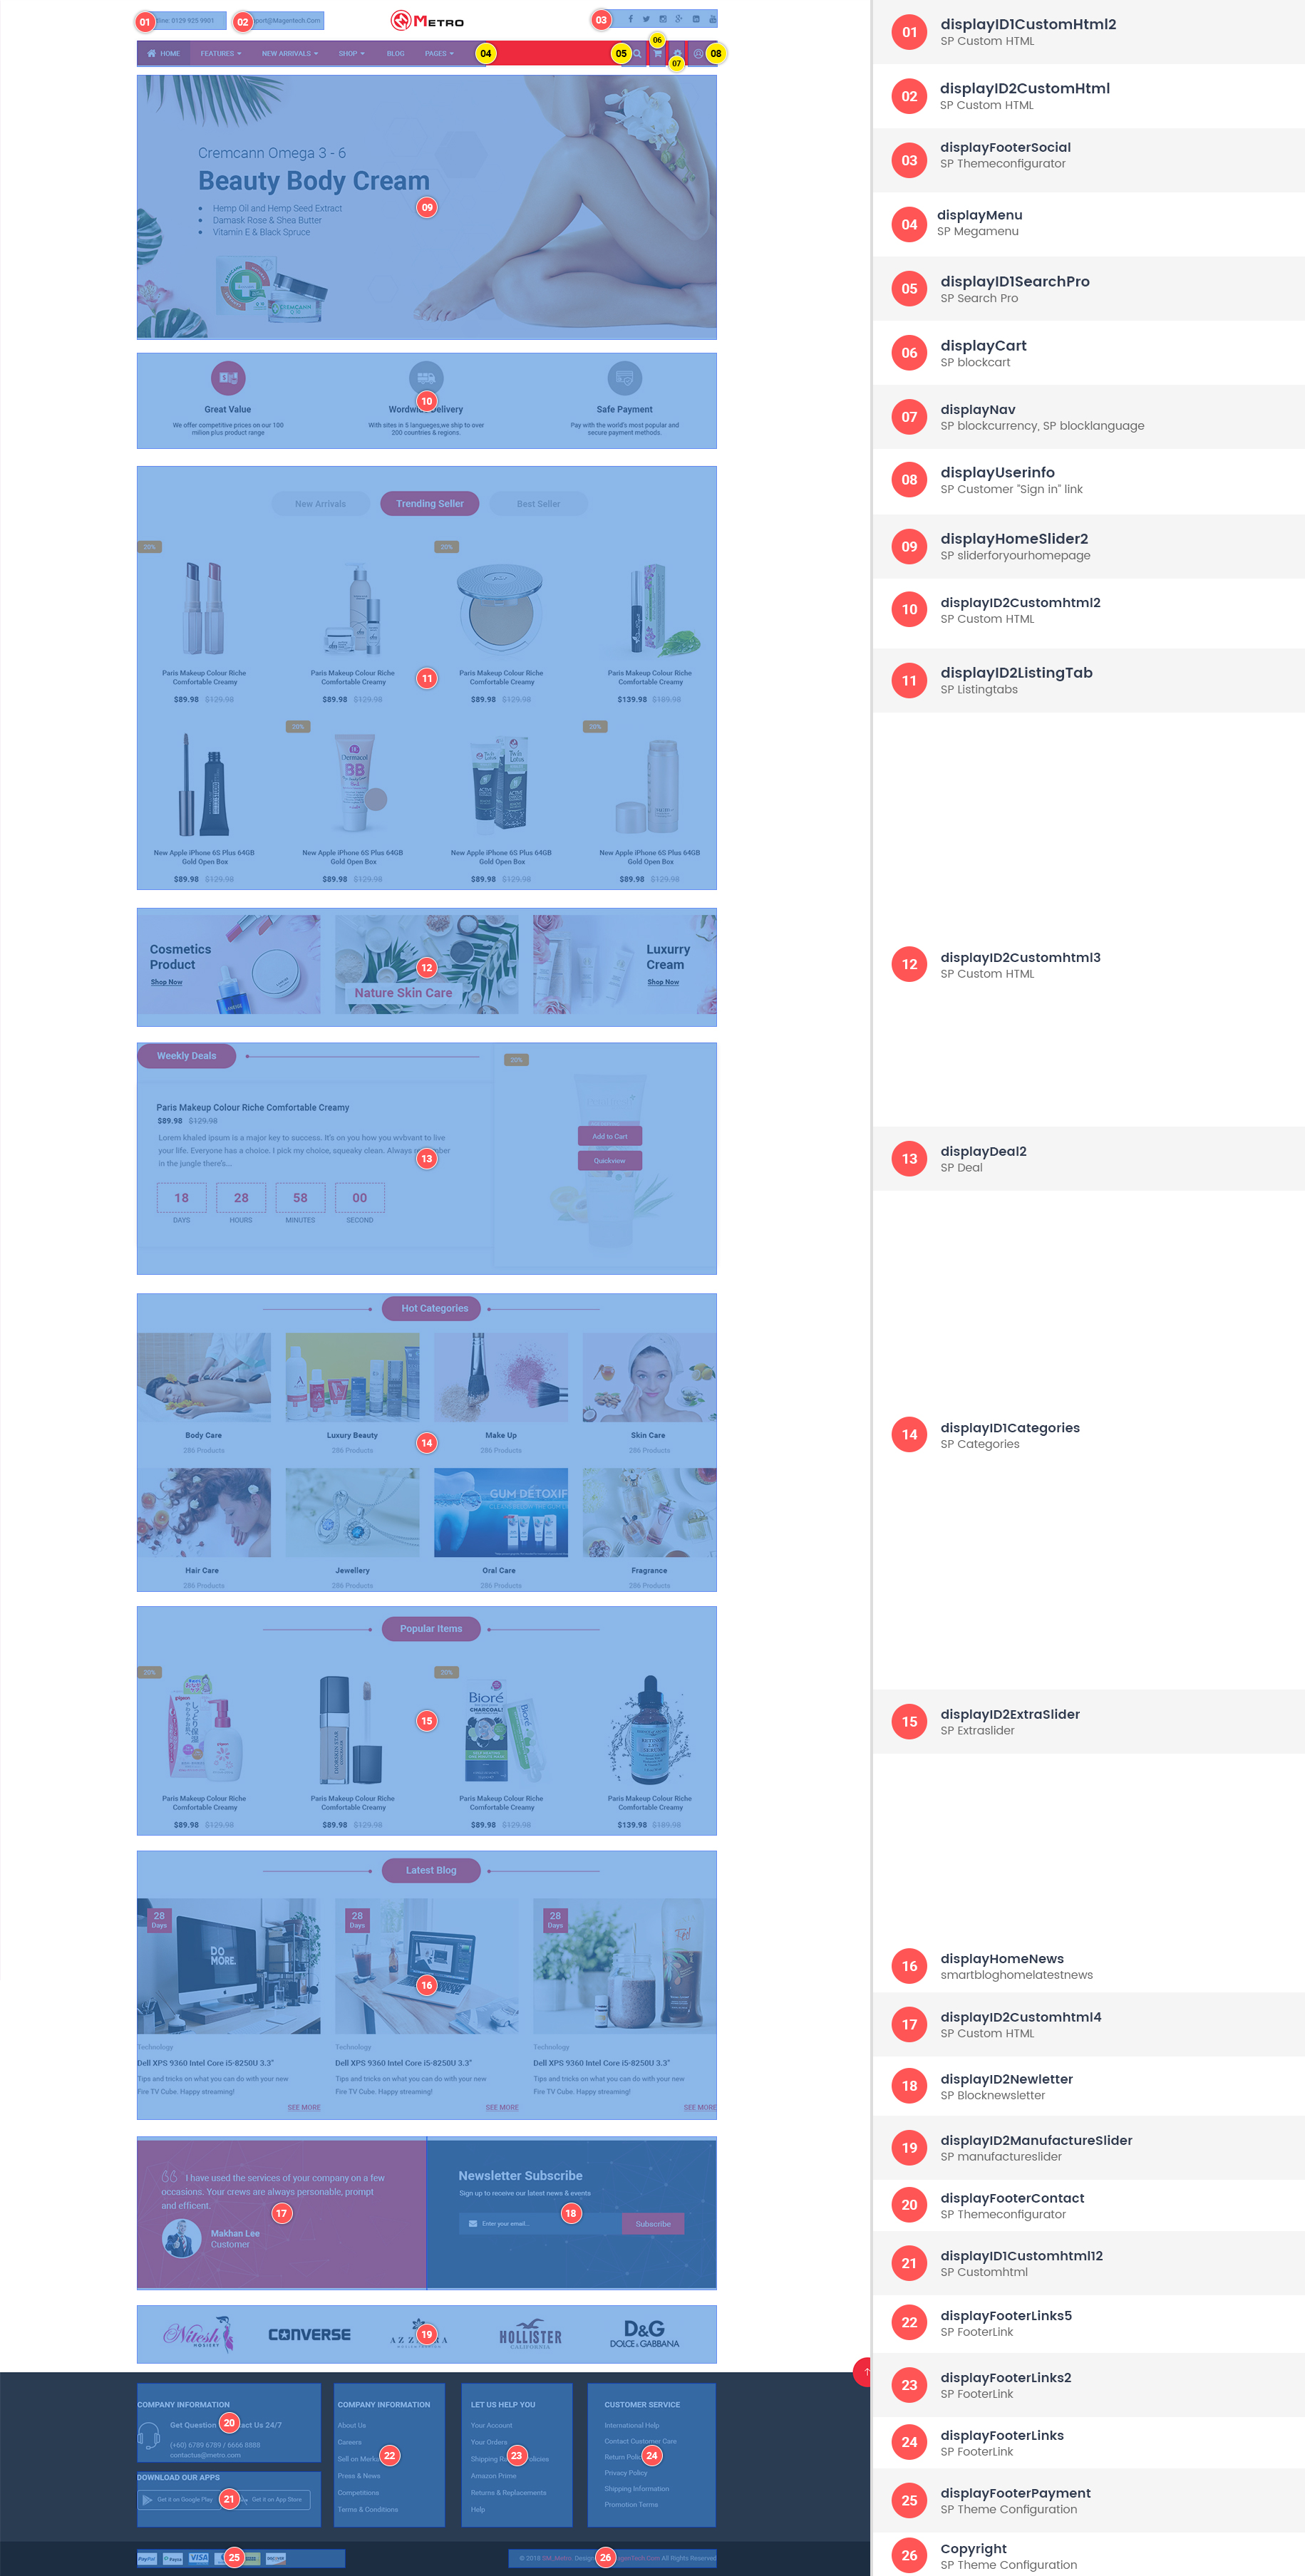 Home Style 2
 Home Style 3
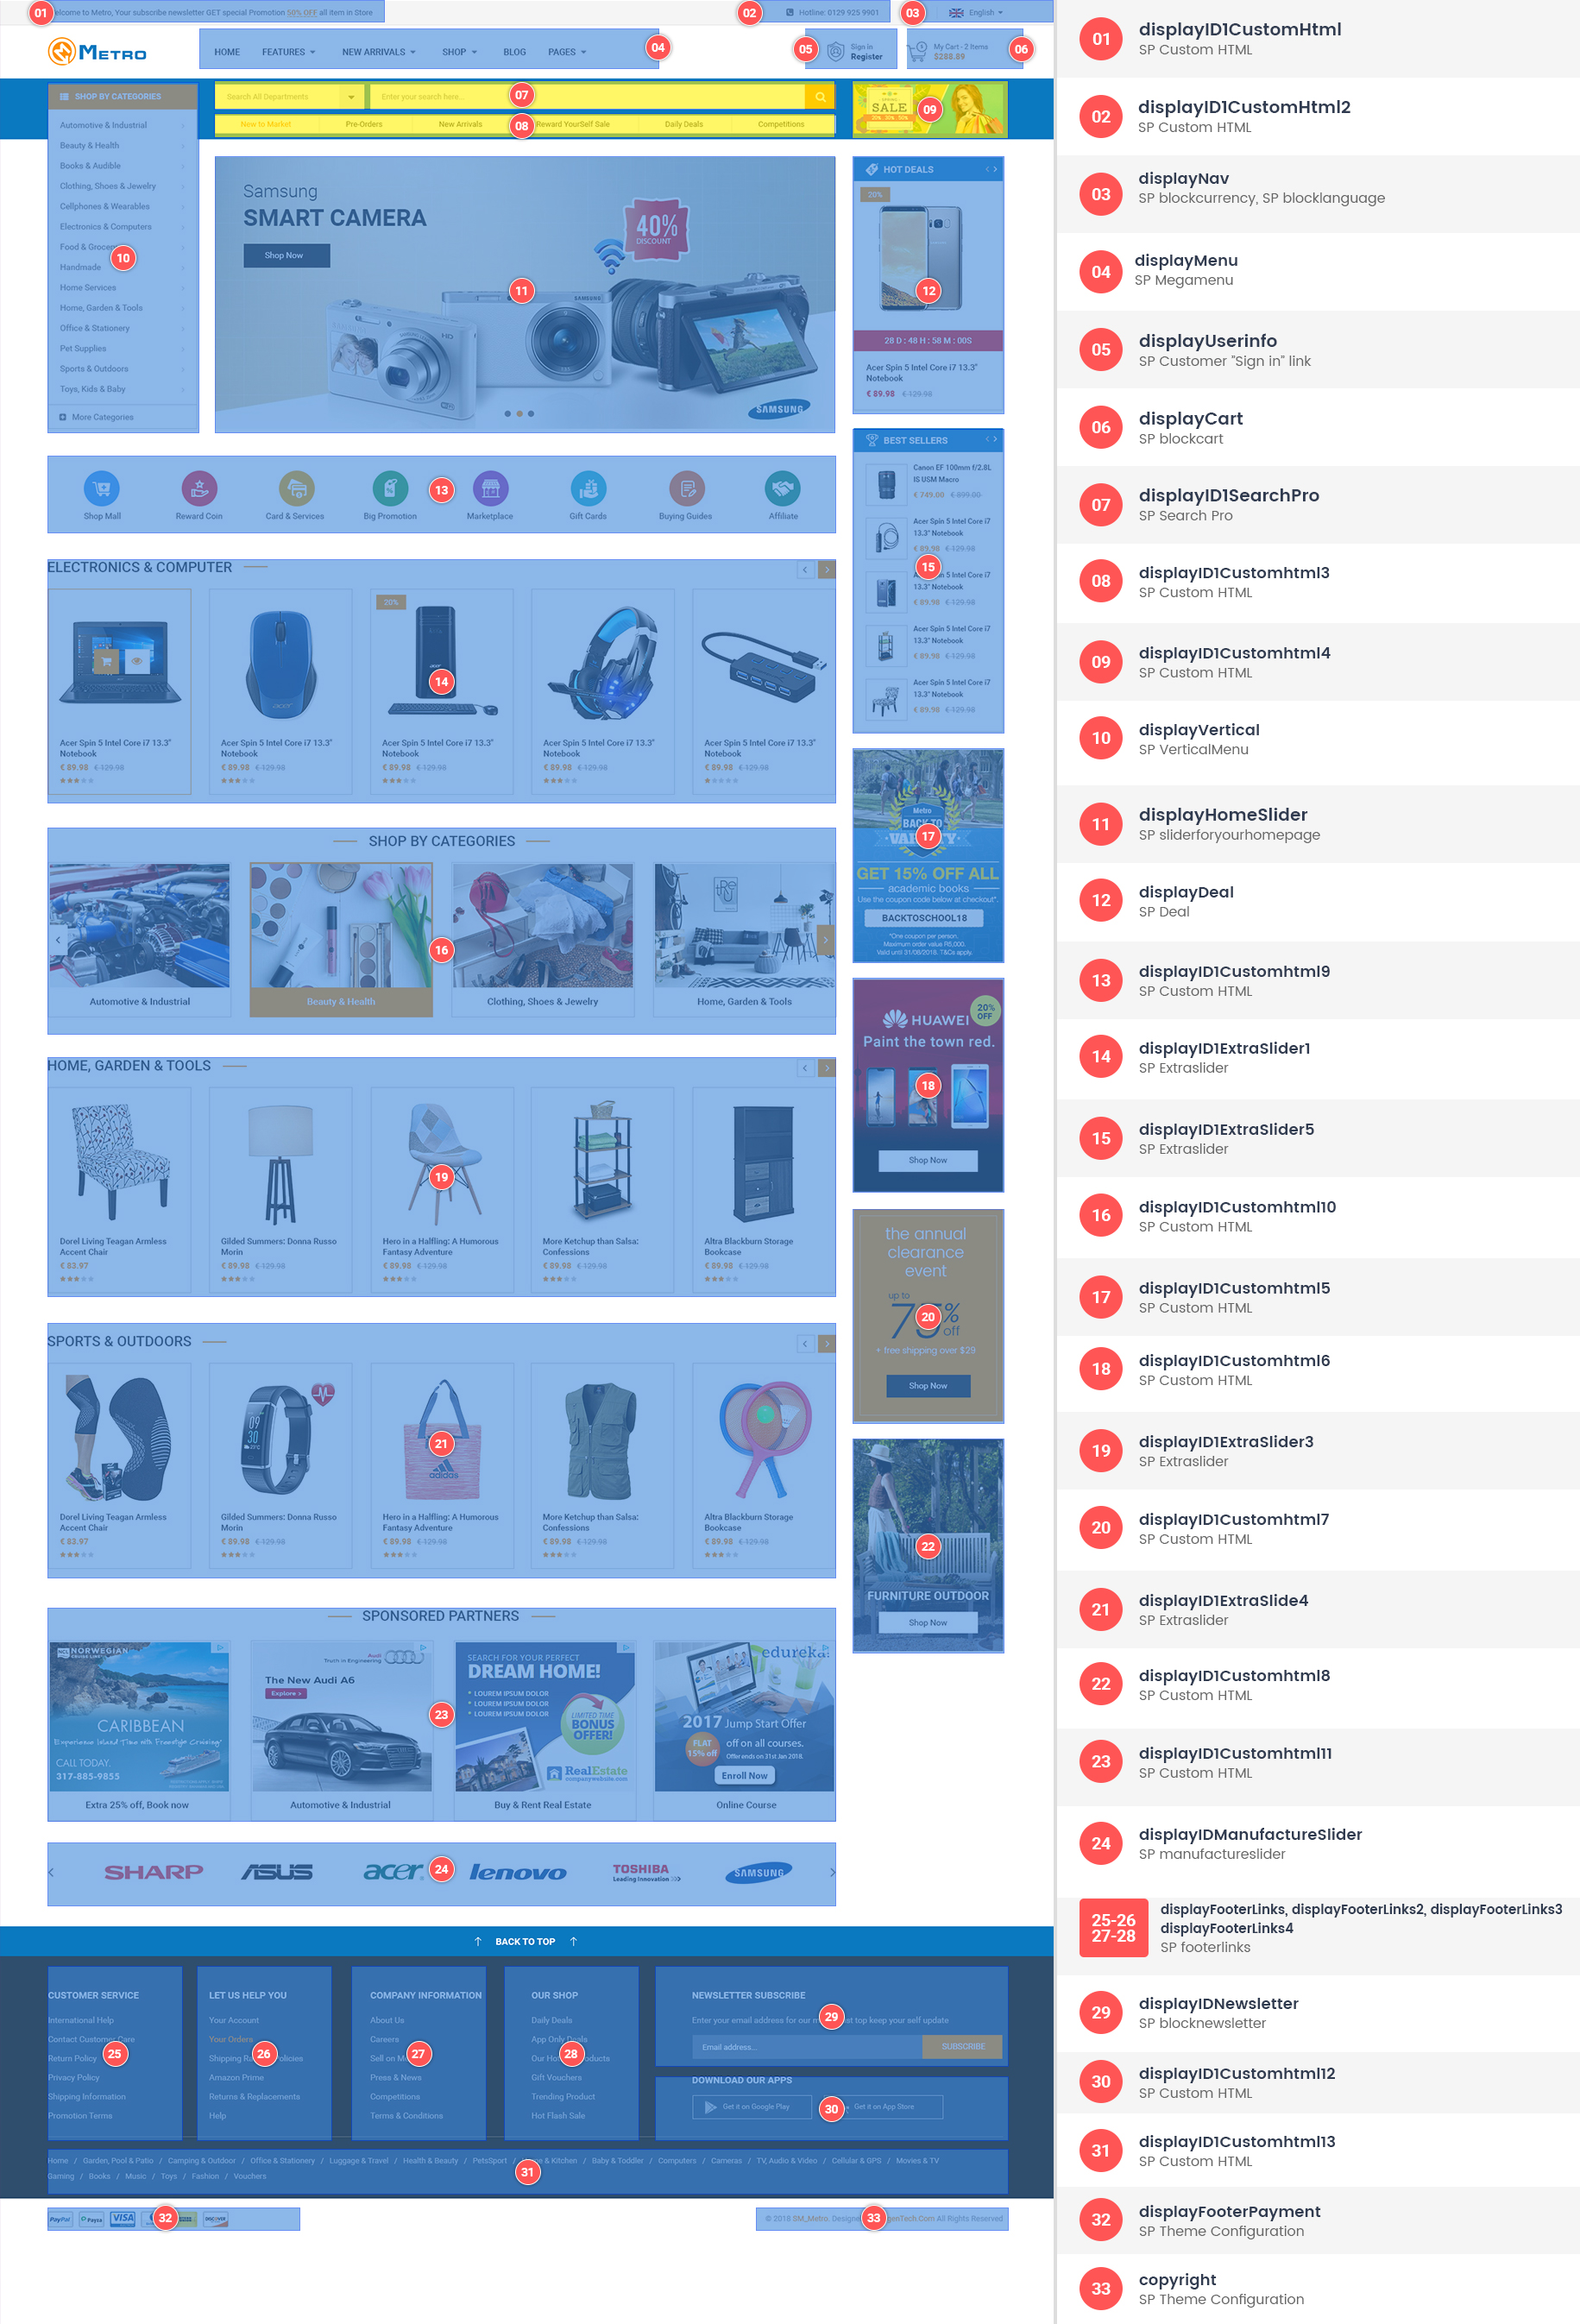
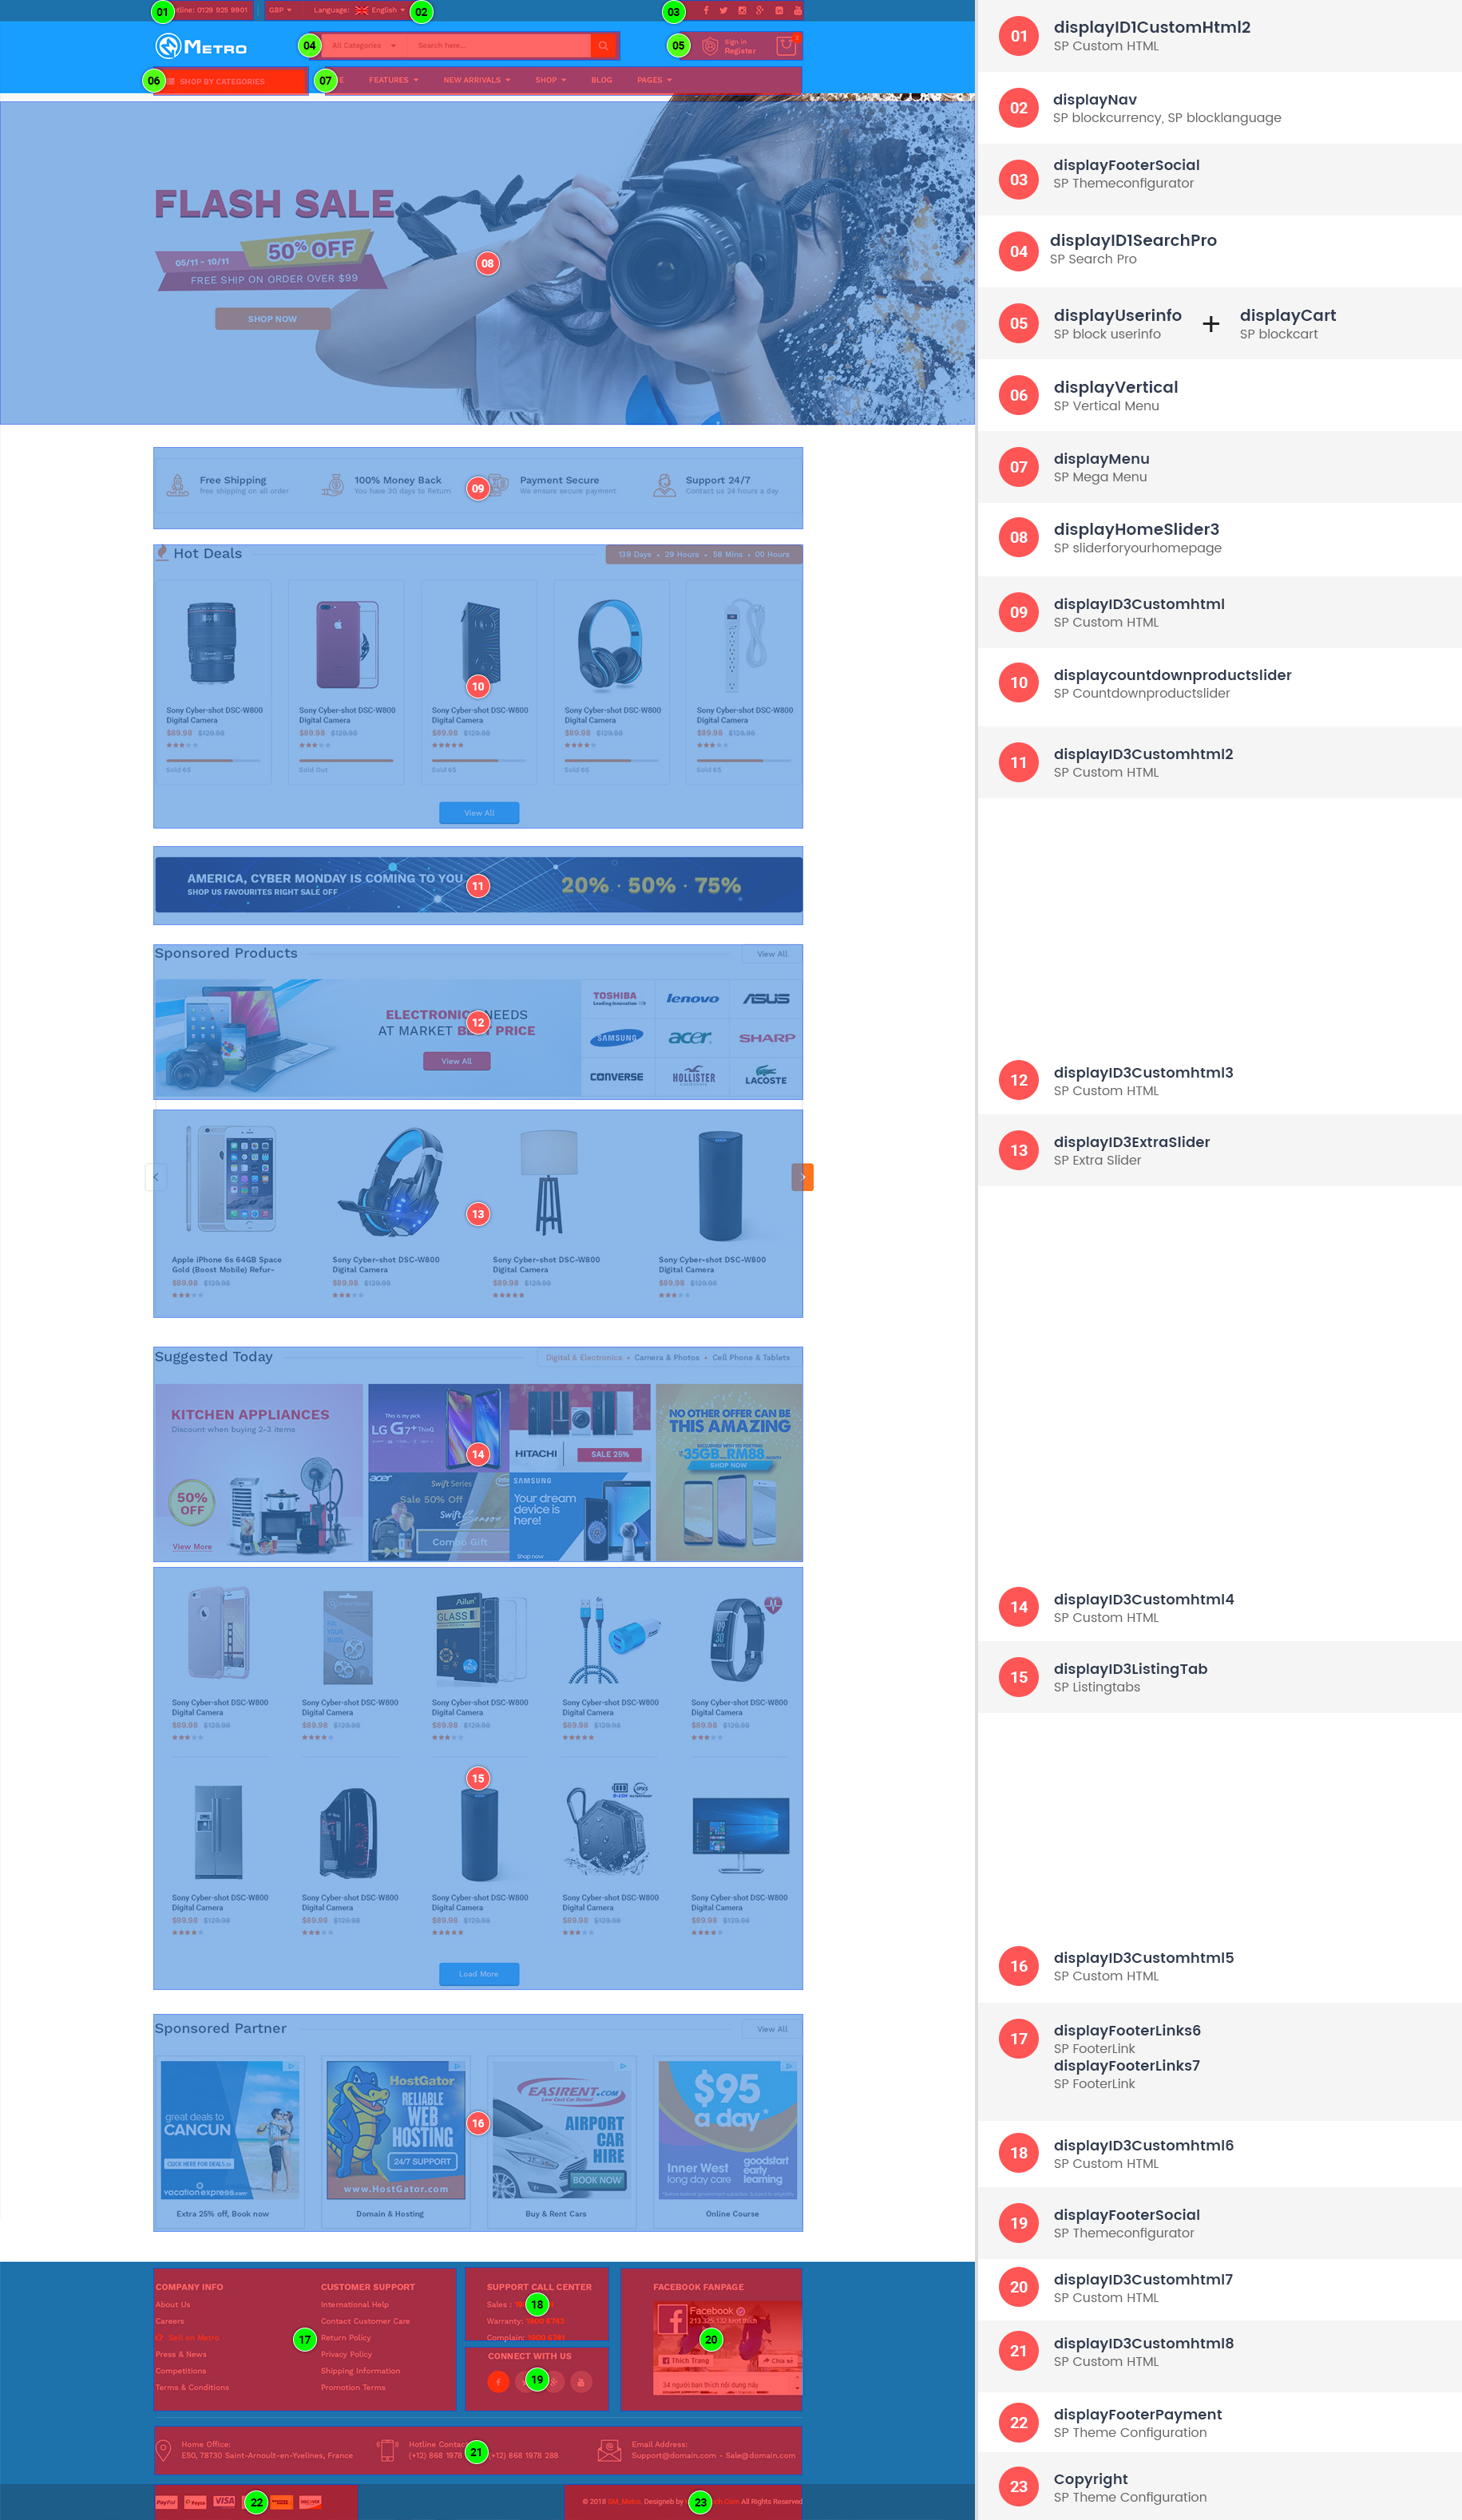
Frontend Appearance:
Backend Settings:
Step 1: In the Prestashop Admin Panel, navigate to IMPROVE >> Modules >> Modules and Services >> look for “SP Newsletter Block” module.
Step 2: You could configure its settings like the illustration. You can Enable/Disable button "Enable Newsletter Popup" to Show/Hide popup.
Background image: You could override in folder "../themes/sp_metro/assets/img/bg_popup.jpg"
SP Custom HTML
Frontend Appearance:

Backend Setting:
Step 1: In the Prestashop Admin Panel, navigate to IMPROVE >> Modules >> Modules and Services >> Installed Modules look for “SP Custom HTML module >> click “Configure” button to configure.
Step 2: In the “SP Custom HTML” configuration page, click  button in the right corner to “ADD NEW MODULE”.
Step 3: You could configure this module like the illustration
Copy and paste the following code into the content:
<p><span>Welcome to Metro, Your subscribe newsletter GET special Promotion <span class="color-color">50% OFF</span> all item in Store</span></p>
SP Custom HTML
Frontend Appearance:

Backend Setting:
Step 1: In the Prestashop Admin Panel, navigate to IMPROVE >> Modules >> Modules and Services >> Installed Modules look for “SP Custom HTML module >> click “Configure” button to configure.
Step 2: In the “SP Custom HTML” configuration page, click button in the right corner to “ADD NEW MODULE”.
Step 3: You could configure this module like the illustration
Copy and paste the following code into the content:
<p>Hotline: 0129 925 9901</p>
a. SP Currencies Block
Frontend Appearance:
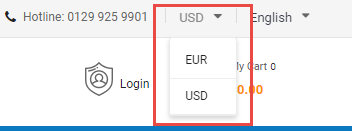
Backend Settings:
In the Prestashop Admin Panel, navigate to IMPROVE >> Modules >> Modules and Services >> Installed Modules look for “SP Currency Block” >> click “Enable” button to enable this module.
b. SP Languages Selector Block
Frontend Appearance:
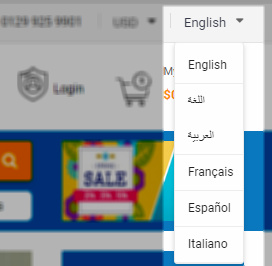
Backend Settings:
In the Prestashop Admin Panel, navigate to IMPROVE >> Modules >> Modules and Services >> Installed Modules look for “SP Languages Selector Block >> click “Enable” button to enable this module.
Sp Customer "Sign in" link
Frontend Appearance:
Backend Settings:
In the Prestashop Admin Panel, navigate to IMPROVE >> Modules >> Modules and Services >> Installed Modules look for “Sp Customer "Sign in" link” module >> click “Enable" button to enable this module.
SP Shopping Cart
Frontend Appearance:
Backend Settings:
Step 1: In the Prestashop Admin Panel, navigate to IMPROVE >> Modules >> Modules and Services >> Installed Modules look for “ SP Shopping Cart module >> click “Configure” button to configure.
Step 2: You could configure this module like the illustration
SP Search Pro
Frontend Appearance:

Backend Settings:
Step 1: In the Prestashop Admin Panel, navigate to IMPROVE >> Modules >> Modules and Services >> Installed Modules look for “SP Search Pro” module >> click “Configure” button to configure.
Step 2: In the “SP Search Pro” configuration page, click button in the right corner to “ADD NEW MODULE”.
Step 3: You could configure this module like the illustration.
SP Custom HTML
Frontend Appearance:

Backend Setting:
Step 1: In the Prestashop Admin Panel, navigate to IMPROVE >> Modules >> Modules and Services >> Installed Modules look for “SP Custom HTML module >> click “Configure” button to configure.
Step 2: In the “SP Custom HTML” configuration page, click button in the right corner to “ADD NEW MODULE”.
Step 3: You could configure this module like the illustration
Copy and paste the following code into the content:
<ul>
<li><a href="#">New to Market</a></li>
<li><a href="#">Pre-Orders</a></li>
<li><a href="#">New Arrivals</a></li>
<li><a href="#">Reward YourSelf Sale</a></li>
<li><a href="#">Daily Deals</a></li>
<li><a href="#">Competitions</a></li>
</ul>
SP Custom HTML
Frontend Appearance:

Backend Setting:
Step 1: In the Prestashop Admin Panel, navigate to IMPROVE >> Modules >> Modules and Services >> Installed Modules look for “SP Custom HTML module >> click “Configure” button to configure.
Step 2: In the “SP Custom HTML” configuration page, click button in the right corner to “ADD NEW MODULE”.
Step 3: You could configure this module like the illustration
Copy and paste the following code into the content:
<p><a class="banner" href="#"><img src="/ytc_templates/prestashop/sp_metro_17/themes/sp_metro/assets/img/cms/img-1-1.jpg" alt="Static Image" /></a></p>
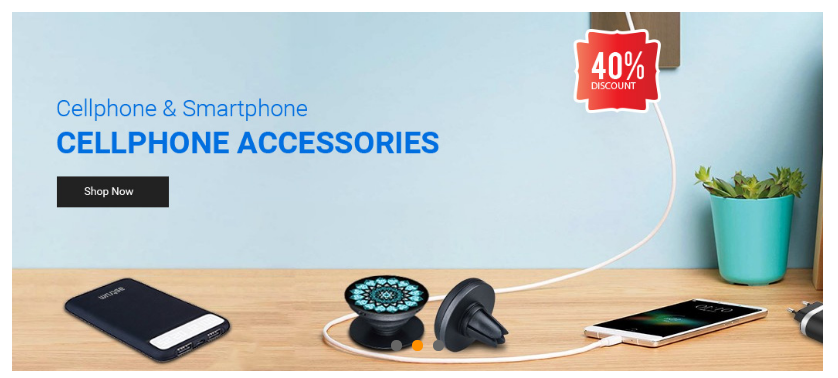
SP Home Slider
Frontend Appearance:
Backend Settings:
Step 1: In the Prestashop Admin Panel, navigate to IMPROVE >> Modules >> Modules and Services >> Installed Modules look for “Sp slider for your homepage module >> click “Configure” button to configure.
Step 2: In the “SP Slider For Your Homepage” configuration page, click button in the right corner to “ADD NEW MODULE”.
Step 3: You could configure this module like the illustration
Step 4: In the last part named Slides List of this configuration page, click button in the right corner to add new slide and edit slide’s information as follows:
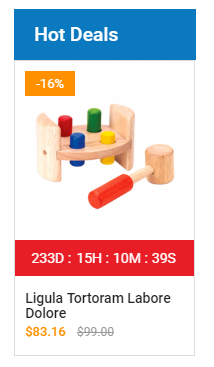
SP Deal – HOT DEALS
Frontend Appearance:
Backend Settings:
Step 1: In the Prestashop Admin Panel, navigate to IMPROVE >> Modules >> Modules and Services >> Installed Modules look for “SP Deal module.
Step 2: In the “SP Deal” configuration page, click button in the right corner to “ADD NEW MODULE”.
Step 3: You could configure this module like the illustration
SP Custom HTML
Frontend Appearance:

Backend Setting:
Step 1: In the Prestashop Admin Panel, navigate to IMPROVE >> Modules >> Modules and Services >> Installed Modules look for “SP Custom HTML module >> click “Configure” button to configure.
Step 2: In the “SP Custom HTML” configuration page, click button in the right corner to “ADD NEW MODULE”.
Step 3: You could configure this module like the illustration
Copy and paste the following code into the content:
<ul>
<li class="item item-1">
<div class="icon"></div>
<div class="text">
<p>Shop Mall</p>
</div>
</li>
<li class="item item-2">
<div class="icon"></div>
<div class="text">
<p>Reward Coin</p>
</div>
</li>
<li class="item item-3">
<div class="icon"></div>
<div class="text">
<p>Card & Services</p>
</div>
</li>
<li class="item item-4">
<div class="icon"></div>
<div class="text">
<p>Big Promotion</p>
</div>
</li>
<li class="item item-5">
<div class="icon"></div>
<div class="text">
<p>Marketplace</p>
</div>
</li>
<li class="item item-6">
<div class="icon"></div>
<div class="text">
<p>Gift Cards</p>
</div>
</li>
<li class="item item-7">
<div class="icon"></div>
<div class="text">
<p>Buying Guides</p>
</div>
</li>
<li class="item item-8">
<div class="icon"></div>
<div class="text">
<p>Affiliate</p>
</div>
</li>
</ul>
SP Extra Slider – Electronics & Computer
Frontend Appearance:
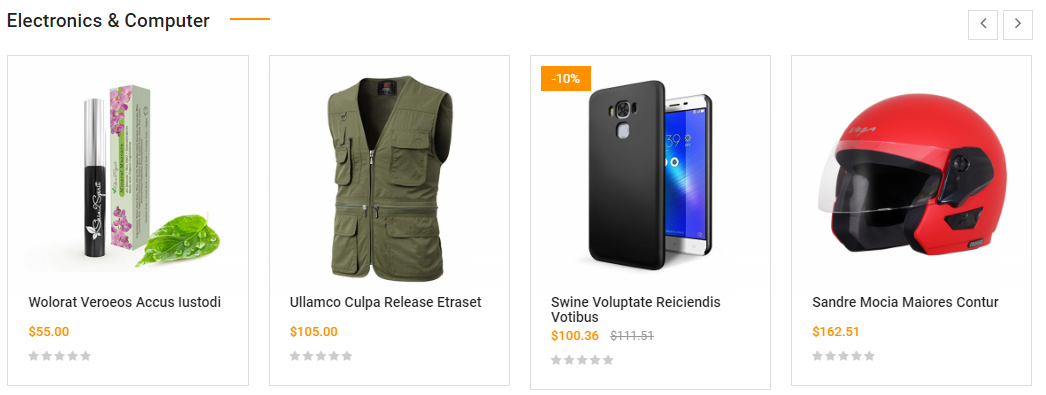
Backend Settings:
Step 1: In the Prestashop Admin Panel, navigate to IMPROVE >> Modules >> Modules and Services >> Installed Modules look for “SP Extra Slider module.
Step 2: In the “SP Extra Slider” configuration page, click button in the right corner to “ADD NEW MODULE”.
Step 3: You could configure this module like the illustration
Note: Do the same with other hook ( displayID1ExtraSlider3, displayID1ExtraSlider4, displayID1ExtraSlider5).SP Custom HTML
Frontend Appearance:
Backend Setting:
Step 1: In the Prestashop Admin Panel, navigate to IMPROVE >> Modules >> Modules and Services >> Installed Modules look for “SP Custom HTML module >> click “Configure” button to configure.
Step 2: In the “SP Custom HTML” configuration page, click button in the right corner to “ADD NEW MODULE”.
Step 3: You could configure this module like the illustration
Copy and paste the following code into the content:
<ul>
<li class="item item-1">
<div class="item-image"><a href="/ytc_templates/prestashop/sp_metro_17/9-men-fashion"><img src="/ytc_templates/prestashop/sp_metro_17/themes/sp_metro/assets/img/cms/cate-1.jpg" alt="#" /></a></div>
<div class="item-content">
<h4><a href="/ytc_templates/prestashop/sp_metro_17/9-men-fashion">Smartphone & Tablet</a></h4>
</div>
</li>
<li class="item item-2">
<div class="item-image"><a href="/ytc_templates/prestashop/sp_metro_17/9-men-fashion"><img src="/ytc_templates/prestashop/sp_metro_17/themes/sp_metro/assets/img/cms/cate-2.jpg" alt="#" /></a></div>
<div class="item-content">
<h4><a href="/ytc_templates/prestashop/sp_metro_17/9-men-fashion">Fashion</a></h4>
</div>
</li>
<li class="item item-3">
<div class="item-image"><a href="/ytc_templates/prestashop/sp_metro_17/9-men-fashion"><img src="/ytc_templates/prestashop/sp_metro_17/themes/sp_metro/assets/img/cms/cate-3.jpg" alt="#" /></a></div>
<div class="item-content">
<h4><a href="/ytc_templates/prestashop/sp_metro_17/9-men-fashion">electronics</a></h4>
</div>
</li>
<li class="item item-4">
<div class="item-image"><a href="/ytc_templates/prestashop/sp_metro_17/9-men-fashion"><img src="/ytc_templates/prestashop/sp_metro_17/themes/sp_metro/assets/img/cms/cate-4.jpg" alt="#" /></a></div>
<div class="item-content">
<h4><a href="/ytc_templates/prestashop/sp_metro_17/9-men-fashion">Furniture & Decor</a></h4>
</div>
</li>
</ul>
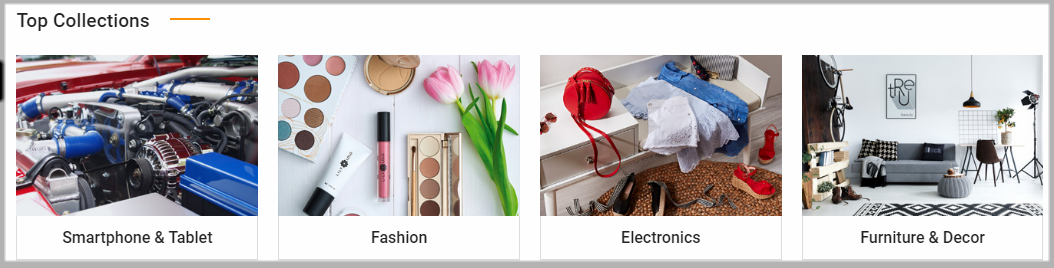
SP Custom HTML
Frontend Appearance:

Backend Setting:
Step 1: In the Prestashop Admin Panel, navigate to IMPROVE >> Modules >> Modules and Services >> Installed Modules look for “SP Custom HTML module >> click “Configure” button to configure.
Step 2: In the “SP Custom HTML” configuration page, click button in the right corner to “ADD NEW MODULE”.
Step 3: You could configure this module like the illustration
Copy and paste the following code into the content:
<ul>
<li><a class="banner" href="#"><img src="/ytc_templates/prestashop/sp_metro_17/themes/sp_metro/assets/img/cms/img-1-6.jpg" alt="Static Image" /></a>
<div class="text"><a href="#">Extra 25% off, Book now</a></div>
</li>
<li><a class="banner item-2-1" href="#"><img src="/ytc_templates/prestashop/sp_metro_17/themes/sp_metro/assets/img/cms/img-1-7.jpg" alt="Static Image" /></a>
<div class="text"><a href="#">Automotive & Industrial</a></div>
</li>
<li><a class="banner" href="#"><img src="/ytc_templates/prestashop/sp_metro_17/themes/sp_metro/assets/img/cms/img-1-8.jpg" alt="Static Image" /></a>
<div class="text"><a href="#">Buy & Rent Real Estate</a></div>
</li>
<li><a class="banner" href="#"><img src="/ytc_templates/prestashop/sp_metro_17/themes/sp_metro/assets/img/cms/img-1-9.jpg" alt="Static Image" /></a>
<div class="text"><a href="#">Online Course</a></div>
</li>
</ul>
SP Manufacture Slider
Frontend Appearance:

Backend Settings:
Step 1: In the Prestashop Admin Panel, navigate to IMPROVE >> Modules >> Modules and Services >> Installed Modules look for “SP Manufacture Slider module.
Step 2: In the “SP Manufacture Slider” configuration page, click button in the right corner to “ADD NEW MODULE”.
Step 3: You could configure this module like the illustration
SP Custom HTML
Frontend Appearance:

Backend Setting:
Step 1: In the Prestashop Admin Panel, navigate to IMPROVE >> Modules >> Modules and Services >> Installed Modules look for “SP Custom HTML module >> click “Configure” button to configure.
Step 2: In the “SP Custom HTML” configuration page, click button in the right corner to “ADD NEW MODULE”.
Step 3: You could configure this module like the illustration
Copy and paste the following code into the content:
<p><a class="banner" href="#"><img src="/ytc_templates/prestashop/sp_metro_17/themes/sp_metro/assets/img/cms/img-1-2.jpg" alt="Static Image" /></a></p>
SP Custom HTML
Frontend Appearance:
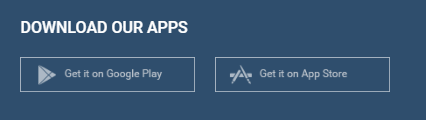
Backend Setting:
Step 1: In the Prestashop Admin Panel, navigate to IMPROVE >> Modules >> Modules and Services >> Installed Modules look for “SP Custom HTML module >> click “Configure” button to configure.
Step 2: In the “SP Custom HTML” configuration page, click button in the right corner to “ADD NEW MODULE”.
Step 3: You could configure this module like the illustration
Copy and paste the following code into the content:
<p><a class="app-1" href="#">google store</a> <a class="app-2" href="#">apple store</a></p>
SP Custom HTML
Frontend Appearance:

Backend Setting:
Step 1: In the Prestashop Admin Panel, navigate to IMPROVE >> Modules >> Modules and Services >> Installed Modules look for “SP Custom HTML module >> click “Configure” button to configure.
Step 2: In the “SP Custom HTML” configuration page, click button in the right corner to “ADD NEW MODULE”.
Step 3: You could configure this module like the illustration
Copy and paste the following code into the content:
<div class="footer-bottomlinks">
<ul>
<li><a href="#">Home</a></li>
<li><a href="#">Garden, Pool & Patio</a></li>
<li><a href="#">Camping & Outdoor</a></li>
<li><a href="#">Office & Stationery</a></li>
<li><a href="#">Luggage & Travel</a></li>
<li><a href="#">Health & Beauty</a></li>
<li><a href="#">PetsSport</a></li>
<li><a href="#">Home & Kitchen</a></li>
<li><a href="#">Baby & Toddler</a></li>
<li><a href="#">Computers</a></li>
<li><a href="#">Cameras</a></li>
<li><a href="#">TV, Audio & Video</a></li>
<li><a href="#">Cellular & GPS</a></li>
<li><a href="#">Movies & TV</a></li>
<li><a href="#">Gaming</a></li>
<li><a href="#">Books</a></li>
<li><a href="#">Music</a></li>
<li><a href="#">Toys</a></li>
<li><a href="#">Fashion</a></li>
<li><a href="#">Vouchers</a></li>
</ul>
</div>
CUSTOMER SERVICE
Frontend Appearance:
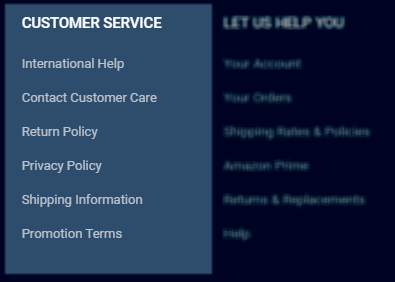
Backend Settings:
Step 1: In the Prestashop Admin Panel, navigate to IMPROVE >> Modules >> Modules and Services >> Installed Modules look for “SP Footer Links module >> click “Configure” button to configure.
Step 2: In the “SP Footer Links” configuration page, click button in the right corner to “ADD NEW MODULE”.
Step 3: You could configure this module like the illustration
Note: Do the same with displayFooterLinks2, displayFooterLinks3, displayFooterLinks4.SP NewsLetter Block
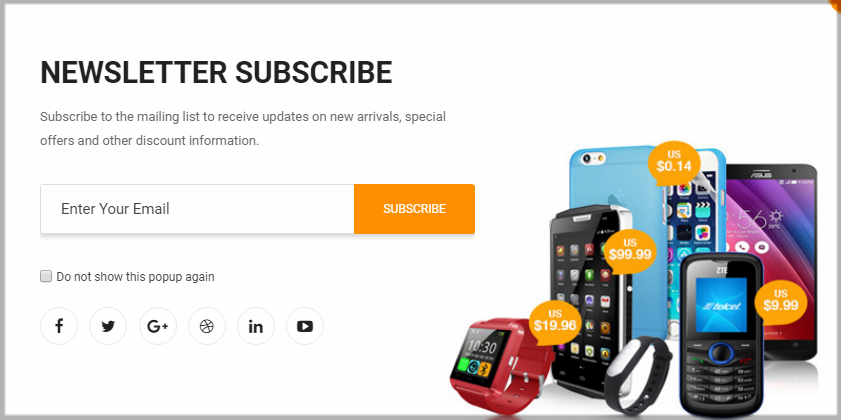
Frontend Appearance:

Backend Settings:
Step 1: In the Prestashop Admin Panel, navigate to IMPROVE >> Modules >> Modules and Services >> Installed Modules look for “SP Newsletter block module.
Step 2: In the “SP Newsletter block” configuration page, click button in the right corner to “ADD NEW MODULE”.
Step 3: You could configure this module like the illustration
Frontend Appearance:

Backend Settings:
Step 1: In the Prestashop Admin Panel, navigate to IMPROVE >> Modules >> Modules and Services >> Installed Modules look for “SP Theme Configuration module.
Step 2: In the SP Theme Settings, choose “Social” to configure the parameters in this section.
Frontend Appearance:

Backend Settings:
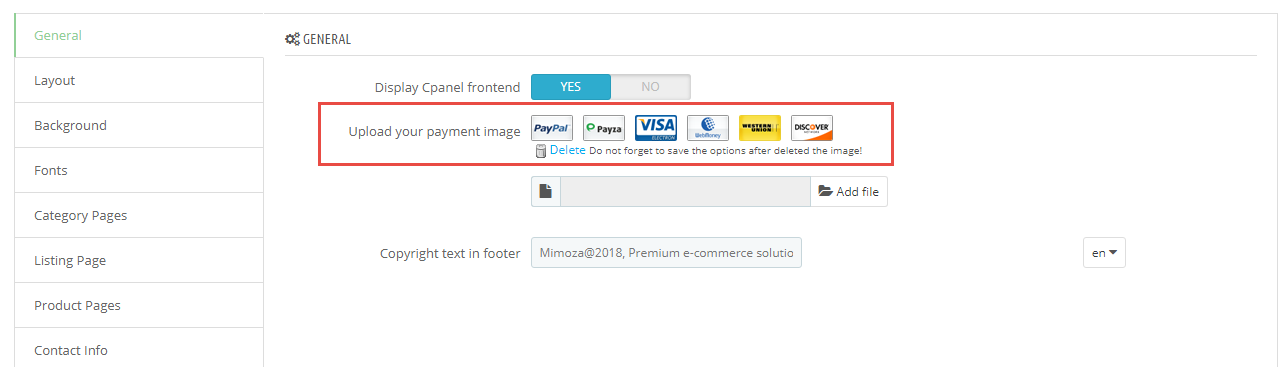
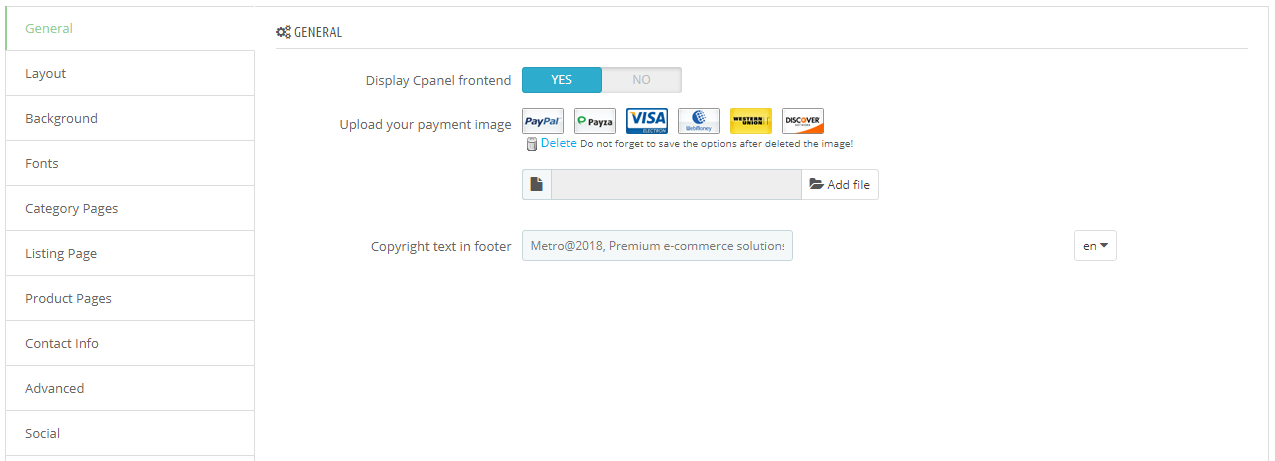
Step 1: In the Prestashop Admin Panel, navigate to IMPROVE >> Modules >> Modules and Services >> Installed Modules look for “SP Theme Configuration module.
Step 2: In the SP Theme Settings, choose “General” to configure the parameters in this section.
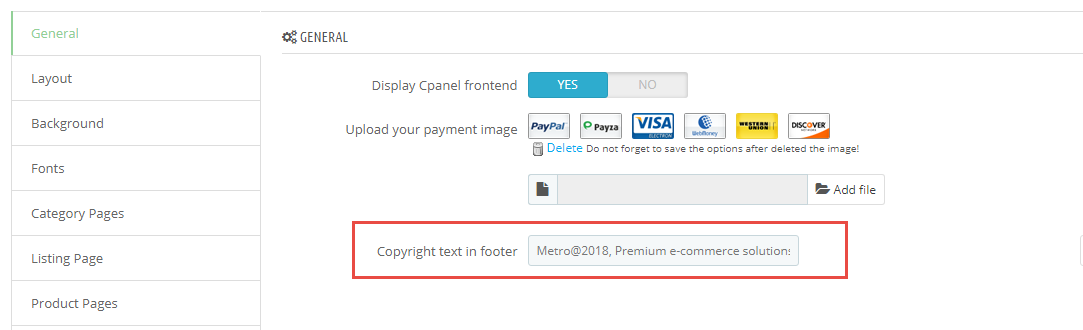
In your Prestashop Admin Dashboard, navigate to IMPROVE >> Modules >> Modules and Services >> go to Installed modules section, search for “SP Theme Configuration” module then click to Configure.
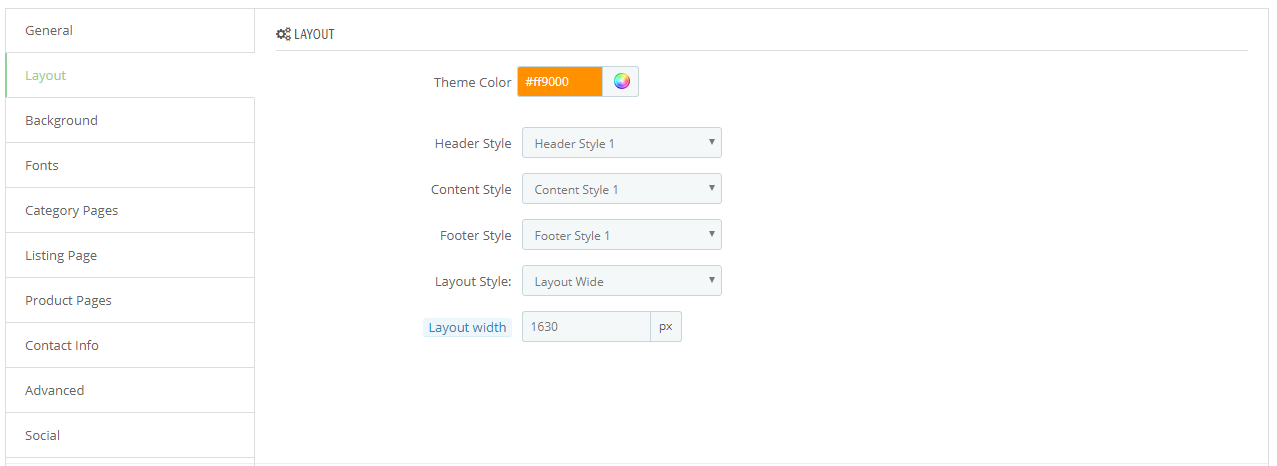
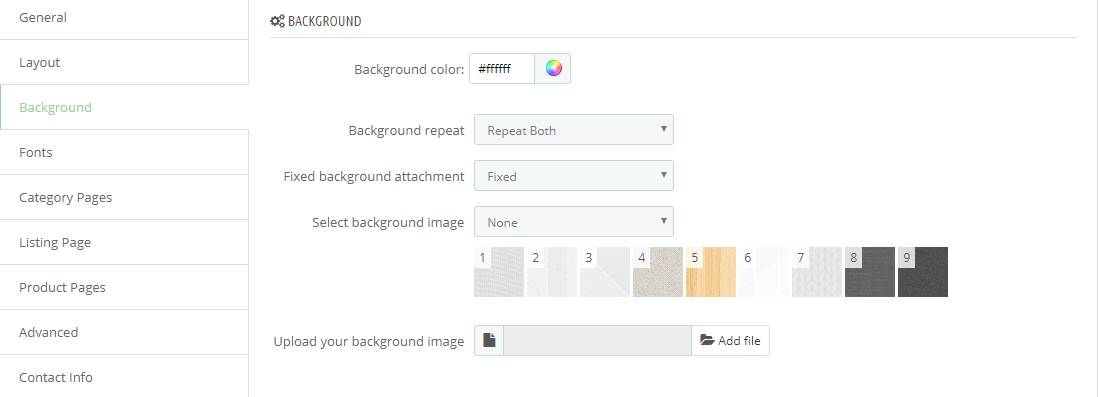
In the SP Theme Configuration, choose “Background” to configure the parameters in this section. After finishing, you could go to the front-end to view the changes.
In the SP Theme Configuration, choose “Fonts” to configure the parameters in this section. After finishing, you could go to the front-end to view the changes.
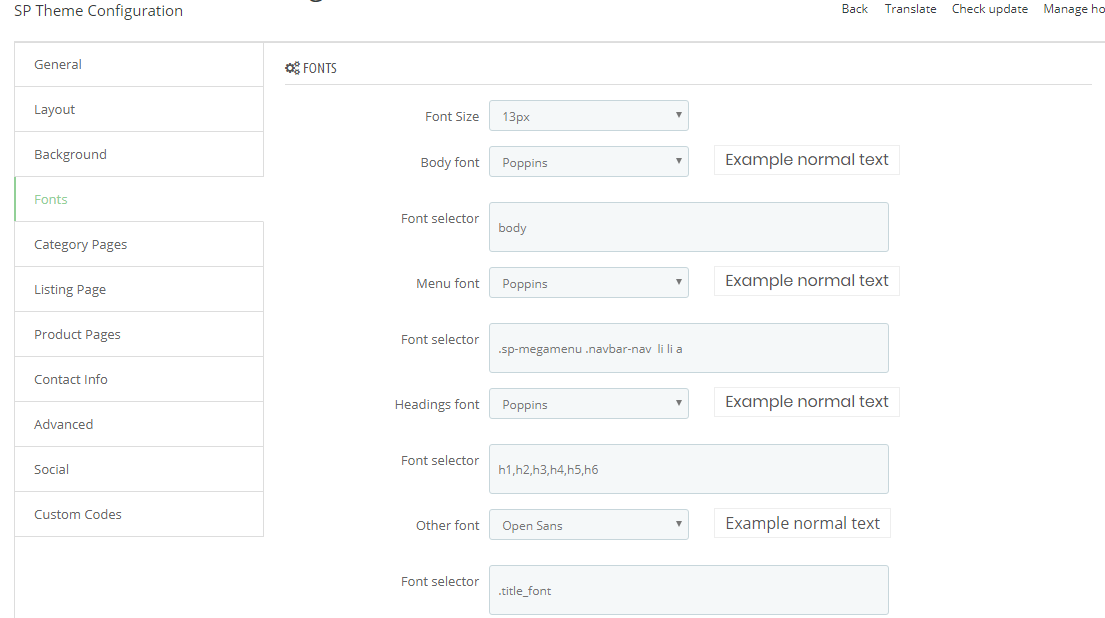
Note: Please copy and paste the following line into Font Selector tab:
1.
body, h5.product-name, .price-box, #attributes .attribute_list select, h1.product_name2.
.sp-megamenu .navbar-nav li li a3.
h1,h2,h3,h4,h5,h6,.content_sortPagiBar_top label, .content_sortPagiBar_bottom label,.content_sortPagiBar_top div.selector span, .content_sortPagiBar_bottom div.selector span4.
.title_font
In the SP Theme Configuration, choose “Listing Pages” to configure the parameters in this section. After finishing, you could go to the front-end to view the changes.

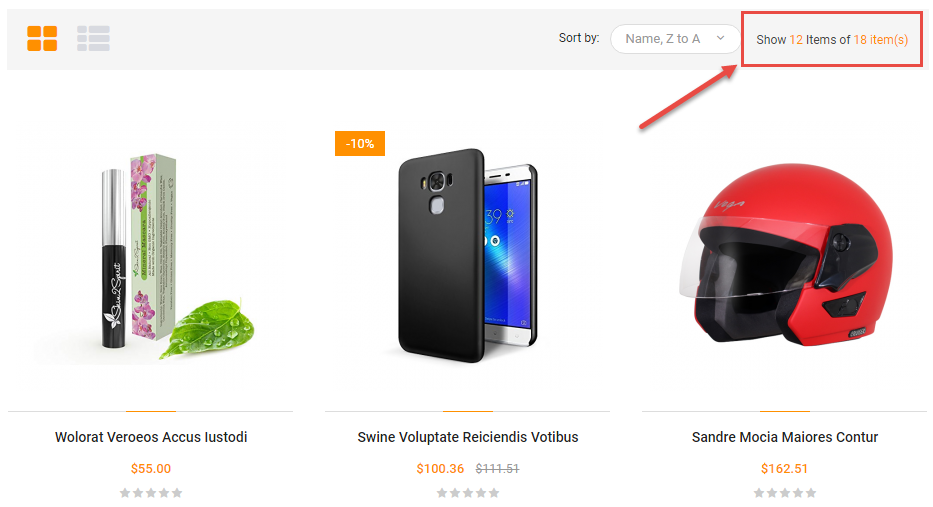
Display product number on Listing Page (Show/Hide)
Frontend Appearance:
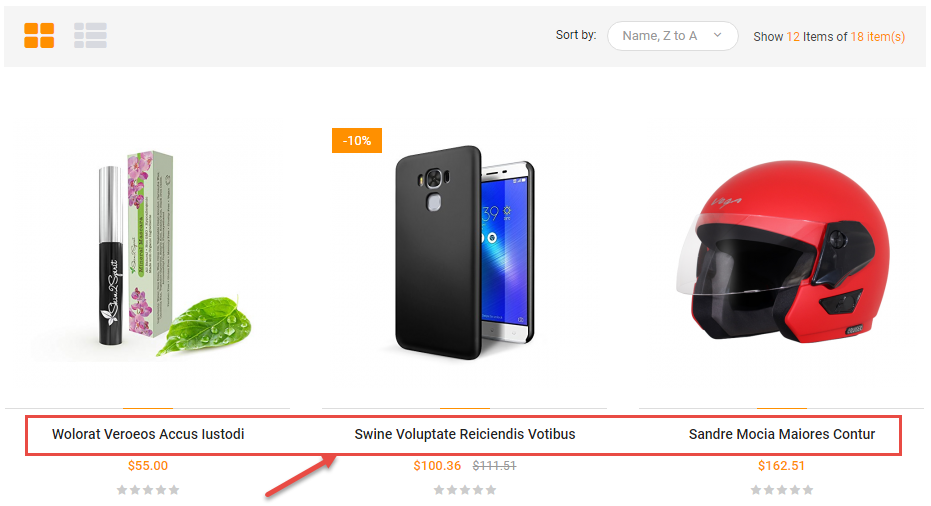
Display product title on Listing Page (Show/Hide)
Frontend Appearance:
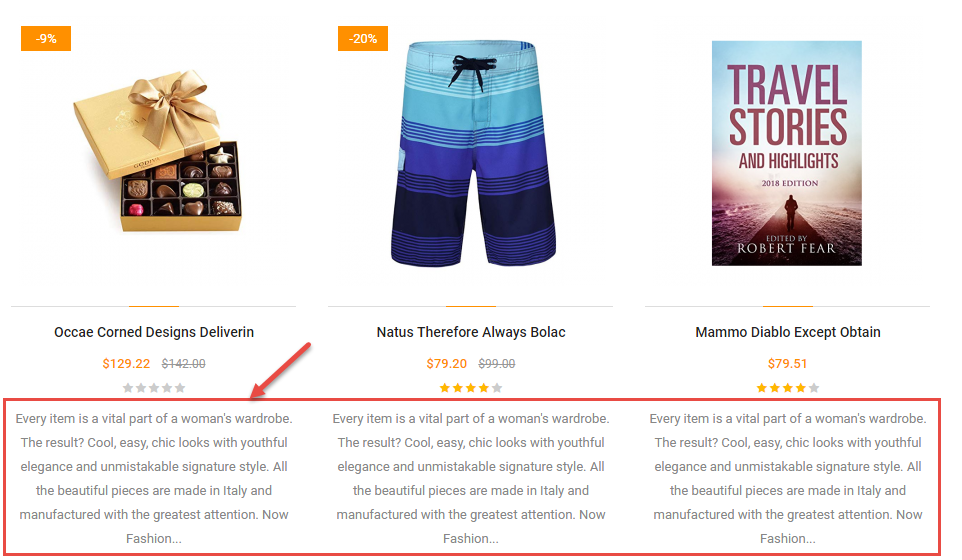
Display product short description on Listing Page (Show/Hide)
Frontend Appearance:
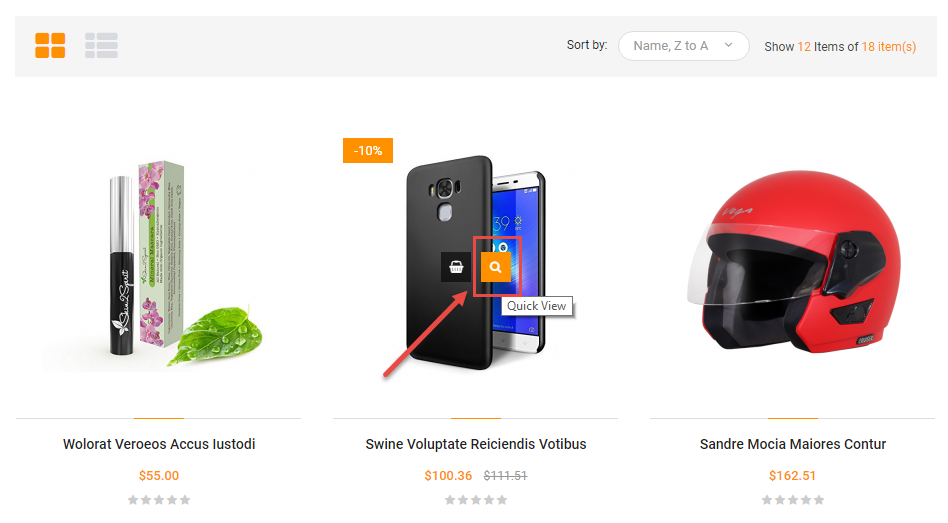
Display button Quickview on Listing Page (Show/Hide)
Frontend Appearance:
Display product price on Listing Page (Show/Hide)
Frontend Appearance:
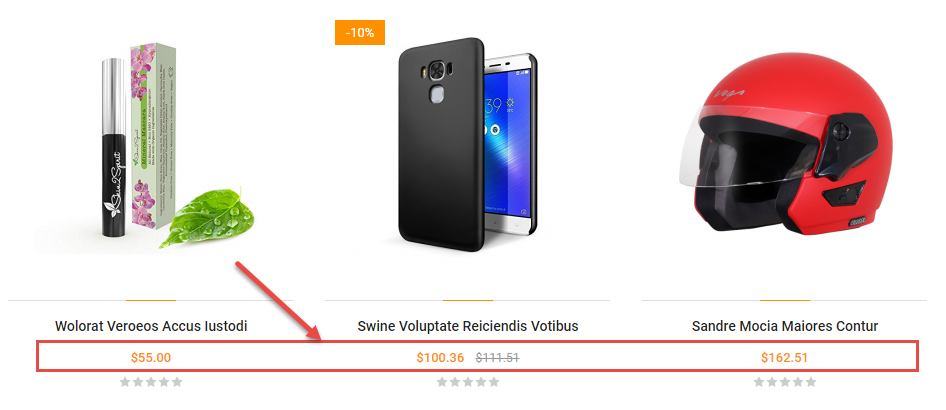
Display product price on Listing Page (Show/Hide)
Frontend Appearance:

In the SP Theme Configuration, choose “Product Pages” to configure the parameters in this section. After finishing, you could go to the front-end to view the changes.
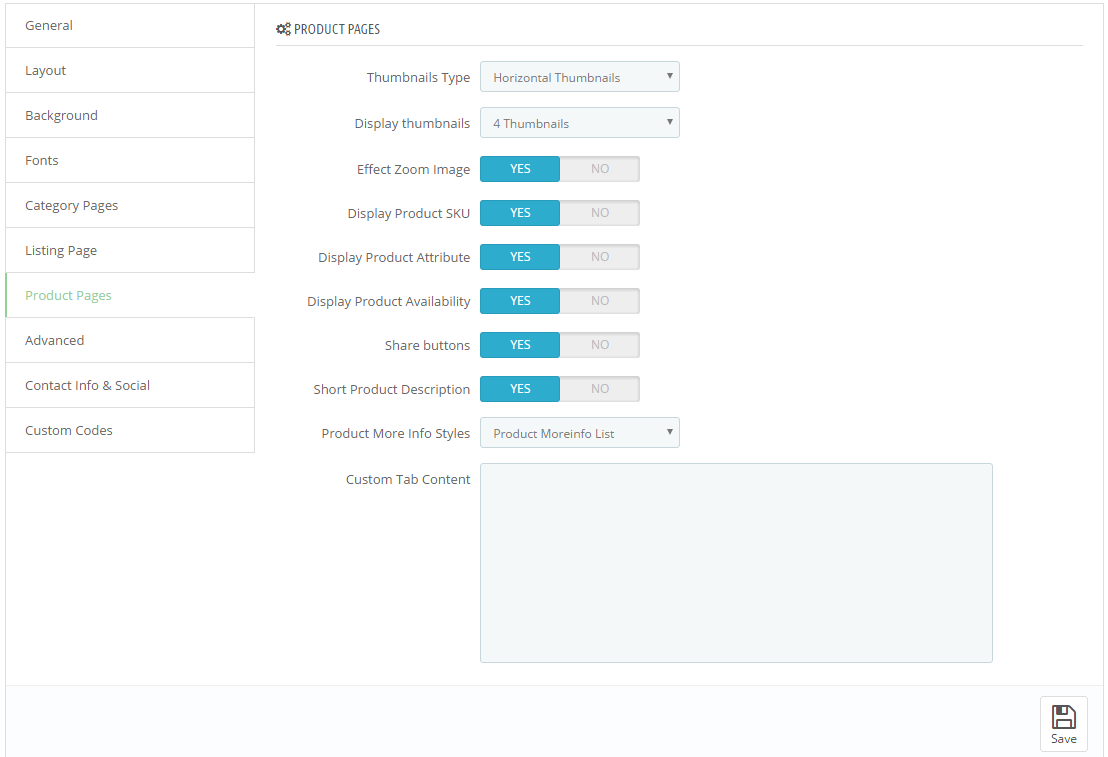
Choose type display of thumbnails block on product page.
Frontend Appearance:
-Vertical Thumbnails
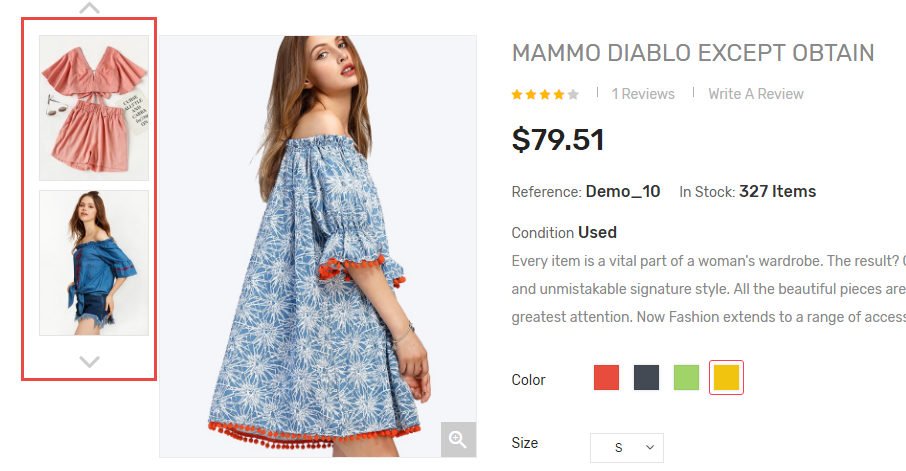
-Horizontal Thumbnails
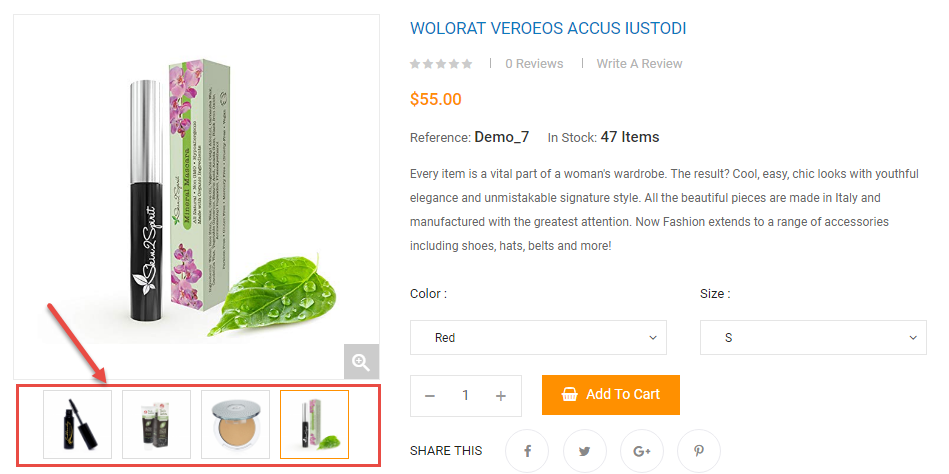
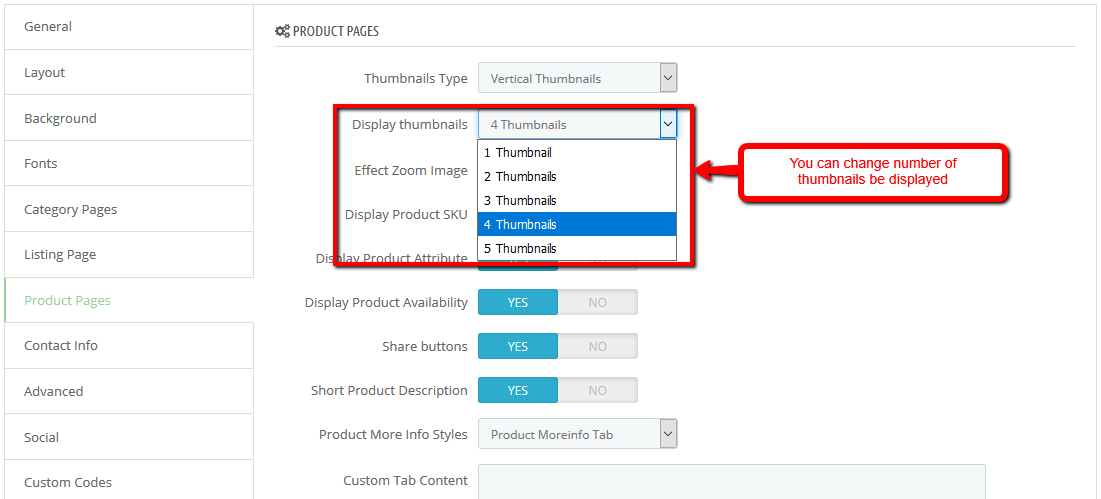
Number of thumbnails be displayed.
Backend Settings:
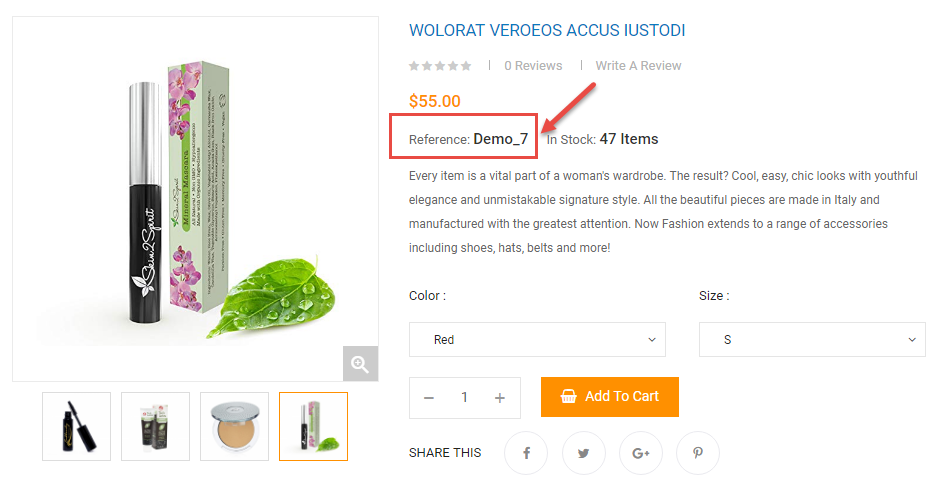
Show/Hide Product SKU.
Frontend Appearance:
Show/Hide Product Attribute.

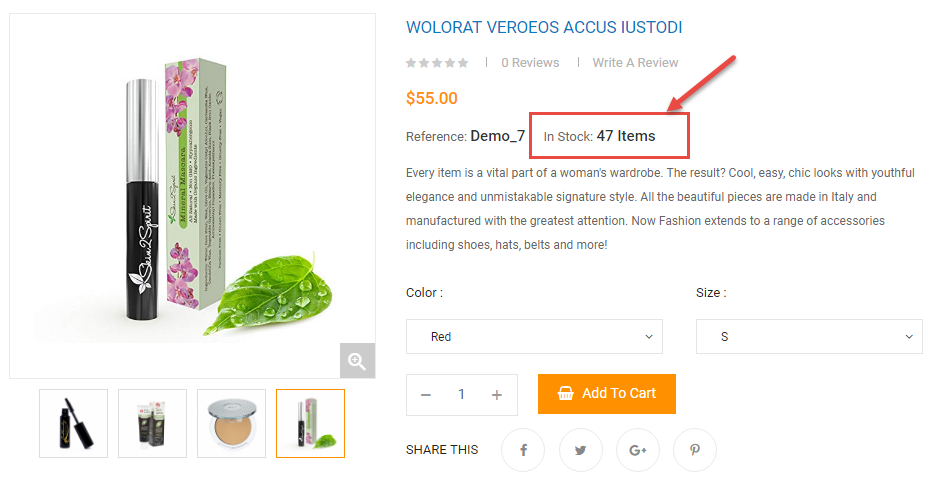
Show/Hide Product Availability.
Frontend Appearance:
Show/Hide Share buttons.
Frontend Appearance:

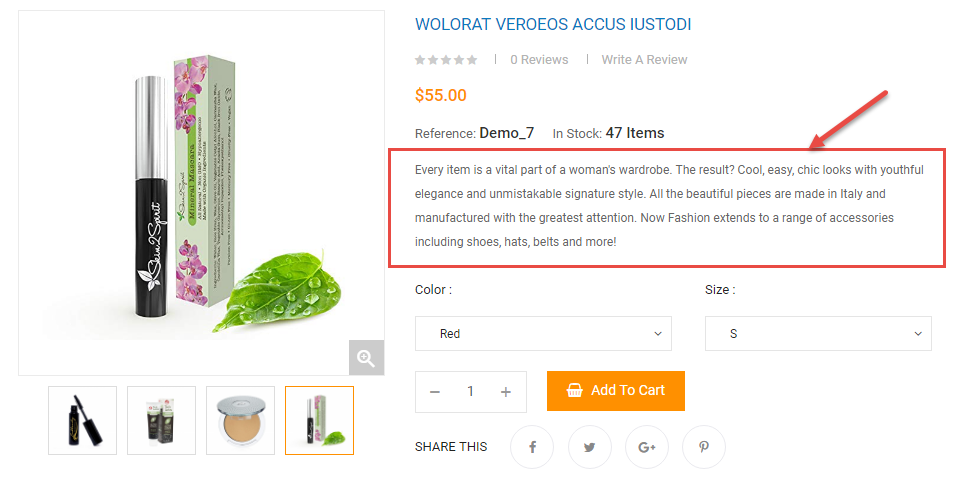
Show/Hide Short Product Description.
Frontend Appearance:
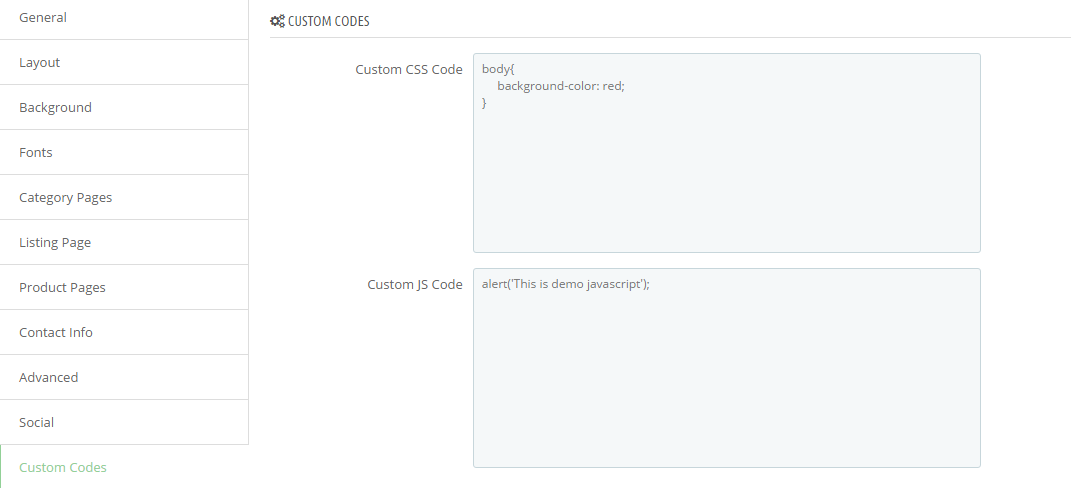
In the SP Theme Configuration, choose "Custom Codes" to configure the parameters in this section. After finishing, you could go to the front-end to view the changes.
Frontend Appearance
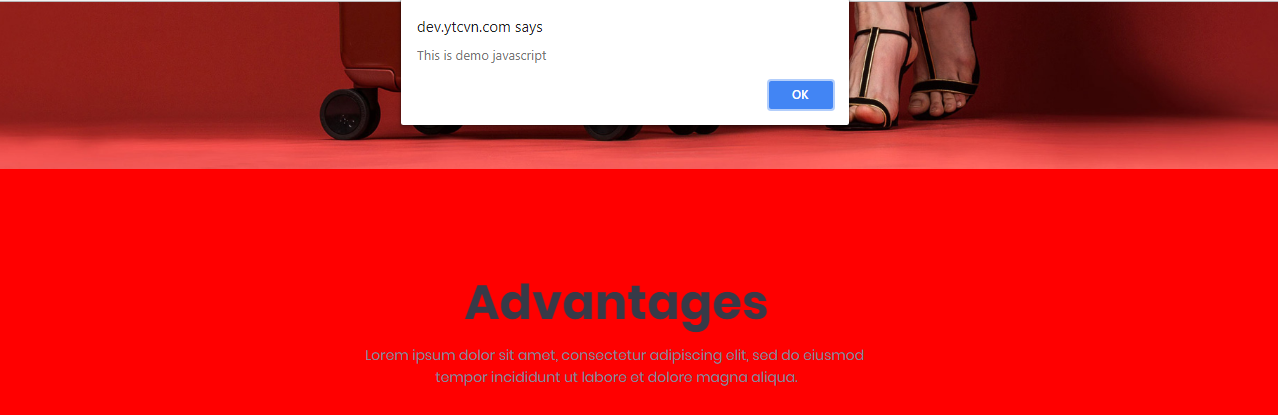
- You can input css or javascript.
Examples code css
body{
	background-color: red;
}
Examples code Javascript
alert('This is demo javascript');
- In the SP Theme Settings, choose “Advanced” to configure the parameters in this section. After finishing, you could go to the front-end to view the changes.
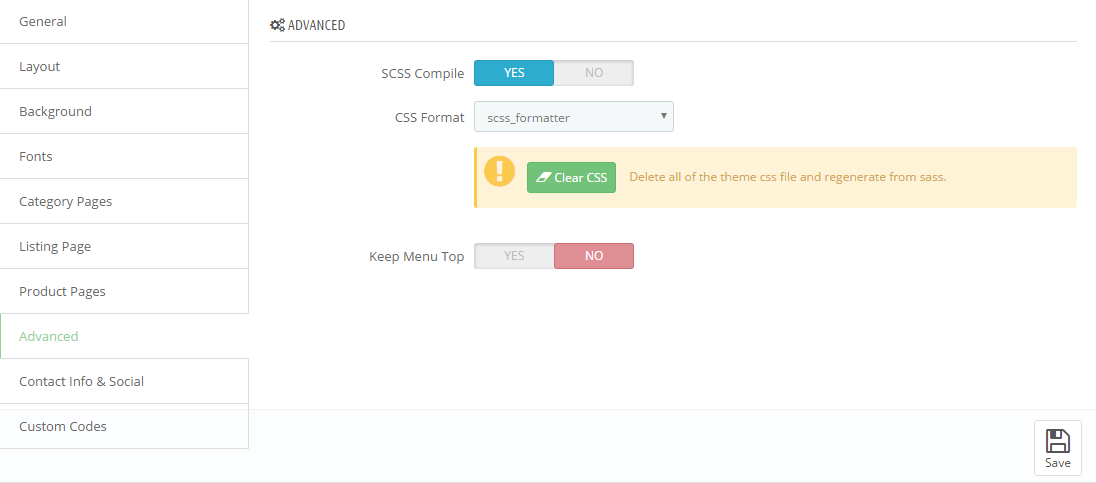
- Active: The system will automatically compile into CSS from SCSS when you refresh the website
Note: System will change css file theme-...css. Ex: theme-ff0000.css
Do not edit css file when active SCSS Compile
Css formatting after compile from sass.
There are two instances to edit css file via ftp.
1. SCSS Compile: Disable
- You can edit css file of modules.
Example: "../themes/sp_metro/modules/spcustomhtml/views/css/style.css"
- You can edit css file of theme.
Example:
+) "../themes/sp_metro/assets/css/theme-0083c1.css"
+) "../themes/sp_metro/assets/css/theme.css"
2. SCSS Compile: Enable
- You can edit css file of modules. (Sample as Disable)
Note: The system will generate css file "theme-0083c1.css, theme-{color code}.css"
Your changes to this file will be lost
- You must edit file "*.scss" in the folder "_dev/css"
Example: "../themes/sp_metro/_dev/css/themestyles/_content.scss"
Click Here to view documentation of SP MegaMenu module.

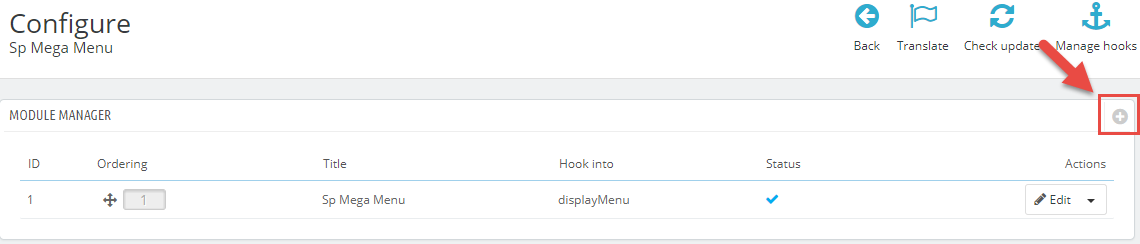
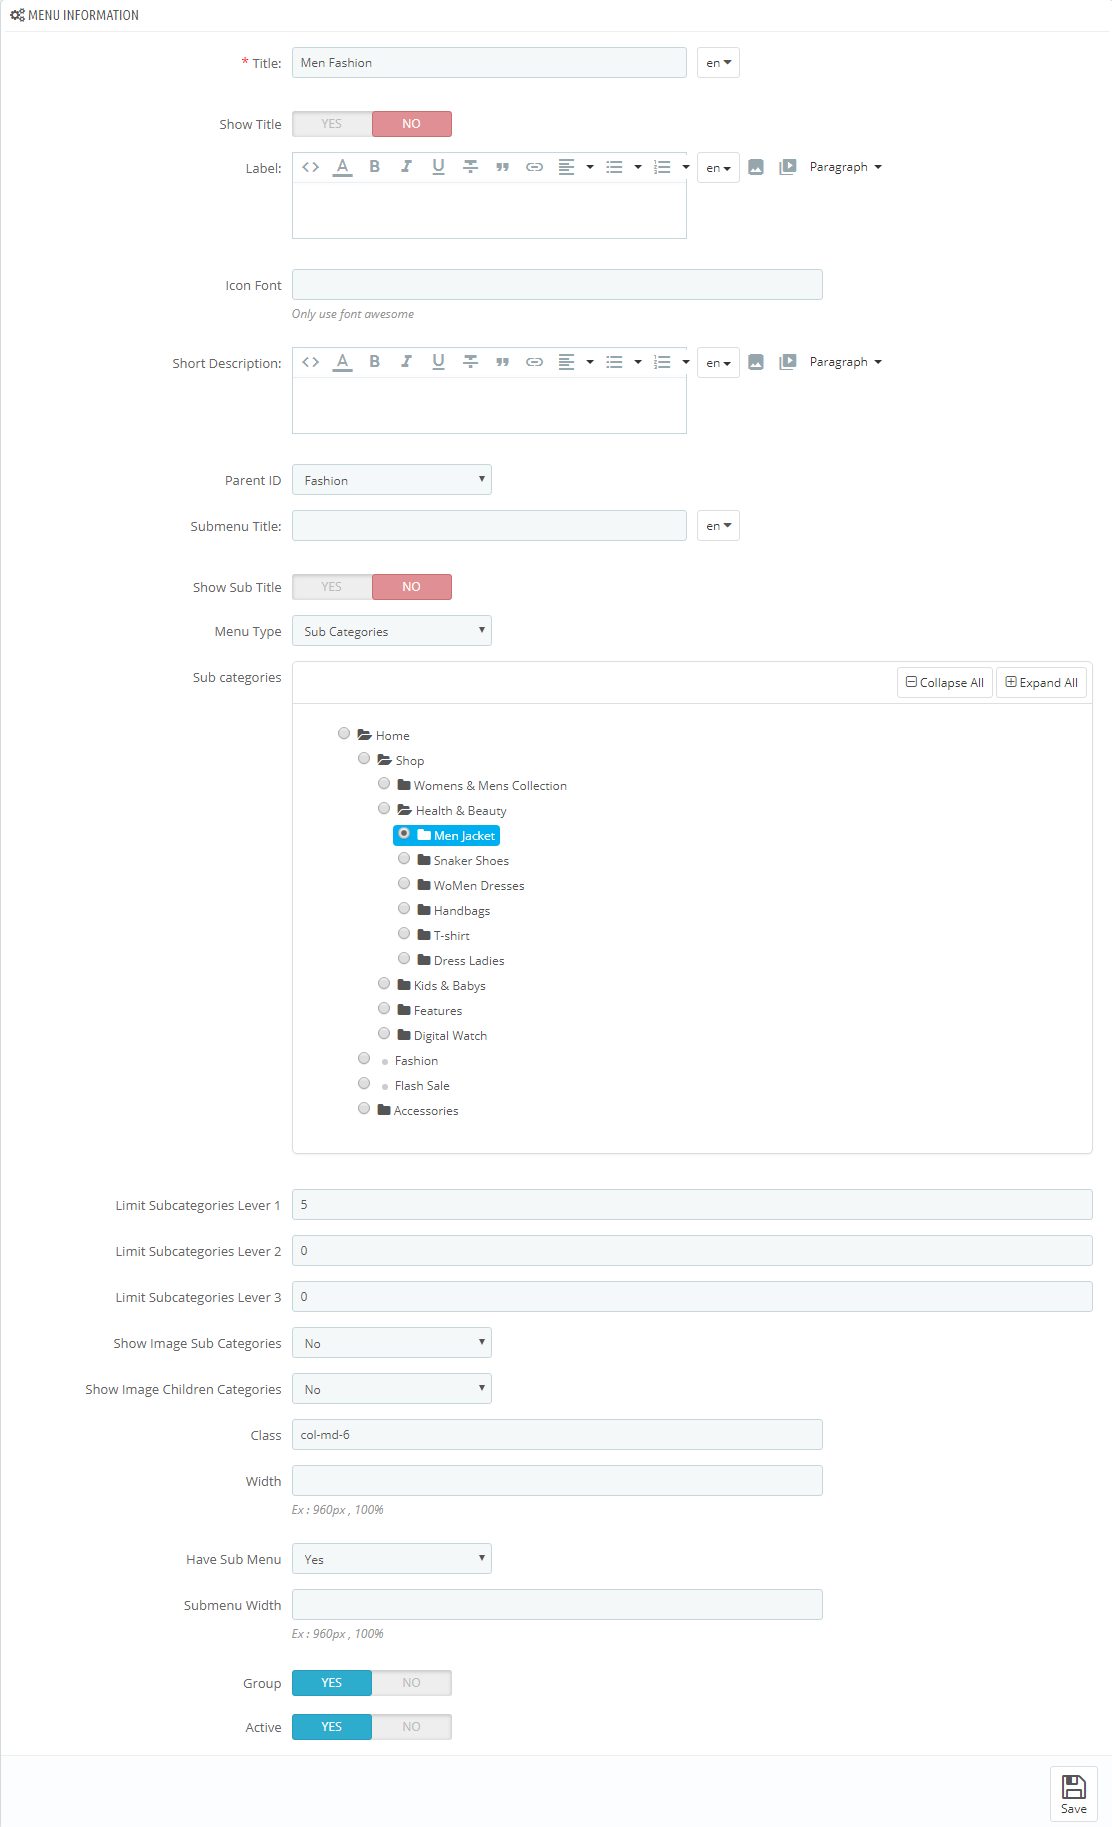
1. Navigate to IMPROVE >> Modules >> Modules and Services go to Installed modules section and look for SP Mega Menu >> Click the Configure button to access the module configuration page.
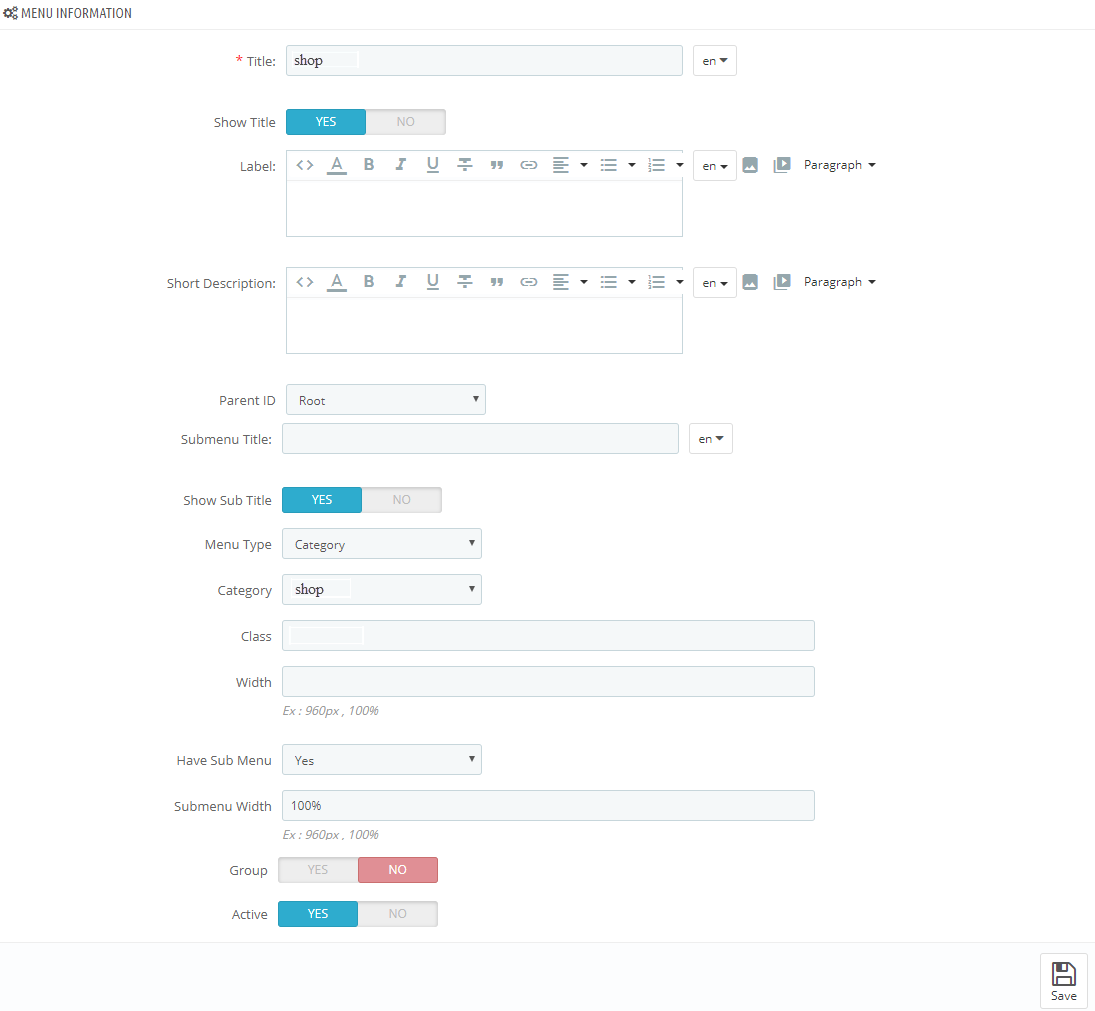
2. In the SP Mega Menu Panel, you could Add New Module by click on the button like the following image:
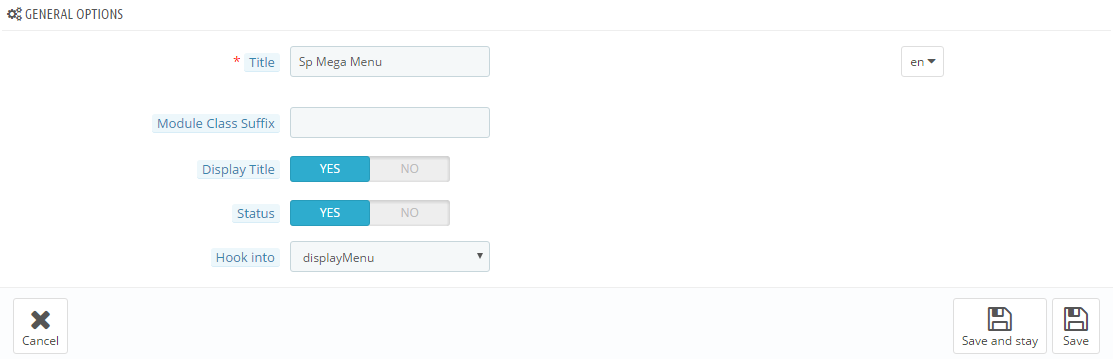
3. You could configure General Options then click "Save" or "Save and stay" button.
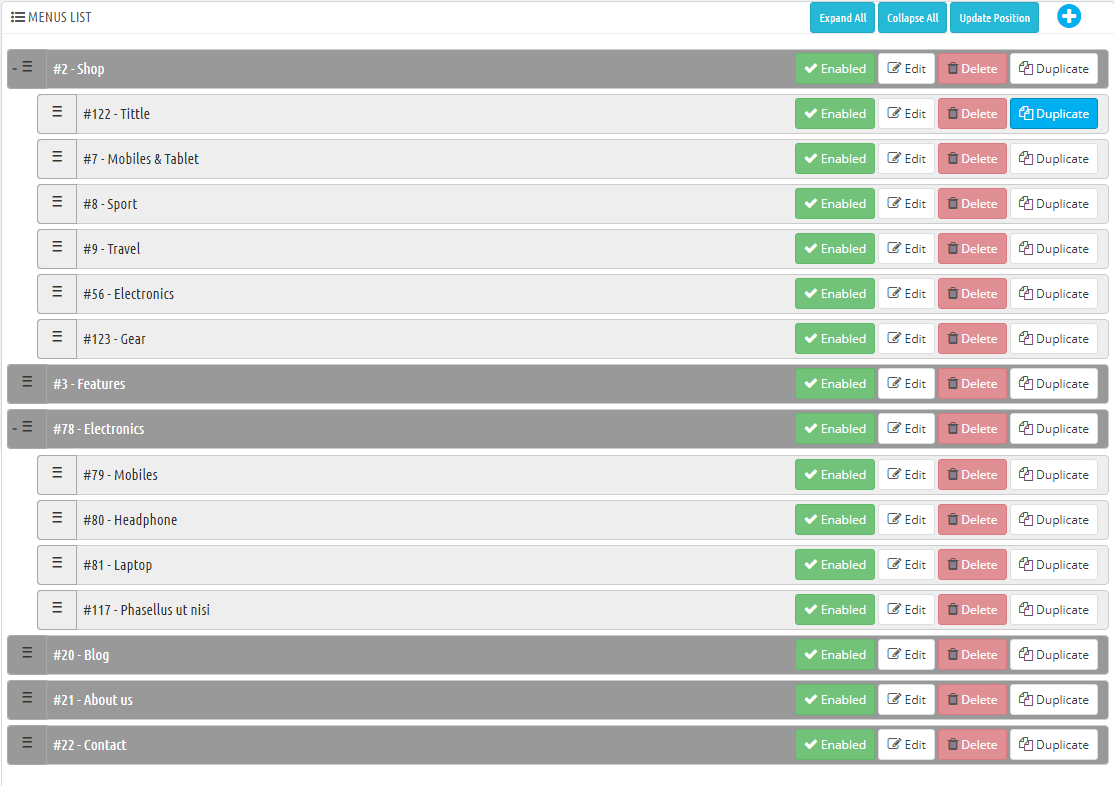
4. Menu list of Mega Menu. You need to look at the menu list to configure easily.
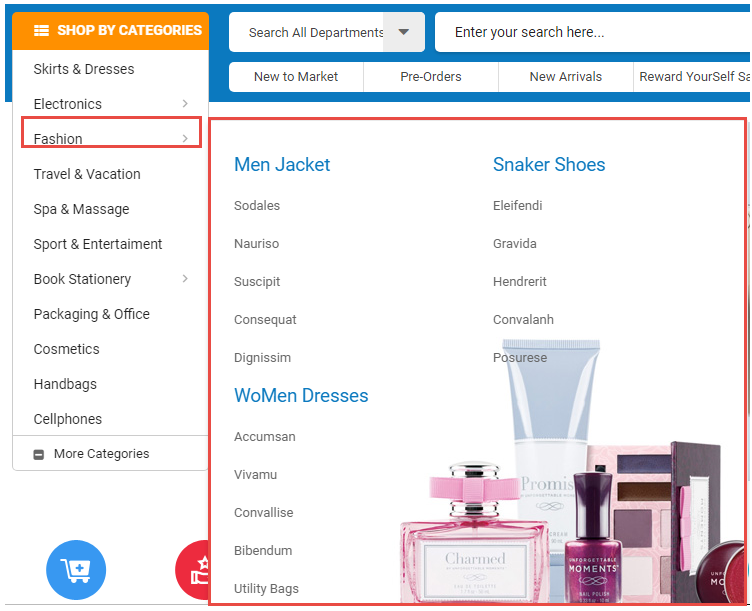
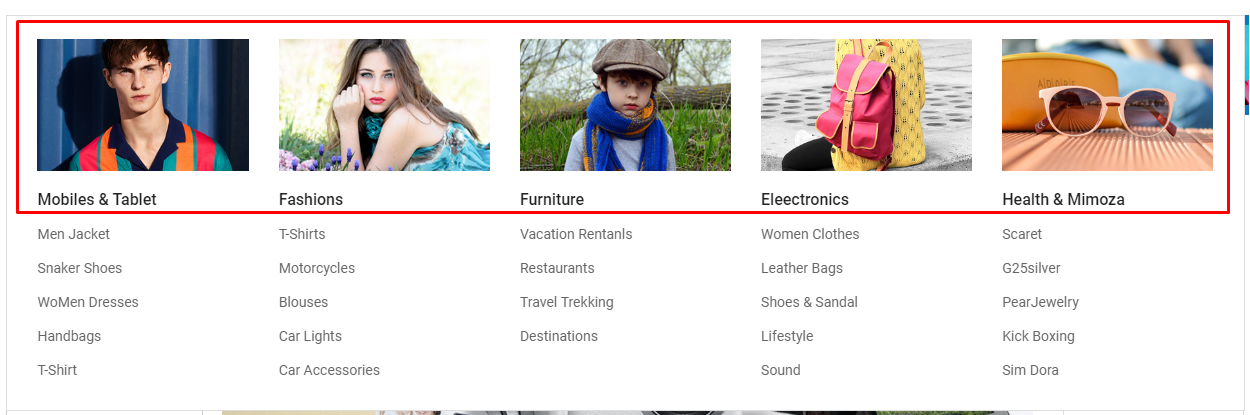
5. Examples. Create megamenu as the demo.
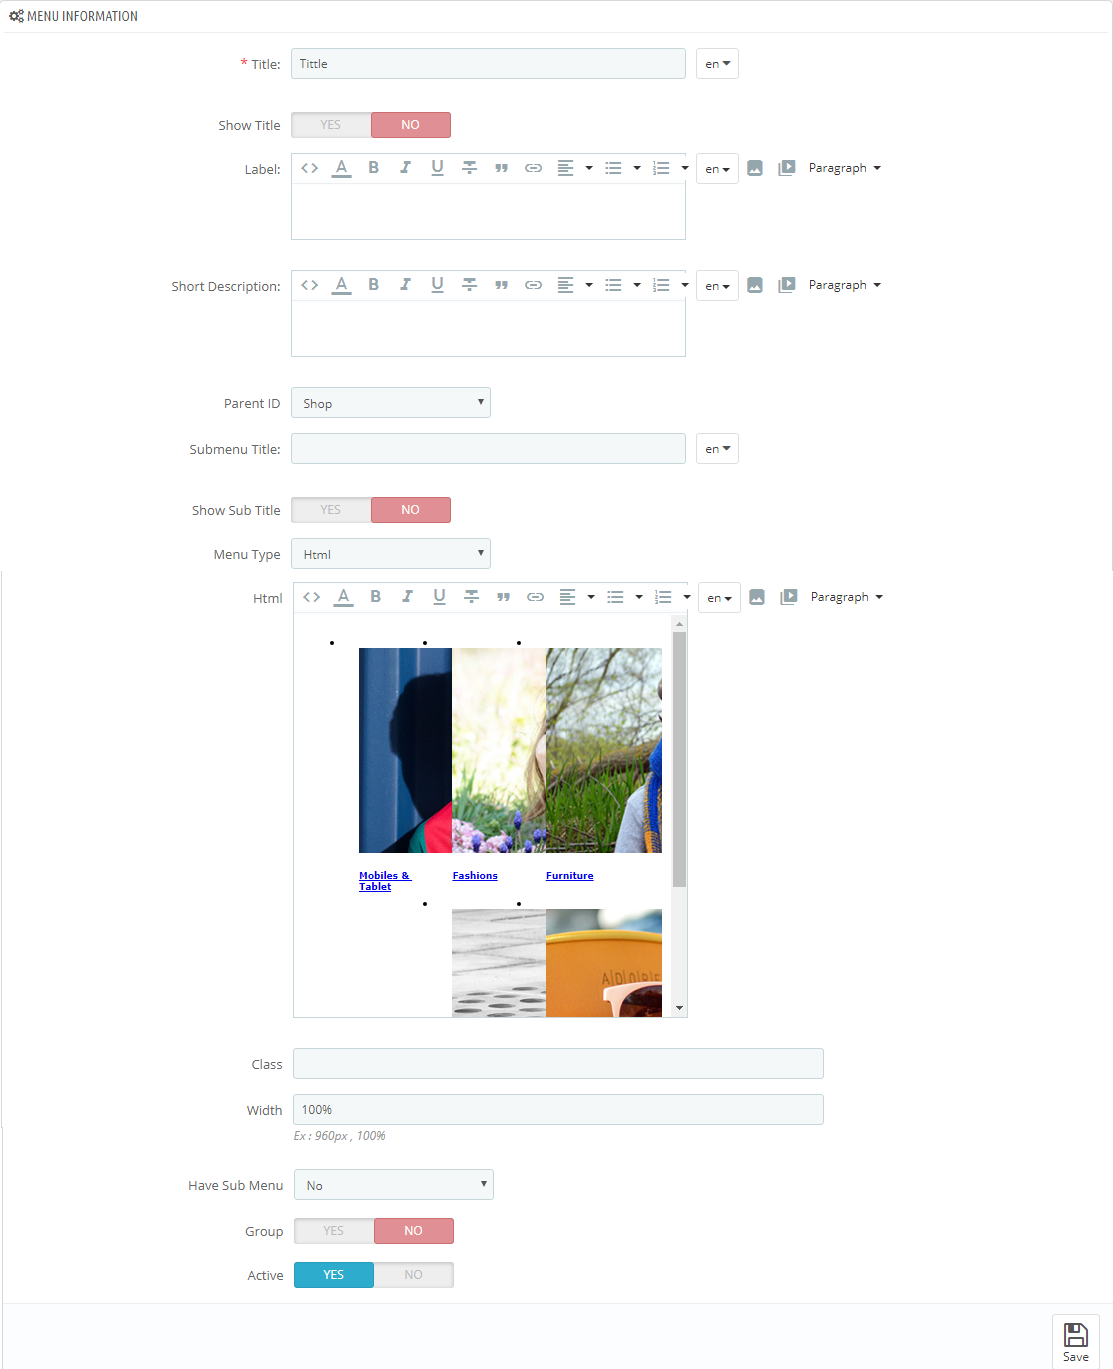
Copy and paste the following code into the content HTML:
<div class="cha clearfix">
<ul>
<li style="width: 20%; float: left; padding: 0 15px;"><img src="/ytc_templates/prestashop/sp_metro_17//themes/sp_metro/assets/img/cms/img-megamenu-1.jpg" alt="" />
<h5><a href="#">Mobiles & Tablet</a></h5>
</li>
<li style="width: 20%; float: left; padding: 0 15px;"><img src="/ytc_templates/prestashop/sp_metro_17//themes/sp_metro/assets/img/cms/img-megamenu-2.jpg" alt="" />
<h5><a href="#">Fashions</a></h5>
</li>
<li style="width: 20%; float: left; padding: 0 15px;"><img src="/ytc_templates/prestashop/sp_metro_17//themes/sp_metro/assets/img/cms/img-megamenu-3.jpg" alt="" />
<h5><a href="#">Furniture</a></h5>
</li>
<li style="width: 20%; float: left; padding: 0 15px;"><img src="/ytc_templates/prestashop/sp_metro_17//themes/sp_metro/assets/img/cms/img-megamenu-4.jpg" alt="" />
<h5><a href="#">Eleectronics</a></h5>
</li>
<li style="width: 20%; float: left; padding: 0 15px;"><img src="/ytc_templates/prestashop/sp_metro_17//themes/sp_metro/assets/img/cms/img-megamenu-5.jpg" alt="" />
<h5><a href="#">Health & mimoza</a></h5>
</li>
</ul>
</div>
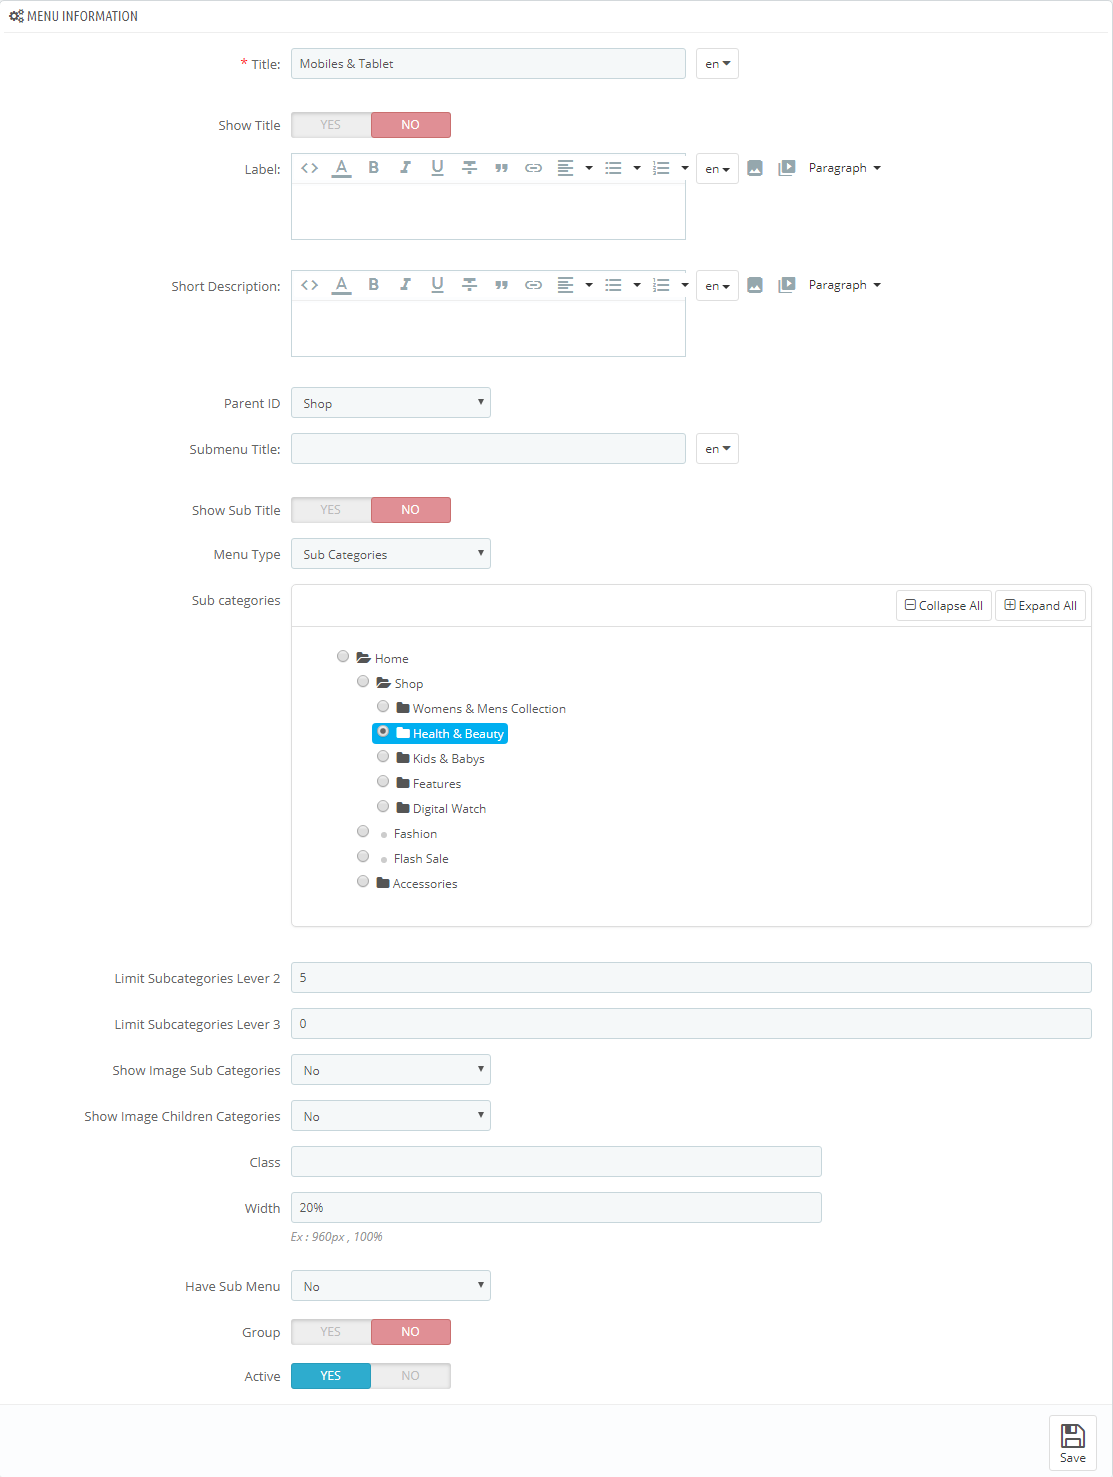
- Create submenu item. In this step, you can do the same to create other items.
Click Here to view documentation of SP Vertical MegaMenu module.
1. Navigate to IMPROVE >> Modules >> Modules and Services go to Installed modules section and look for SP Vertical Mega Menu >> Click the Configure button to access the module configuration page.
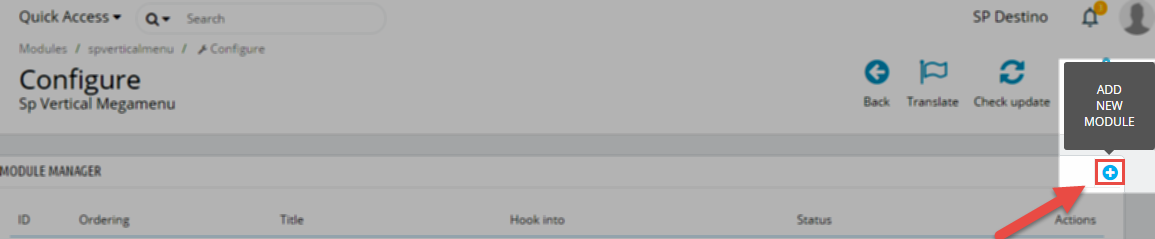
2. In the SP Vertical Megamenu Panel, you could Add New Module by click on the button like the following image:
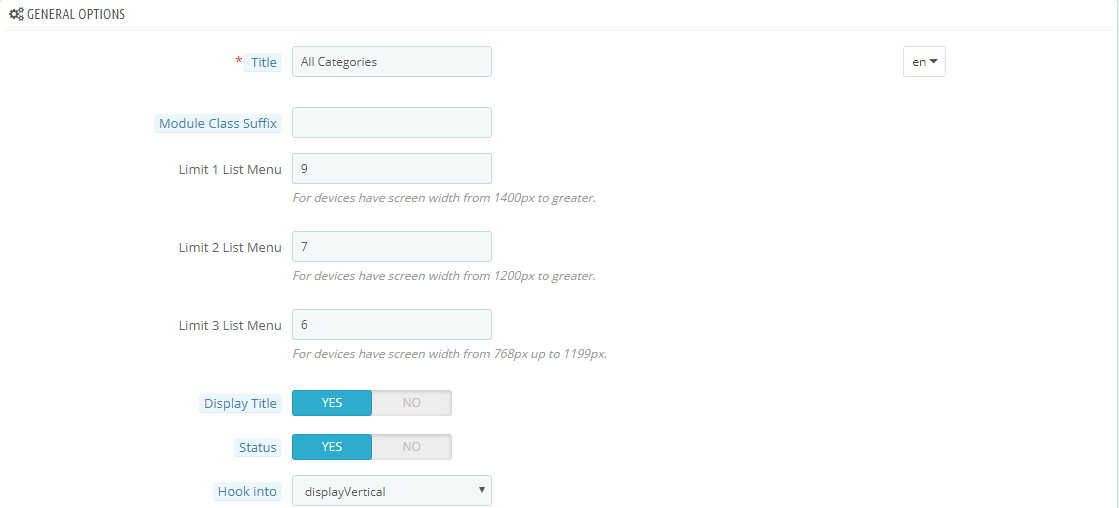
3. You could configure General Options as follows
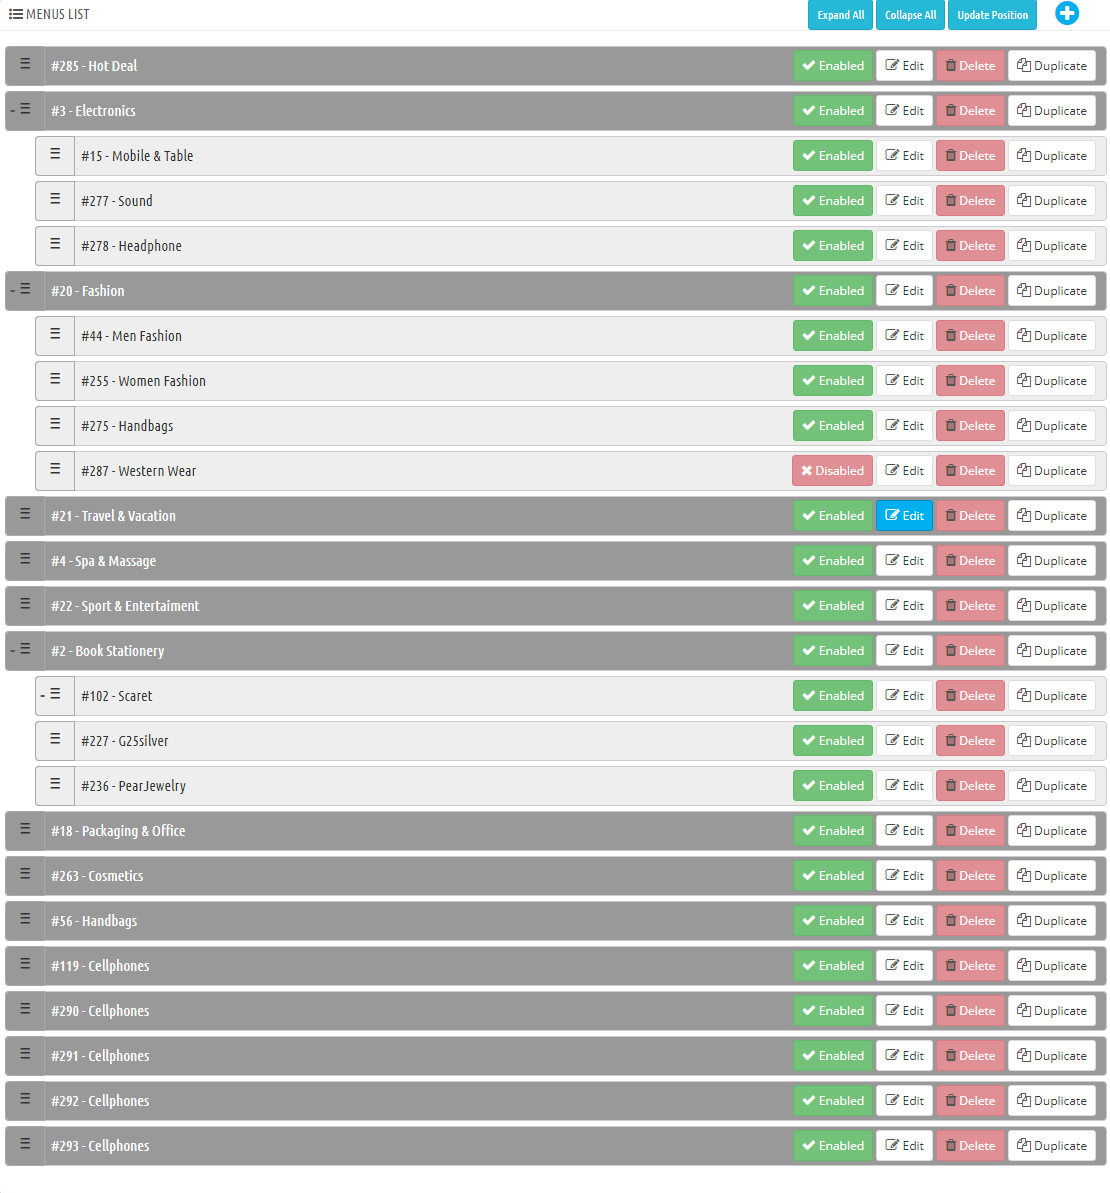
4. Menu list of Vertical Megamenu. You need to look at the menu list to configure easily.
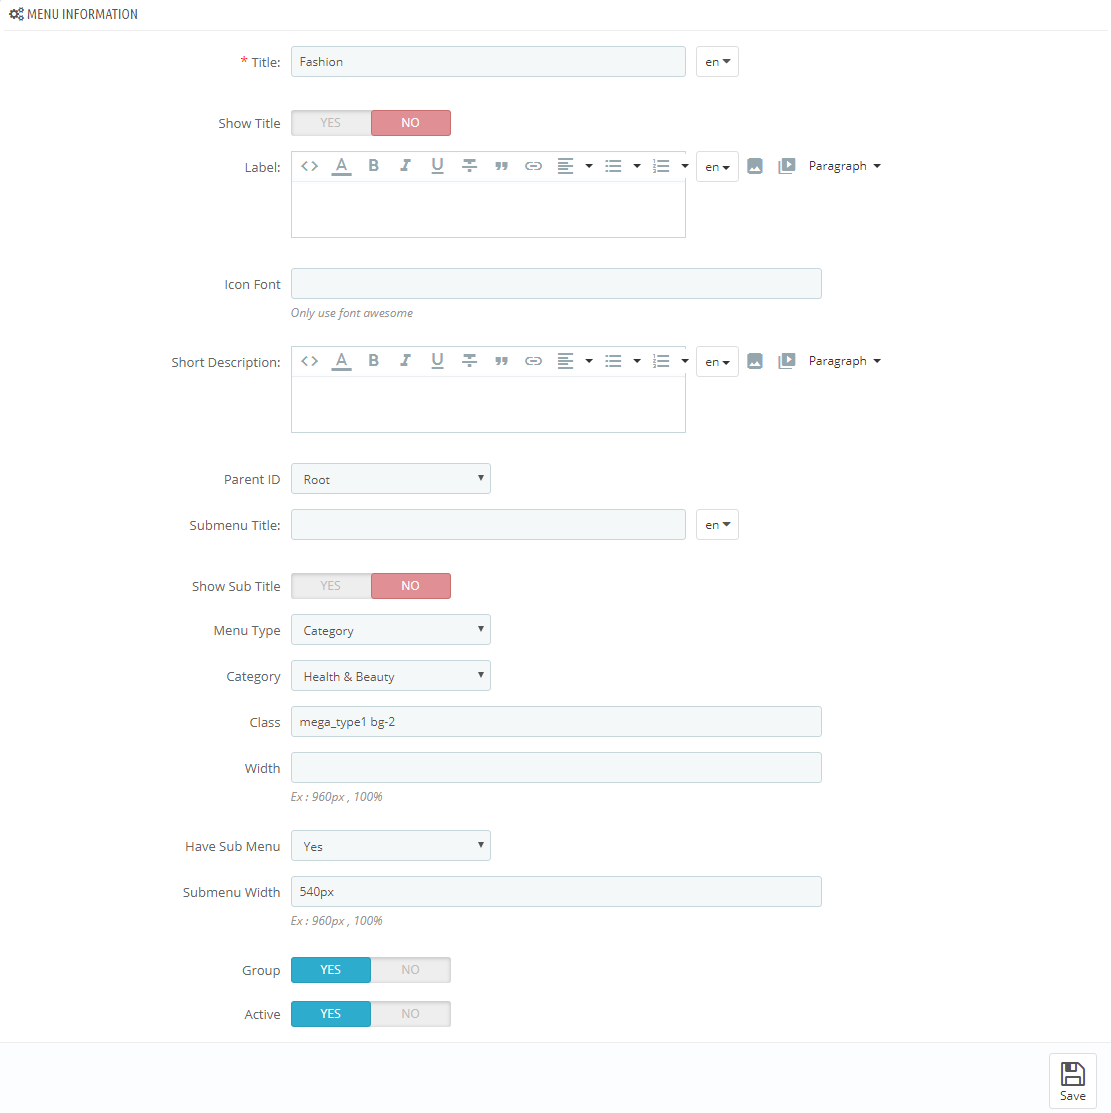
5. Examples. Create vertical megamenu as follows.
theme/sp_metro/assets/img/icon/bg-ver-2-1.jpg
Backend Settings:
Step 1:
Step 2: In the Prestashop Admin Panel, navigate to IMPROVE >> Modules >> Modules and Services >> Installed Modules
Step 3: You could configure this module like the following image.
- Smart Blog
- SmartBlog Home Latest

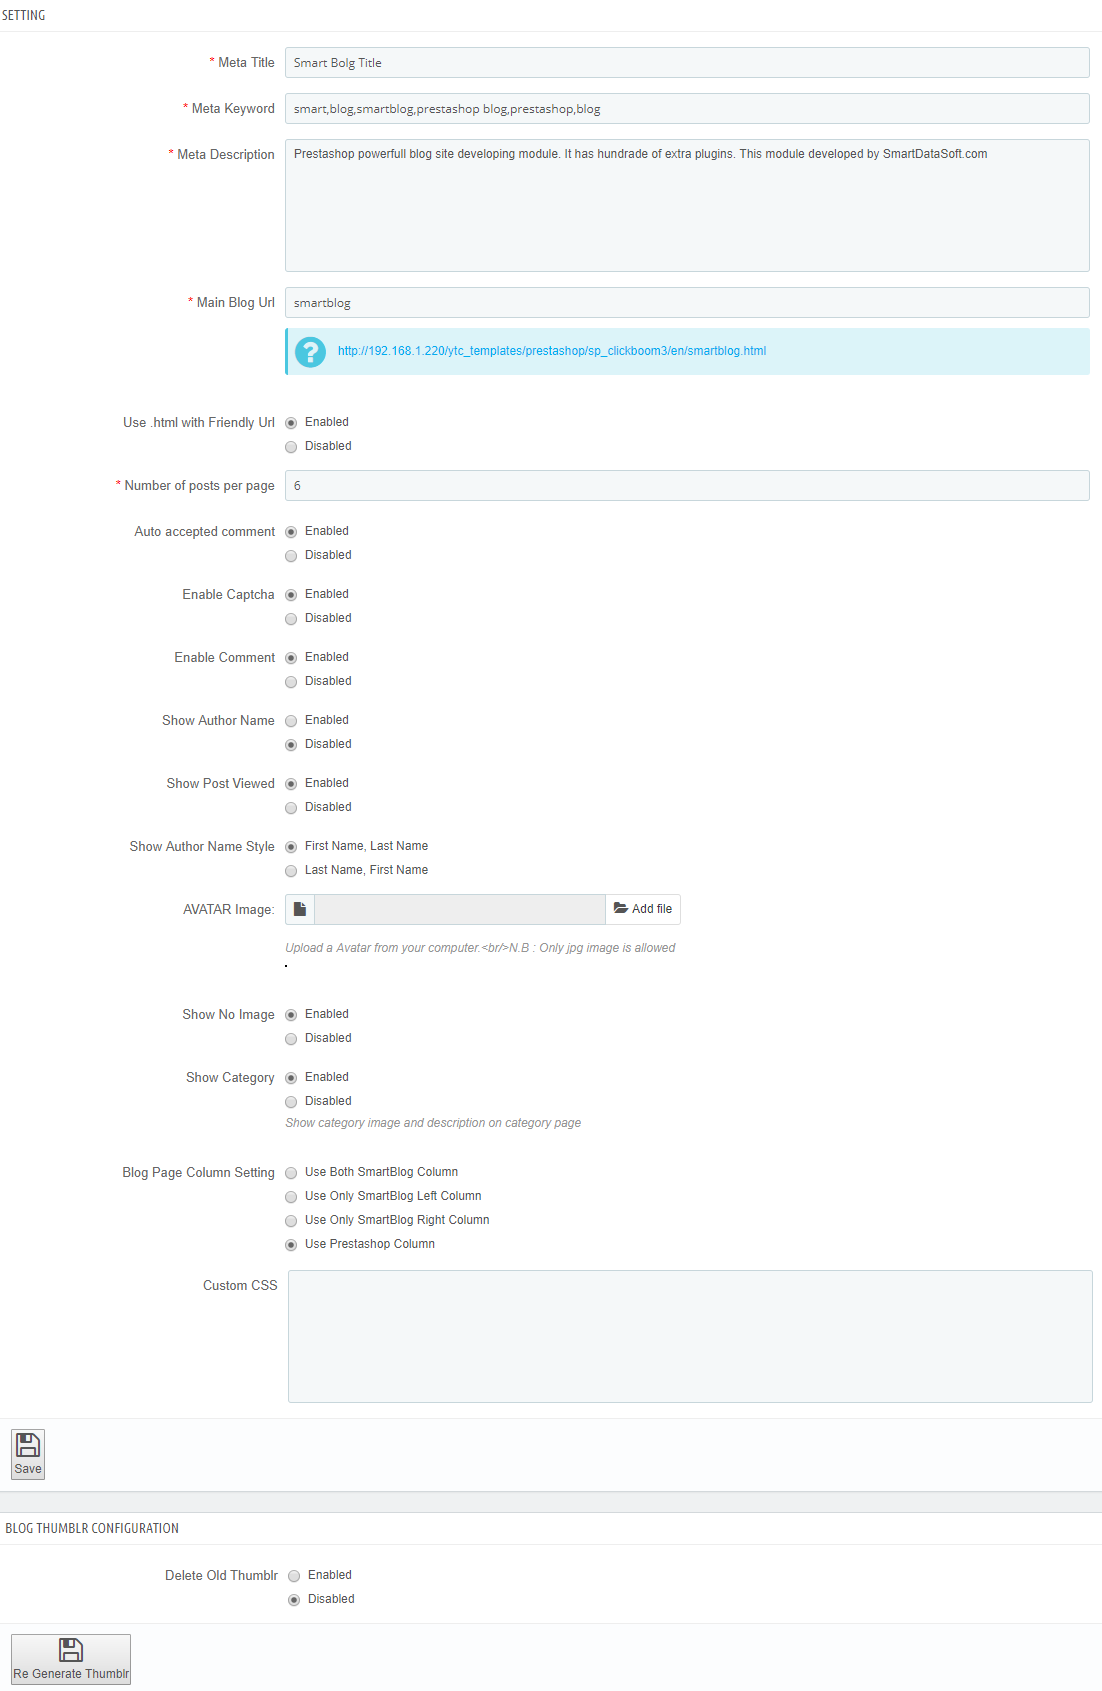
Please read more guide for Smartblog at here. SmartBlog Module

Backend Setting:
Step 1: In the Prestashop Admin Panel, navigate to IMPROVE >> Modules >> Modules and Services >> Installed Modules look for “SP Custom HTML module >> click “Configure” button to configure >> Hook into "displayID1Customhtml14".
Step 3: You could configure this module like the illustration
Copy and paste the following code into the content:
<ul>
<li class="item item-1">
<div class="icon"></div>
<div class="text">
<h5>Phone</h5>
<p>Phone 1: (+123) 4 567 890</p>
<p>Phone 2: (+234) 5 210 102</p>
</div>
</li>
<li class="item item-2">
<div class="icon"></div>
<div class="text">
<h5>Address</h5>
<p>2012 Lenorad Creet Street, Behind Los Angeles, USA</p>
</div>
</li>
<li class="item item-3">
<div class="icon"></div>
<div class="text">
<h5>Email</h5>
<p>Support-customer@MagenTech.Com - Martketing@MagenTech.Com</p>
</div>
</li>
<li class="item item-4">
<div class="icon"></div>
<div class="text">
<h5>Opening time</h5>
<p>Monday-Saturday: 6AM - 9PM Sunday: Closed</p>
</div>
</li>
</ul>
Frontend Appearance:

Backend Setting:
Step 1: In the Prestashop Admin Panel, navigate to IMPROVE >> Design >> Pages
Step 2: In the “Pages” configuration page, click  button in the right corner to “ADD NEW”.
Step 3: You could add new cms page like the illustration
Copy and paste the following code into the content:
<div class="about-wrap">
<div class="why-choose clearfix">
<div class="title col-lg-4">
<h3><span class="number">01.</span> <span class="text">Working at Metro</span></h3>
<p>If you are an inventor, you'll love being an Merkat. From day one at Metro you'll take ownership of projects that have a direct impact on our customers.</p>
<div class="list-faqs">
<ul>
<li><span class="light-text">01</span> Explore working at Metro</li>
<li><span class="light-text">02</span> Get to know us</li>
<li><span class="light-text">03</span> Opportunities for veterans</li>
<li><span class="light-text">04</span> Our culture</li>
</ul>
</div>
</div>
<div class="item shipping col-lg-8"><img src="/ytc_templates/prestashop/sp_metro_17/themes/sp_metro/assets/img/cms/about-us-1.png" alt="#" /></div>
<!--end item--></div>
<!--end why-choose-->
<div class="about-us">
<div class="title">
<h3><span>02.</span> Who Are You?</h3>
</div>
<div class="row">
<div class="col-lg-6 col-md-6 col-sm-6 col-xs-12">
<div id="accordion">
<h3>Lorem Khaled Ipsum is a major key to success</h3>
<div>
<p>The key to more success is to get a massage once a week, very important, major key, cloth talk. Mogul talk. Cloth talk. I’m giving you cloth talk, cloth. Special cloth alert, cut from a special cloth. In life you have to take the trash out, if you have trash in your life, take it out, throw it away, get rid of it, major key. Surround yourself with angels.</p>
</div>
<h3>Lorem Khaled Ipsum is a major key to success</h3>
<div>
<p>Sed non urna. Donec et ante. Phasellus eu ligula. Vestibulum sit amet purus. Vivamus hendrerit, dolor at aliquet laoreet, mauris turpis porttitor velit, faucibus interdum tellus libero ac justo. Vivamus non quam. In suscipit faucibus urna.</p>
</div>
<h3>Lorem Khaled Ipsum is a major key to success</h3>
<div>
<p>Nam enim risus, molestie et, porta ac, aliquam ac, risus. Quisque lobortis. Phasellus pellentesque purus in massa. Aenean in pede. Phasellus ac libero ac tellus pellentesque semper. Sed ac felis. Sed commodo, magna quis lacinia ornare, quam ante aliquam nisi, eu iaculis leo purus venenatis dui.</p>
<ul>
<li>List item one</li>
<li>List item two</li>
<li>List item three</li>
</ul>
</div>
<h3>Lorem Khaled Ipsum is a major key to success</h3>
<div>
<p>Cras dictum. Pellentesque habitant morbi tristique senectus et netus et malesuada fames ac turpis egestas. Vestibulum ante ipsum primis in faucibus orci luctus et ultrices posuere cubilia Curae; Aenean lacinia mauris vel est.</p>
<p>Suspendisse eu nisl. Nullam ut libero. Integer dignissim consequat lectus. Class aptent taciti sociosqu ad litora torquent per conubia nostra, per inceptos himenaeos.</p>
</div>
</div>
</div>
<div class="col-lg-6 col-md-6 col-sm-6 col-xs-12"><img src="/ytc_templates/prestashop/sp_metro_17/themes/sp_metro/assets/img/cms/about-us-2.png" alt="#" /></div>
</div>
</div>
<!--end about-us -->
<div class="our-team">
<div class="title">
<h3><span>03.</span> Our Team Work</h3>
</div>
<div class="out-team-content owl-carousel">
<div class="content-inner">
<div class="image"><img src="/ytc_templates/prestashop/sp_metro_17/themes/sp_metro/assets/img/cms/our-team-1.jpg" alt="#" />
<div class="socials"><a class="fb" href="#">Facebook</a> <a class="tw" href="#">Twitter</a> <a class="google" href="#">Google</a><a class="dribbble" href="#">Dribbble</a><a class="linkedin" href="#">Linkedin</a></div>
</div>
<div class="text">
<h3 class="name">Share Portman</h3>
<h5 class="job">Ceo</h5>
</div>
</div>
<div class="content-inner">
<div class="image"><img src="/ytc_templates/prestashop/sp_metro_17/themes/sp_metro/assets/img/cms/our-team-2.jpg" alt="#" />
<div class="socials"><a class="fb" href="#">Facebook</a> <a class="tw" href="#">Twitter</a> <a class="google" href="#">Google</a><a class="dribbble" href="#">Dribbble</a><a class="linkedin" href="#">Linkedin</a></div>
</div>
<div class="text">
<h3 class="name">Jimmy Carter</h3>
<h5 class="job">Director</h5>
</div>
</div>
<div class="content-inner">
<div class="image"><img src="/ytc_templates/prestashop/sp_metro_17/themes/sp_metro/assets/img/cms/our-team-3.jpg" alt="#" />
<div class="socials"><a class="fb" href="#">Facebook</a> <a class="tw" href="#">Twitter</a> <a class="google" href="#">Google</a><a class="dribbble" href="#">Dribbble</a><a class="linkedin" href="#">Linkedin</a></div>
</div>
<div class="text">
<h3 class="name">Warrent Buffet</h3>
<h5 class="job">Deverlopment</h5>
</div>
</div>
<div class="content-inner">
<div class="image"><img src="/ytc_templates/prestashop/sp_metro_17/themes/sp_metro/assets/img/cms/our-team-4.jpg" alt="#" />
<div class="socials"><a class="fb" href="#">Facebook</a> <a class="tw" href="#">Twitter</a> <a class="google" href="#">Google</a><a class="dribbble" href="#">Dribbble</a><a class="linkedin" href="#">Linkedin</a></div>
</div>
<div class="text">
<h3 class="name">Jame Bone</h3>
<h5 class="job">Designer</h5>
</div>
</div>
<div class="content-inner">
<div class="image"><img src="/ytc_templates/prestashop/sp_metro_17/themes/sp_metro/assets/img/cms/our-team-5.jpg" alt="#" />
<div class="socials"><a class="fb" href="#">Facebook</a> <a class="tw" href="#">Twitter</a> <a class="google" href="#">Google</a><a class="dribbble" href="#">Dribbble</a><a class="linkedin" href="#">Linkedin</a></div>
</div>
<div class="text">
<h3 class="name">Mary Stone</h3>
<h5 class="job">Designer</h5>
</div>
</div>
</div>
</div>
<!--end our-team--></div>
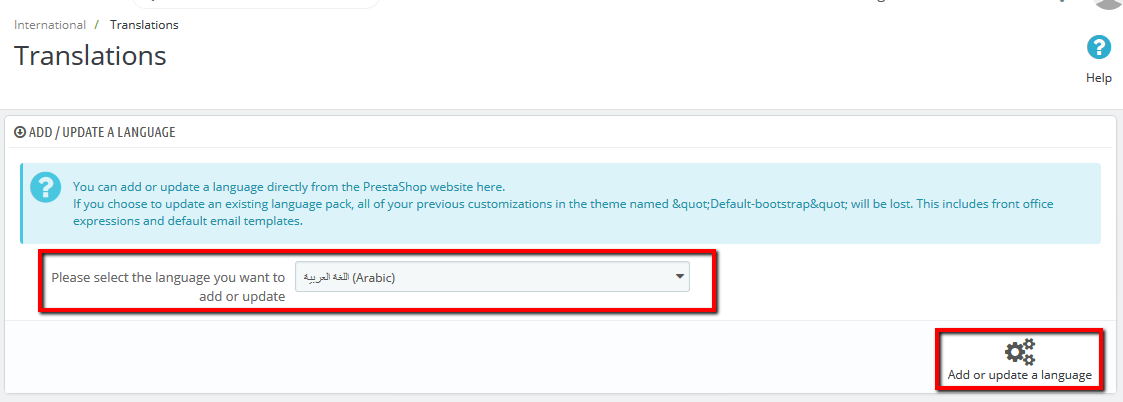
- In the Prestashop Admin Panel, navigate to IMPROVE >> International >> Translations
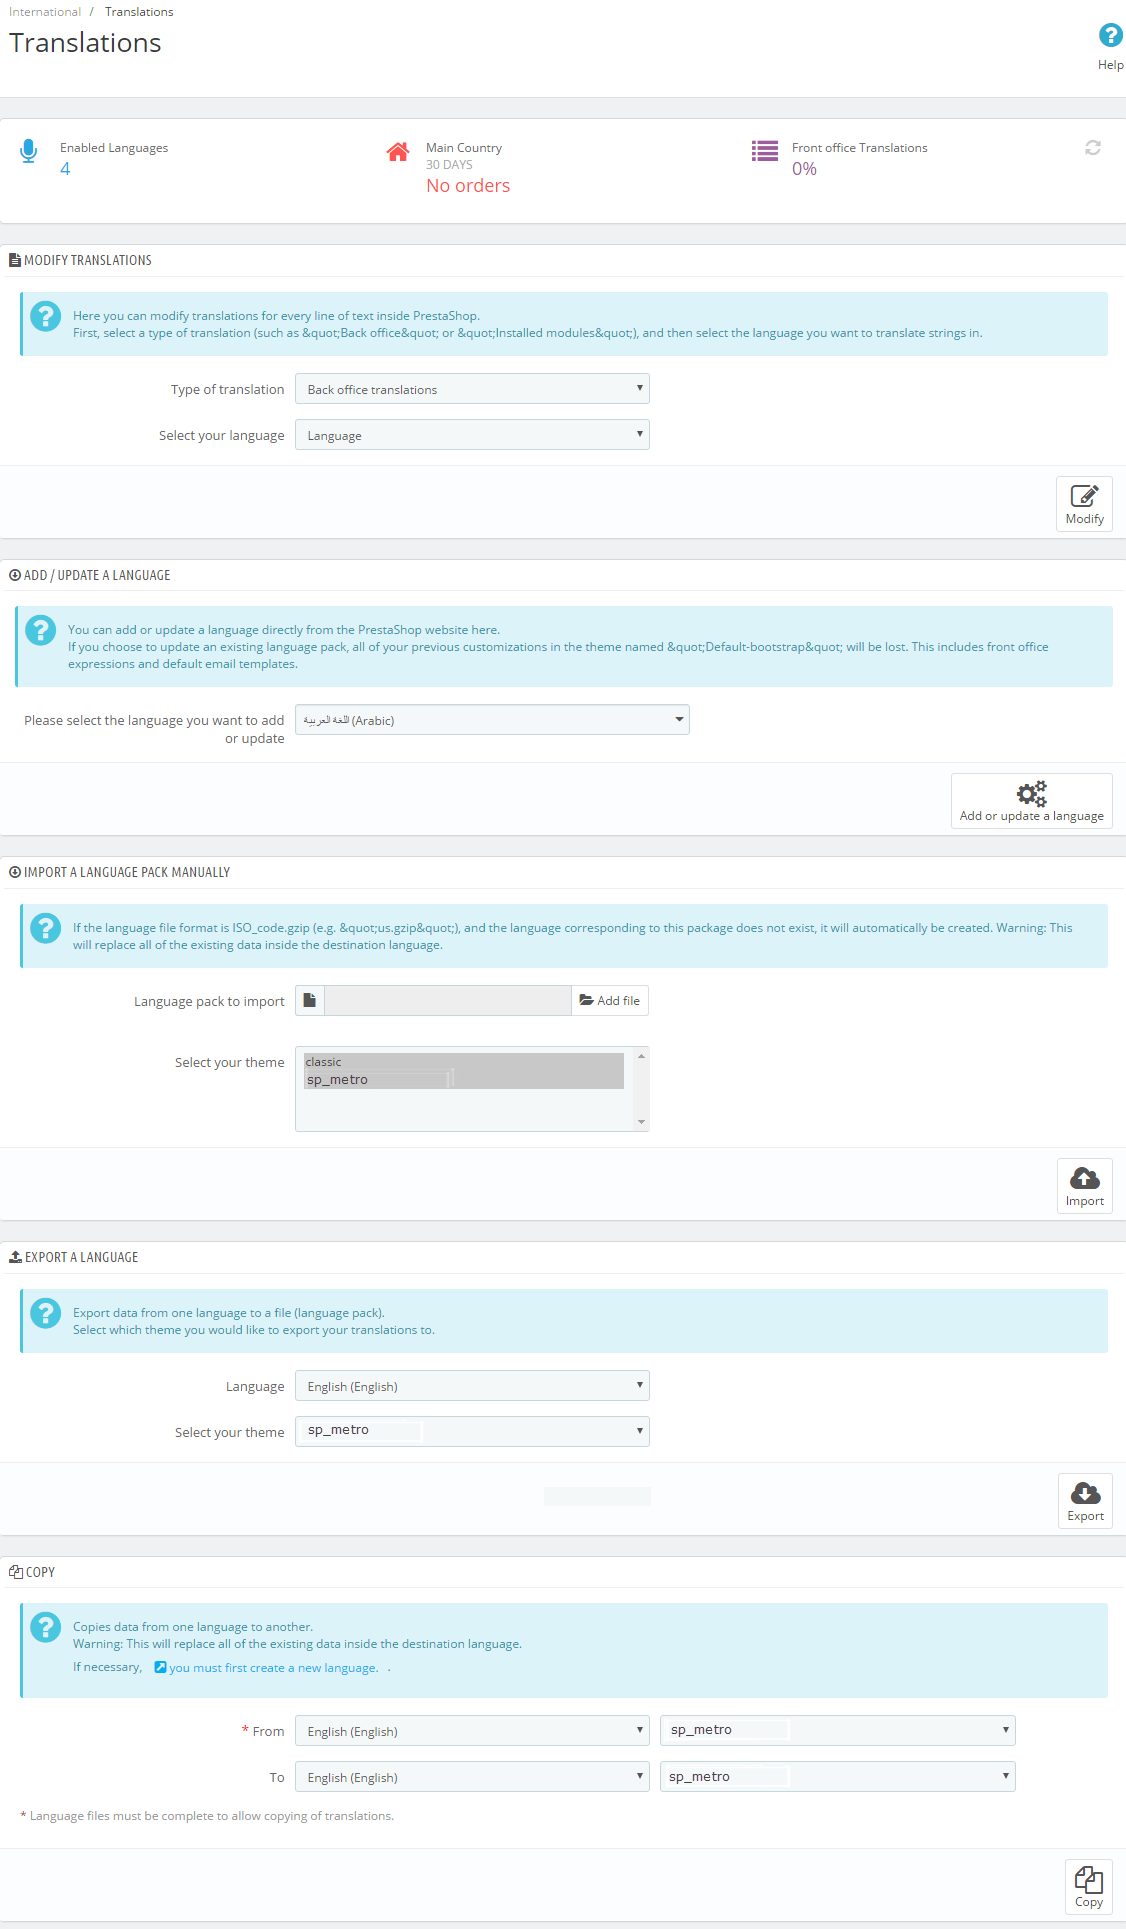
- At here, Scroll to block "ADD / UPDATE A LANGUAGE"
- Then, Select the language you want to add new, and click button "Add or update a language"
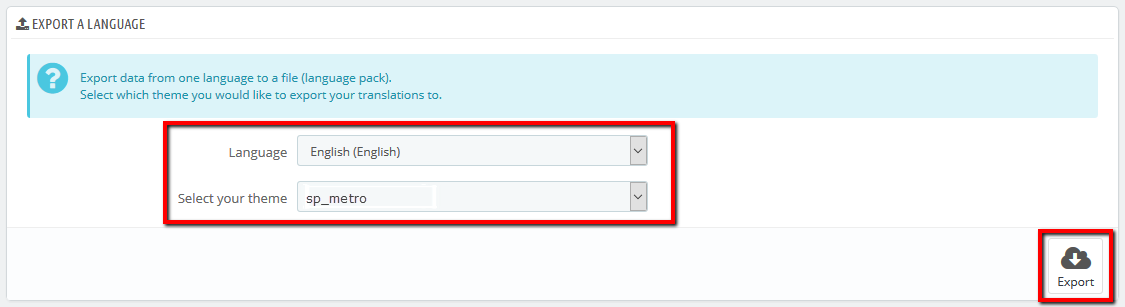
- In the Prestashop Admin Panel, navigate to IMPROVE >> International >> Translations (Same Add new Language)
- At here, Scroll to block "Export a Language"
- Then, Select Language and Your theme that you want Export, and click button "Export"
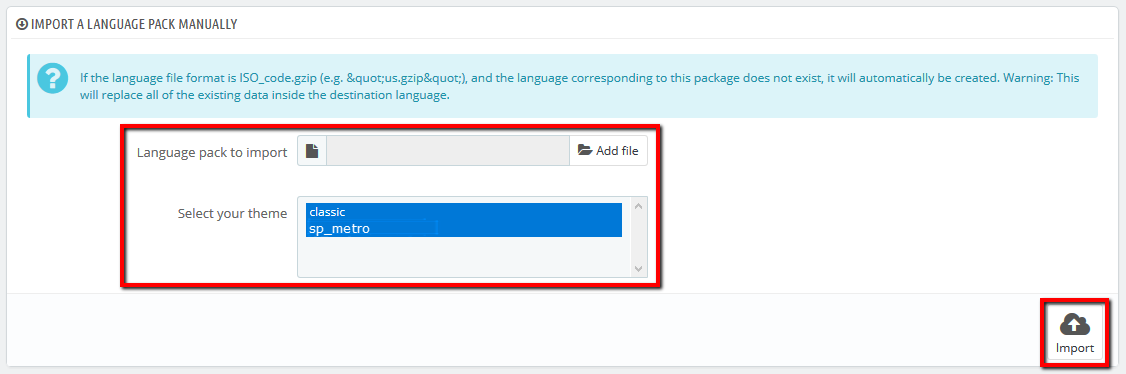
- In the Prestashop Admin Panel, navigate to IMPROVE >> International >> Translations (Same Add new Language)
- At here, Scroll to block "Import a language pack manually"
- Then, click button "Add file" and choose file language and select your theme, and click button "Import"
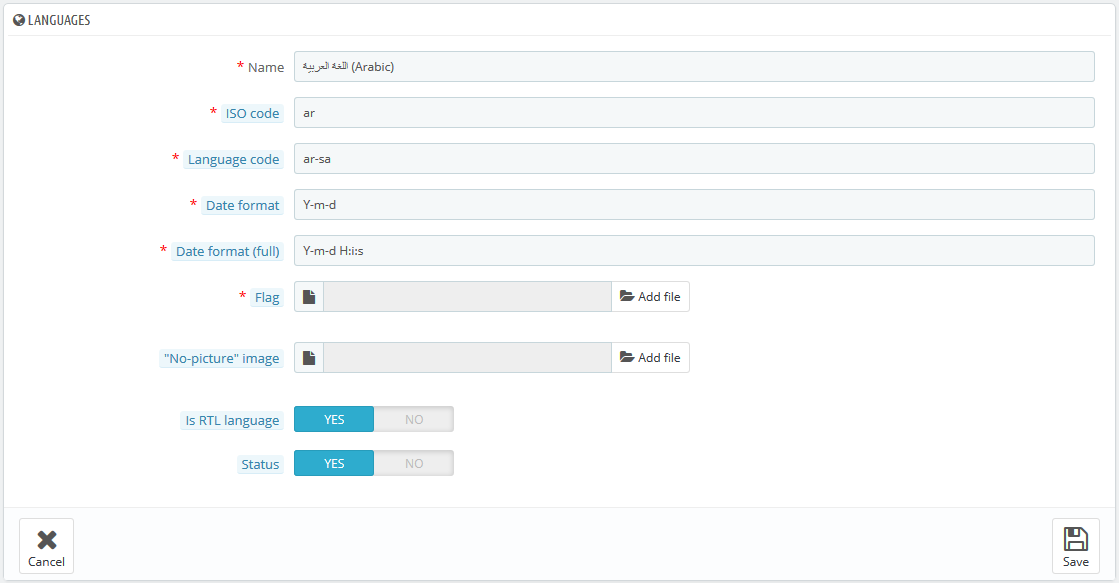
- In the Prestashop Admin Panel, navigate to IMPROVE >> International >> Localization, and choose tab "Languages"
- You can edit or delete language on your store
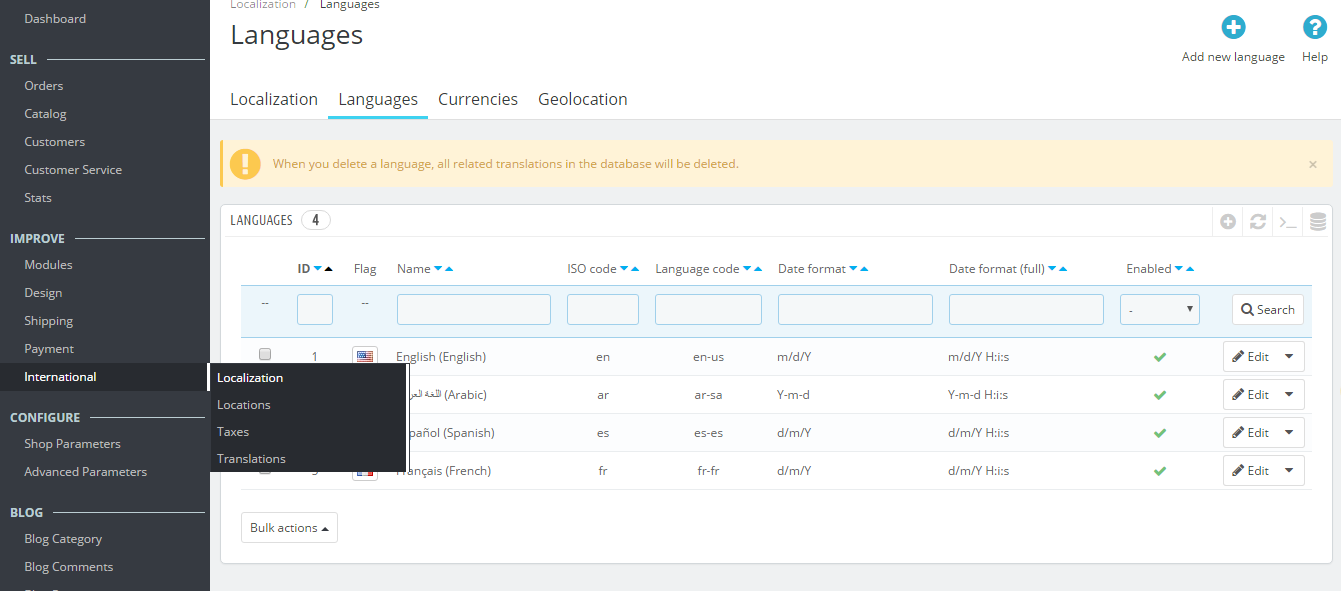
- If you want change language, click button "Edit".
- In the Prestashop Admin Panel, navigate to IMPROVE >> International >> Localization, and choose tab "Currencies"
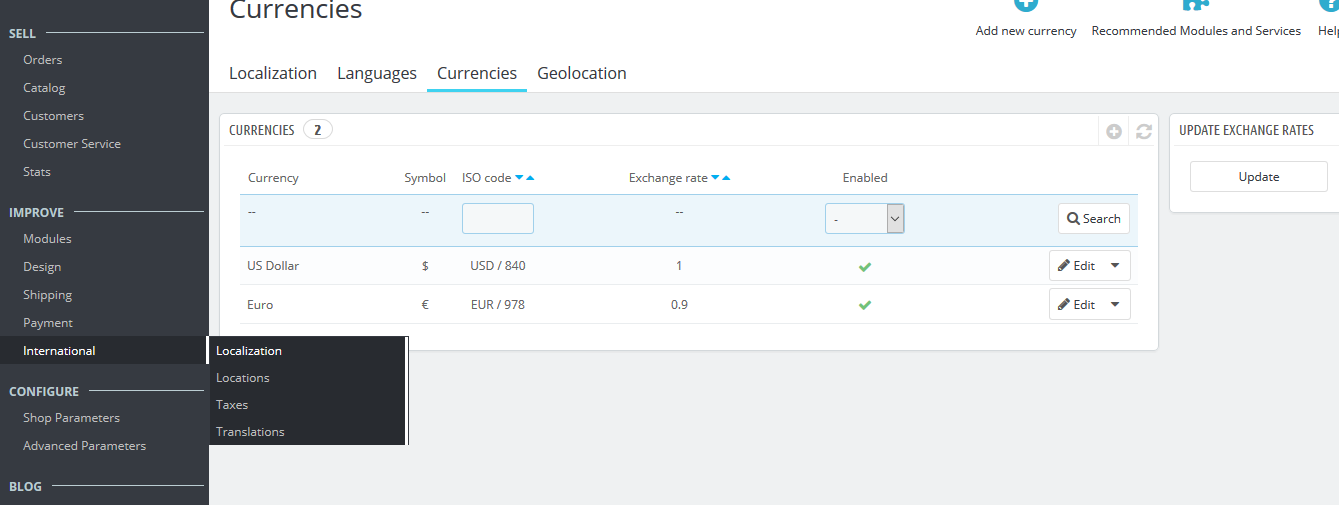
- In the "Currencies" configuration page, click button  in the right corner to “ADD NEW”.
You could configure this module like the illustration
- In the Prestashop Admin Panel, navigate to IMPROVE >> International >> Translations (Same Add new Language)
- In the "Translations" configuration page, scroll to block "MODIFY TRANSLATIONS"
- Then click button "Modify"
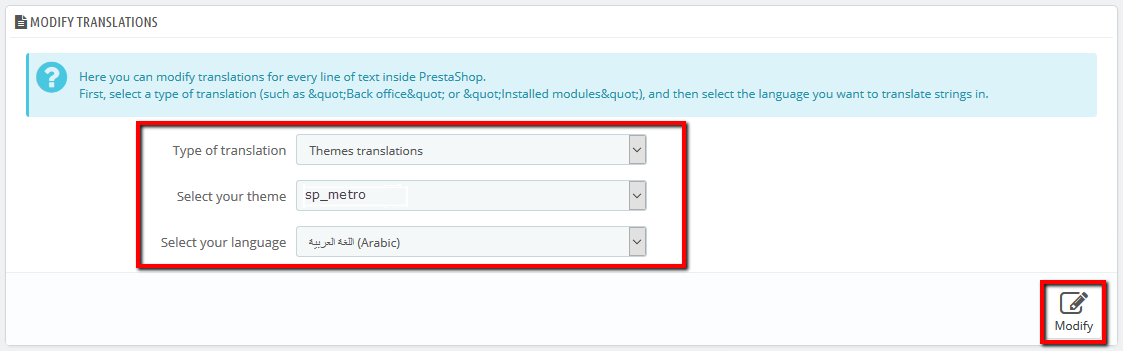
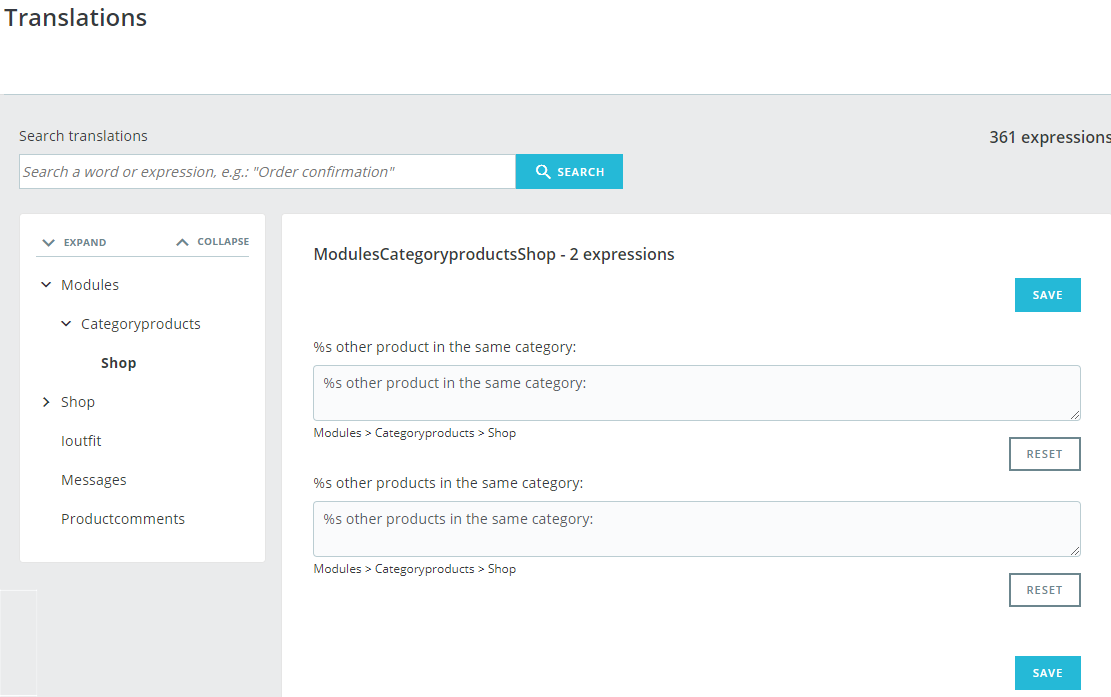
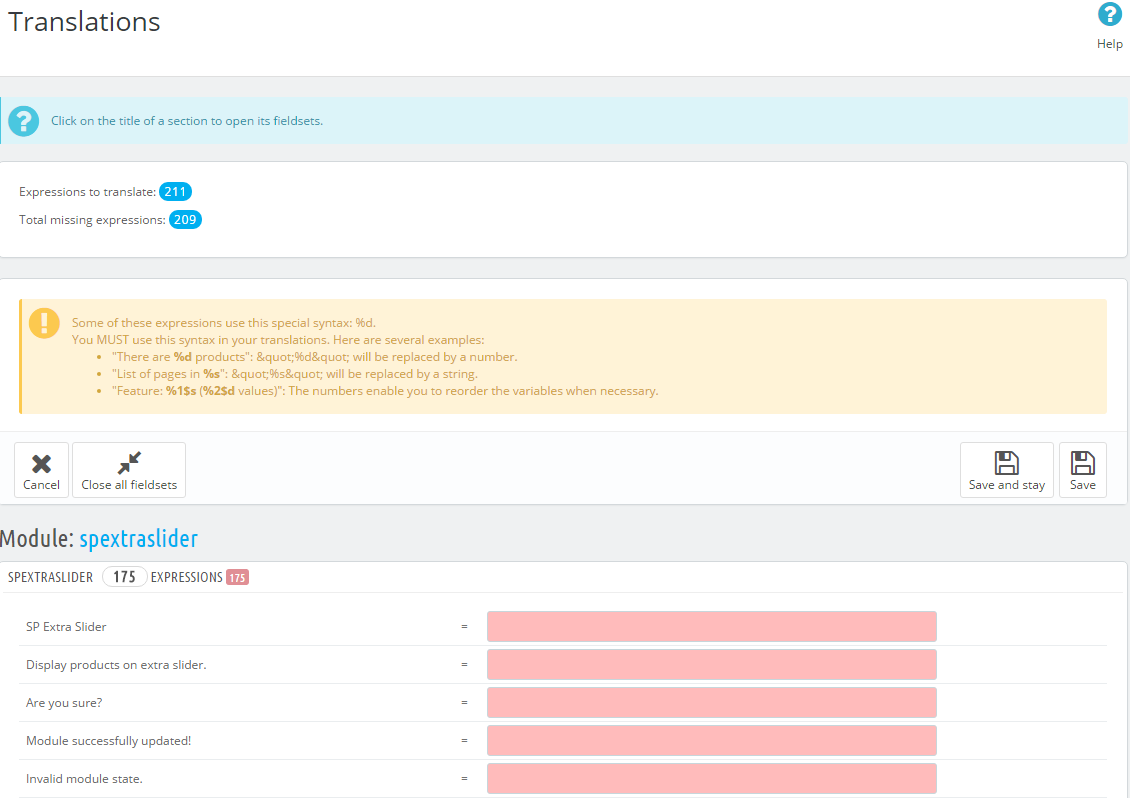
- Here, you can translate the text in the theme.
- In the Prestashop Admin Panel, navigate to IMPROVE >> International >> Translations (Same Add new Language)
- In the "Translations" configuration page, scroll to block "MODIFY TRANSLATIONS"
- Then click button "Modify"
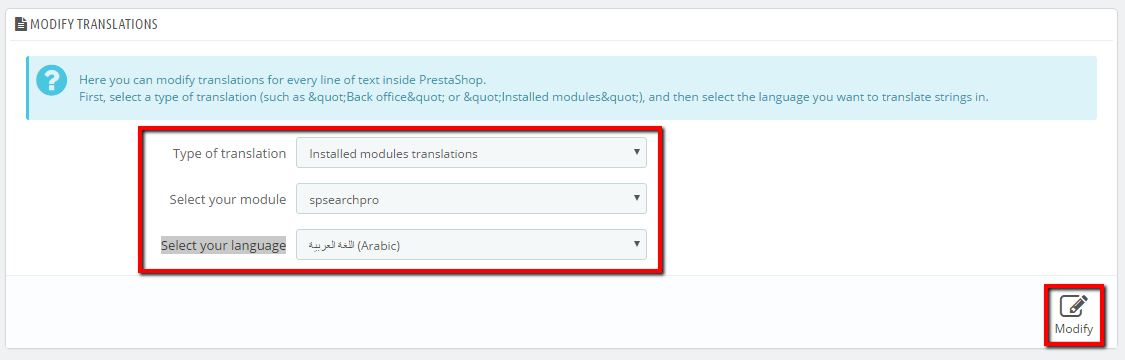
- Here, you can translate the text in the module.
SUPPORT - If you have any questions that are beyond the scope of this help file, please feel free to send us via:
Support Tickets System
FAQs - Go to
Here to view more the Frequently Asked Questions.

