Getting Started
Welcome to Maximum Magento 2 Theme!
Firstly, a huge thanks for purchasing this theme, your support is truly appreciated!
This document covers the installation and use of this theme, reveals some answers to common problems and issues. We encourage you to read throughout this document if you are experiencing any difficulties. If you have any questions that are beyond the scope of document, please feel free to contact us via our Support Tickets System
Compatible with Magento
| Version Magento | Link Documentation |
|---|---|
| Version 2.0.x to 2.3.x | Click Here |
| Ver 2.4.x | Click Here |
Magento Information
To install this theme you must have a working version of Magento already installed. If you need help installing Magento, follow below sites and tutorials from magento.com, hope everything that you need are there.
- System Requirements - Required system credentials for your magento installation.
- Installation Guide - Installation guide that describes how to install magento2.
- Online Magento 2 guide - Online magento documentation that describes about magento2 in detail.
- Magento Forum - Magento forum site.
- stackoverflow.com - You can also get some useful articles from stackoverflow.
Installation
Elasticsearch
As of Magento 2.4.0, MySQL is no longer used for search. You must use Elasticsearch. Magento supports Elasticsearch 7.6.x.
Note: Magento no longer supports Elasticsearch 2.x, 5.x, and 6.x.Prepare Installation
There are two ways to install a Magento Theme:
- Quickstart Installation: Suitable if you have your first installation and want to get a whole new fresh site as our Demo.
- Manual Installation (including Theme Installation): Manual Installation (including Theme Installation): Suitable if your store is full with data/content (category, products...) that you don't want to overwrite.
Quickstart Installation
Magentech provides SM Quickstart package for each theme which aims to ease the installation for users. If you plan to start your site from the beginning, it will help you save much time of installing and configuring. Please follow steps below:
Important: You must use the command line to install Magento 2.4+.
- Step 1: Download the quickstart package named as sm_maximum_quickstart_pl_m2.4.0_v2.0.0
- Step 2: Upload and Extract the whole Quickstart package to your server. In Quickstart folder you will see the extracted folder that include all sample data
- Step 3: Create a Database for your Magento site
Important!
You need to remember the database name to use in the next steps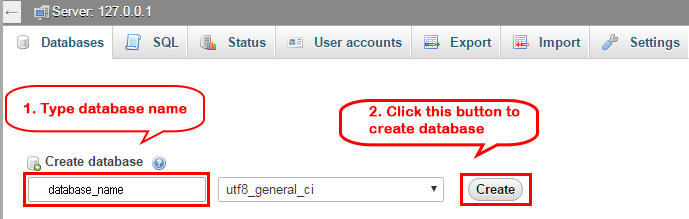
- Step 4: Import database sample_data.sql under the folder sm_maximum_quickstart_pl_m2.4.0_v2.0.0\data_quickstart
Note: You can import database by run this command
mysql -u root -p database_name < sample_data.sql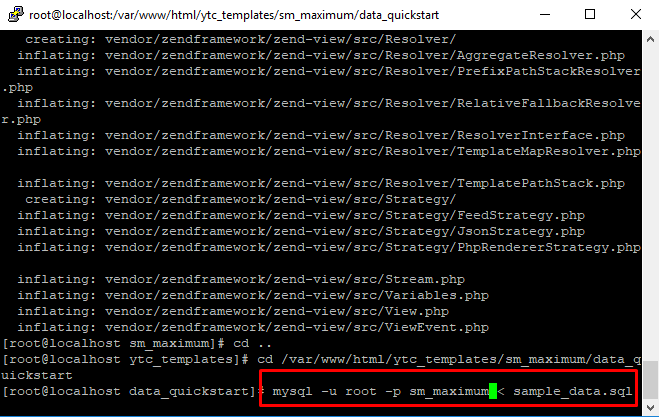
- Step 5: Install Magento
This example assumes that the Magento install directory is named
sm_maximum, the db-host is on the same machine (localhost), and that the db-name, db-user, and db-password are allmagento:php bin/magento setup:install --base-url=http://192.168.1.220/ytc_templates/magento/sm_maximum --base-url-secure=https://192.168.1.220/ytc_templates/magento/sm_maximum --db-host=localhost --db-name=magento --db-user=magento --db-password=magento --admin-firstname=admin --admin-lastname=admin --admin-email=admin@admin.com --admin-user=admin --admin-password=admin123 --language=en_US --currency=USD --timezone=America/Chicago --use-rewrites=1 --backend-frontname="admin" --search-engine=elasticsearch7 --elasticsearch-index-prefix=maximum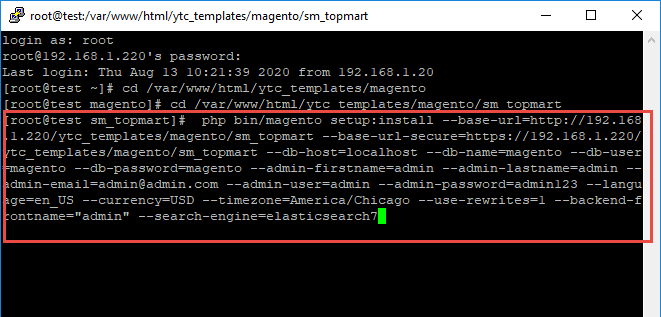
Messages similar to the following display to indicate a successful installation:Post installation file permissions check...Note: You can customize the Admin URI with the --backend-frontname option. However, we recommend omitting this option and allowing the installation command to automatically generate a random URI. A random URI is harder for hackers or malicious software to exploit. The URI displays in your console when installation is complete.
For security, remove write permissions from these directories: '/var/www/html/ytc_templates/magento/sm_maximum/app/etc'
[Progress: 274 / 274]
[SUCCESS]: Magento installation complete.
[SUCCESS]: Admin Panel URI: /admin_puu71q
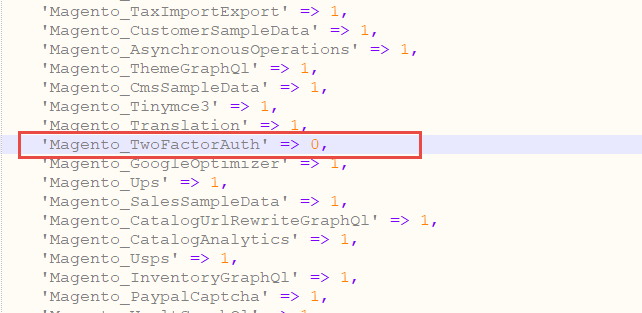
- Step 6: Can't login to admin panel
When you login to admin will be display like this image:
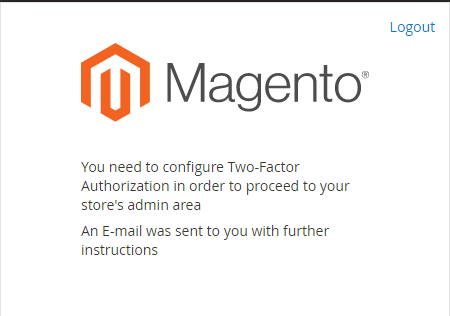
Please open fileapp/etc/config.phpand change 'Magento_TwoFactorAuth' => 1 to 'Magento_TwoFactorAuth' => 0
After that run these command:
1.php bin/magento setup:upgrade
2.php bin/magento setup:static-content:deploy -f
3.php bin/magento indexer:reindex - Step 7: Finally, permissions for the following folders by run these commands:
chmod -R 777 pub
chmod -R 777 generated
chmod -R 777 var
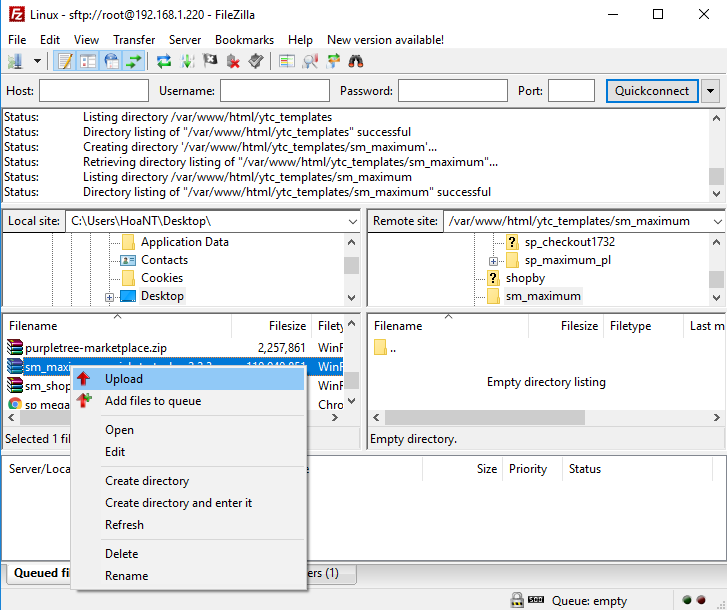
After upload quickstart package, please extract package by this command:
unzip file.zip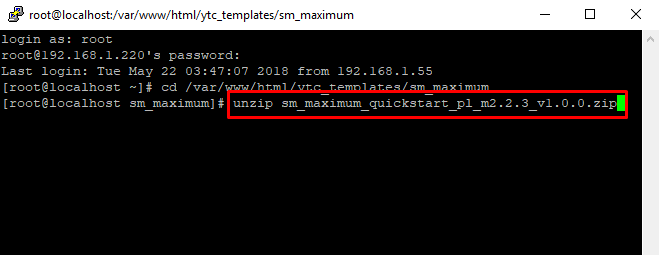
Manual Installation
Important!
- We recommend you to duplicate your live store on a development store and try installation on it in advance.
- Backup magento files and the store database.
It's very important to backup all of themes and extensions in Magento before installation, especially when you are working on a live server. We strongly recommend you to do not omit this step.- Note: Manual Installation can only import CMS Page and Static Block. Products, Categories, Megamenu may not display when you use Manual Installation, you need to configure manually (by yourself >> please read documentation carefully)
- Step 1: Download Magento 2.4.x
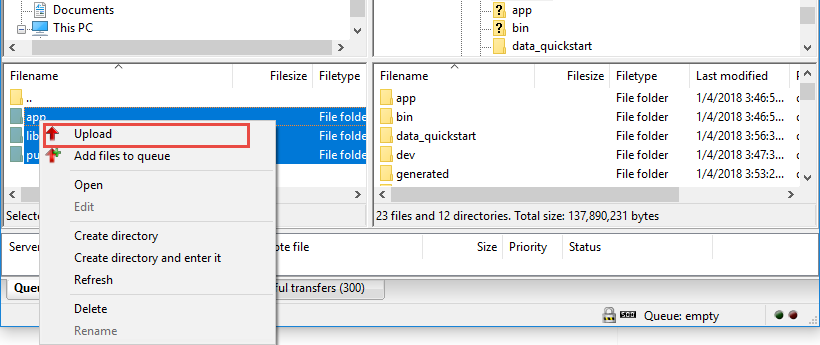
https://magento.com/tech-resources/downloadand install on your server - Step 2: Please download 'sm_maximum_theme_m2.1.x-2.4.x_v2.0.0.zip' file and upload to the root of your magento site folder on your server, after that unzip by command
unzip name_file.zip.
- Step 3:
Active SM Extensions, open command line in folder root of magento and run commands via ssh using putty or others
php bin/magento setup:upgrade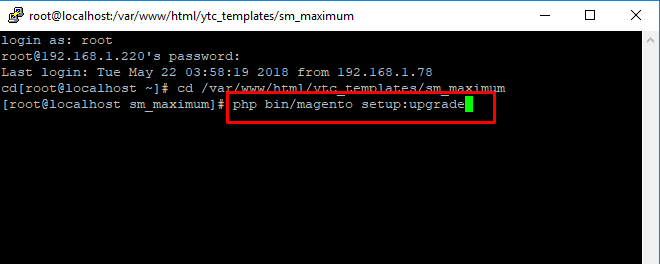
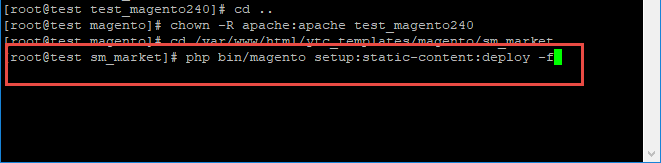
Step 4: Run deploy command: - Step 5:
Navigate to Content > Design > Configuration > Edit Default Store > Select "SM maximum" theme.
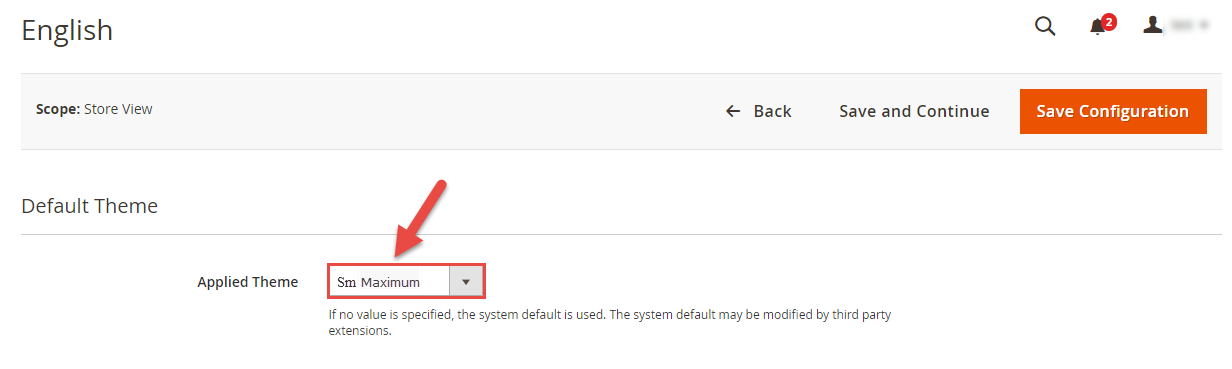
Important!
For Magento 2.2.4, 2.2.5: Something went wrong while saving this configuration: Area is already set. Don't worry, please click here to fix this issues - Step 5: Click "Save Configuarion" button to save your changes.
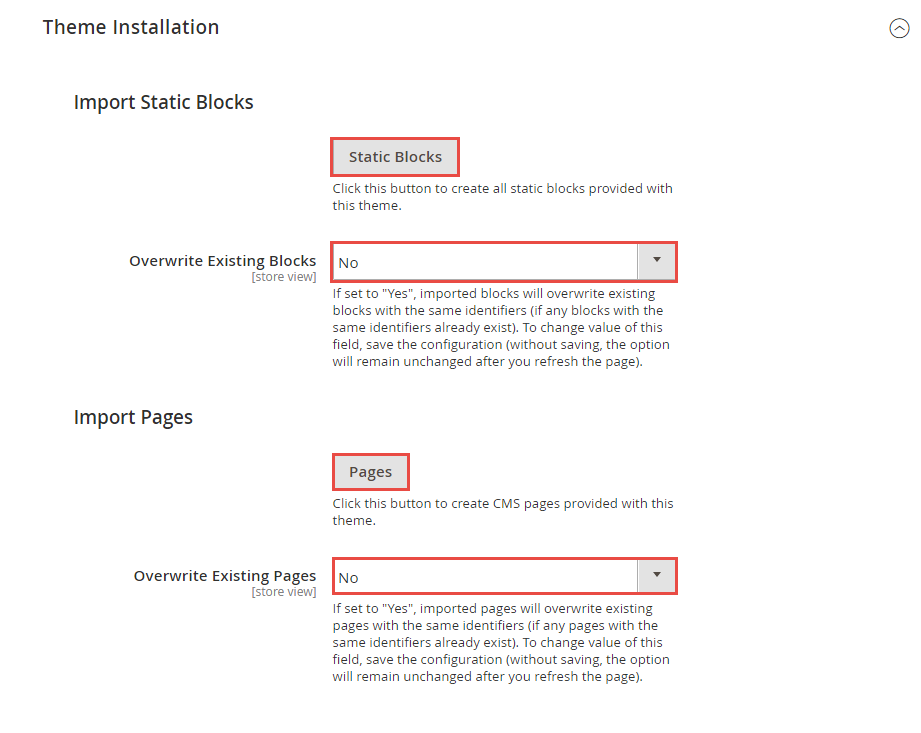
- Step 6: Navigate to Stores>> Settings>> Configuration >> MAGENTECH.COM >> Sm maximum >> Theme Installation. Press the buttons named 'Static Blocks' and 'Pages' to import all default blocks and pages. Click "Save Configuarion" button to save your changes.
- Step 7: Click "Demo X" button to install demo version that you prefer to install. After that, click "Save config" button on the top.

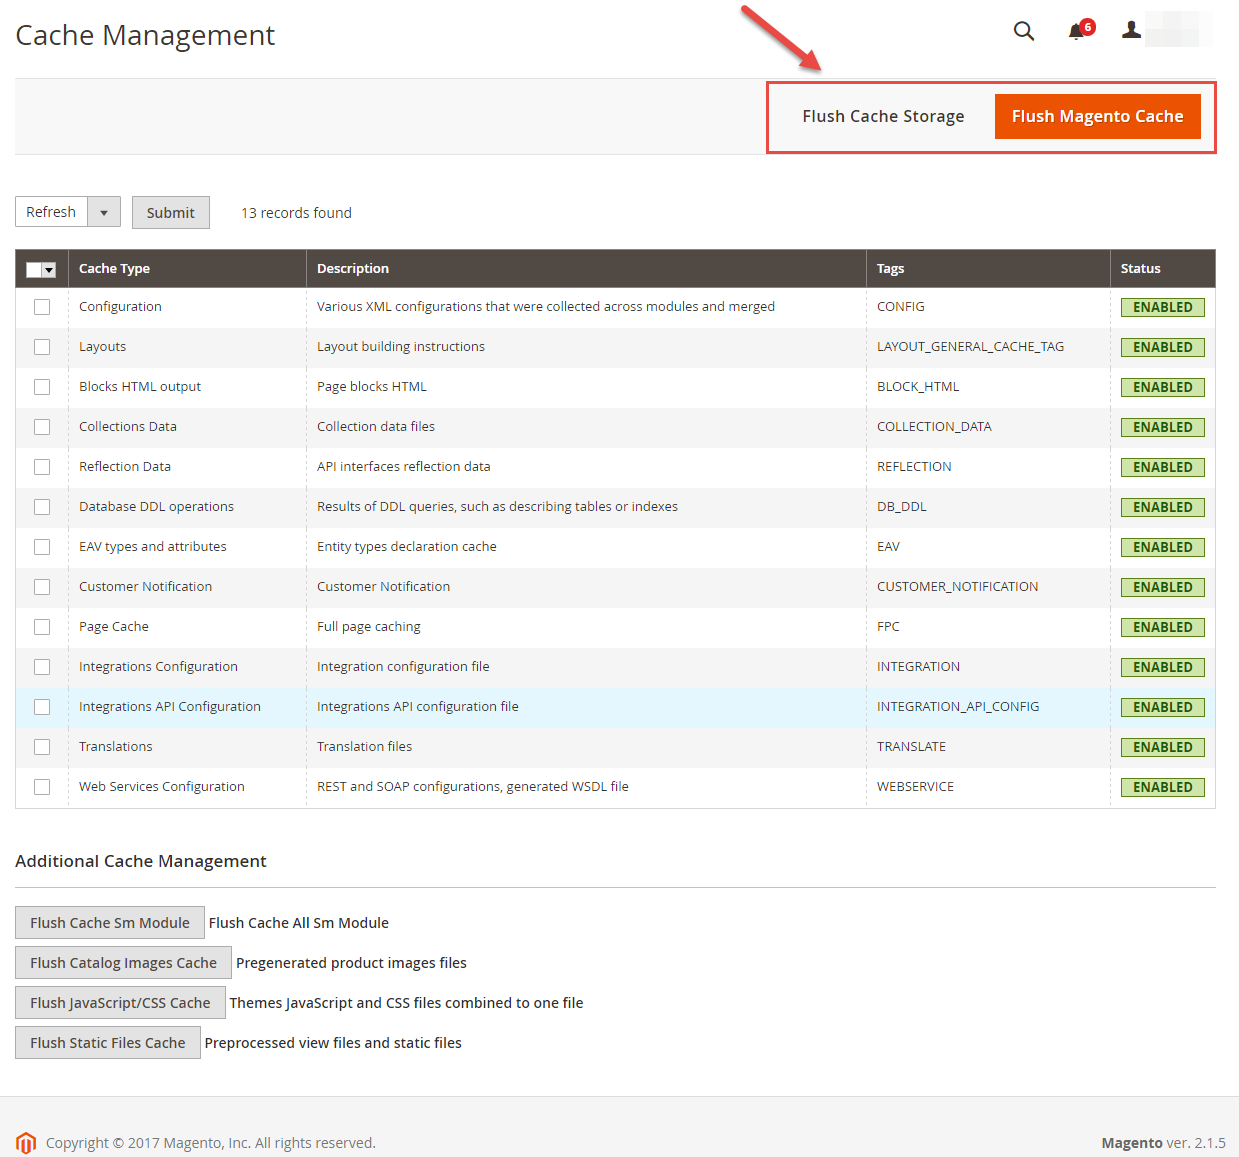
- Step 8: Flush Cache: After successfully import your demo, save Theme Settings and Design Settings and clear the cache by using this command as php bin/magento cache:flush
in Command Prompt. Or you could go to System >> Tools >> Cache Management, click 'Flush Cache Storage' button to flush all the cache.
- Step 9: Finally, go to front-end to view demo (example import demo 1).
Note: In front-end, you will see some extension don't display product as below image: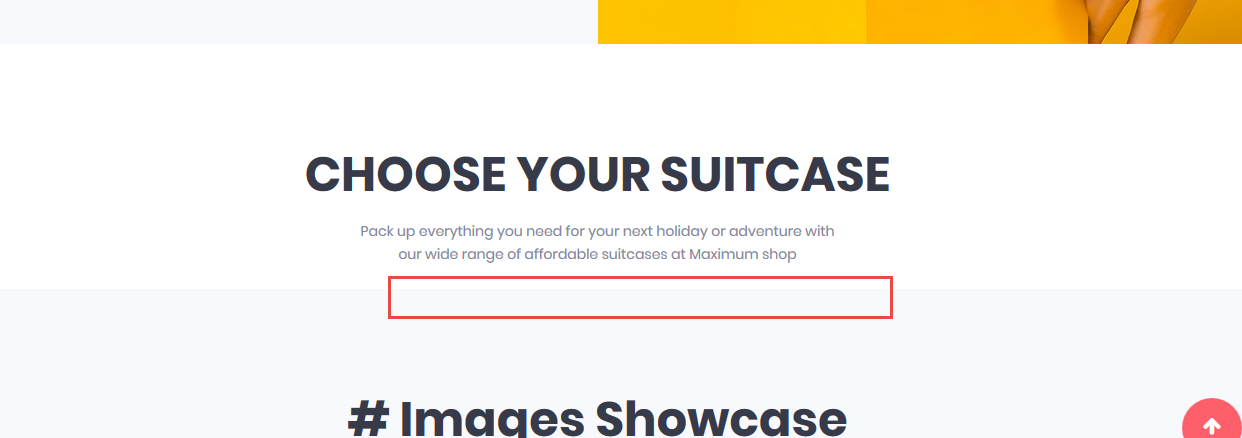
Because in some extension: SM Filter Products you must change id of categories that you created.
Please go to Admin Panel >> Content >> Elements >> Blocks and search identifier "id1-block3" >> Edit. In code content, search Filter product module and change id of categories as below image: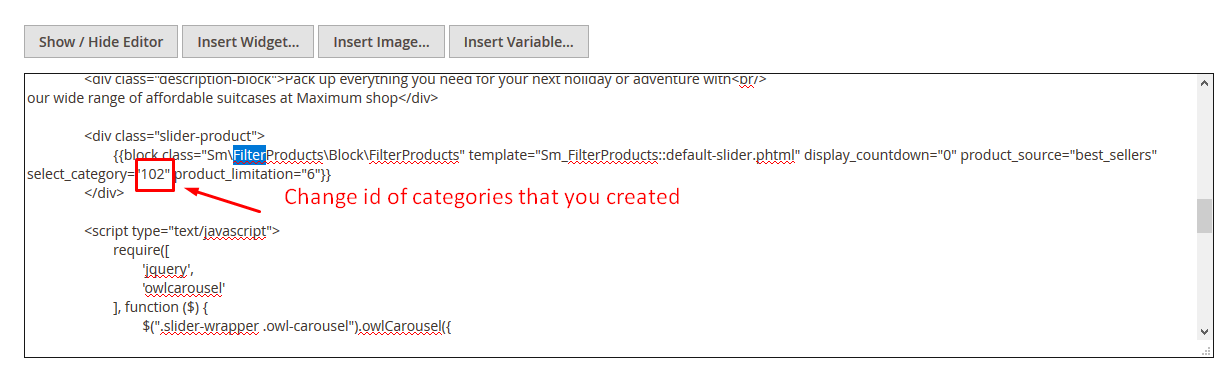
php bin/magento setup:static-content:deploy -f
chmod -R 777 pub
chmod -R 777 generated
chmod -R 777 var
Note. Please remember that: If you have imported these Static Blocks, Pages successfully, you would have all blocks and pages provided with this theme and you do not need to create any static blocks or pages manually as the following instruction of this document.
Layout Position
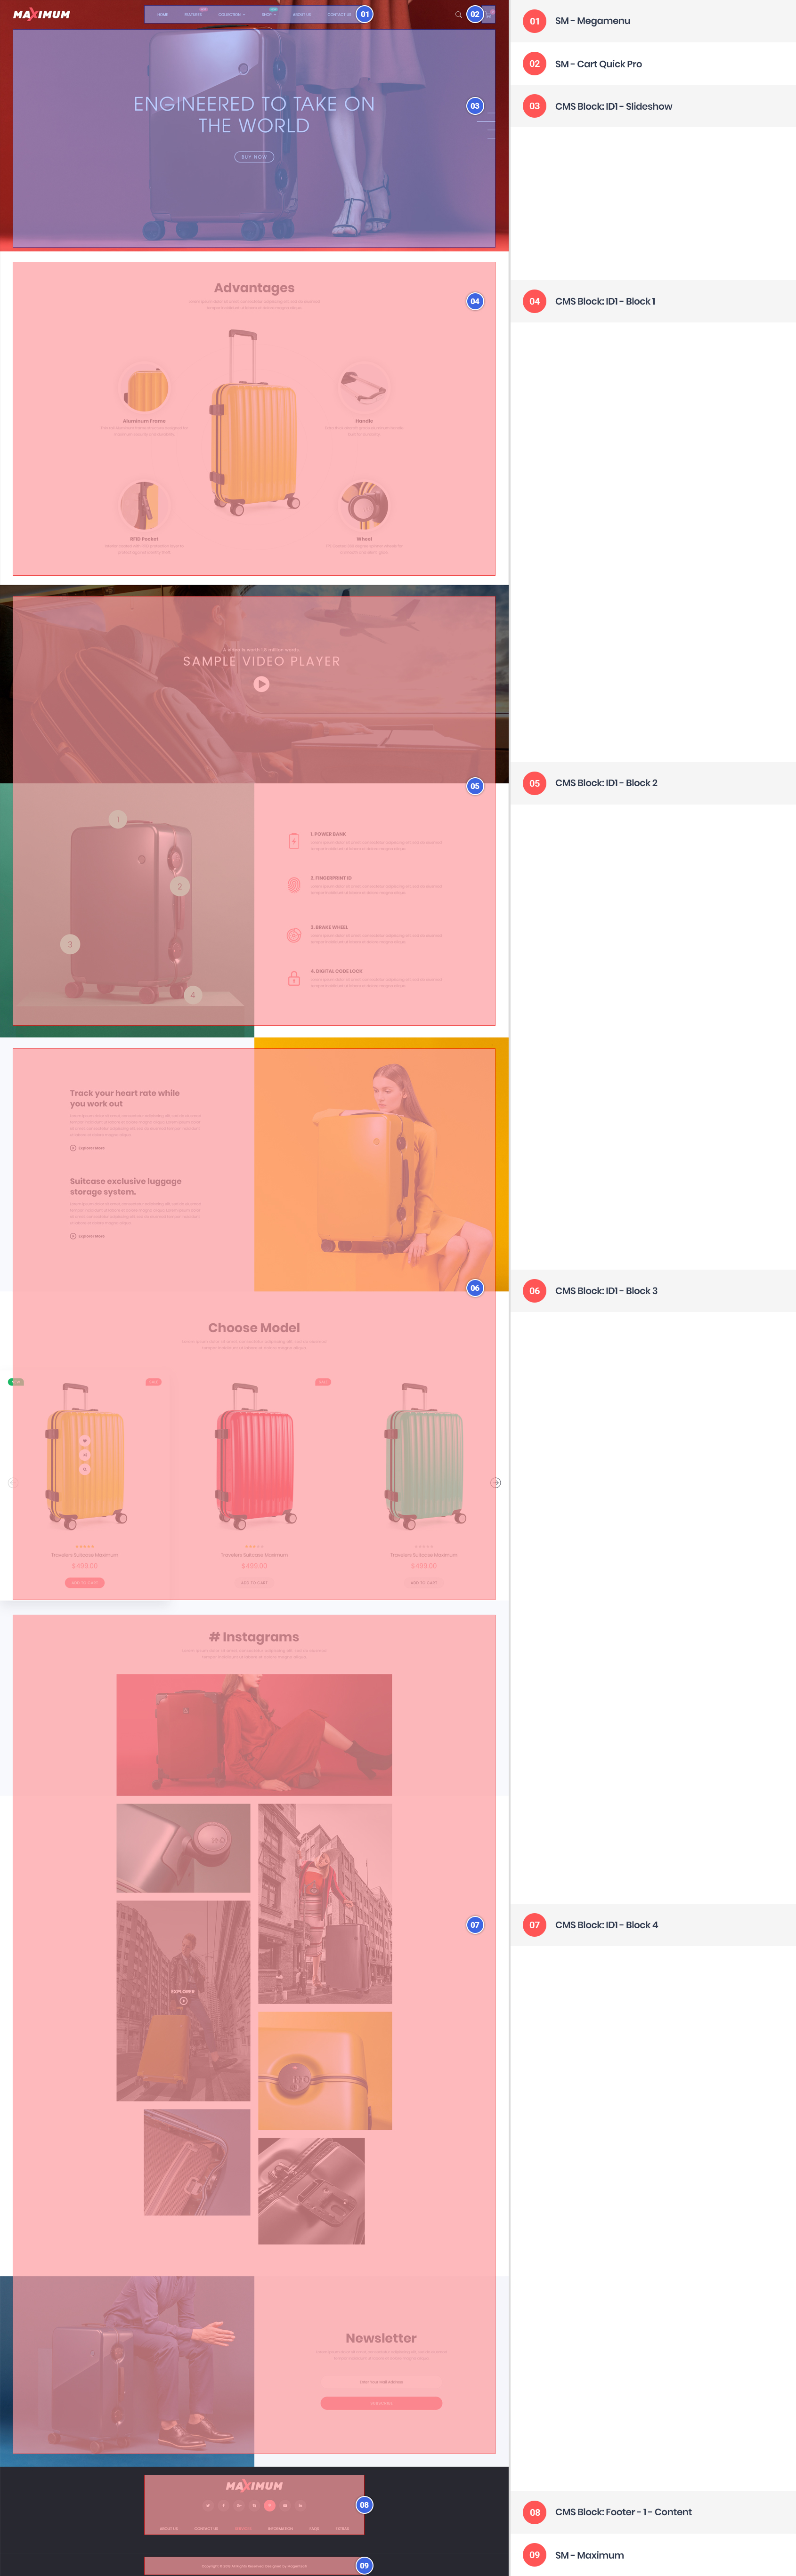 Home Style 1
Homepage Configuration
- To configure the default home page for your store, please go to Stores>> Settings >>Configuration>>General>>Web>>Default Pages tab, select the desired page in the CMS Home Page field and save configuration.
- You need to change to the website / store view that you want to change (the dropdown menu in the upper left corner). You will probably have to create a new CMS page if you want to have something different from your default home page.
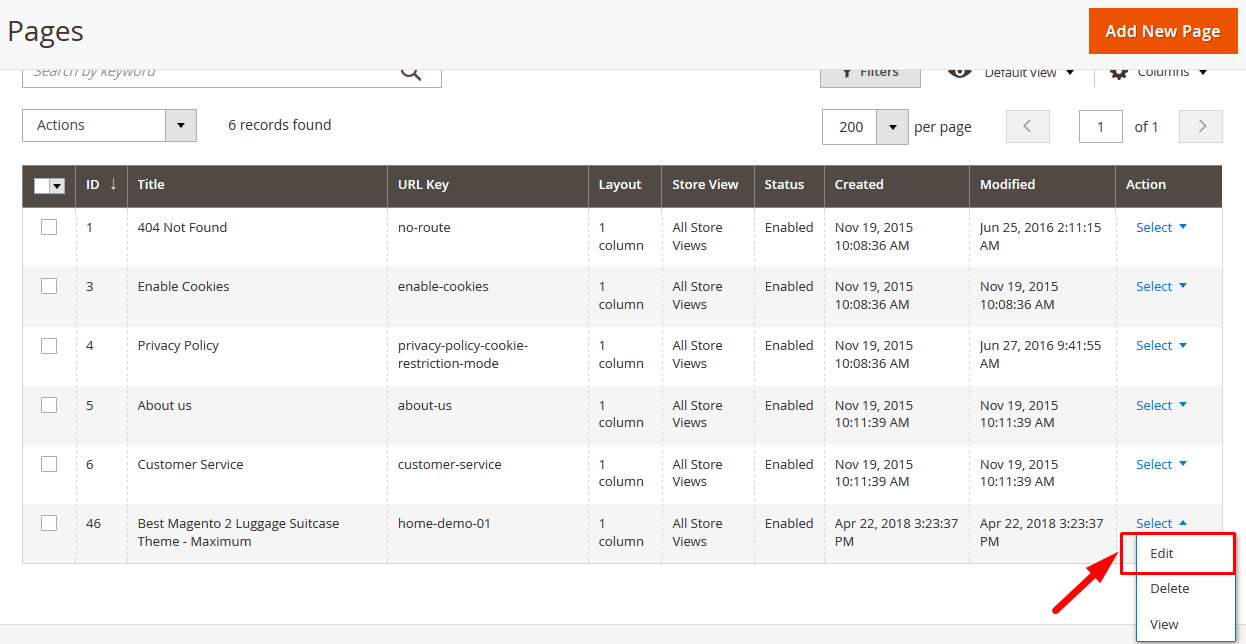
From the top menu, please select Content >> Elements >> Pages. Here you can find all the store pages that you have imported, so you don't need to add them. You only need to update the pages HTML and XML content as you wish.
- Step 1. Open any of them in order to get the access to the content.
- Step 2. Edit the content as you desire
- Step 3. Press Save Page button to save your configuration
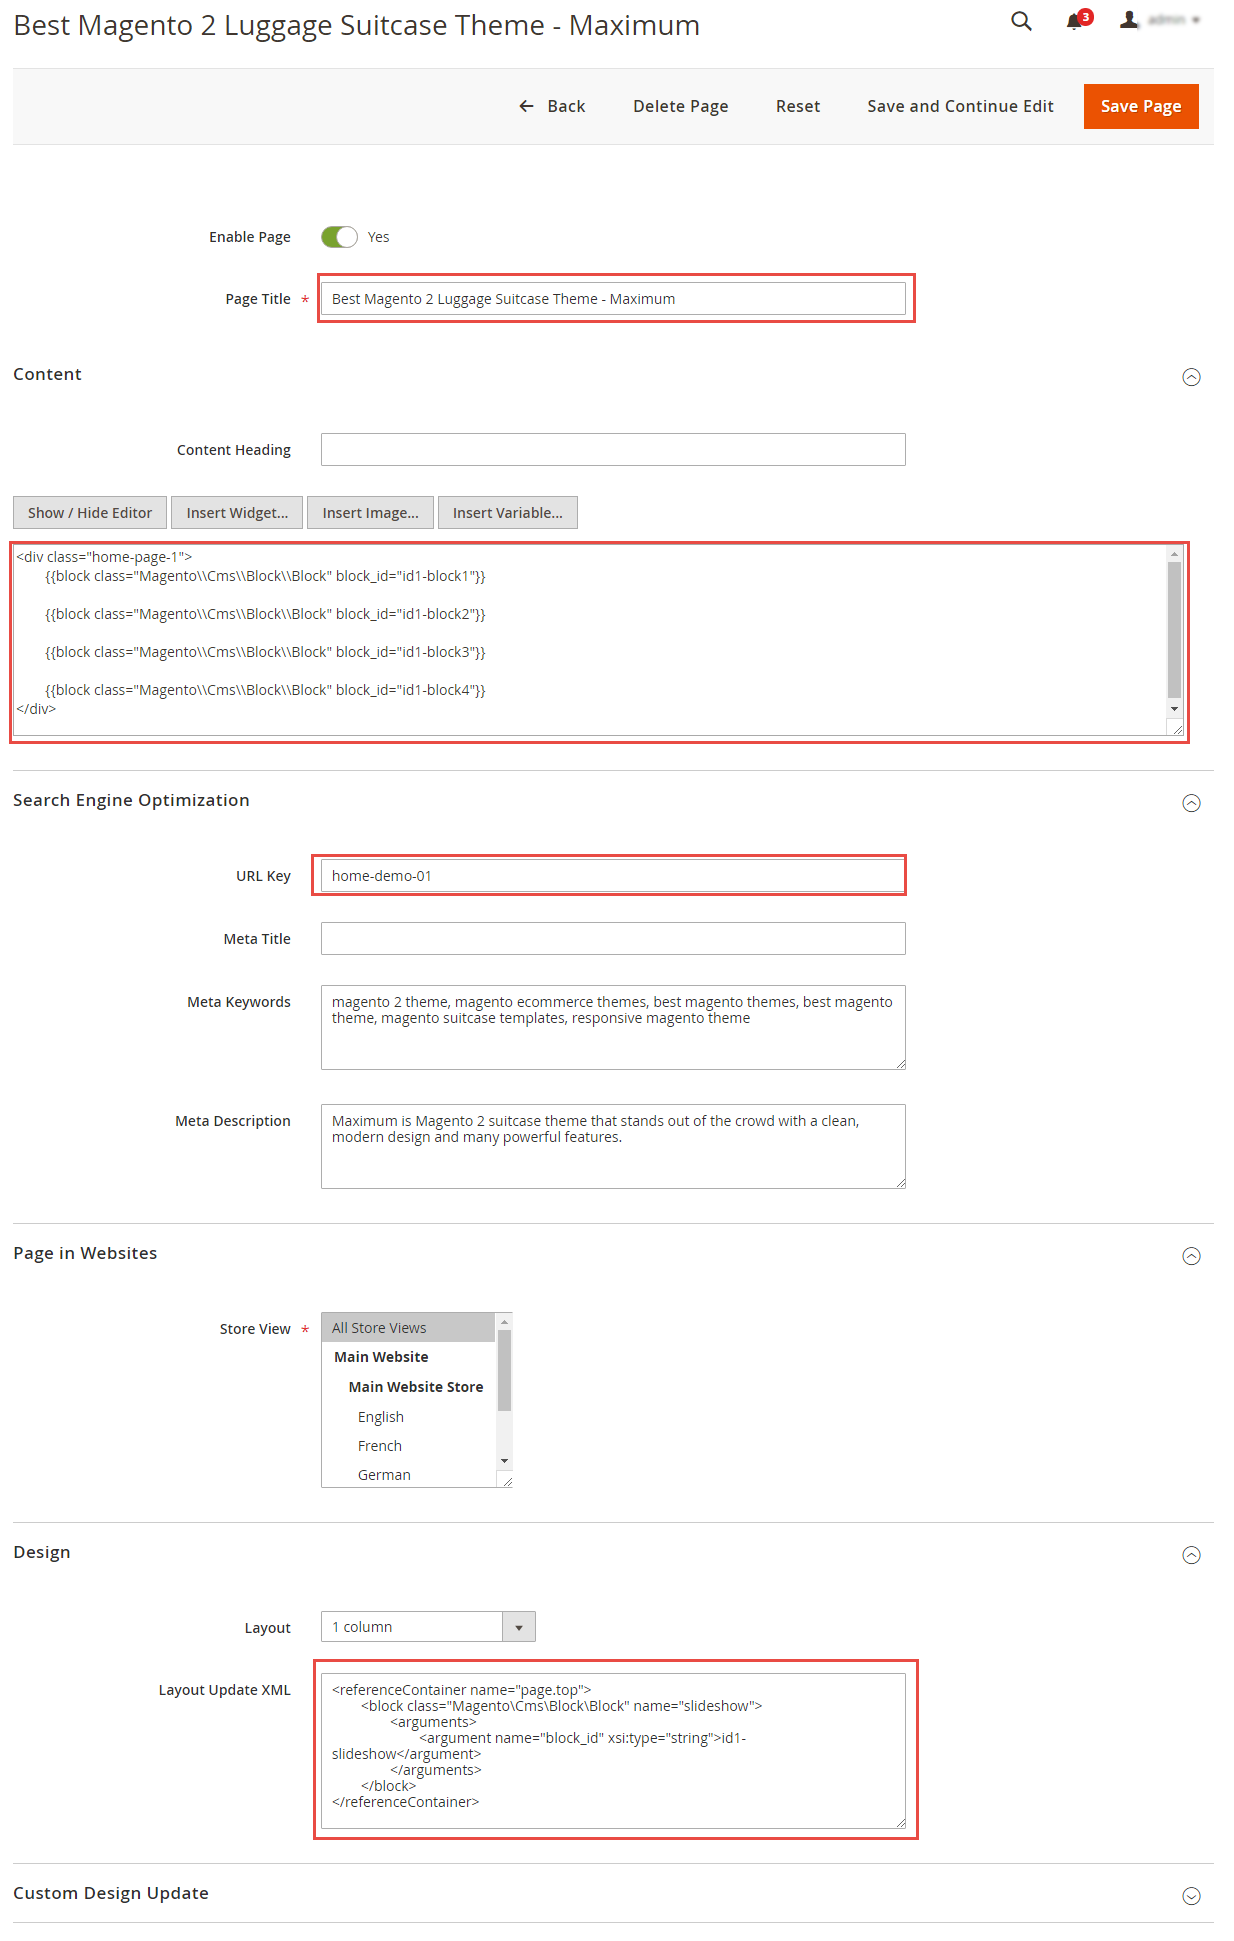

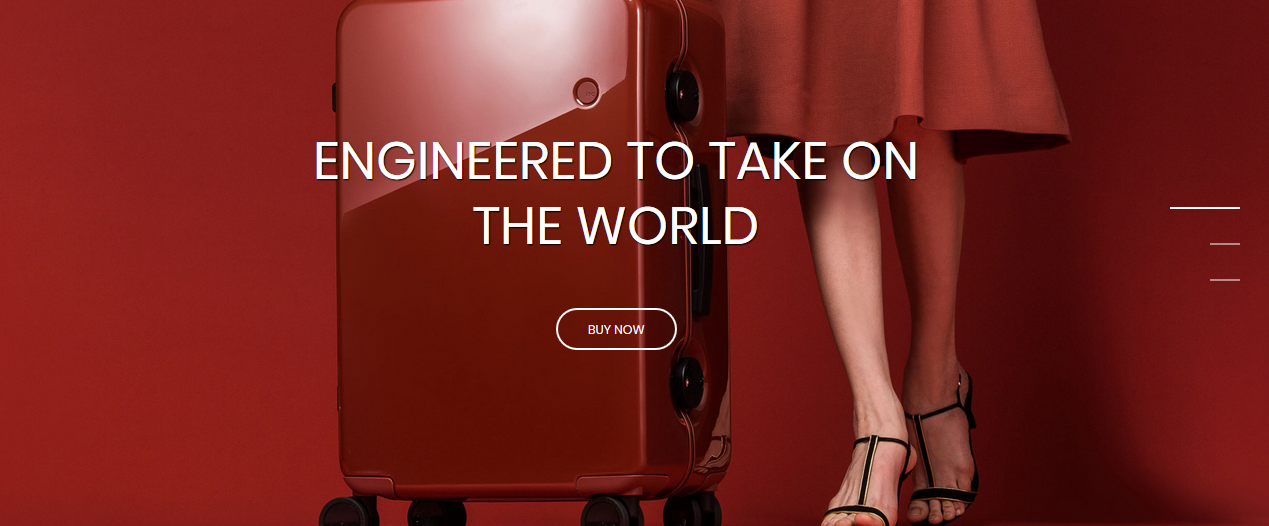
Please try to use below example code in your cms contents.
<div class="slidershow">
	<div class="owl-carousel">
		<div class="item">
			<a href="#" title="Slide 1"><img src="{{media url="wysiwyg/slideshow/home-1/item-1.jpg"}}" alt="Slide 1" /></a>

			<div class="description-slidershow zoom-out">
				<h2>ENGINEERED TO TAKE ON <br> THE WORLD</h2>
				<p><a class="btn-shopnow" href="#">Buy Now</a></p>
			</div>
		</div>

		<div class="item">
			<a href="#" title="Slide 2"><img src="{{media url="wysiwyg/slideshow/home-1/item-2.jpg"}}" alt="Slide 2" /></a>

			<div class="description-slidershow left-right">
				<h2>Elegant - stylish - handy <br> for gentlemen</h2>
				<p><a class="btn-shopnow" href="#">Buy Now</a></p>
			</div>
		</div>

		<div class="item">
			<a href="#" title="Slide 3"><img src="{{media url="wysiwyg/slideshow/home-1/item-3.jpg"}}" alt="Slide 3" /></a>

			<div class="description-slidershow top-bottom">
				<h2>Pack More - Save More <br> Explore More</h2>
				<p><a class="btn-shopnow" href="#">Buy Now</a></p>
			</div>
		</div>
	</div>

	<script type="text/javascript">
		require([
			'jquery',
			'owlcarousel'
		], function ($) {
			$(".slidershow .owl-carousel").owlCarousel({
				animateOut: 'fadeOut',
				animateIn: 'fadeIn',
				items:1,
				autoplay:true,
				loop:true,
				nav : false,
				dots: true,
				autoplaySpeed : 500,
				navSpeed : 500,
				dotsSpeed : 500,
				autoplayHoverPause: true,
				mouseDrag: false,
				touchDrag: true,
				margin:1,
			});
		});
	</script>
</div><referenceContainer name="page.top">
<block class="Magento\Cms\Block\Block" name="slideshow">
<arguments>
<argument name="block_id" xsi:type="string">id1-slideshow</argument>
</arguments>
</block>
</referenceContainer>
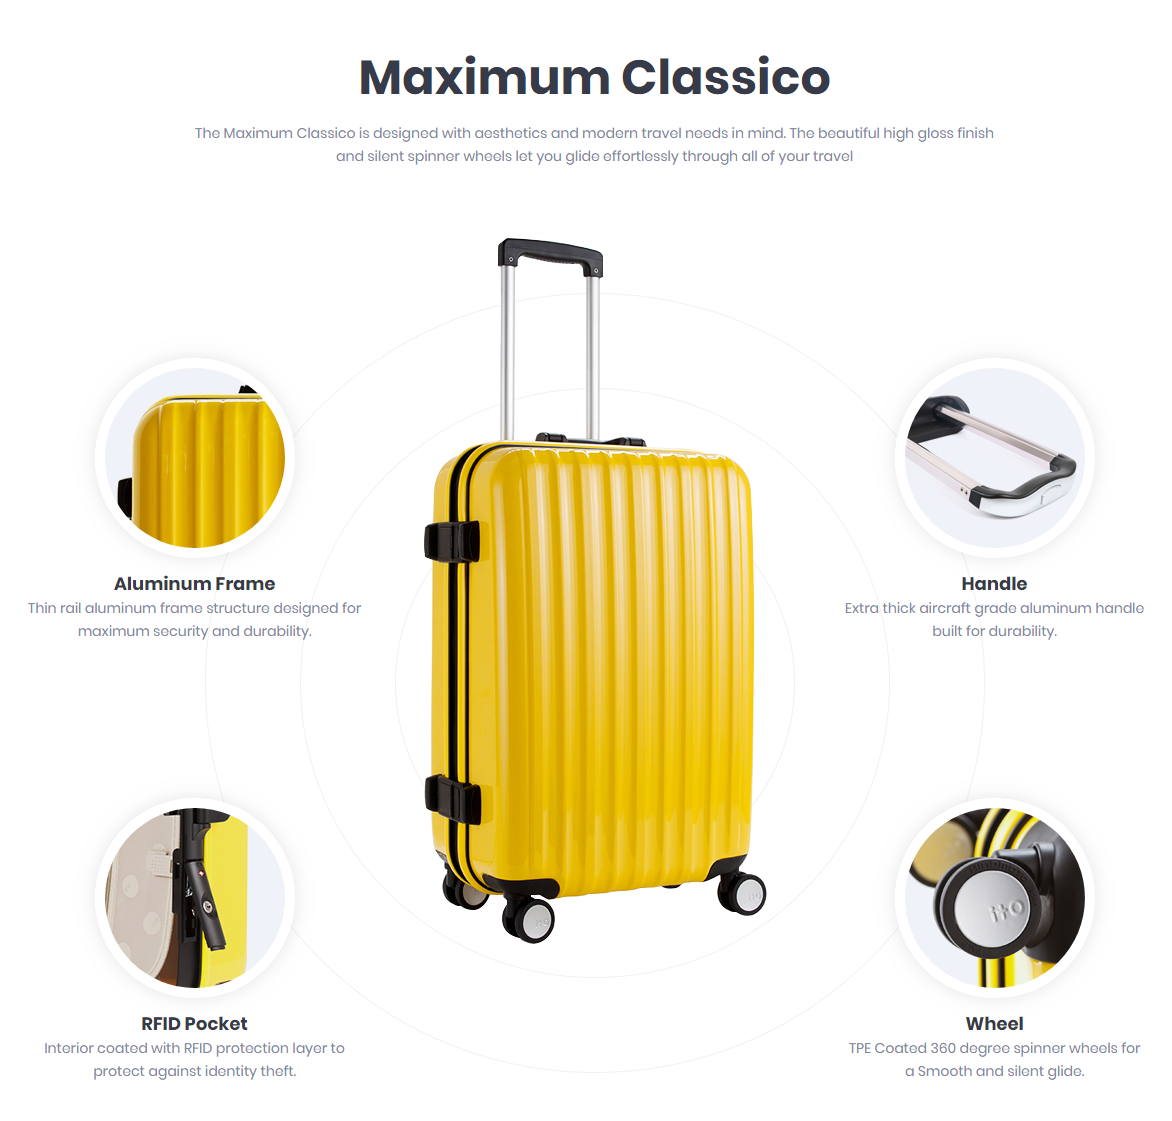
Please try to use below example code in your cms contents.
	<div class="container">
		<div class="advantages">
			<div class="title-block">
				<h2>Maximum Classico</h2>
			</div>

			<div class="description-block">The Maximum Classico is designed with aesthetics and modern travel needs in mind. The beautiful high gloss finish<br/>
and silent spinner wheels let you glide effortlessly through all of your travel</div>

			<div class="content-block">
				<div class="row">
					<div class="col-lg-4 col-md-4">
						<div class="item-block wow bounceInLeft" data-wow-delay="0.4s">
							<div class="image-item">
								<a href="#"><img src="{{media url="wysiwyg/hot-item/item-1.jpg"}}" alt="Item 1" /></a>
							</div>

							<div class="info-item">
								<h3><a href="#">Aluminum Frame</a></h3>
								<p>Thin rail aluminum frame structure designed for<br/>maximum security and durability.</p>
							</div>
						</div>

						<div class="item-block wow bounceInLeft" data-wow-delay="1.2s">
							<div class="image-item">
								<a href="#"><img src="{{media url="wysiwyg/hot-item/item-3.jpg"}}" alt="Item 1" /></a>
							</div>

							<div class="info-item">
								<h3><a href="#">RFID Pocket</a></h3>
								<p>Interior coated with RFID protection layer to<br/>protect against identity theft.</p>
							</div>
						</div>
					</div>

					<div class="col-lg-4 col-md-4">
						<div class="primary-item wow pulse" data-wow-iteration="5" data-wow-duration="0.3s" data-wow-delay="3s">
							<div class="image-primary">
								<a href="#"><img src="{{media url="wysiwyg/hot-item/big-image.png"}}" alt="Primary Image" /></a>
							</div>
						</div>
					</div>

					<div class="col-lg-4 col-md-4">
						<div class="item-block wow bounceInRight" data-wow-delay="0.8s">
							<div class="image-item">
								<a href="#"><img src="{{media url="wysiwyg/hot-item/item-2.jpg"}}" alt="Item 1" /></a>
							</div>

							<div class="info-item">
								<h3><a href="#">Handle</a></h3>
								<p>Extra thick aircraft grade aluminum handle<br/>built for durability.</p>
							</div>
						</div>

						<div class="item-block wow bounceInRight" data-wow-delay="1.6s">
							<div class="image-item">
								<a href="#"><img src="{{media url="wysiwyg/hot-item/item-4.jpg"}}" alt="Item 1" /></a>
							</div>

							<div class="info-item">
								<h3><a href="#">Wheel</a></h3>
								<p>TPE Coated 360 degree spinner wheels for<br/>a Smooth and silent  glide.</p>
							</div>
						</div>
					</div>
				</div>
			</div>
		</div>
</div> {{block class="Magento\\Cms\\Block\\Block" block_id="id1-block1"}}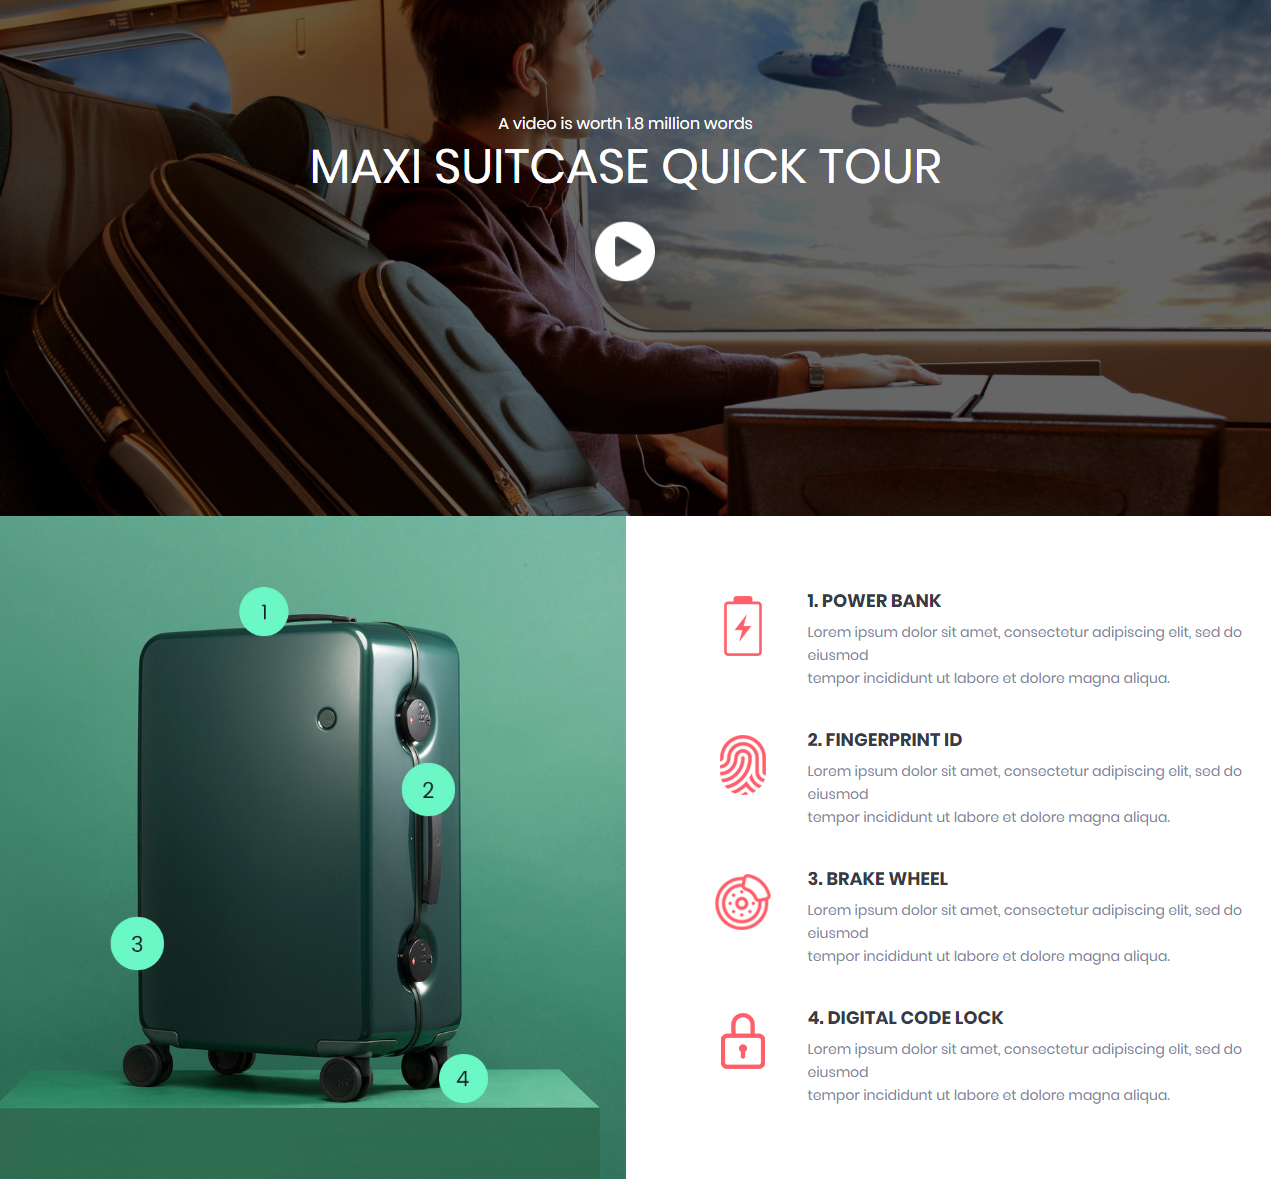
Please try to use below example code in your cms contents.
<div class="video-play">
		<div class="video-content">
			<img src="{{media url="wysiwyg/video/video-image.jpg"}}" alt="Video" />

			<div class="video-description">
				<p>A video is worth 1.8 million words</p>
				<h4>MAXI SUITCASE QUICK TOUR</h4>
				<a class="btn-play" href="https://www.youtube.com/watch?v=PQefqx7rAS4" title="Play">Play</a>
			</div>

			<script type="text/javascript">
				require([
					'jquery',
					'jqueryfancyboxpack',
					'jqueryfancyboxmedia'
				], function ($) {
					$('.btn-play').fancybox({
						openEffect	: 'elastic',
						closeEffect	: 'elastic',
						helpers : {
							media : {}
						}
					});
				});
			</script>
		</div>
	</div>

	<div class="product-features clearfix">
		<div class="image-features">
			<img src="{{media url="wysiwyg/features/image-feature.jpg"}}" alt="Features" />
		</div>

		<div class="info-features">
			<div class="features-item wow fadeInUp" data-wow-duration="0.3s" data-wow-delay="0.3s">
				<div class="icon-features">
					<img src="{{media url="wysiwyg/features/ico-feature-1.png"}}" alt="Features" />
				</div>

				<div class="description-features">
					<h5><a href="#">1. Power Bank</a></h5>
					<p>Lorem ipsum dolor sit amet, consectetur adipiscing elit, sed do eiusmod<br/>tempor incididunt ut labore et dolore magna aliqua.</p>
				</div>
			</div>

			<div class="features-item wow fadeInUp" data-wow-duration="0.3s" data-wow-delay="0.6s">
				<div class="icon-features">
					<img src="{{media url="wysiwyg/features/ico-feature-2.png"}}" alt="Features" />
				</div>

				<div class="description-features">
					<h5><a href="#">2. Fingerprint ID</a></h5>
					<p>Lorem ipsum dolor sit amet, consectetur adipiscing elit, sed do eiusmod<br/>tempor incididunt ut labore et dolore magna aliqua.</p>
				</div>
			</div>

			<div class="features-item wow fadeInUp" data-wow-duration="0.3s" data-wow-delay="0.9s">
				<div class="icon-features">
					<img src="{{media url="wysiwyg/features/ico-feature-3.png"}}" alt="Features" />
				</div>

				<div class="description-features">
					<h5><a href="#">3. Brake Wheel</a></h5>
					<p>Lorem ipsum dolor sit amet, consectetur adipiscing elit, sed do eiusmod<br/>tempor incididunt ut labore et dolore magna aliqua.</p>
				</div>
			</div>

			<div class="features-item wow fadeInUp" data-wow-duration="0.3s" data-wow-delay="1.2s">
				<div class="icon-features">
					<img src="{{media url="wysiwyg/features/ico-feature-4.png"}}" alt="Features" />
				</div>

				<div class="description-features">
					<h5><a href="#">4. Digital Code Lock</a></h5>
					<p>Lorem ipsum dolor sit amet, consectetur adipiscing elit, sed do eiusmod<br/>tempor incididunt ut labore et dolore magna aliqua.</p>
				</div>
			</div>
		</div>
</div> {{block class="Magento\\Cms\\Block\\Block" block_id="id1-block2"}}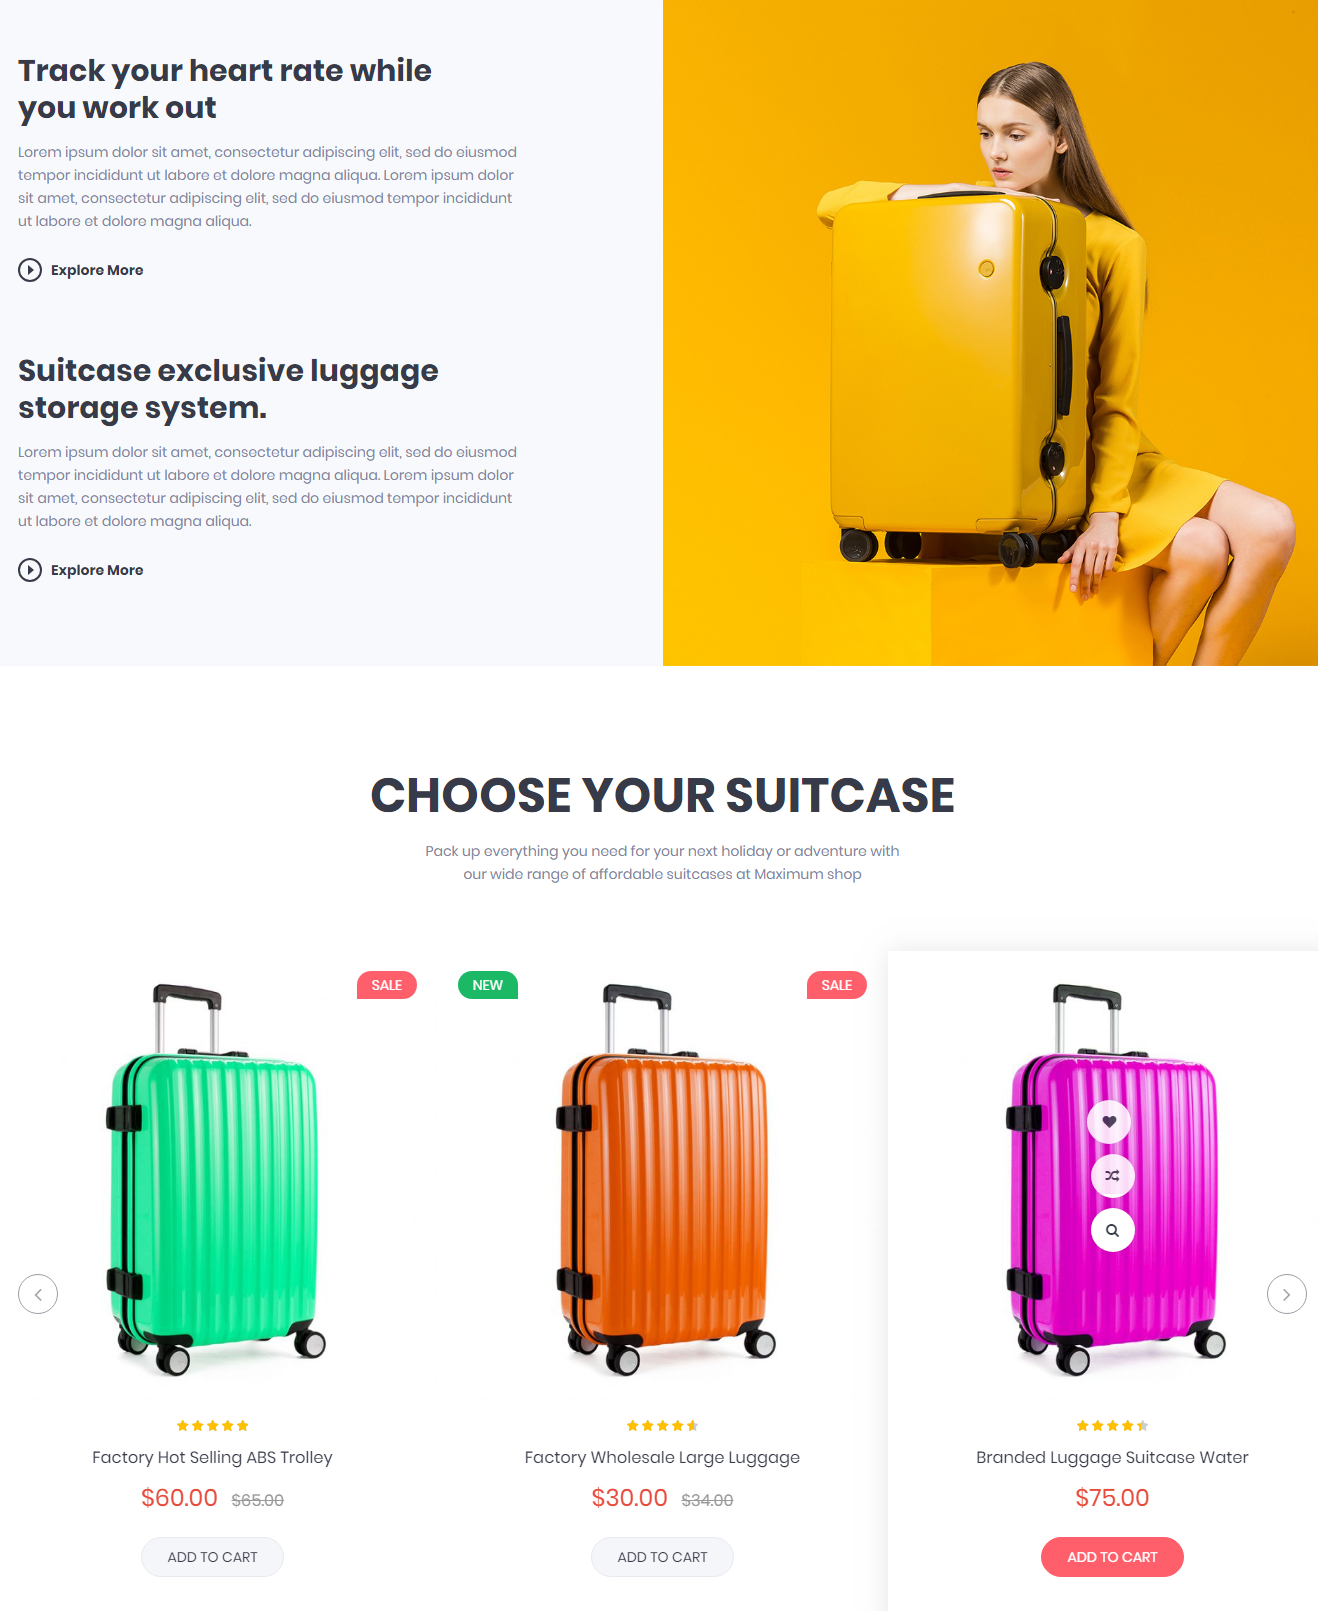
Please try to use below example code in your cms contents.
<div class="product-explore clearfix">
		<div class="image-explore">
			<img src="{{media url="wysiwyg/features/explore.jpg"}}" alt="Explore" />
		</div>

		<div class="explore-info">
			<div class="explore-info-content">
				<div class="content-item wow bounceInLeft" data-wow-delay="0.3s">
					<h4>Track your heart rate while<br/>you work out</h4>
					<p>Lorem ipsum dolor sit amet, consectetur adipiscing elit, sed do eiusmod<br/>
						tempor incididunt ut labore et dolore magna aliqua. Lorem ipsum dolor<br/>
						sit amet, consectetur adipiscing elit, sed do eiusmod tempor incididunt<br/>
						ut labore et dolore magna aliqua.
					</p>

					<a class="btn-explore" href="#">Explore More</a>
				</div>

				<div class="content-item wow bounceInRight" data-wow-delay="0.6s">
					<h4>Suitcase exclusive luggage<br/>storage system.</h4>
					<p>Lorem ipsum dolor sit amet, consectetur adipiscing elit, sed do eiusmod<br/>
						tempor incididunt ut labore et dolore magna aliqua. Lorem ipsum dolor<br/>
						sit amet, consectetur adipiscing elit, sed do eiusmod tempor incididunt<br/>
						ut labore et dolore magna aliqua.
					</p>

					<a class="btn-explore" href="#">Explore More</a>
				</div>
			</div>
		</div>
	</div>

	<div class="slider-product-container">
		<div class="title-block">
			<h2>CHOOSE YOUR SUITCASE</h2>
		</div>

		<div class="description-block">Pack up everything you need for your next holiday or adventure with<br/>
our wide range of affordable suitcases at Maximum shop</div>

		<div class="slider-product">
			{{block class="Sm\FilterProducts\Block\FilterProducts" template="Sm_FilterProducts::default-slider.phtml" display_countdown="0" product_source="best_sellers" select_category="102" product_limitation="6"}}
		</div>

		<script type="text/javascript">
			require([
				'jquery',
				'owlcarousel'
			], function ($) {
				$(".slider-wrapper .owl-carousel").owlCarousel({

					responsive:{
						0:{
							items:1
						},
						480:{
							items:2
						},
						768:{
							items:3
						},
						992:{
							items:3
						},
						1200:{
							items:3
						}
					},

					autoplay:false,
					loop:false,
					nav : true,
					dots: false,
					autoplaySpeed : 500,
					navSpeed : 500,
					dotsSpeed : 500,
					autoplayHoverPause: true,
					margin:1,
				});
			});
		</script>
	</div>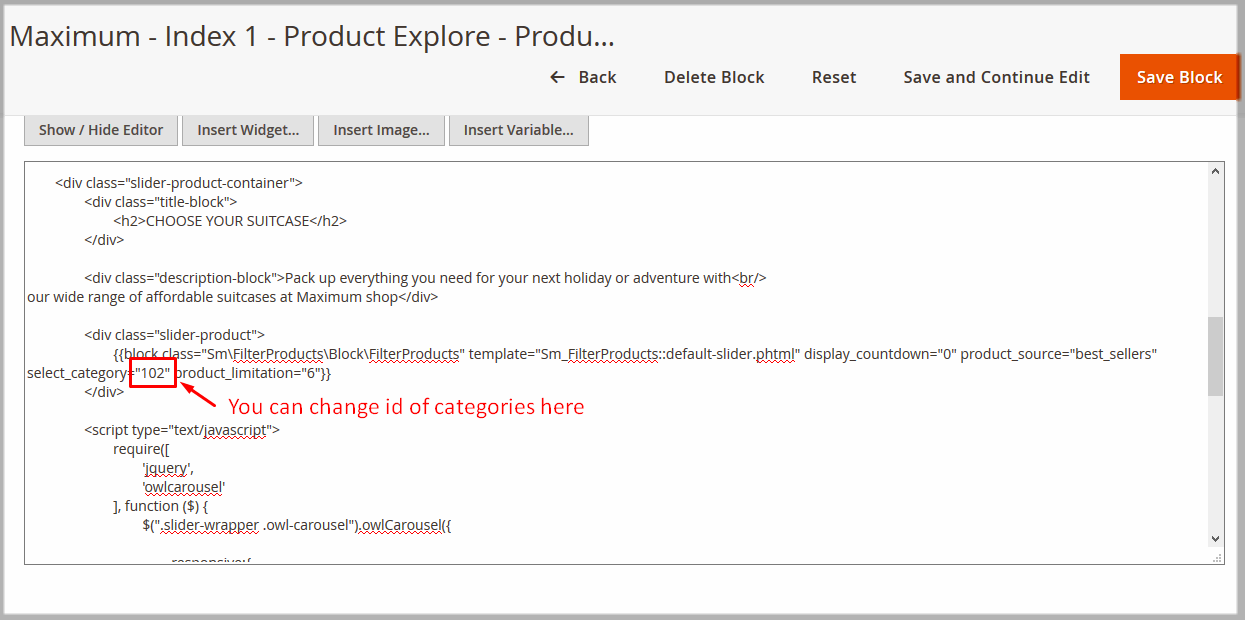
{{block class="Magento\\Cms\\Block\\Block" block_id="id1-block3"}}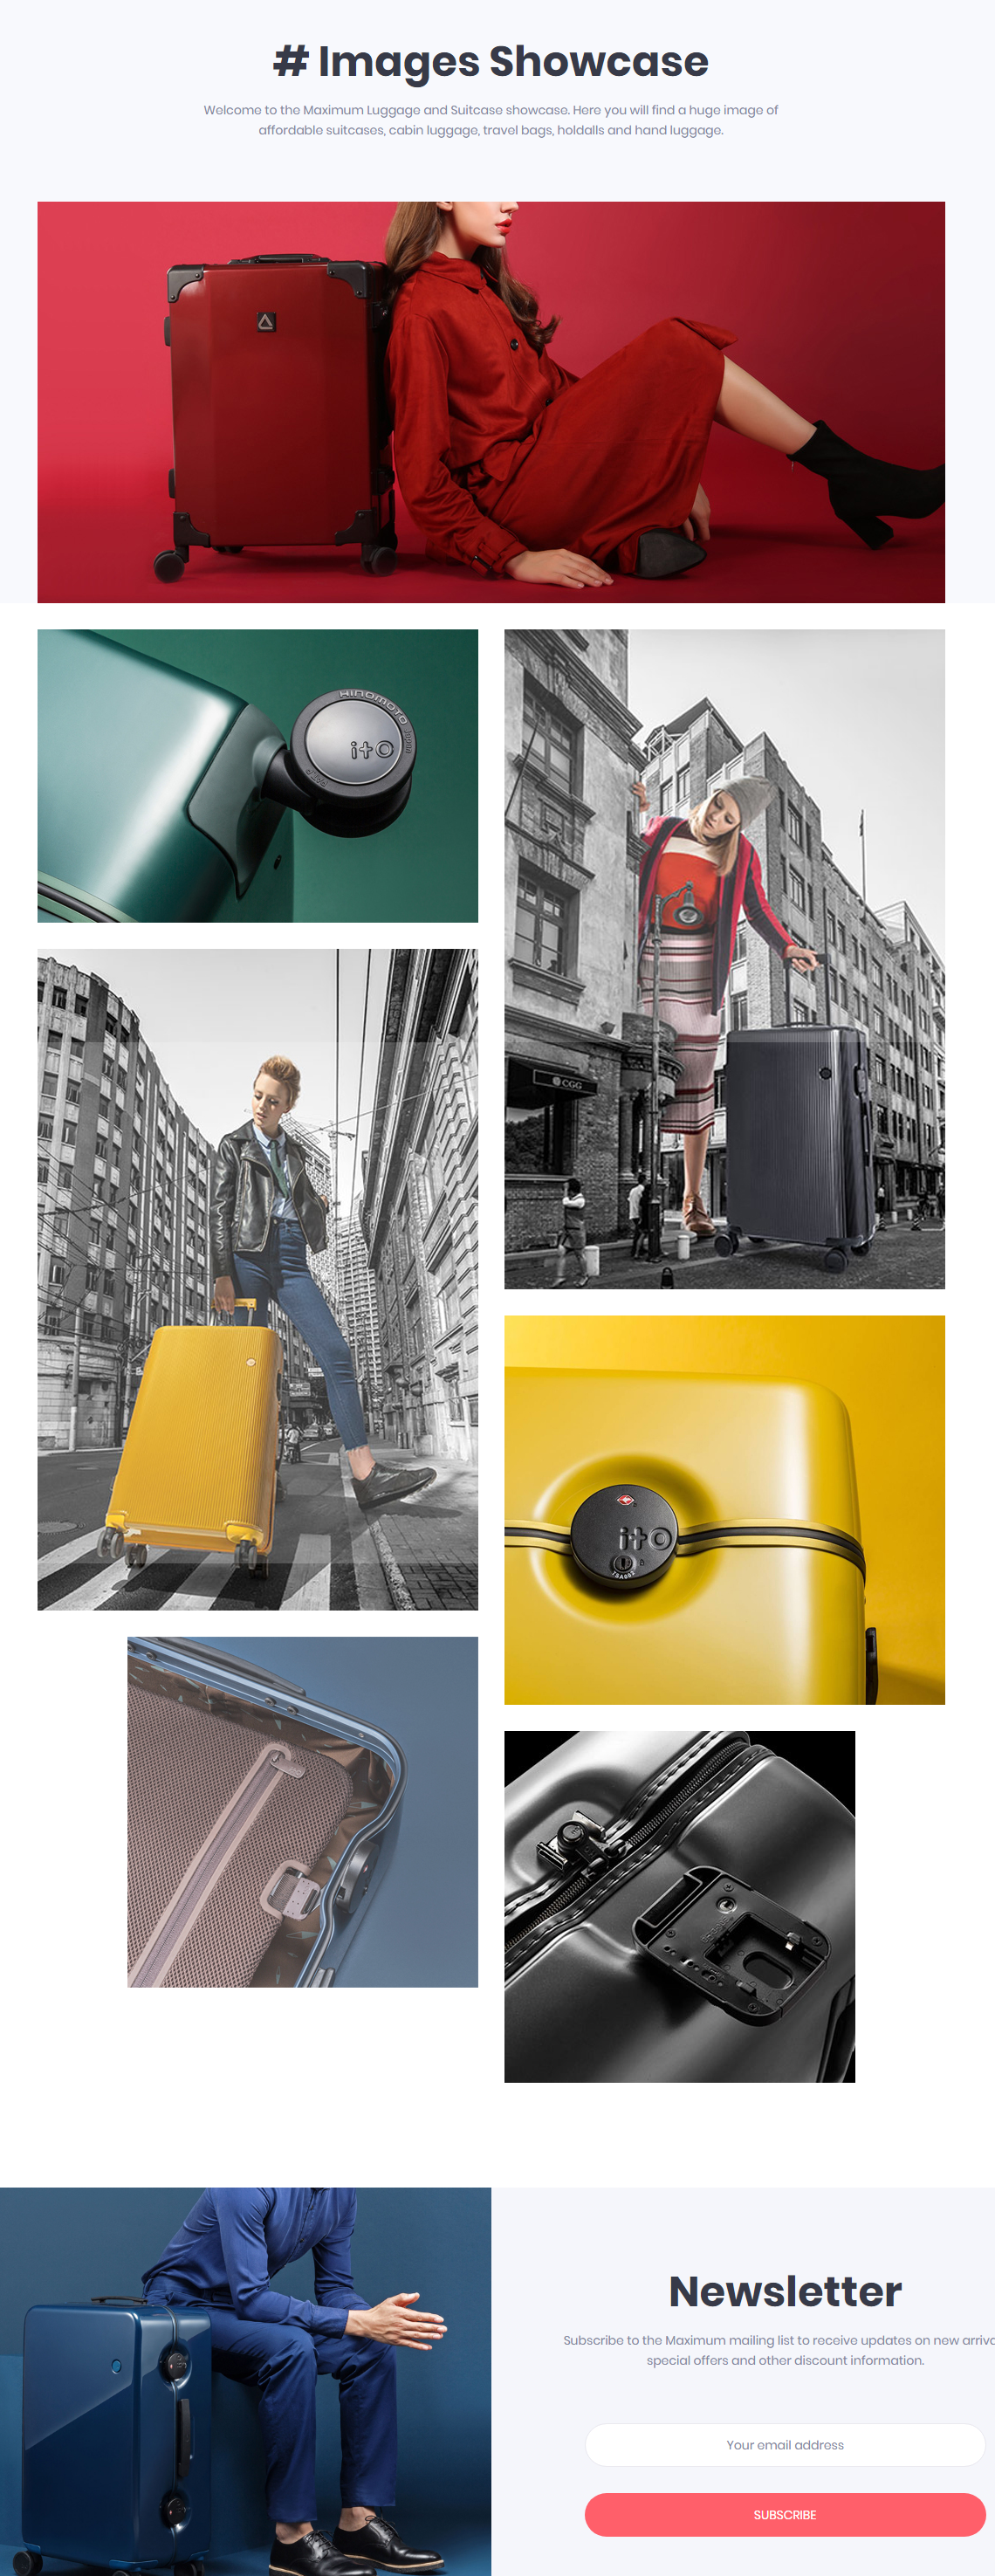
Please try to use below example code in your cms contents.
<div class="instagrams">
		<div class="ins-top-content">
			<div class="container">
				<div class="title-block">
					<h2># Images Showcase</h2>
				</div>

				<div class="description-block">Welcome to the Maximum Luggage and Suitcase showcase. Here you will find a huge image of<br/>
affordable suitcases, cabin luggage, travel bags, holdalls and hand luggage. </div>

				<div class="image-top">
					<a class="img-popup" rel="gallery" href="{{media url="wysiwyg/instagrams/item-1.jpg"}}"><img src="{{media url="wysiwyg/instagrams/item-1.jpg"}}" alt="Instagrams" /></a>
				</div>
			</div>
		</div>

		<div class="container">
			<div class="row">
				<div class="col-lg-6 col-md-6 col-sm-6 align-right">
					<div class="ins-item">
						<a class="img-popup" rel="gallery" href="{{media url="wysiwyg/instagrams/item-2.jpg"}}"><img src="{{media url="wysiwyg/instagrams/item-2.jpg"}}" alt="Instagrams" /></a>
					</div>

					<div class="ins-item">
						<a class="img-popup" rel="gallery" href="{{media url="wysiwyg/instagrams/item-3.jpg"}}"><img src="{{media url="wysiwyg/instagrams/item-3.jpg"}}" alt="Instagrams" /></a>
					</div>

					<div class="ins-item">
						<a class="img-popup" rel="gallery" href="{{media url="wysiwyg/instagrams/item-4.jpg"}}"><img src="{{media url="wysiwyg/instagrams/item-4.jpg"}}" alt="Instagrams" /></a>
					</div>
				</div>

				<div class="col-lg-6 col-md-6 col-sm-6 align-left">
					<div class="ins-item">
						<a class="img-popup" rel="gallery" href="{{media url="wysiwyg/instagrams/item-5.jpg"}}"><img src="{{media url="wysiwyg/instagrams/item-5.jpg"}}" alt="Instagrams" /></a>
					</div>

					<div class="ins-item">
						<a class="img-popup" rel="gallery" href="{{media url="wysiwyg/instagrams/item-6.jpg"}}"><img src="{{media url="wysiwyg/instagrams/item-6.jpg"}}" alt="Instagrams" /></a>
					</div>

					<div class="ins-item">
						<a class="img-popup" rel="gallery" href="{{media url="wysiwyg/instagrams/item-7.jpg"}}"><img src="{{media url="wysiwyg/instagrams/item-7.jpg"}}" alt="Instagrams" /></a>
					</div>
				</div>
			</div>

			<script type="text/javascript">
				require([
					'jquery',
					'jqueryfancyboxpack'
				], function ($) {
					$(".img-popup").fancybox({
						openEffect	: 'elastic',
						closeEffect	: 'elastic'
					});
				});
			</script>
		</div>
	</div>

	<div class="newsletter-container clearfix">
		<div class="newsletter-image">
			<a href="#"><img src="{{media url="wysiwyg/newsletter/item-1.jpg"}}" alt="Newsletter" /></a>
		</div>

		<div class="newsletter-info">
			<div class="title-block">
				<h2>Newsletter</h2>
			</div>

			<div class="description-block">Subscribe to the Maximum mailing list to receive updates on new arrivals<br/>special offers and other discount information.</div>

			{{block class="Magento\Newsletter\Block\Subscribe" template="subscribe-home.phtml"}}
		</div>
	</div>
{{block class="Magento\\Cms\\Block\\Block" block_id="id1-block4"}}Theme Setting
In Magento admin panel, navigate to Stores >> Settings >> Configuration >> MAGENTECH.COM >> SM Maximum and configure its settings as you want.
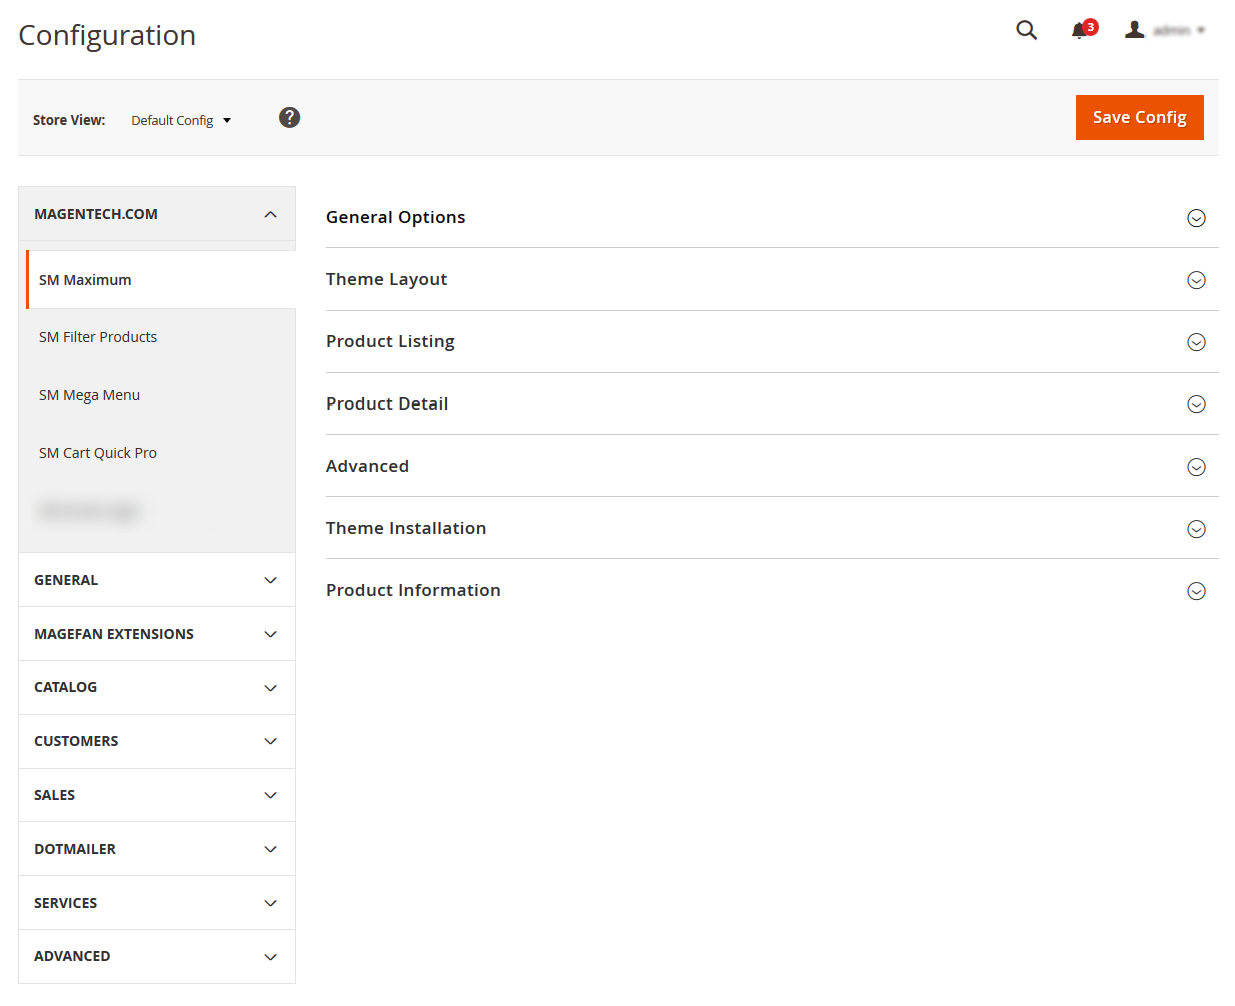
Please click Here to view the theme settings.
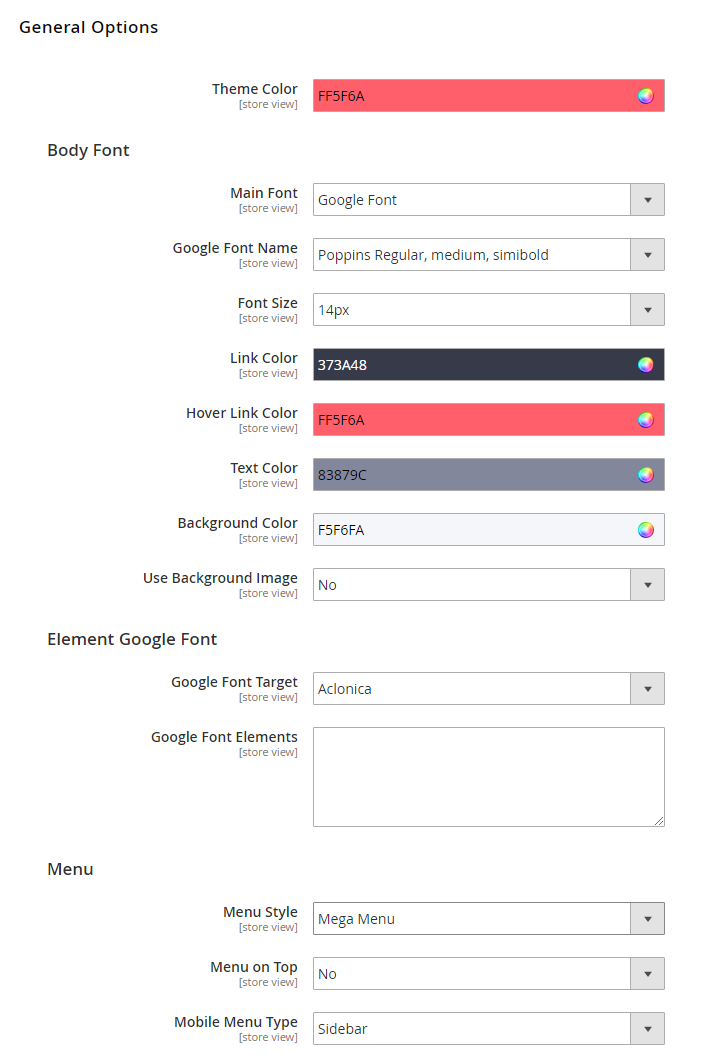
Theme Color: In this option, you can set main color of entire page.
Body Font
In these options, you can change main font, font size, link color, text color, background, etc.
Menu
Menu Style: This theme support mega menu and css menu. You can select a menu style that you want.
Menu on Top: Choose "Yes" to turn on "Sticky Menu" feature, the menu will be fixed on top when scroll down the page.
Mobile Menu Type: This theme support sidebar menu and collapse on mobile. You can select a menu style that you want.
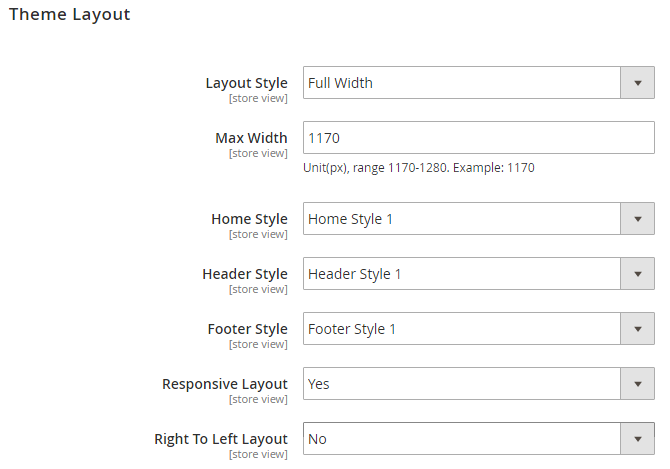
Layout Style: This theme support boxed and full width layout. You can select a layout style that you want.
Responsive Layout: Choose "Yes" to show responsive layout for each type of devices.
Right To Left Layout: This theme support right to left layout. Choose "Yes" to view.
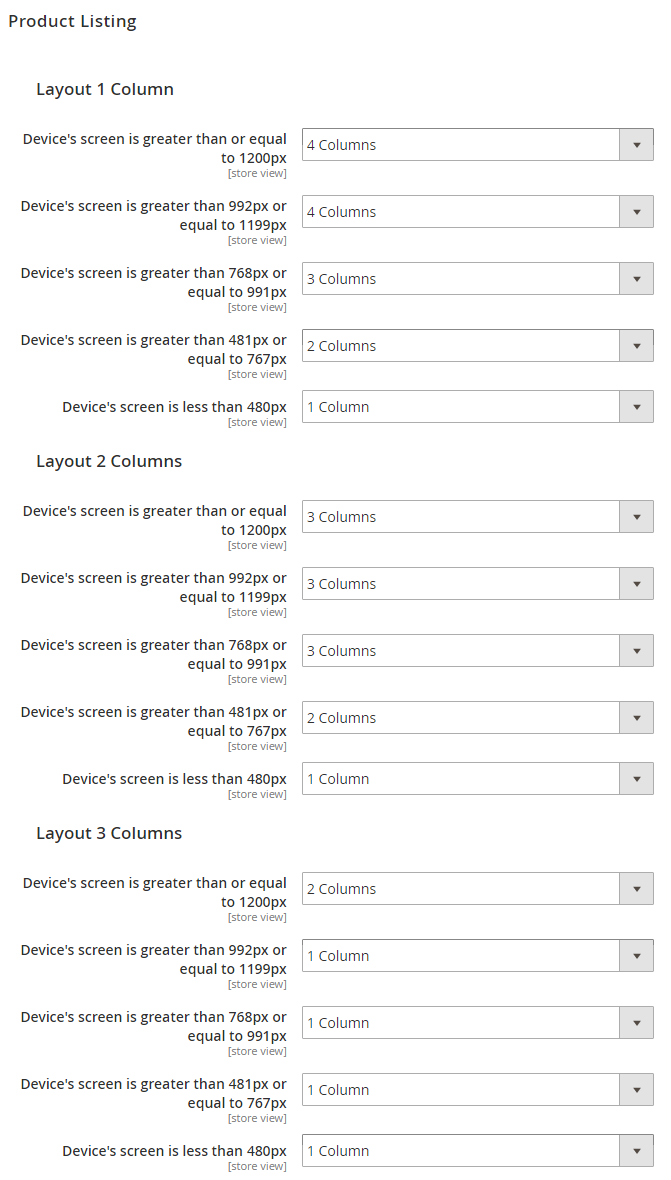
We provides flexible grid system includes: layout 1 column, layout 2 columns, layout 3 columns. You can change product's quantity per row to fit each screen.
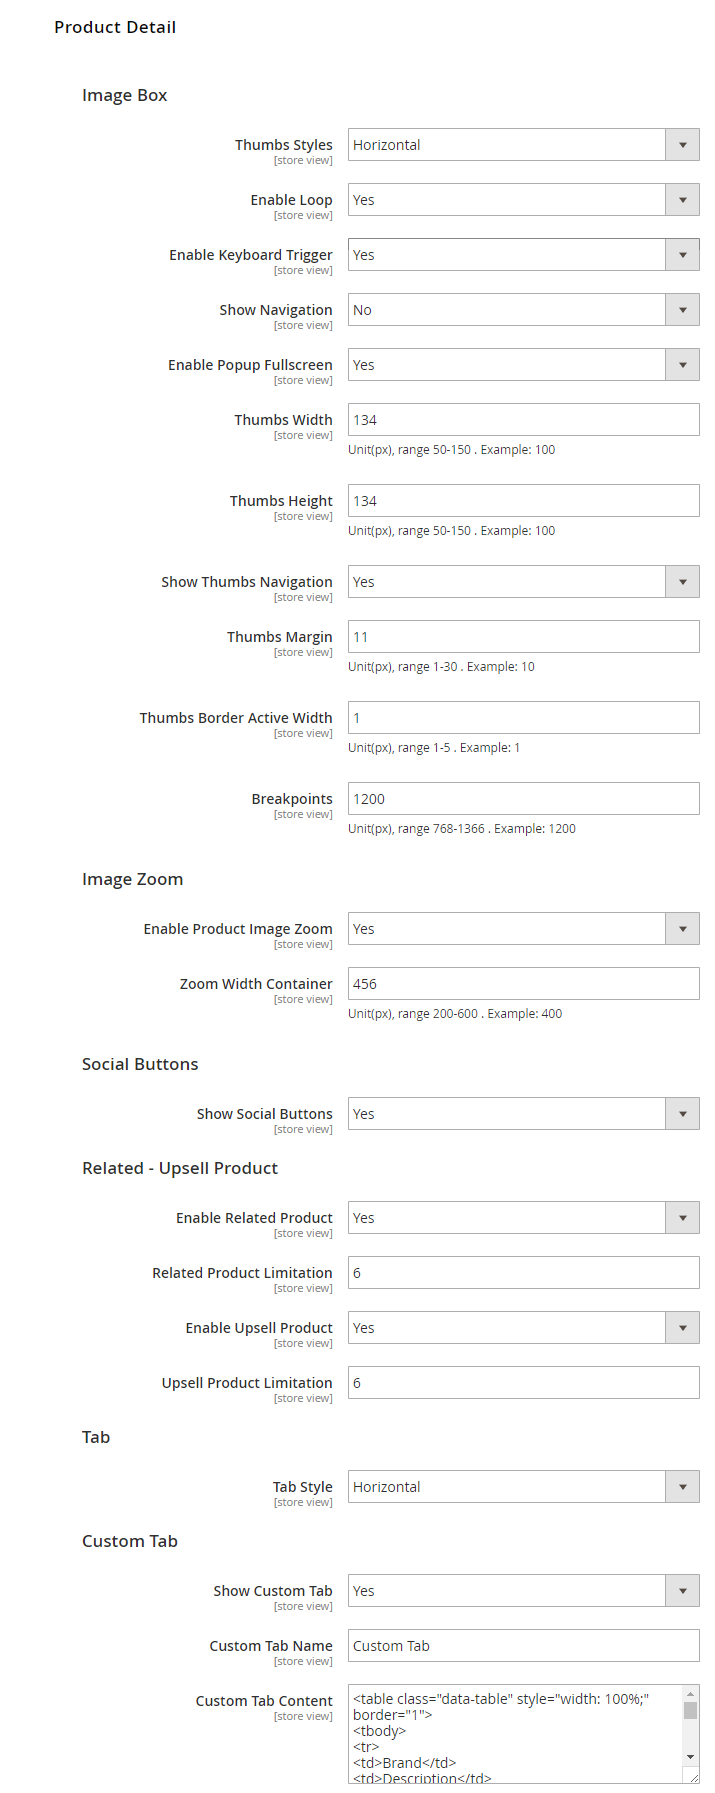
Image Box
Thumbs Styles: This option allow you choose thumb style types that you want.
Enable Loop: Choose "Yes" to repeat your loop.
Enable Keyboard Trigger: Choose "Yes/No" to "Enable/Disable" keyboard trigger feature.
Show Navigation: Choose "Yes/No" to "Show/Hide" navigation.
Enable Popup Fullscreen: Choose "Yes" to show fullscreen popup when you mouse click on the product detail.
Show Thumbs Navigation: Choose "Yes/No" to "Show/Hide" thumb navigation.
Thumbs Margin: Distance between the thumb images.
Thumbs Border Active Width: You can change width of thumb boder when active.
Breakpoints: Breakpoints are used to set up the screen width at which the design of thumbnails changes.
Image Zoom
Enable Product Image Zoom: Choose "Yes/No" to "Allow/Not Allow" show product image zoom when you mouse hover on the product image.
Social Buttons
Show social buttons: Choose "Yes/No" to "Show/Hide" social button in detail page.
Related - Upsell Product
In these options, you can choose "Yes/No" to "Show/Hide" and set limit quantity for related and upsell products.
Tab
Choose tab style types that you want.
Custom Tab
Choose "Yes", you can change name and add content for Custom Tab.
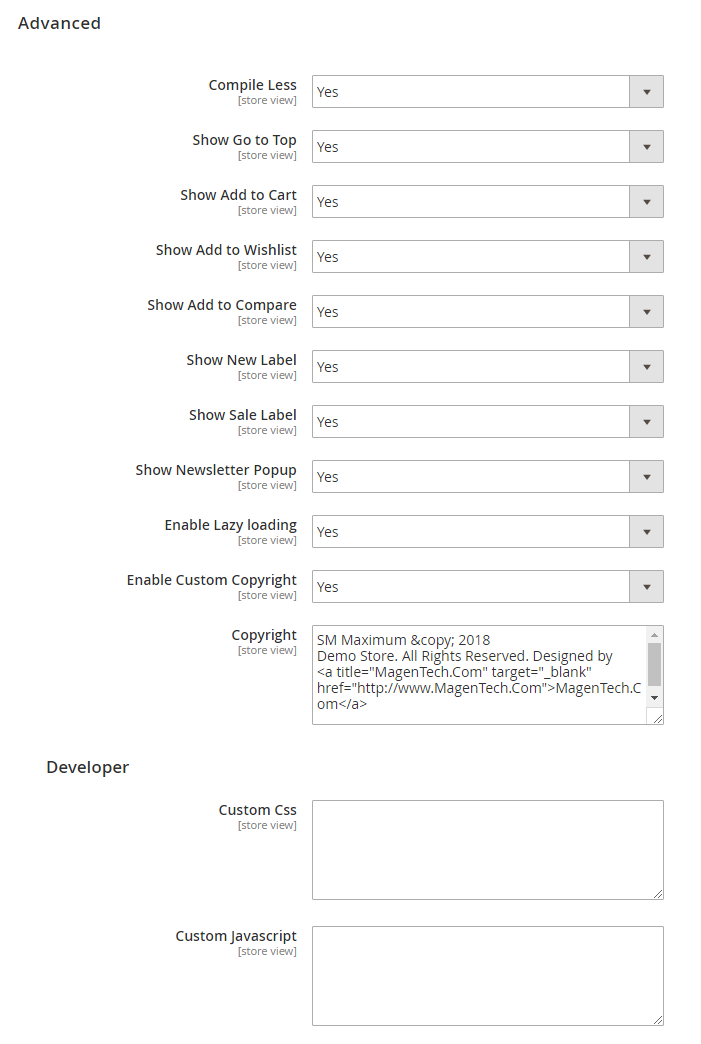
Advanced
Choose "Yes/No" to "Show/Hide" Go to Top, Add to Cart, Add to Wishlist, Add to Compare, Newsletter Popup, Copyright, etc.
Developer
To custom Css or Javascript
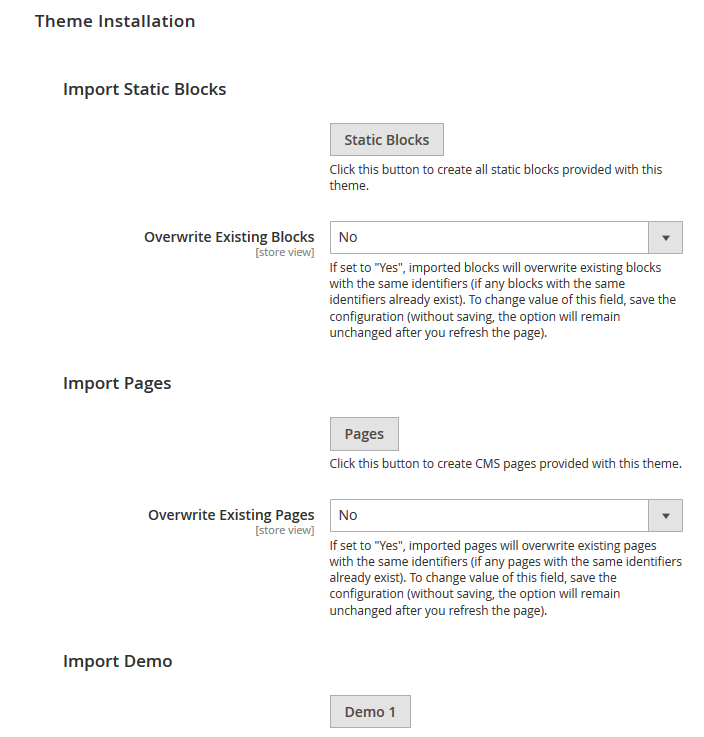
Import Static Blocks
By clicking this button, you can import all static blocks that are used for our demo site.
Import Pages
By clicking this button, you can import all pages that are used for our demo site.
Import Demos
Click "Demo X" button to install demo version that you prefer to install.
Note: When you click "Demo X" button, the administration page will reload automatically. After it finishes reloading, please click "Save Config" button and refesh cache.
Extensions
Magentech Extensions
Click here to view documentation of SM Mega Menu module.
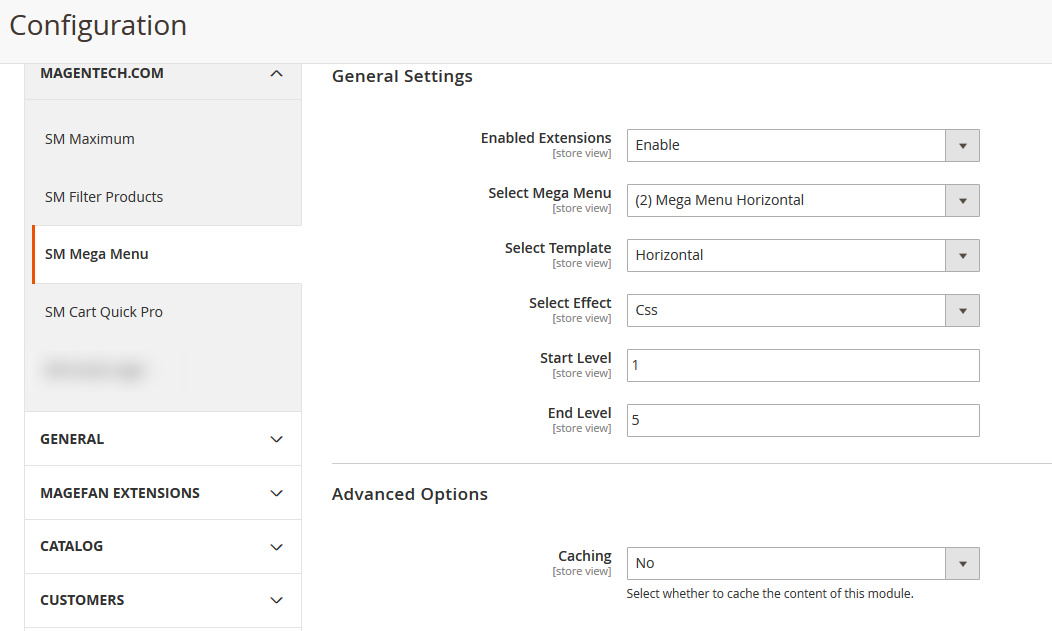
Enable Extensions: Allow to enable/disable the module. If choose "Disable", magento's default menu style will be applied.
Select Mega Menu: Allow to choose Mega Menu.
Select Template: This module support 2 templates for presenting of menu (Horizontal and Vertical).
Select Effect: We support effects for Mega menu (CSS/Animation/Toggle)
Advanced Options
Caching: Allow to choose to cache the content of module.How to create list Menu Items for your menu?
Click here to view documentation of SM Filter Product module.
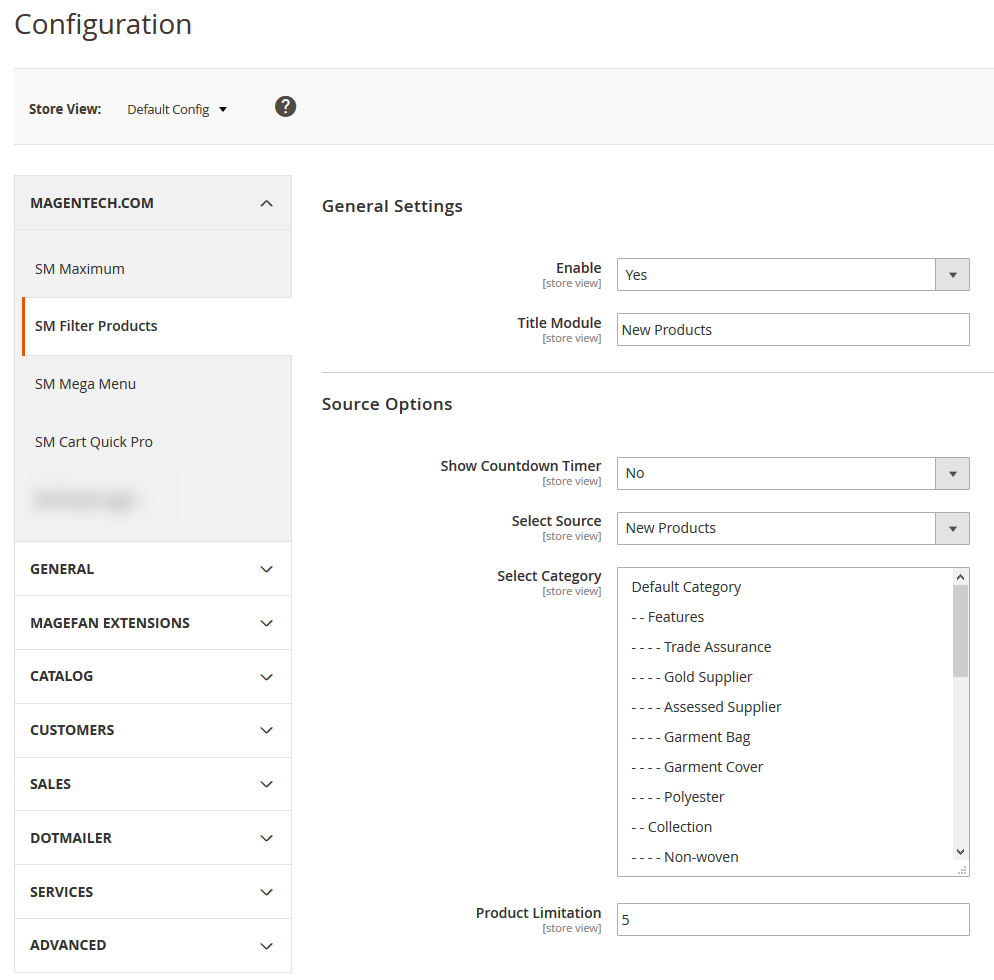
General Settings
Enabled : Enable or disable the module displaying on Frontend area.
Title Module: Enter the title of the module.
Source Options
Show Countdown Timer: Allow to show countdown timer for special product when you select “Yes”.
Select Category: Allow you to select Category.
Product Limitation: Allow to set product limitation.
Click here to view documentation of SM Cartquickpro module.
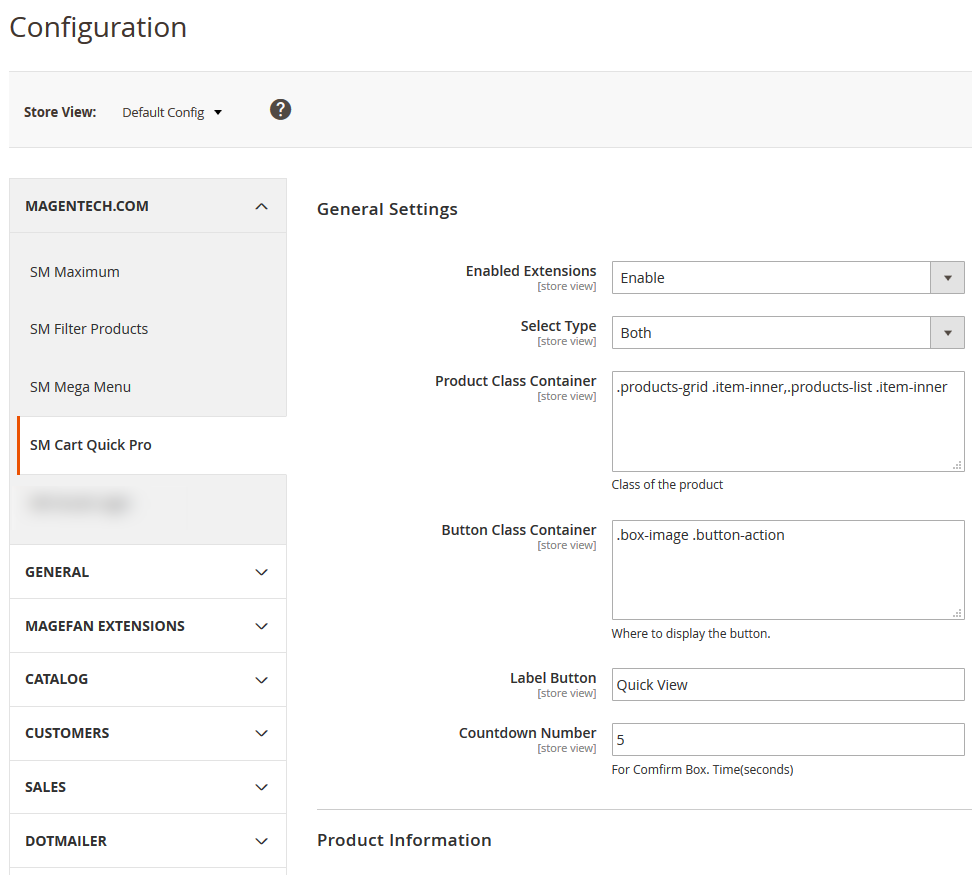
Enable Extensions: Enable or Disable this extension.
Select Type: This module support 3 types: Both, Quickview, Ajax Cart. Option "Both" including quickview and ajaxcart.
Product Class Container: Class of the product.
Button Class Container: Where to display the button.
Label Button: You can define texts of the quickview labels.
Countdown Number: The time of ajax box displaying on the screen.
Optimized Speed
When your store is ready to go, you should set the Magento 2 in Production mode. Because it help you improve the performance of the store, improve security and ease of use.
To change or set the Production mode, you can use the following CLI command in your SSH Terminal:
php bin/magento deploy:mode:set {mode} [-s|--skip-compilation]
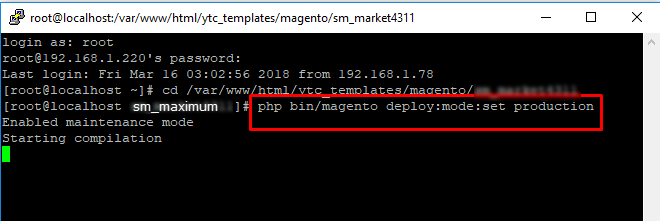
You’ll get the next messages:

After changing the mode, you should clean the cache as well by running the following command:
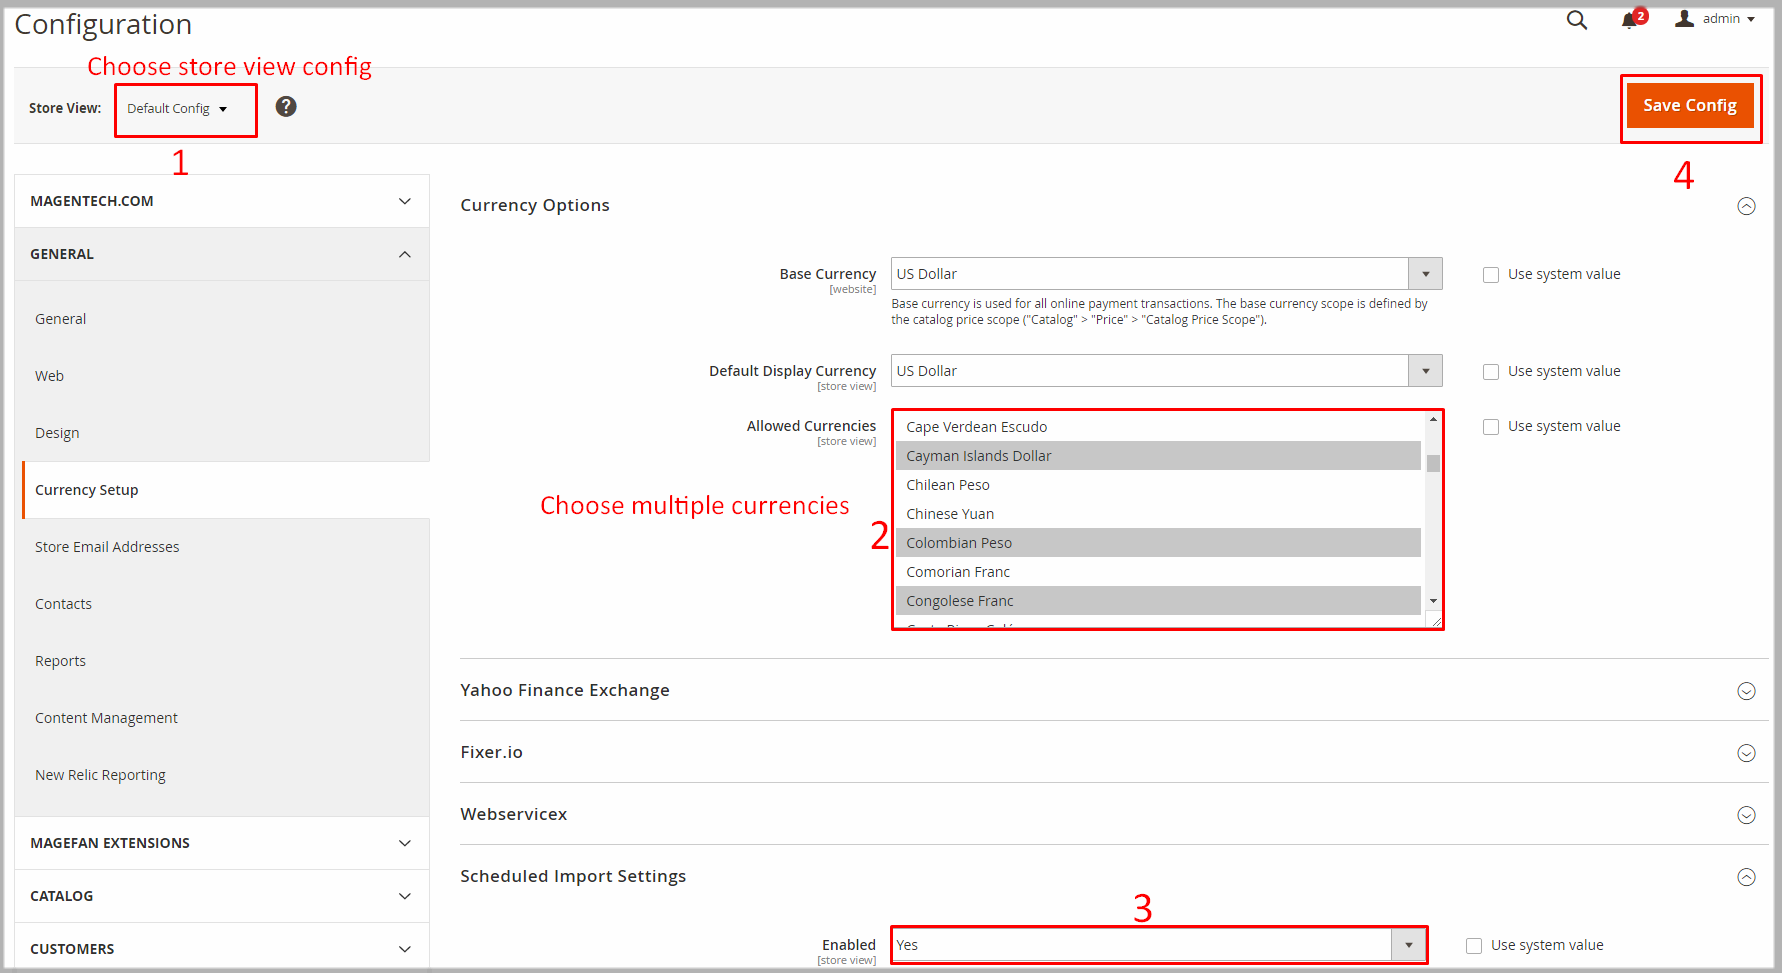
php bin/magento cache:cleanHow To Setup Currency?
To setup currency, you can go to Store -> Configuration -> General -> Currency Setup. Set Allowed Currencies are the currency you want on your store:
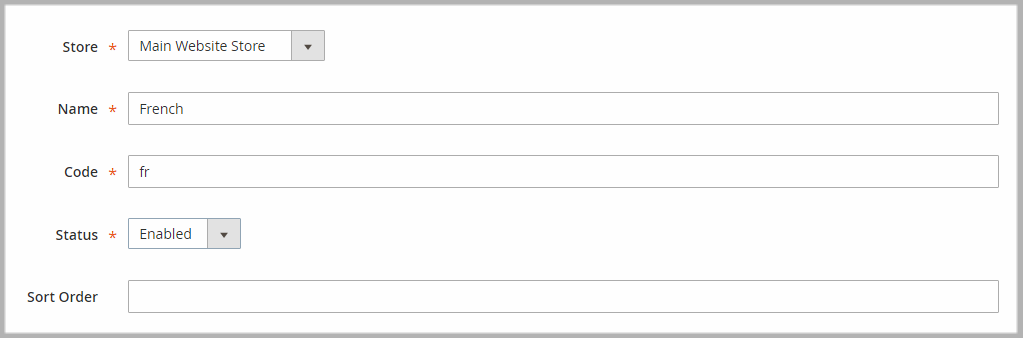
How To Setup Multi Languages?
To setup multi languages, you can go to Admin -> Stores -> All Stores -> Create Store View

Example with French:
How To Translate Languages?
You can translate the interface lables into other languages.
Example: To translate the interface into Arabic languages, follow these instruction:
Store >> Configuration >> Generalapp/design/frontend/Sm/maximum/i18n and open file ar_SA.csvar_SA.csv file and make all required changes in your translation. File opened in a text editor might look like this:The first column contains the original character strings. In the second column you can place your translation of each string.
php bin/magento setup:static-content:deploy ar_SANote: Do not forget to change
ar_SA to your own language tag.
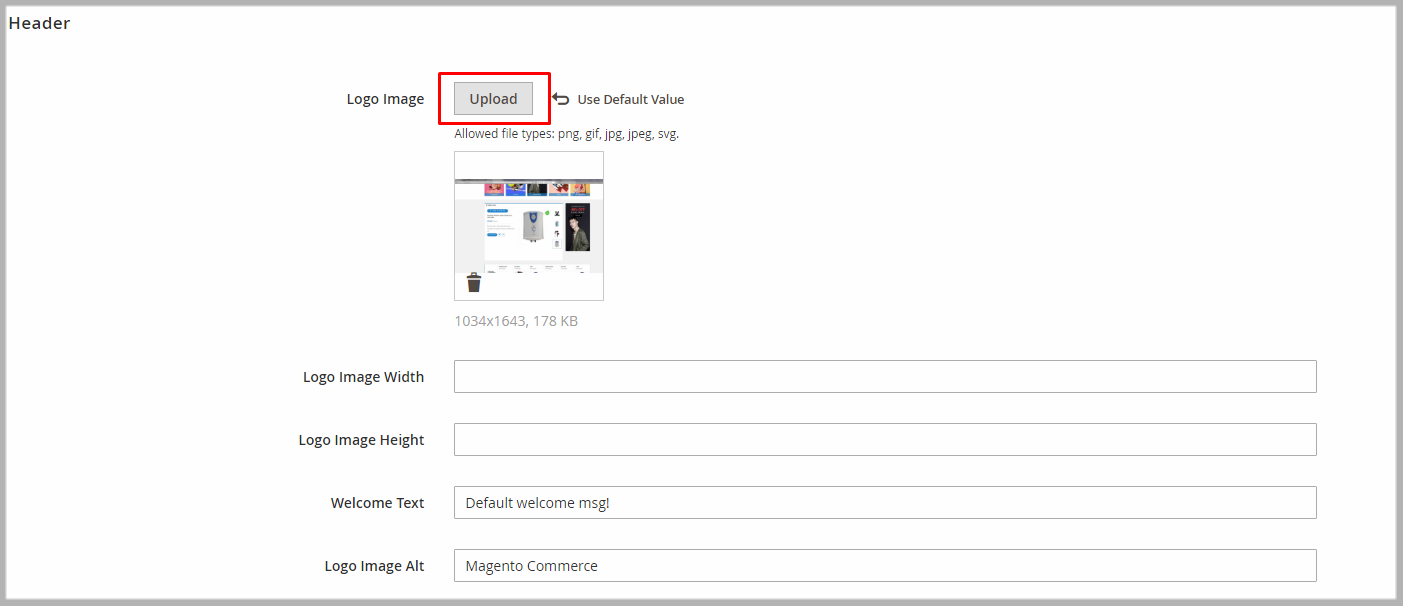
How To Change Logo?
To change logo, in admin panel please go to Content >> Configuarion >> Edit Store >> Header tab. After, upload logo that you want.
Support
SUPPORT - If you have any questions that are beyond the scope of this help file, please feel free to send us via: Support Tickets System
FAQs - Go to Here to view more the Frequently Asked Questions.

